Knitting the Calliope Pullover in Rustic Gold Wool

Stumped while knitting the sleeves of my second Calliope sweater.

After I had knit my first Calliope sweater, I wanted to knit another one. The style is basic raglan, but it has some rib at the yoke. The sleeves also have an extra long rib. I ended up changing that on my project. (The pattern was free at one time, but no longer is.)

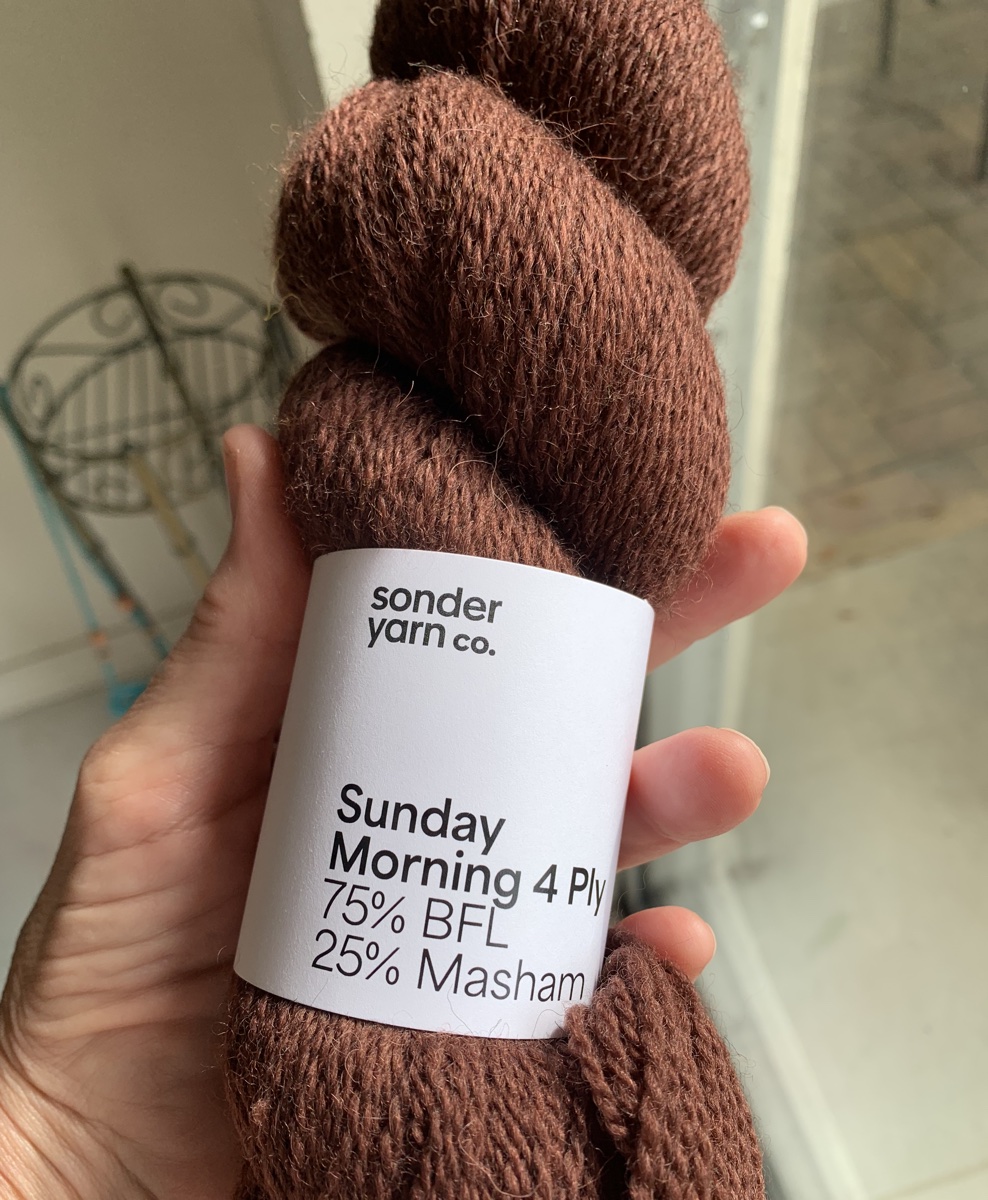
The yarn is something new for me, and came from the Sonder Yarn Company. It is a pretty, golden color called “Toast & Honey”. I’m really enjoying knitting with it. Some skeins had more than one knot though. Thumbs down on all the knots, which I cut out and “spit spliced“.

The sweater had some weird looking stitches as I knit, but after washing all things magically smoothed out and it looks wonderful!

An Easy Sweater Knitting Project

This sweater pattern is quite easy to knit and might be perfect as a first sweater project for beginners. It helps to know the basic construction of a raglan. Increases widen the front, back and sleeves as the yoke expands. The pattern says exactly where and when to make the increases. Stitch markers help to keep track of it all. I used removable stitch markers to mark the two sleeve sections, for my own preference.

The sweater designer used two yarns held together: a fingering weight with lace to make a DK. I did that for my first Calliope and used Superwash yarn. The sweater stretched and ended up very big and droopy – that’s why I now avoid this type of yarn for sweaters. This time I am knitting a smaller size overall, and using a single strand of DK wool.

Buy the Calliope Pattern at Ravelry

Knitting the Sleeves

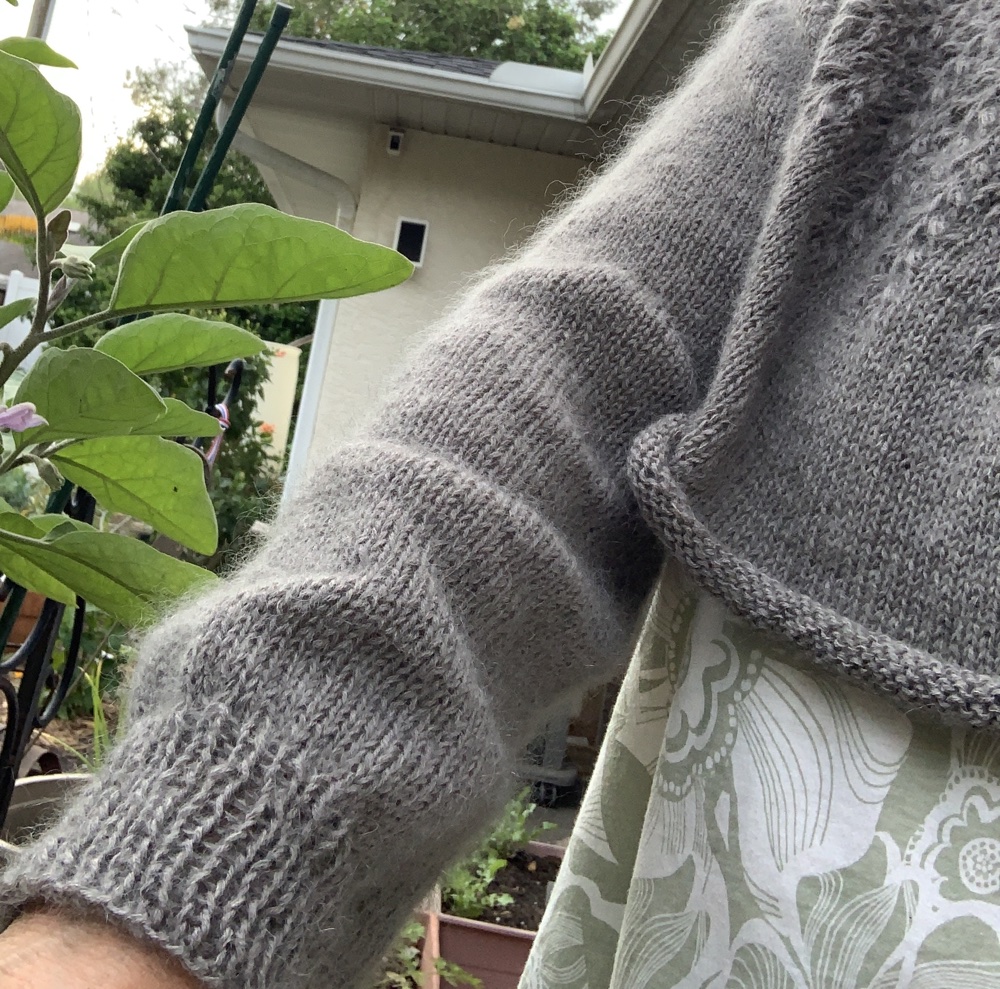
My one concern is the sleeves of this sweater. I’m using a completely different yarn this time, but as I knit the long ribbing, it seems big around.

I considered doing the sleeves differently. I do like the unique long rib, but I’m not sure this yarn is right for it. Yarn can change a great deal once it’s washed and blocked which usually makes a sweater look much better. *Yes, this happened! I think the original ribbing in the pattern would have worked out fine.

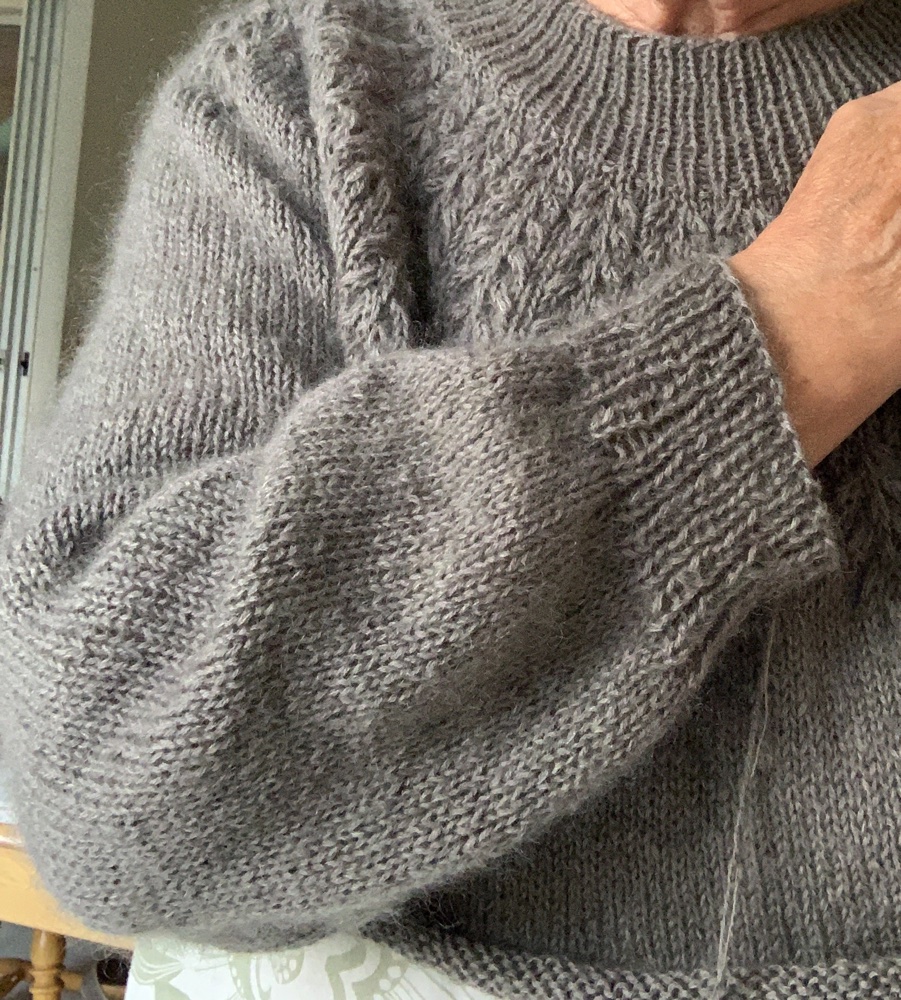
Sleeve changes: I ripped back to the beginning of all that ribbing on the sleeve. I did a few more decrease rounds to end up with 60 stitches on the needle. Knit to about 16 inches and made a 2 inch rib cuff. I’m not happy with the bind-off and may go back and do an Invisible rib BO. *Update: I am now knitting the second sleeve with a 1×1 twisted rib cuff that is about 4 inches long. Will go back to the first sleeve and re-knit to match! I’m happy with my ending choice on the cuff. See below.

twisted rib cuff
Ribbing on cuff after washing

I used magic loop on the cuff but it was leaving ladders, so I changed to DPNs. The ladders are now gone and the cuff looks perfect – through the magic of washing! (Soaked entire project in Eucalan -Amazon paid link- for 20 minutes and put on boards to dry.)

Making it a Split Hem

I decided to split the hem and do a twisted rib. I’ve never done this on my own, without following a pattern, but it’s simple enough. Divide front and back stitches in half. Make a nice edge at each side of the rows. I did have to learn how to knit the wrong side of a twisted rib because it’s different than going round and round.

Doing a Flat (Back and Forth) Twisted Rib

For the hem ribbing I did this once the stitches were divided between front and back of sweater: Right side: begin row with K1tbl, sl1wyib – then *knit through the back loop and purl one across to last two stitches and end row with sl1wyib, k1tbl. Wrong side: begin row with Sl1wyif, P1 – then *knit one and purl through the back loop, to last two stitches and end with P1, Sl1wyif.

Lost at Yarn Chicken (Knew I Would)

When it came time to bind off the back hem, I had only a small bit of yarn remaining. I did not make it, so had to wind up my last skein. I encountered two knots in that one skein and it was my one complaint with this yarn. Too many knots to cut out. I have nearly one entire skein of yarn leftover.

Washed and Photographed

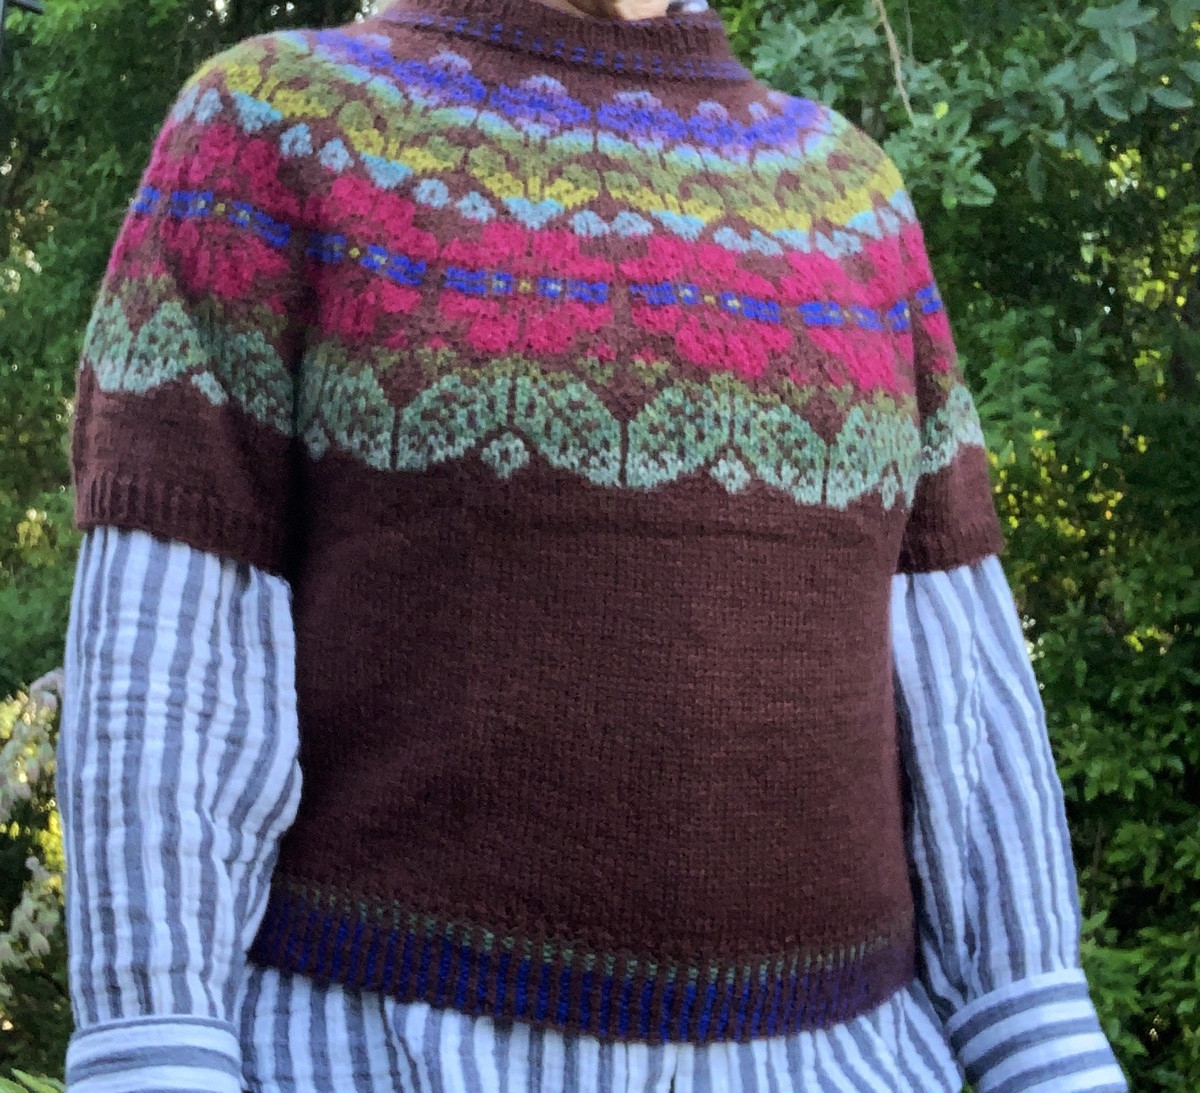
As is so often true, this yarn became soft and lovely after a wash. My sweater is plenty loose, long and comfy – just like I’d hoped it would be. I would have no trouble wearing this without a shirt underneath. But layering would also work. I am very happy with the finished project. On to the next…

End measurements: Total length from top of back to bottom is 26 inches. Sleeves are 18.5 inches, Body knit for 12 inches and then did a 3 inch twisted rib in the front, and a 4 inch rib in the back. I knit the size 3 Calliope using a size 6 US needle as my main needle. I used 4 skeins of Sunday Morning DK = 1072 yards (plus about a foot!) See notes on my Ravelry page.

Have you knit the Calliope sweater?

Please leave a comment, as I’d love to hear if, and how, you changed the sleeves.


More knitting projects, reviews and stories.

Something went wrong. Please refresh the page and/or try again.

My Turn to Knit The Musselburgh Hat

The Musselburgh Hat pattern is super popular and I’ve seen the finished hat photos everywhere online. Knitters are raving about this simple, unique, double layered hat that is really two hats in one. It is knit from one crown to a second crown, creating a long section of stockinette in-between.

The Musselburgh pattern is by Ysolda Teague and can be found to purchase at her Ravelry page, or on her website. At the time of this writing, over 17,000 projects have been knit…!!! Wow. Knitters LOVE this hat.

The big draw, I imagine, is not only the simple circular stockinette, but the fact that it’s a perfect hat for using up stash yarn. Suggested weights are heavy lace to DK, and nothing bigger because this hat will be worn doubled. Also, if you knit it long enough for a brim, the brim will contain four layers when folded up.

If you don’t understand this pattern, I have drawn a picture. The hat is knit, in the round, from one end to the other. You make a long, enclosed tube. One end is tucked into the other when worn, to make a double layer. The long style creates a folded brim using the center colors, or make it shorter for a doubled hat with no brim.

My finished hat will be bright green with a folded black brim, OR a striped (black and green) hat with a folded black brim. Two hats in one. Each hat will be two layers of fabric with four layers at the folded brim.

Musselburgh hat drawing
Musselburgh tube

Musselburgh Finished

I decided to knit a total of 25 inches with 9 inches at each end and 6 inches in the center for the brim (folded measurement 3 inches). That was the plan, but my hat ended up measuring less at 21.5 inches. Too short for my liking. See this video from a knitter who has made 12 of these hats!

How Do I Begin Knitting This Hat?

Although I’ve been knitting quite a lot of items during the past few years, I was stumped when it came to beginning this hat!

To begin the project, the cast-on begins at the crown with a small number of cast-on stitches, which will expand outward with increases made. (You must be able to knit “make ones”.) Directions say to cast on the stitches using your “preferred center-out cast on.” The designer goes on to list a few, but it’s up to the knitter to figure out which one to use and how to knit it.

Pinhole, or Disappearing Loop Cast On

When I searched for “Musselburg cast on” the pinhole, or disappearing loop, cast-0n came up. This video, by Mostly Knitting, is a good tutorial – not for the hat, but for the cast-on. She gets straight to the point and the tutorial is easy to follow. However, be prepared for this fiddly cast on. She makes it look easy – and for me, it was not! I won’t go into detail, but let’s say it took me a few tries to get my stitches made. Hint: It does help to keep the loops of each cast-on stitch loose.

FYI: I am using a size 4, 32″ circular needle, wood Lykke brand, to do the pinhole cast on. My yarn is from stash, and I am guessing it is a fingering weight sock yarn.

Below left: My stitches have been cast on and there is a loop still open. Below Right: I have pulled the strand to close up the loop. Hence the “disappearing loop” cast-on name.

pinhole cast on
Pinhole, or Disappearing Loop cast on. I’m not sure it should look this messy, but oh well!
pinhole cast on loop closed
Loop closed

Now I have my cast on accomplished, but I need to knit in the round with only a few stitches. Apparently most people use the magic loop knitting method to continue knitting from here. Maybe it is time for me to learn Magic Loop.

Magic Loop Knitting Tutorial

The video above gets the cast-on made and ends with four stitches on each end of a long circular needle. Then, the rounds begin and must be knit using the magic loop method. Or, the stitches can be transferred to DPNs, which can’t be easy to manage with so few stitches. I dislike DPNs. So, I figured I would try to do the Magic Loop.

In this video by Myra Wood, the details of the magic loop are covered. She is not casting on the the Musselburgh Hat, but it doesn’t matter. She is showing us how the needles are positioned to knit in the round starting with very few stitches. So, first do the pinhole / disappearing loop cast-on, and then begin knitting in the round using the magic loop method. Simple. It’s always good to learn something new – or in this case, two somethings!

For magic loop knitting remember this:

  • Use good needles, with soft, pliable cable. This is important. The needle I used was wood (Lykke brand) with a rather thick cable for my liking. I should have used my Chiaogoo needles (Amazon paid link). Try a metal needle with a bendable cord. Make sure the join between the needle and cable is smooth because the stitches have to slide easily from the cord to the needle.
  • Whichever needle has the working yarn, pull that needle out of the stitches and use it to knit.
  • Place a marker as a reminder of the beginning of the round..!
After the cast on, divide the stitches evenly on each end of circular needles.
Stitches divided evenly on needles
placing markers
Markers in center of each needle
Knit stitches on DPNs
Transfer of stitches to DPNs

For the Musselburgh Hat pattern, I didn’t worry about the markers until I knit the first round using Magic Loop, and added them on that first round. From there, I followed the hat pattern while doing Magic Loop. The orange marker in my photo is for the beginning of the round – BOR. You need to mark that somehow.

Transfer Stitches, or Continue in Magic Loop

The knitting could continue using magic loop, but I transferred my stitches – on a plain knit round – to four DPNs making each corner (end of needle) a marker. Because I had the needles, I began on shorter DPNs and then transferred to longer DPNs. Once I had my total number of stitches to begin the length of the hat, I used a 16″ circular needle.

Find Your Gauge to Complete the Crown

The pattern has charts for size and gauge. This was confusing at first, but as is usually true, reading the directions carefully is everything!

The designer has created these charts to help us get the right size hat for our knitting tension. Once we begin the crown knitting and take the measurement, we will then know our personal gauge number. This is the opposite of what is generally done to knit a pattern. Usually we (the knitters) have to match the designer’s gauge.

Because each knitter will be using various types of yarn and various needle sizes, the gauge will vary for each individual. The designer has calculated the gauge variations and given us a number to go by for the crown and hat size.

Once the crown size was big enough, I measured for my gauge. I counted six stitches in one inch across, so my gauge is 6. From there, I used the charts to find out how much more knitting I would have to do to complete the crown section. BUT, I decided to add more stitches for a total of 136 around, and this ended up being too large. I think the original count would have been too small, so somewhere in-between.

Don’t forget to weave in the ends at the right time!

Before finishing up by decreasing for the second crown, don’t forget to weave in the ends! Pull the hat inside out and do your weaving before the entire thing gets closed up. Glad I remembered this step.

Knitting Musselburgh hat
Reducing for second crown at the opposite end. First – weave in the ends!

Final Thoughts

This pattern is versatile and looks to be quite easy, until you try to get started with the crown. It’s probably going to be a learning curve for many. Once the second crown is knit, the final yarn must be woven so it can’t be seen with the tail tucked inside.

I used sock type yarn, which is not my favorite to work with. I was hoping this hat pattern would help me use up some stash. But, in the end, I am not very impressed with the outcome. Mainly it is my own fault for bad measuring and using too many stitches.

More than that, I simply have knit hats that are much more fun and end up looking and fitting a lot nicer. A ribbed hat for instance hugs the head better.

More knitting stories and reviews:

Quick Hat Knits For Christmas Gifts

The most difficult thing about knitting a simple hat to gift at the holidays may be waiting for the yarn order to arrive! If there is a yarn store near you, consider yourself lucky and head on over to get your supplies.

Use a heavier yarn, such as worsted or bulky weight – I have some suggestions listed down this page – and these hats will finish up in plenty of time to put under the tree.

Included on this page are pattern ideas for adults and kids. Also, I’ve searched for some nice yarn, from online shops, in worsted, bulky and super bulky weights to get you started. Many yarn links go to Wool and Company where I buy a lot of my online yarn. They will wind yarn for free and also offer free shipping to US residents! Or search online and possibly find good sales this time of year.

Why Knit Hats For Gifts?

Hats are quick projects, are easy to take-along and knit, and mail easily. Usually only one skein of yarn is needed – depending on the style of hat and yardage of the skein. Each pattern will list the amount of yarn needed, so check that. If there is a long brim or pom pom, more yarn may be required.

Christmas comes upon us quickly. Many people choose to wear hats in winter, so everyone could use a nice new hat, right? Make it a hand-knit, and it’s extra special for the recipient. It can be created in their favorite color, or made in their favorite style. Choose a washable yarn, and it’s easy to care for.

Hats don’t have to be sized perfectly. Most hat patterns may seem a little small while being knit, but they are meant to stretch a bit to fit the head.

Quick Knits

Hats are also quick projects. A hat without any kind of brim is super fast to finish. Hats are small enough to take along on a car ride, or knit while visiting a friend. Easy hat patterns mean simple knitting without following a chart or directions.

To make a quick knit hat, use a thick yarn – worsted, aran or bulky weight. Be sure you have the correct size needle for the yarn used, and a simple hat will knit up fast. Unless you are knitting for a bald person or a baby, the yarn won’t need to be super soft. The yarn I have listed on this page is “Superwash” or machine washable, in case the recipient will tend to toss the hat in the washer!

Miss Babs K2 Chunky yarn, Rock Sparrow
Miss Babe – chunky yarn
Manos del Uruguay Franca yarn
“Franca” super bulky, washable yarn

Easy Hat Knitting Patterns For Adults

The list of hat patterns on this page are perfect for anyone to knit, using simple knit, or knit and purl stitches. Some easy cable hats are also included.

  • Nina Hat (free pattern) – Super bulky yarn (Franca – link below, or similar), US size 11 needles
  • Harbormaster bulky yarn – perfect for him.
  • Pebbles Hatfree pattern in worsted weight (slouchy style)
  • Easy Tweed Hatfree pattern, super bulky – the pattern uses two strands of yarn held together to create a “tweed”, but a super bulky yarn alone would also work.

For knitting a bottom up hat (starting at the brim) you will normally need these supplies: Yarn – enough for your chosen pattern, a 16 inch circular needle, same size DPNs (double pointed needles) for finishing the top. A tapestry needle for closing up the last stitches and weaving in yarn ends, and scissors for cutting the yarn. (I usually use a DPN needle when doing simple cables.)

Northward cable hat hand-knit
Northward easy cable hat for kids and adults by Tin Can Knits. Link to pattern on Ravelry
Cable hat in light pink
Aran Watch Cap – pattern is in the Hat’s On book and is a simple cable knit in worsted yarn.

Hat Patterns For Kids

  • Kids’ Banana Beanie – (bulky yarn) free pattern from Balls to the Walls Knits. Comes in a variety of sizes. A 16 inch circular may be too large to knit the smallest of sizes.
  • Kid’s Helmet Hat – (bulky yarn – free pattern)
  • Christmas Elf Stocking Cap – (worsted) – pattern website contains a LOT of ads to wade through. More patterns for kids on this page, if you can deal with the ads!

Machine Washable Worsted Weight Yarn

Any item that is hand knit will last longer if it is hand-washed. But, using a Superwash yarn means it can be washed in the machine. Items should be washed on a delicate cycle. Be sure to tell the recipient how to care for the item, or include a tag they can keep and reference.

I would use a mesh laundry bag (Amazon affiliate paid link), so maybe gift one to the recipient along with the hat. For the most part hand-knits should not go into the dryer!

Here is a short list of worsted weight yarns to get you started, but there are more washable yarns out there. Most worsted weight yarns require a 6 – 9 needle size.

Machine Washable Bulky Yarn

The needle size used for bulky and / or super bulky yarn is usually US size 10 or 11. Don’t forget you will also need DPNs in the same size.

Although hats and other items knit up fast using thicker, bulky yarn, some people find it tough on the hands.

I hope these selections were helpful. Remember, next year get started early, and give everyone a special, hand-knit hat!

(Chipmunk in hat, photo at top, courtesy of Pixabay.)

More knitting stories

Review of Knitting the Eva Cardigan

Cardigan knitting requires a little extra effort, but worth the effort for the Eva Cardigan by Petite Knit.

The Eva Cardigan is knit in a DK yarn and is a low v-neck with four buttons. It is a design by PetiteKnit (link to pattern below). I began to knit this – cast on – around the middle of September and finished the end of October. I found it to be a good pattern and love the sweater. Also, I learned some new things along the way.

I used a new yarn too. Sandnes Garn Peer Gynt, which is a DK, but really seems more like a worsted to me.

Although I have knit a few cardigans, none have had a shoulder construction like this one. I also had to watch a video to complete the buttonholes.

The Pattern and Yarn

The yarn is nice and I was very happy knitting with it. I bought mine at Wool & Company. It is made of Norwegian wool and the Peer Gynt is DK weight, but seems heavier. Wool and Company offers many colors, including heathers and tweed.

I bought 12 skeins of Sandnes Garn Peer Gynt yarn in color “Eucalyptus” green – per my daughter’s color request. I ended up with nearly two skeins leftover. But, better too much than not enough!

Peer Gynt yarn skeins leftover
Eva Cardigan leftover yarn

I knit a swatch with size 6US needles and it was a bit large. I don’t have many needles in size 5 (and then go down 2 sizes for the ribbing), so I chose to use the sixes (with size 4 for rib) and knit the extra-small size sweater. (Lots of various length needles are needed for this sweater in both the 4 and 6 sizes.)

However, this cardigan is being knit for my daughter, who is tall and thin, and likes longish sleeves. I’ll be adding length to the body (end measurement is 23 inches) and especially the sleeves (18.5 inches).

Wool and Company notified me that only 10 skeins were matching dye lot numbers, so two would be off, but very similar. I took them anyway, and have used one of the odd dye lots to knit the body ribbed hem. I was saving the other for the button band – but never had to use it.

Hurdles During Knitting

After the initial neck knitting, stitches have to be picked up at each of the shoulders. I really didn’t know how to do this, so I used another needle to pick them up and then added those stitches to the main needle.

I think this may be called a “saddle shoulder”, but I’m not sure. The design idea is to keep the sweater from sliding off the shoulders – I think.

  • Eva cardigan sweater knitting
  • shoulder construction Eva Cardigan knitting pattern
  • knitting a sweater

Picking Up Stitches for Button Band

Picking up stitches for the button band is not at all my favorite thing to do when knitting! This always takes me hours. I love cardigans, but it’s one of the things I dislike about knitting them.

For this wide button band, which goes up one side, around the neck, and down the other, the total number of stitches picked up needed to be divisible by four in order to make the 2×2 ribbing. Also, while you’re at it, make sure both front sides have the same number of stitches.

At least the designer said to pick up 3 for every 4 stitches. I guess most knitters know this, but I appreciate the instructions. (This is something another designer didn’t bother to mention and my Carbeth cardigan is totally messed up because of it.)

I watched a helpful video by Cocoknits which advised to only do the picking up of stitches, and not “pick up and knit”. YES! Do this! Then, when your counts are off (be prepared to count and count and count), it is easy to remove the picked up stitches and fix the count, which I did… over and over. FINALLY.. I got everything worked out correctly.

How to Make the Buttonholes

The buttonhole directions in the pattern are a little confusing when it comes to doing the “double backward loop”. Many thanks to another knitter, who referenced the video below which shows how it’s done. I am not sure my purl 2 together through the back loop was done right, as it looked a little too loopy.

This YouTube video by Kimmie Mulkholm shows the buttonhole construction for the Eva Cardigan. It is not in English, but can be understood easily using CC or not.

In the End

I have a pretty nice sweater now, which is a gift for my daughter. Since she lives in New England, it will get used a lot. It is currently being dried, on mats in a room with the dehumidifier running (necessary here in Florida), and then the buttons will be added.

This sweater seems quite big. Then again, my gauge was off. The shoulders and sleeves fit me just fine and I knit the XS size. I would like a wider body for myself so I’m not sure which size I’d choose to knit for myself.

  • hand knit cardigan
  • Eva Cardigan hand-knit sweater
  • Back of Eva Cardigan

As is usually true of hand knits, especially wool knits, the fabric smooths out and ends up looking incredibly good. I’m so pleased with the end product. I would knit it again – next time it will be for me!

Here is a little post about how I sewed on the buttons.

More Knitting Fun