Knitting the Shell Cottage Socks Pattern

Knitting the Shell Cottage Socks.

Although I haven’t knit many socks, the Shell Cottage Socks looked pretty cute. I bought the pattern from Curious Handmade and this page is about my sock knitting adventure.

Having less income over the past year and a half, thanks to the pandemic, meant a chance to use up stash yarn. That lack of extra money to spend on yarn forced me to clear out and use up. Most items I’ve been knitting this past year were made from the yarn already in my house.

Sock yarn with nylon should really be used to knit socks. I have quite a few skeins to use and this pretty variegated blue was the one I chose for the cute little ankle socks.

The yarn came from Four Purls, which is a yarn shop near Orlando. It’s Emma’s Sock Yarn in colorway “Juneau”. I bought it back when the shop would travel around central Florida in their yarn truck. They used to come to my town and it was my temporary local yarn store. That hasn’t happened in a while, which has been good for my wallet.

Shell Cottage Socks Pattern to Buy

I bought my Shell Cottage Socks pattern on Ravelry. Helen Stewart is the designer with the shop name Curious Handmade. Her patterns are mostly socks and shawls. One of the very first knitting projects I undertook was her Spindrift shawl.

For the socks I chose to knit a size Large, using size 1US needles. After reading through comments by previous knitters I learned that many people found the socks to be too tight, or too small, so I figured a large size would be safe. I’m a tight knitter, so it made sense to choose the large size.

I began using my 9-inch circular needle for the cast-on and followed the directions with cast-on number 72 and worked the ribbing. I continued to use the small circular needle until I reached the heel.

This pattern is like none I’ve ever seen in my short knitting life. Every single row / round to be worked is written out, except for the ribbing. That makes it easy to follow along and check off each row when finished. A stitch count is also included for every single row!

Good Pattern for Beginners? Probably Not

I like the way every row is written out to be checked off as I knit along. Any beginner knitter would appreciate that. But a couple of things slowed me down while knitting this pair of socks.

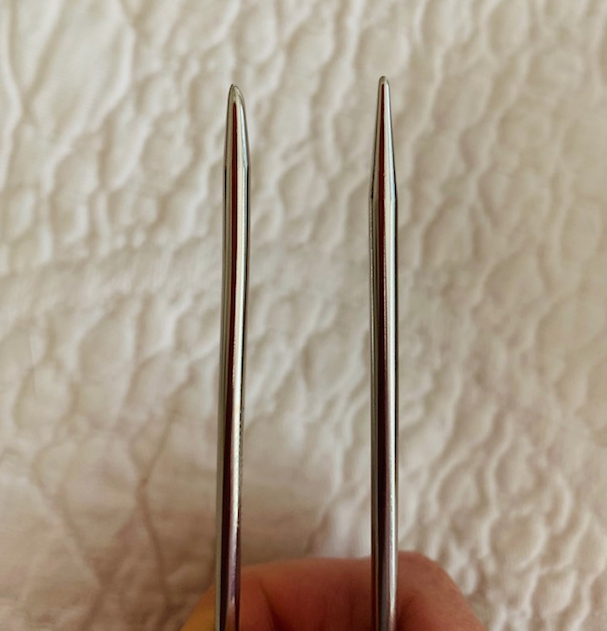
First, when it comes to working the heel and the gusset, the stitch placement refers to only two needles – Magic Loop knitting. If you know how to use Magic Loop, you’re all set. But, anyone using four DPN’s would have to adjust. Although it’s not a tough thing to do, a beginner might be confused.

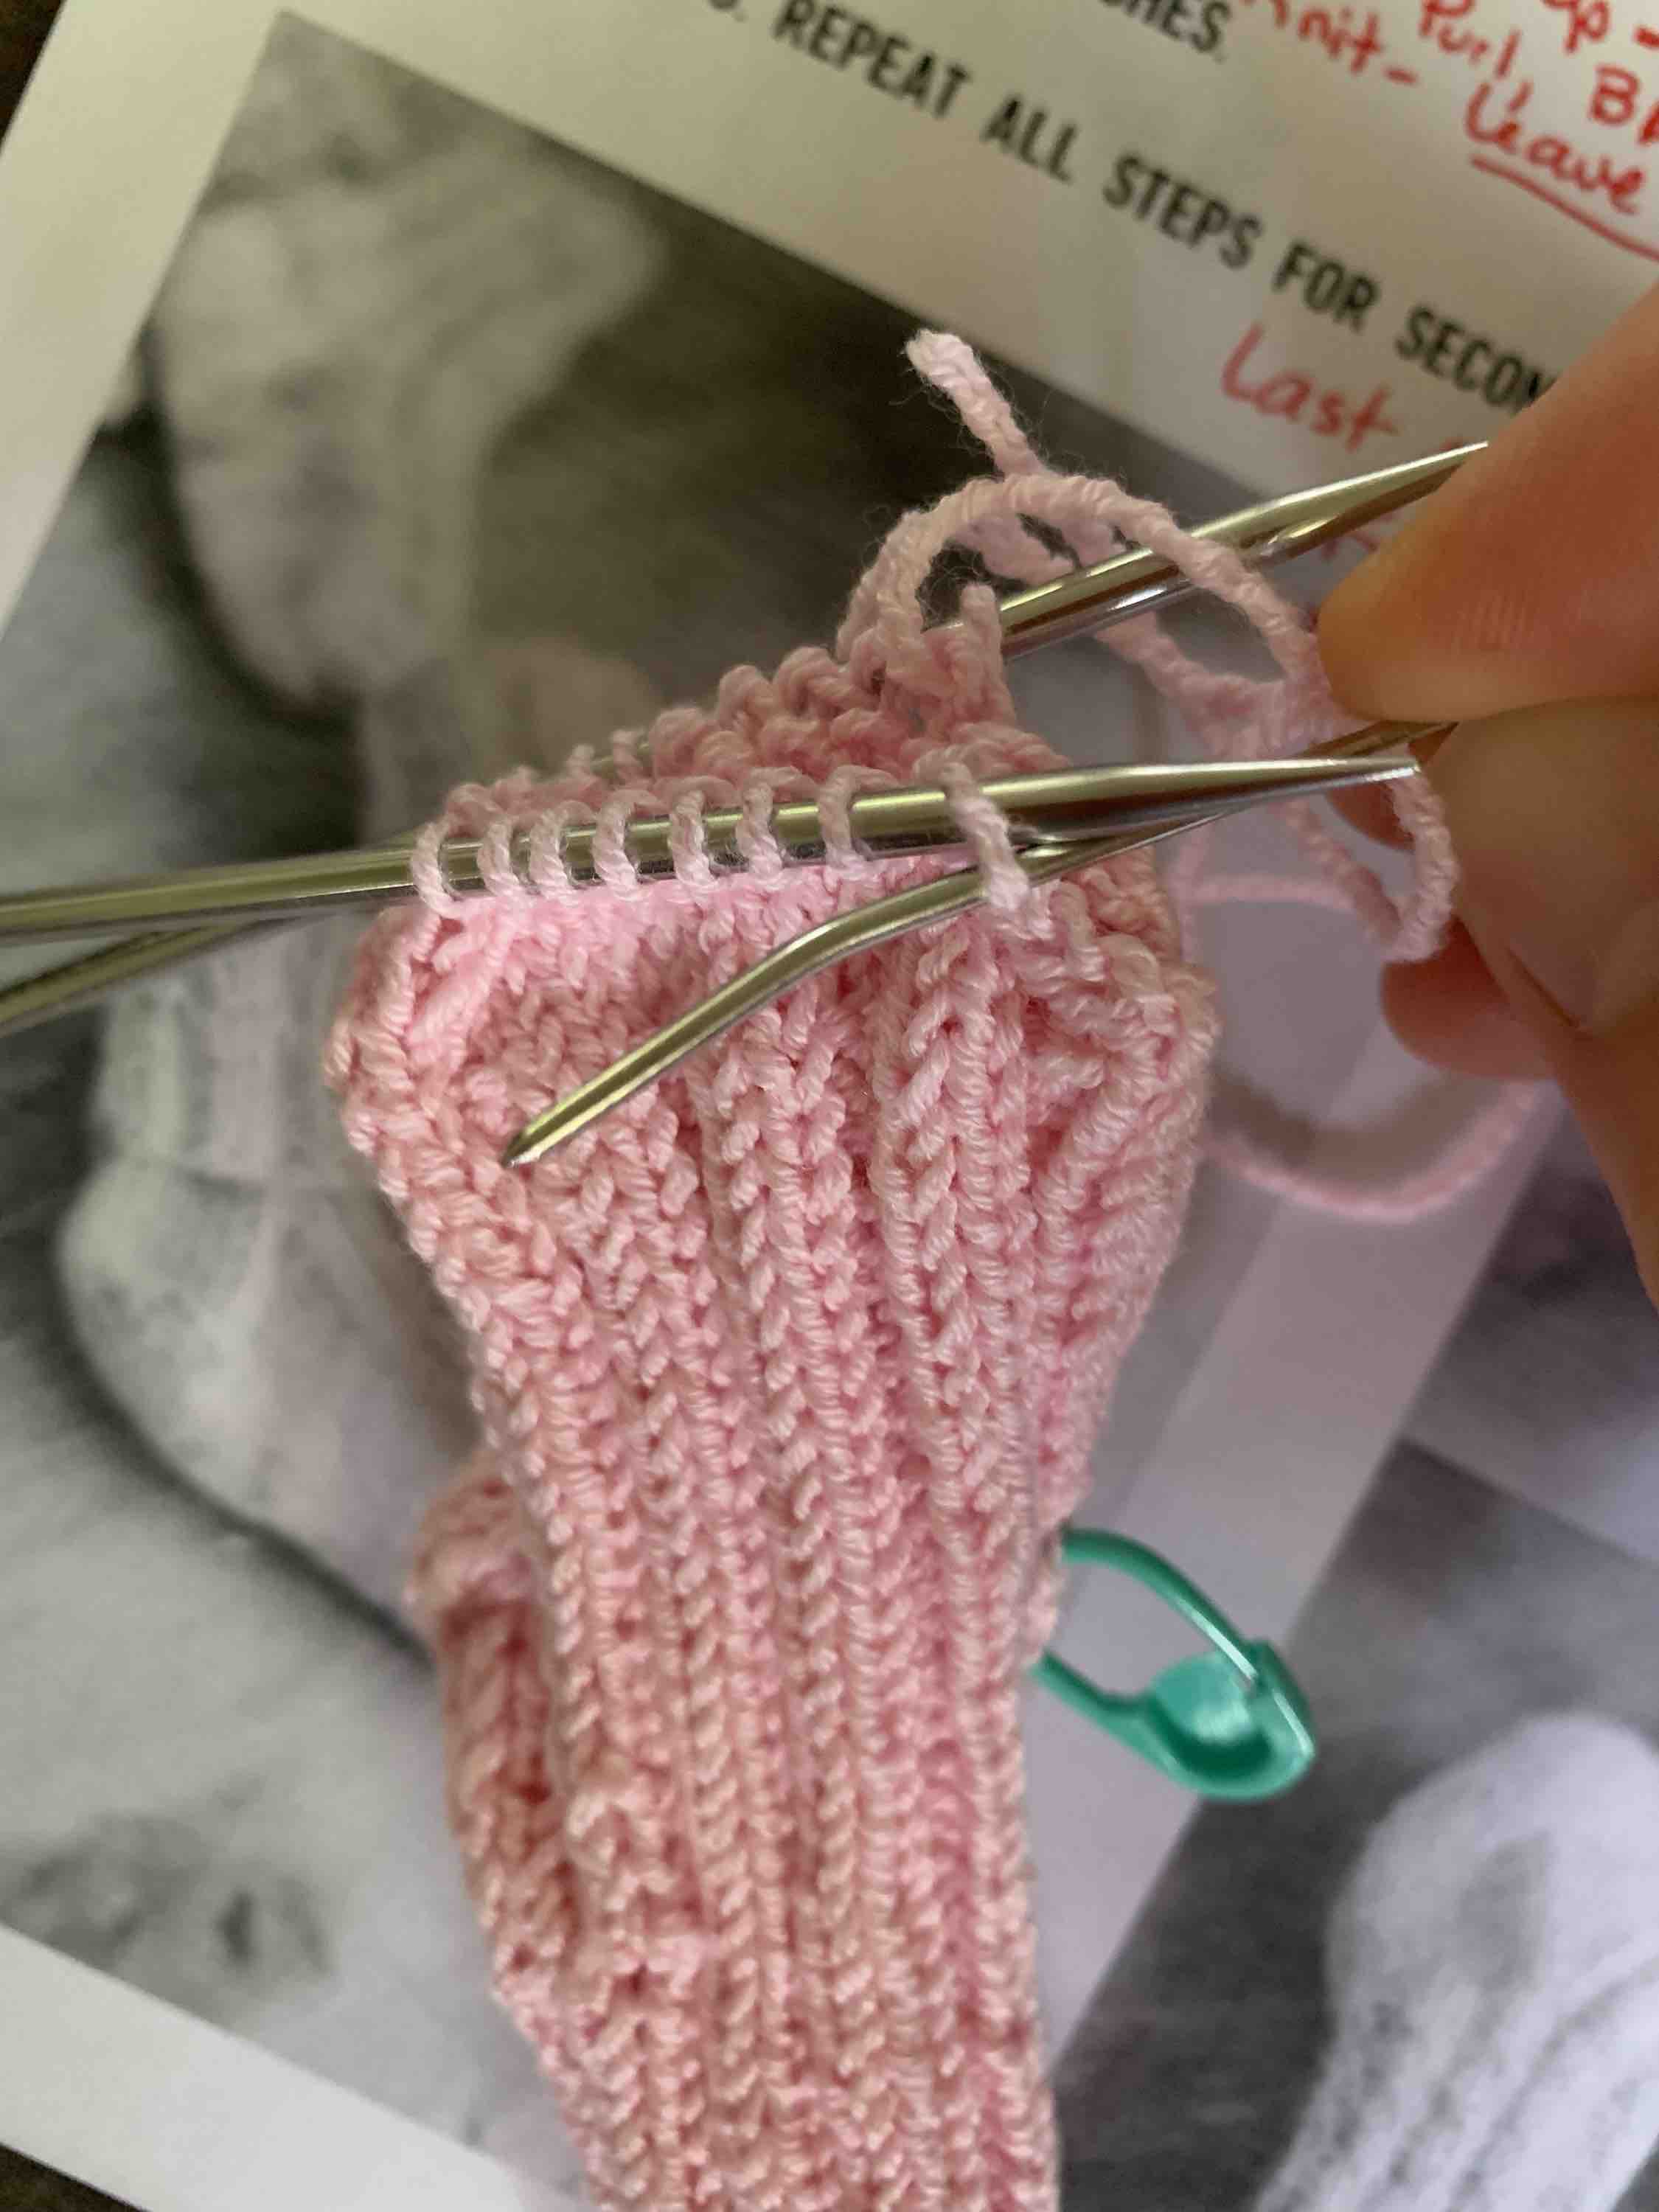
My other problem was that I personally found it difficult to do that slipover stitch that creates the cute cable look. That cute design is the reason I chose this pattern! I had a really hard time grabbing that stitch and pulling it over the others. I ended up using a crochet hook, which was annoying. Maybe different needles would have helped, I don’t know. And to be fair, I did not read any other reviews of this pattern where the knitter complained about doing that faux cable stitch.

The toe is finished with the Kitchener Stitch, which is probably a difficult accomplishment for a beginner knitter.

In fact, if you are reading this and have not knit much at all, try something easier than socks! Socks are my least favorite item to knit. I think many people knit socks because they are useful garments. We all want to be able to use the items we knit.

For my first sock, I quit doing that extra stitch (named “KNOT” in the pattern) after the cuff (photo left above) because the aggravation for me was just not worth it.

On my second sock, I changed the way I did the “KNOT” stitch so the slipover was done on my right-hand needle instead of the left. This was much easier for me. It’s not exactly the same, but close enough, and was easy to do so I continued with it all the way to the toe.

So, my socks don’t match. They were good practice. I may knit this pattern again one day using a solid color, which I think would work much better for showing off that cable-look design. That ball of yarn is all I had left from the skein.

In conclusion, I did like this pattern once I made my changes. I made lots of notes on the pattern pages and that will make it easier to follow next time.

If you are a crazy sock knitter, and / or love knitting shawls, and haven’t heard of this designer, check out the Curious Handmade website.


Keep Reading: Recent Blog Posts

Knitting For Baby, The Free “Perfect Newborn Socks” Pattern

After knitting the Beloved baby bonnet pattern for a friend’s new granddaughter, I found this free baby sock pattern. The Perfect Newborn Socks pattern is offered for free by Tabitha Gandee and I got the pattern on the Ravelry site. I already had the CoBaSi machine washable yarn in color Bubblegum pink.

Get the Free Pattern Here

Perfect Newborn Socks pattern page at Ravelry.

Some knitters complained that the pattern did not make sense in areas and I would agree. For that reason, I would not recommend this pattern to a beginner knitter, unless you are knowledgable in the way socks are knit. It could be very frustrating if you try to follow the pattern exactly.

I have made notes below for anyone who needs a little advice along the way. I’m grateful to the people who offer us free patterns, but often those patterns can have mistakes or less clear directions than a designer who requires payment.

baby socks pink bubblegum yarn

Places in the Pattern Where I Made Changes

First of all, I went up to a size 2 needle and knit with DPN’s, not magic loop. I am a relatively tight knitter and I didn’t want the socks to be too small. After washing and drying, the foot measures about 3 1/2 inches and the ribbed cuff is about 2 inches before folding.

These are top-down socks and I cast-on with the German Twisted cast-on. Then I did the more simple 2×2 rib without cabling.

I followed the pattern fine until the end of the Heel Turn section. For the last Row 3 knit, I did not do the SSK and simply knit across the 8 stitches, because the count was correct after Row 2. But, if you stop knitting after Row 2 you will be in the wrong place to continue.

After knitting that last Row 3, I knit four more stitches onto that needle. Then, with a new needle I knit the next four stitches and began picking up the stitches for the Gusset.

With the next needle, knit across the top of the foot with 2×2 rib or the cable rib, whichever you are doing. After that, use a new needle pick up the nine stitches along the side and knit the four stitches left onto that third needle.

Now you will have three needles. Two needles are holding stitches for the Gusset and 1/2 of heel, and the other is holding the front / top of foot stitches. In the pattern, the writer has four needles being used, but all 16 top of foot stitches can easily be worked on one needle. The fewer DPN’s the better IMO.

Three needles to knit foot of sock
Getting my stitches onto three needles to begin the decreases

Doing the Kitchener Stitch at the Toe

After decreasing quickly at the toe area, the Kitchener Stitch will round out the toe. This stitch is done with a darning needle and is not terribly difficult, but it’s something I have to look up every time I do it. I also used it when I knit the Glissade colorwork mittens.

On YouTube I like the slow motion Kitchener Stitch video by Very Pink Knits which is easy to follow. She shows us what to do with the last two stitches on the needle as well. The yarn will be coming off the back needle to start, and you need a darning / embroidery needle to do it.

These ended up being cute little socks that will complete the Hat and Sock set for my friend’s granddaughter. I would make them again, and I also like the CoBaSi yarn for baby things. It washes and dries nicely – and can go in the washing machine and dryer! There is no wool in it which works well if a baby could be allergic. I washed them by hand, but it’s good to know that a new Mom won’t have to.

Perfect Newborn socks pattern knitting
knitting divider

Keep Reading

A Lesson in Holding Two Strands For Yarn Dominance

Colorwork sock knitting the “Wild Angelica” pattern. A fun pattern for those who enjoy knitting socks.

This lesson is mainly for me. When I began knitting the Wild Angelica Socks pattern by Runningyarn, for some reason I got confused after the cuff.

This is not really shocking since I have not knit many socks. But I have knit colorwork hats and mittens. I began to do the color work with the dominant color being dark blue – held in my left hand. This was wrong! The dark color should be the background of this design.

As you should be able to see quite clearly in my photo here, once I changed to holding the tan color as dominant, the pattern begins to pop. This mistake is entirely my own, as the pattern is very clear. I have no explanation for my dimwittedness.

It’s all the same pattern, but just after I finished knitting the cuff, I knit with the dark blue yarn in my left hand – as the dominant color. As the floral pattern began to show, I didn’t like the looks of it. That is when I switched the blue yarn to my right hand. Wow, those tan flowers really began to show nicely. DUH! The difference is striking, so I wanted to share this info. It does matter how you hold your yarn to knit colorwork patterns. Not that I doubted it, because experienced knitters always preach it.

Colorwork knitting and yarn dominance depending on which hand holds the yarn.
Tan yarn near cuff is not prominent, but becomes so when I changed hands.

I also messed up while knitting the cuff of this sock, but I’m not going back to start over. They are socks. No one will be closely inspecting my knitting abilities at my ankles. I want to get on with it and see if I can manage the rest of the project (yes, I did!). The lessons I learn from this pair will help when I go on to knit more socks. Runningyarn has more pretty patterns like this one, as her specialty seems to be colorwork knitting.

If you haven’t yet learned to knit using two hands, the basic way to hold the yarn is with the Main Color (dark blue here) coming OVER the Contrast Color behind the work. As you pick up the strand to knit, keep this in mind. If you use two hands, CC in left and MC in right, it will happen naturally. I wrote a previous post on colorwork knitting.

The Wild Angelica Socks pattern designer explains this clearly in her pattern.

Wild Angelica Socks Pattern Review

Knitting this pattern was fun. I love all kinds of 2-stranded colorwork knitting and I needed practice knitting socks. For the colorwork chart, I used the Knit Companion app on my iPad where I could see it much more clearly.

All directions were very well written, and for the most part, easy to follow. I am not an experienced sock knitter and the heel / heel flap area gave me pause. I had not saved out any extra blue yarn for the heel. I was knitting from a ball and not a cake, so I couldn’t knit from the inside. Fortunately, I did have two balls of the tan yarn. I made up for it by using blue at the toe.

Colorwork Socks Photos

The floral design is pretty and I love the little design on the bottom. I would not attempt this as a beginner sock knitter, but I have enough experience to understand the pattern and do the colorwork. I’m inspired to knit more stranded colorwork socks.

As far as this sock pair goes, I will always know which sock was knit first because of the color dominance mistake.

More Knitting Stories…

Crescent-shaped Shawls to Knit

One of the first things I knit was a shawl. A shawl can be a very easy project and might be perfect for a beginner knitter to make. Shawls can be knit in various ways to make a variety of shapes. Most are triangular, rectangular, or crescent shaped. They can be knit from the top…

Knitting in the Round, Choosing Needles, Size Issues

My new year knitting program is going to include smaller projects, namely socks and mittens. I began The Woolly Thistle Mitten KAL (knit-along) this month (2/2020) and while knitting my mittens, I’ve used 9 inch circular needles, Flexi-flips and DPN’s. Here is my opinion on all three.

A Look at 9-Inch Circular Needles

I really like the little 9 inch circular needles. I think I first used them when I made a little baby bootie (never made the second bootie!) But they were too big for the cuff of the bootie so I used DPNs. I also used them to knit the sleeves of the Polliwog Popover baby sweater sleeves.

Here you can see my Latvian Braid (first one I ever made) using two yarn colors on a 9 inch needle. I think Fontana is unimpressed, but I had fun making it. After doing a Latvian braid on the Milet mittens using Flexi-flips, I realized a 9-inch circular makes for a neater braid.

Latvian braid knitting
Fontana and my Latvian Braid

Overall, I do love using the small 9-inch circular needles. Yarn holders for the ends of the needles are necessary, and the tight circumference can tire my hands quicker, making them ache. Also my colorwork knitting is very sloooow on tiny needles because the stitches are so small and tight.

I have the ChiaoGoo and Hiya Hiya 9-inch and they are both very similar.

Three-Needle Knitting With Addi Flexi-Flips (Size Problems) and Hiya Hiya Flyers

Both Addi Flexi-flips and Hiya Hiya Flyers brands come as a three-needle set. You knit with two needles holding the yarn and use the third to knit. A bit like DPN’s but with fewer, and longer, needles, that flex.

Addi has different tips on the end of each needle so you can knit with either sharp or blunt points.

Flexi flip needle tips are blunt or pointed
Addi Flexi Flips – One needle with two tip choices – sharp or blunt

Using the 3-needle set is easier than DPN’s as there 1 or 2 fewer needle changes, depending on the number of DPNs used, but I still have some trouble with the beginning of round stitches. See my braid rows below and how the BOR colors are off. I do have trouble adding a 3rd needle to start a row.

Beginning of round difficulties
My braid is off a bit using the 3-needle combo

Also with only two needles holding the work, I found that I was dropping stitches, so I began to put stitch blockers at the end of the needle not being used.

I have both brands and the needles are similar. The tube connecting the needles is a little longer on the Hiya brand, and Addi’s needles are a little longer overall. Addi’s come in a tube and Hiya’s come in a plastic bag.

Addi’s Incorrect Sizing

But I want to warn you of one crucial difference and it has to do with needle size – dimension.

When I began knitting my first Milet mittens, I ordered (what I thought was) a size 1.5 US set of Addi Flexi flips. I ordered them from Wool and Company and they were listed as size 1.5 US – no mm size was mentioned. However, when they arrived, the tag simply said 2.75mm (see tag below). I had to look it up, and come to find out 2.75mm does not equal 1.5, it equals size 2. The needles were too large.

So I checked my older pair of Flexi’s which actually says 3.0mm / US2. (See the photo below) BUT…3.0 mm does NOT equal 2, it equals 2.5 US…!!!!

Size difference in Flexi flips
Incorrect mm to US sizing in FlexiFlips

I went back to my order form at Wool and Company to make sure I did not mistakenly order the wrong thing. I did not. I kept the size “2” needles since I didn’t have that size, but I still needed a 1.5 size for my mittens. So I looked at other places online. The small size needle is hard to come by but Amazon had them and advertised them incorrectly also. Or should I say, they were advertised as Addi Flexi Flips advertises them.

Jimmy Beans Wool was where I saw the only notice to customers that the sizes of the Flexi Flips were off. They mention that the smaller size needles are off in the product paragraph. I wasn’t crazy – the needle sizes are not true to advertising. And only 4 of the smallest sizes are listed wrong – all other sizes seem to equate correctly.

If you buy according to the metric system you are fine, but those of us in the US will be using the wrong size needles unless we compare the mm size to US sizing.

The Basic DPNs

I have a heck of a time beginning any small item using DPN’s (double-point needles. With all those pointy sticks in the way, it’s not fun to keep track of where I am and what I’m doing.

Using wood double-pointed needles to knit a sock.

I think it’s actually a little better when using very small needles to knit socks or mittens. The Snowfall sock pattern below has a repeat pattern that fits nicely on four, size one, metal, DPNs. But I did cast on using a 9 inch circular and knit the ribbing before changing to DPNs.

knitting socks with size one dpns
Sock knitting using double pointed metal needles.

Magic Loop

Many knitters use the Magic Loop method to knit in the round. I have looked into it, on YouTube, and found a toe-up sock example, which I may try one day soon.

I can’t give an opinion on the Magic Loop method because I have never used it. Basically you use a long circular needle, split the stitches, and knit as in the round. Some clever people knit two pair (both mittens or both socks) at one time on the same long needle!

Knitting Inside Out… What?

Something else I have just learned is that when knitting colorwork some knitters knit their mittens, socks, and whatever, inside out! Crazy right? The reason for doing this is to keep the floats more uniform and less tight.

I had to search YouTube for that information as well. Melissa B has a good video explaining how simple it is to knit inside out.

In Conclusion

In conclusion, I’d have to say from personal experience that I prefer casting on with circular needles. If I need to do a Latvian Braid, circular is my choice. If needle size is not too small – say size 0 – 2, I don’t mind knitting along with them either. Normal knitting, or stripes, are easy, but for very small sizes and colorwork, they can make my hands ache.

Beyond that, it really depends upon the project at hand. I still have a lot to learn and new methods to try, and a pair of mittens to finish.