Knitting Review of The Oulu Mitts Colorwork Pattern

The cold weather is here, and even in Florida temperatures have been freezing in my area. Knitting mittens and better yet, for me, knitting fingerless mitts, has become an obsession. I purchased the Oulu Mitts pattern as it was on sale in December. The pattern is from Caitlin Hunter of Boyland Knitworks.

I could see from photos that the cuff was a corrugated rib, which I am familiar with, and I can do colorwork. I had the right type of worsted yarn called for, so why not?
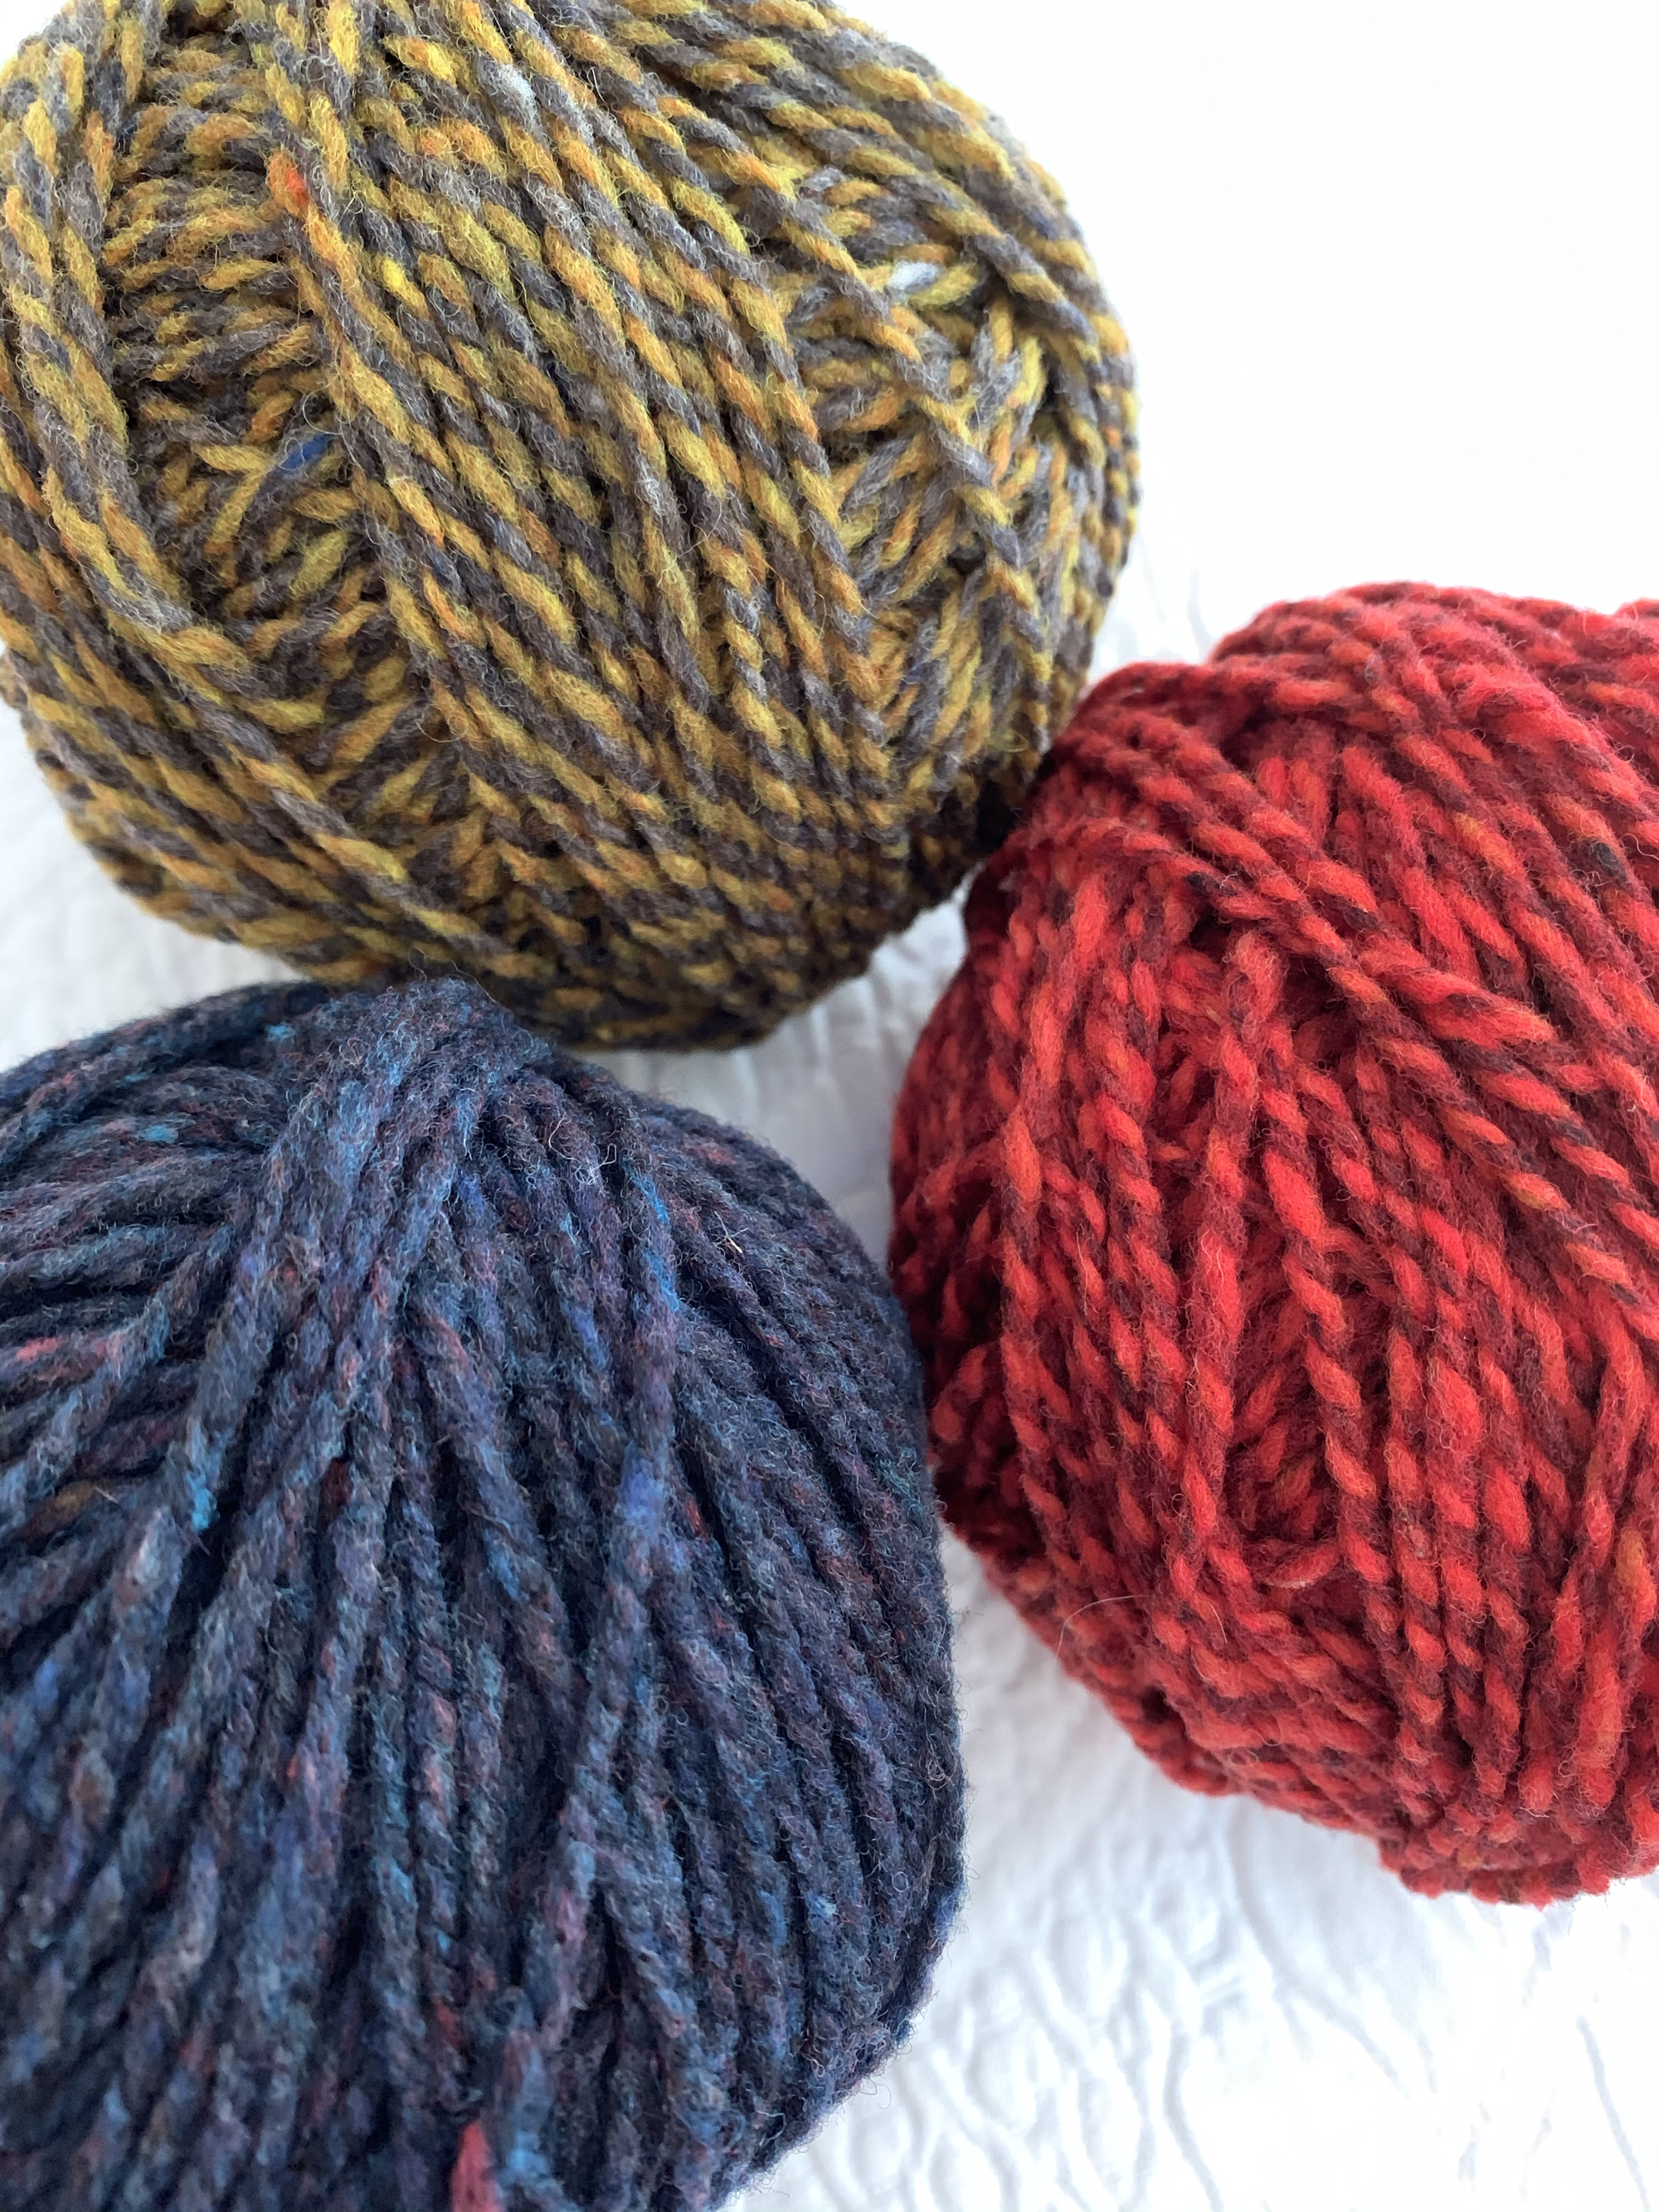
Brooklyn Tweed Shelter yarn in colors Old World, Amaranth, and Caraway
Shelter in Brown: Caraway, Red: Amaranth, Blue: Old World

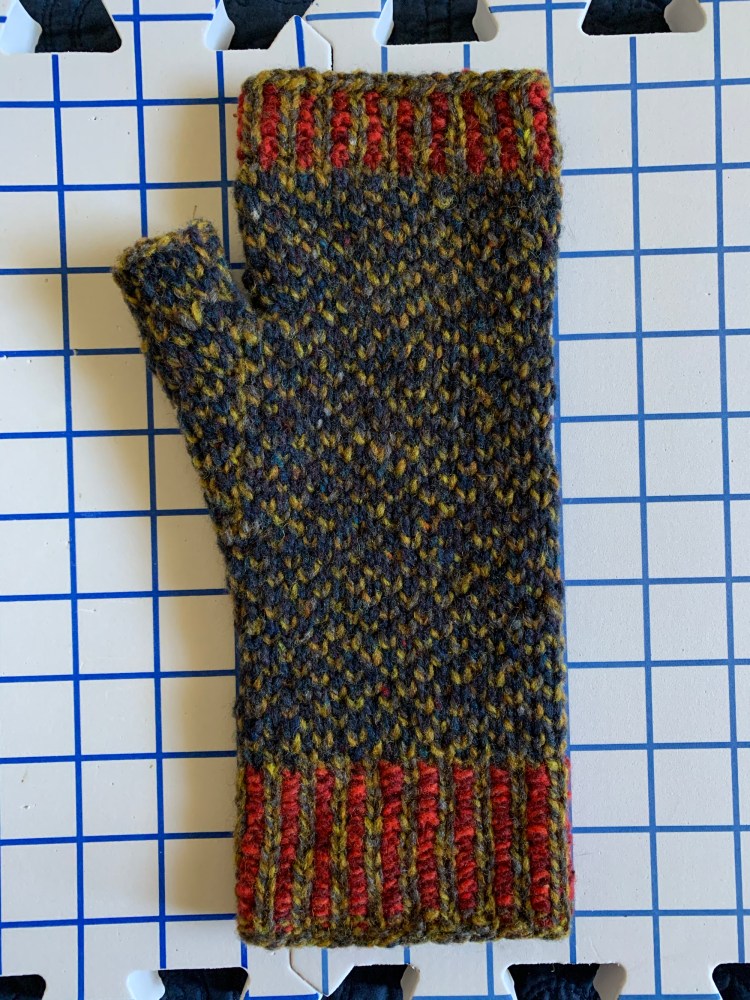
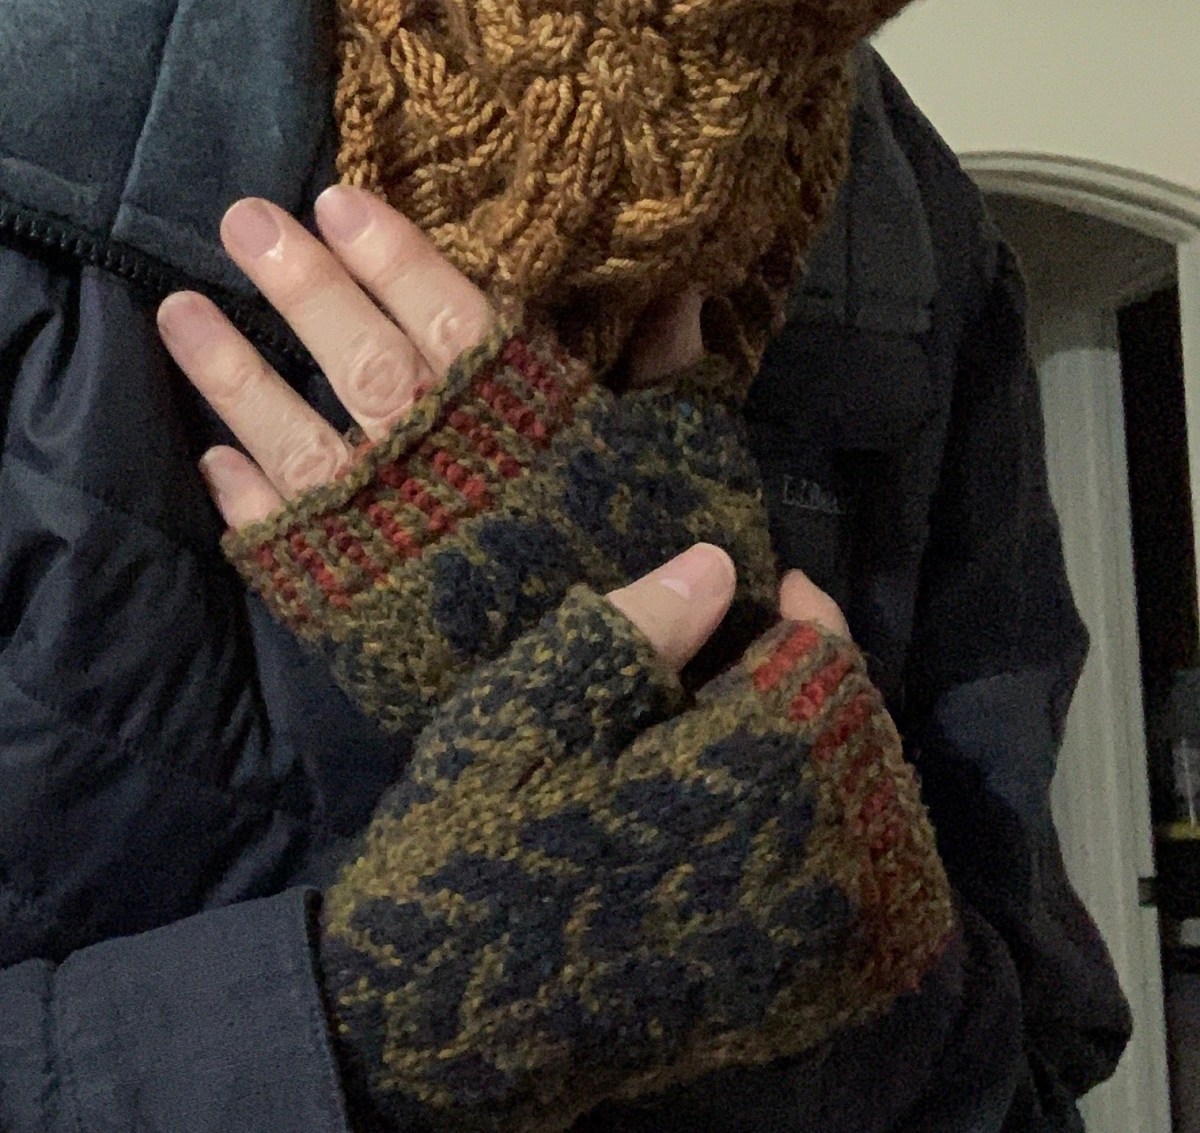
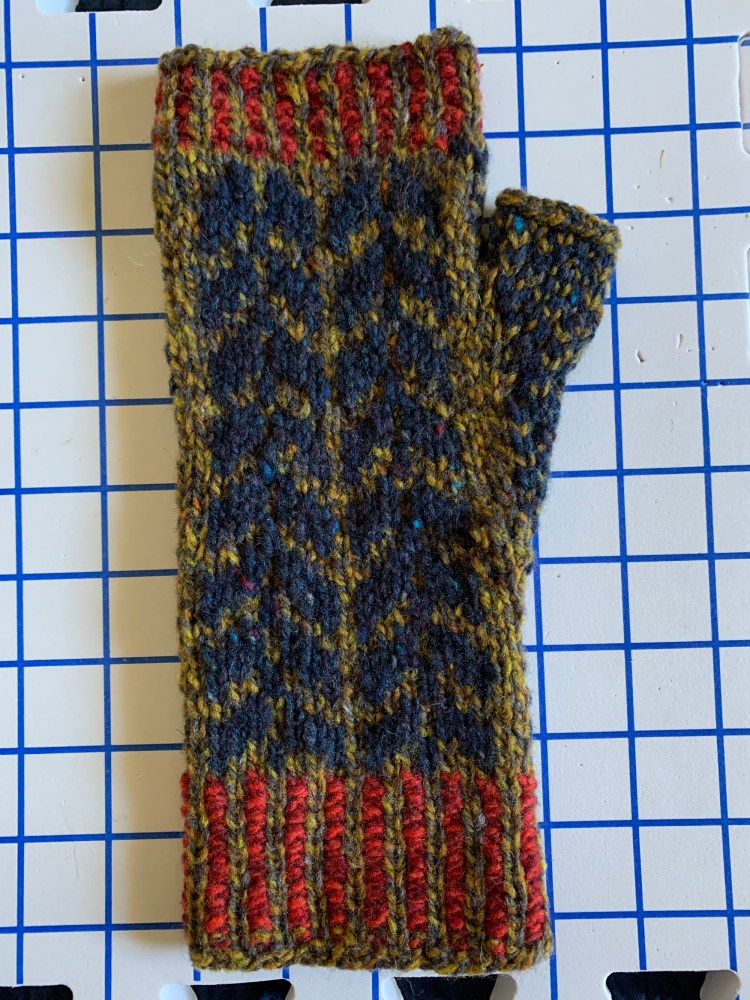
The yarn is Brooklyn Tweed “Shelter” in colors: “Caraway” – the tan for my Main Color, “Amaranth” red for the ribbing, and “Old World” navy blue. I had this yarn on hand so had to find three colors that would work. In the end, I like the look. Here is the left hand mitt drying, in size Medium.
Things to Know Before Knitting This Pattern

First thing to know about this pattern is that the directions are in chart form. The chart shows a k1 MC, P1 CC for the ribbing, which is actually a corrugated rib. The designer does not mention this and assumes the knitter will know how to do corrugated ribbing.

Corrugated ribbing of Oulu Mitt pattern
Beginning left hand mitt

The pattern notes say that the instructions are “written for the Magic Loop method of working in the round” – but, that is not really important because the mitts can be knit with small circular needles (which I used) or DPNs. She only references Magic Loop for the cast-on and dividing stitches between needles. I don’t really see the point in mentioning this at all.

Each of the three sizes has a “right” and “left” mitt chart to follow – so 6 separate charts are included. I began with the left, medium size, and ran into trouble with the thumb colors. The color chart is off, and since it was my first mitt, I wondered if I was doing it wrong or if the pattern was supposed to be that way. Eventually, I had to do the alternating colors and ignore the thumb pattern. Because of this, my thumb colors are not all correct, but the yarn covers the mistakes well enough. This problem was not mentioned specifically by test knitters or previous knitters, but a few did mention having trouble in general.

Neither the right nor left hand chart made sense to me when it came to knitting the thumb. It could be me, or a problem with the pattern, I honestly don’t know. In general I can follow patterns, and I have knit mittens without any problem, but the Oulu pattern did not make sense.

Pattern is wrong for left hand thumb
Thumb chart is off

Getting Gauge

I did not knit a swatch and used my first, washed and dried mitt to get my gauge. My gauge is way off for rows, which is why I needed to add an extra pattern repeat at the top. I got 24 rows in four inches, and she (the designer) has 31 rows!

While I was knitting the first mitt, I thought the mitt would end up too tight. In fact I added a couple extra stitches near the knuckles to widen it a bit. But the day after I finished knitting, I wore it outside while feeding the birds on a cold 32 degree morning, and the fit was good. Then I washed it and began mitt #2.
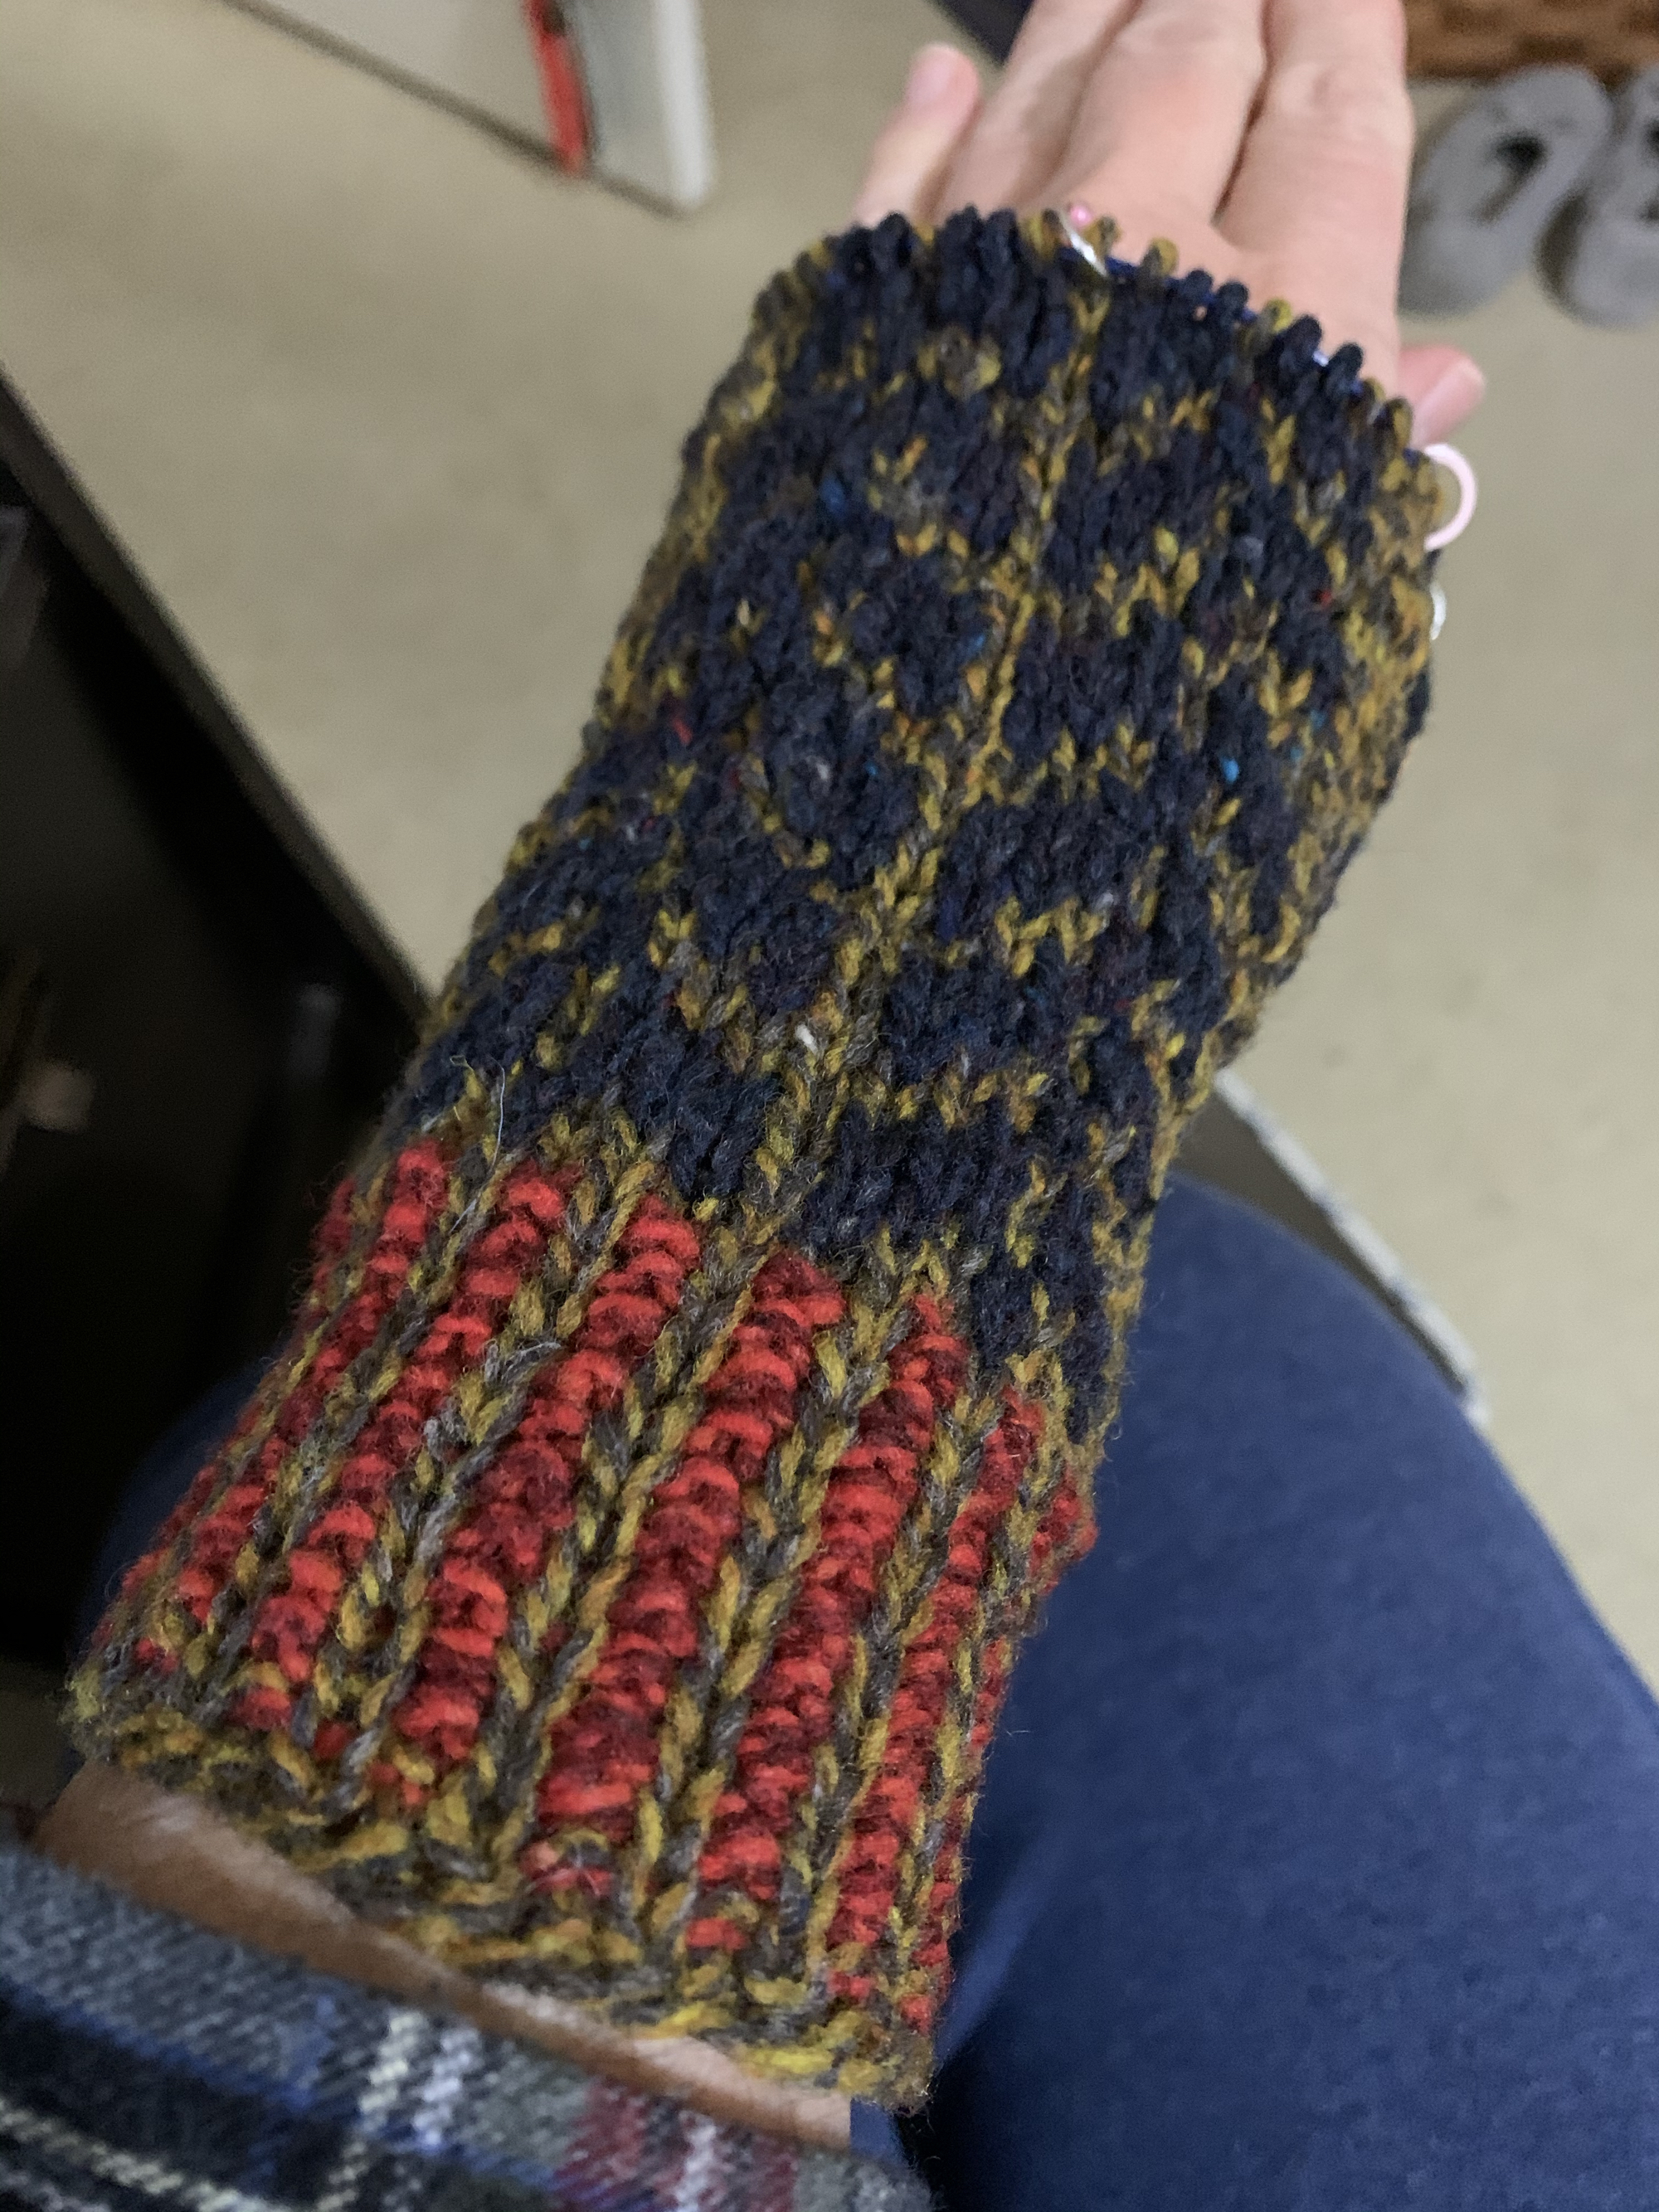
Oulu cuff and back of hand pattern
Cuff and most of hand finished

Changes I Made to Thumb Knitting

Needle size & Thumb stitches: Although the mitt seemed tight at first, it ended up fitting me very nicely. I knit the size Medium, on size 6 needles for the ribbing at the cuff and top. The rest of the mitt was knit using size 7 needles.

I did not use the smaller, size 6 needles for the thumb, as the pattern calls for. In fact I added stitches, by picking up 4-5 in place of the 1 stitch, and it’s perfect. Doing as the pattern suggested would have created a very tight thumb – for me. If you are also a tight knitter, you may want to do the same on the thumb.

Wearing Oulu mitt for left hand
Before washing

Pattern repeats and bind off: I added one more repeat at the top of the hand to get the correct length for me – due to my smaller gauge. For the next pair I would maybe make the cuff shorter. It’s hard to say if I will appreciate the length on the wrist area.

The pattern calls for a “stretchy bind-off” and I did a regular, rather loose bind-off which was fine. Some of the reviewers mentioned that doing a stretchy bind-off made the top flare. I can imagine that would happen. As it turned out the top ribbing could have been more narrow overall. I will plan to decrease a couple of stitches before doing the top ribbing next time.

Finished! I had trouble following the pattern for both the right and left mitt. Don’t know if it was just me, or the pattern. I had to figure too many things out for myself. Maybe a more experienced knitter would not have this trouble.

Oulu mitts
Finished the Oulu Mitts before the end of 2020

Read More Knitting Stories

Turkish Patterned Cap, Hand-spun Knitting Project

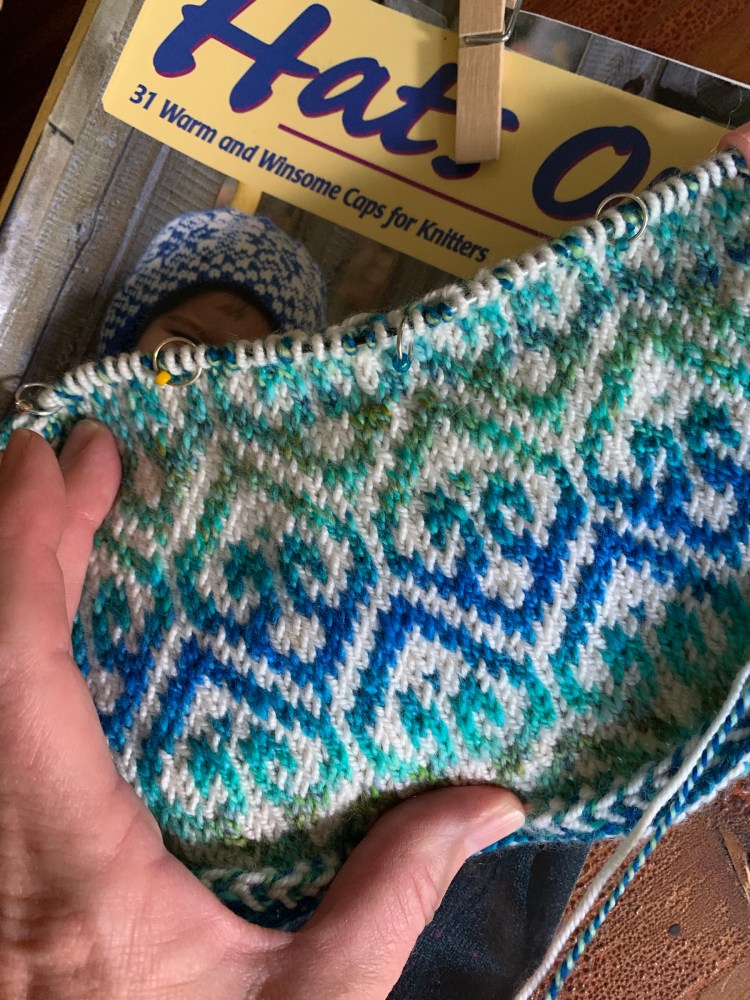
Hats, hats and more hats please! I don’t know why, but I love to knit hats. I’m pretty good at it, and I’ve knit enough of them to be fairly sure of size. The Turkish-Patterned Cap is my latest accomplishment. The pattern can be found in the Hat’s On book by Charlene Schurch.

The image here goes to Amazon, where the book costs around $10 for the Kindle version, or get a used book for around $13 (and up). For that price you will have 31 hat patterns to try out!

Although this particular hat is not a favorite of mine from the book, I’ve knit many others (nine, I think) that I would knit again. I really can’t say enough good about this hat knitting book.

The Turkish-Patterned Cap Review

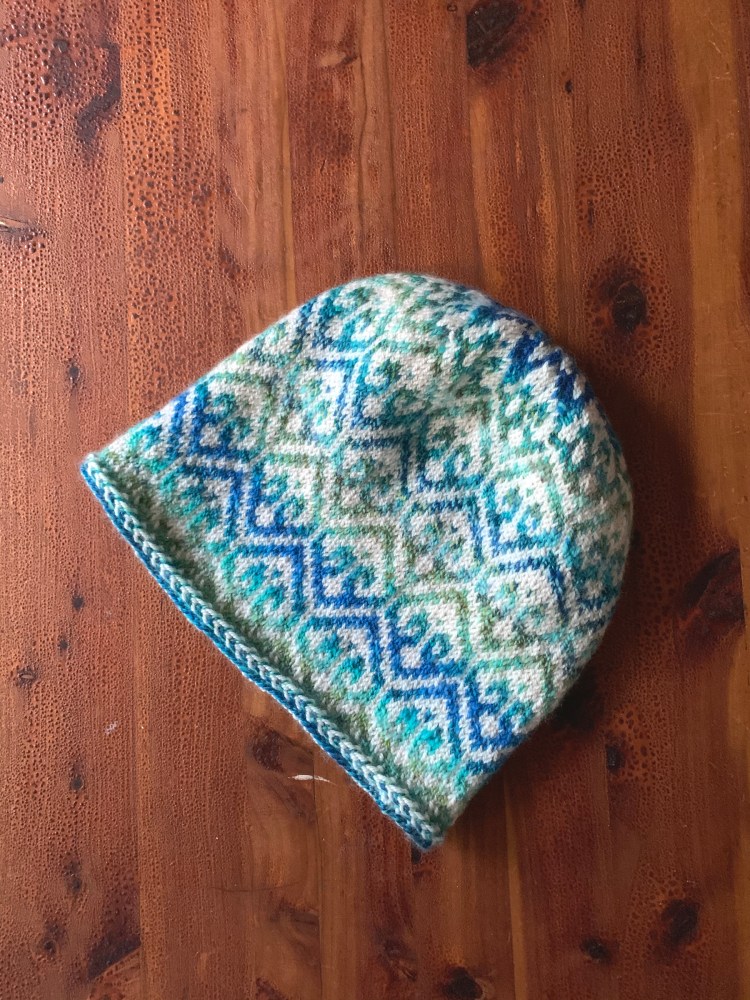
Beginning the cap with a “Twined Herringbone” edge, or braid, was a first. I’ve done braids on mittens a couple times, but never a hat. I knew it wouldn’t stretch much, so I knit the size Large and hoped it would be large enough – it is. This hat will be a gift, and my daughter has a small head, so it should fit perfectly.

Turkish patterned cap stranded knitting
Size 4 circular needle using DK and fingering weight yarn, I knit size Large

I used the suggested needle size, but my yarn was not worsted weight. The circumference of the hat is spot on at 20″ around as the pattern says for a size large.

The hat was fun to make – until I reached the top decreases. I am not new to decreasing for a crown, nor am I new to colorwork at the crown. I knit two Katie’s Keps, and the Tettegouche hat without a problem. For some reason this pattern did not work for me at the crown. I did something wrong, and couldn’t figure out what. I had stitch markers for each section, but suddenly the colors were not matching up.

Please read the post about knitting my second hat like this one where I discovered the mistake in the pattern decrease area! I explain how to fix it- or how I fixed then problem.

Turkish patterned cap stranded knitting
I had trouble with the crown

All I could do was keep going and hope for the best. You can see that the “star” is not perfect, but oh well… . Because of this, and the fact that I am not crazy about the braided brim (for my own hat wearing), I won’t make this hat again. I think my daughter will love it! She does a lot of snowboarding and needs hats like this to wear beneath her helmet.

Turkish patterned cap stranded knitting
Washed and blocked hat

About the Yarn

I’ve been eyeing my hand-spun yarn stash and wishing I could knit something wonderful using those lovely skeins. They are labeled as “sock yarn” but I dislike knitting socks. Projects like this hat are perfect for this yarn. Stranded colorwork knitting is fun with this type of yarn.

Wound Up Fiber Arts sock yarn hand-spun
Beautiful hand-spun yarn

For the Turkish hat, I used my blue-green skein (fingering?) from Wound Up Fiber Arts (see the ball in my yarn photo). For my neutral color, I used off-white “Naked” Kunlun yarn from Miss Babs (DK) which I had bought on sale a while ago (it contains cashmere and silk). By the way, Wound Up Fiber Arts has limited amounts of yarn like this because it is hand-spun. I’ve considered myself fortunate to actually find yarn to buy on her site.

The Turkish cap pattern calls for two colors, and I thought this variegated yarn would make an interesting color gradient. While knitting, it’s fun to see the various shades emerge. Aren’t they pretty?

Turkish patterned cap knitting design
Gradient coloring due to the hand-spun yarn

Ever since I began knitting stranded colorwork mittens back in February, I can’t stop knitting items that require two yarn colors! It is such fun, and the end result is so nice. Those mittens could be knitted with this same yarn, which would make a pretty set.

Knitting Katie’s Kep Number Two in Earthy Colors

Because my first Katie’s Kep (hat) came out a bit large, I decided to cast on four fewer stitches for my second knit. (Find the link to the Kep pattern at the bottom of this page.) I still used a size 3 circular needle and did the Old Norwegian cast on – or something like it! I’m not sure I did it exactly right, but it looks okay.

Corrugated ribbing knit on the brim of a hat
The brim of this hat is knit in 2×2 corrugated rib

Once the corrugated ribbing was done, I increased around by four to get back to the original pattern count. Here’s how:

*Knit 33, make 1* – 4x’s around = 4 additional stitches. Total stitches are 136 now (as pattern calls for). Continue with pattern increase row.

Now I was back to the correct number of stitches needed for the colorwork. I would love to make this hat using a 2 or 2.5 US needle size, which would work out better I think, but I don’t have those sizes in a circular needle. I might have to buy them.

My main yarn used for the tan Kep is Rauma Finullgarn color 406, Wheat Heather. Other yarn used is Jamieson & Smith in colors: 4: brown, FC7: Peach / orange, FC62: green, and 133: medium purple. The colors are more subdued than what I used for my first Kep.

The fun of knitting this colorwork hat is choosing the colors. It’s probably the reason people can’t stop at knitting only one! As you can see in my photo above, very little yarn is used to make one hat. But if you choose to use J&S yarn as the main color, you will need 2 skeins.

Where to Buy Jamieson & Smith Yarn

This was the first time I knit with J & S yarn. I found it for sale, at a very good price, at Fairlight Fibers. I saved over $1.50 PER SKEIN compared to the current price of the exact same yarn at another online shop. And shipping is FREE when you spend over $50.

At this time, many yarn sellers are low on yarn, thanks to the Covid pandemic keeping people from making the yarn.

Other yarns the designer mentions in her materials section of the pattern are: Uradale (UK based), Shetland Handspun, and Jamieson’s of Shetland.

Wool

Some people don’t like wool because they think it is scratchy, although I don’t mind it. When wool is used for a hat, it doesn’t really matter (unless you are bald). I find the Rauma and J&S to be similar in feel, and once it’s washed, it feels softer. I use Eucalan no rinse wash, and it conditions the wool.

Anything made of wool dries quickly and will of course keep the wearer warm.

Katie’s Kep is a Free Download at Ravelry, by designer Wilma Malcolmson

Katie's keep crown star
Crown star

Tettegouche is My Second Colorwork Hat

If you have the Milarrochy Heids hat-knitting pattern book, you have the pattern for the Tettegouche hat. ( It is also sold separately – see the link at the bottom of this post.)

It’s a beautiful book, with lots of pretty hat patterns and they all use Kate Davies Milarrochy Tweed yarn. I bought the yarn in a variety of colors and began this hat a while ago. I didn’t like the way it was coming out. I blamed myself for not being familiar with colorwork, good cast-on’s, or having the right hat gauge. Honestly I didn’t like the yarn. I put it aside.

Tettegouche hat pattern
Finished Tettegouche

When I joined The Woolly Thistle knit-along, I became familiar with Rauma wool and fell in love! Everyone was using it to knit colorwork projects. After knitting some mittens by this hat’s designer, Virginia Sattler-Reimer, I went back to try to knit the Tettegouche, only this time I used Rauma yarn. By the way, she has mittens to match the Tettegouche hat pattern!

Tettegouche hat pattern
Good size, with a bit of extra room at the top.

I made some changes to the pattern, and one was to do a 2×2 ribbing for the brim. The colors I used were what I had available and they are not the greatest. But I had fun with this. It has been a good practice hat after knitting Katie’s Kep. Because I had already knit that colorwork hat, I knew to try a smaller needle for Tettegouche.

Buy The Tettegouche Hat Pattern

The pattern is also sold separately and you can buy the Tettegouche hat pattern here. Please click the link to see it, because it is so much prettier than mine! You won’t believe it is the same hat…!

What Was My First Colorwork Hat?

My first all-colorwork, Fair Isle knitting project was Katie’s Kep, which is a fun hat pattern which is Free to download.

Katie's Kep hand knit hat
Nearly done, just working the crown