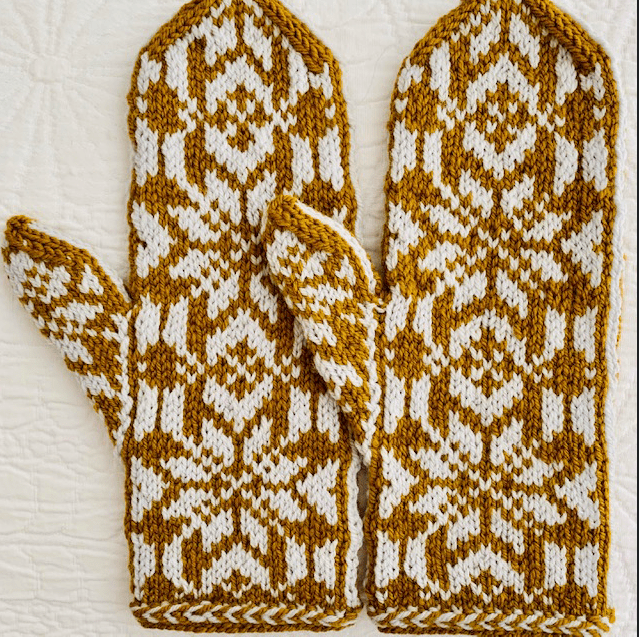
Silver and Gold Mitten in Stranded Colorwork

After beginning The Woolly Thistle mitten knitalong with one mitten pattern, I came across a new pattern for sale that I liked a lot better.

I finished on mitten in my first choice (Milet) and then started this one which is called “Glissade” and you can buy the pattern and download it at Ravelry – I have a link further down the page. I have finished one mitten, and I do love this pattern! Read on…
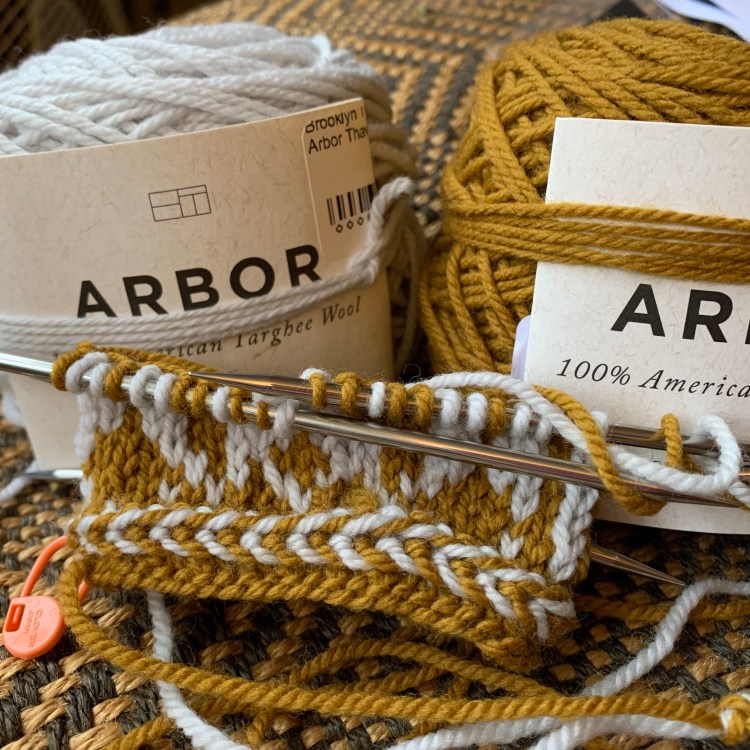
Arbor yarn mitten knitting project
Brooklyn Tweed Arbor yarn is pretty nice

I wanted to use the same DK yarn the designer used, but it was out of stock, so I began looking for other DK yarn to use.

One thing I want to do this year with my knitting projects is to use new types of yarn. I’ve already fallen in love with the Rauma yarn, and I vow to use more pure wool this year. The Woolly Thistle imports beautiful wool from overseas, so that’s a good place to start when shopping for “yarn with a story”. I love knowing where my yarn came from!

But this time I chose Brooklyn Tweed’s Arbor yarn for a couple of reasons. After researching this yarn, reviews are outstanding. Everyone loves it, and I can now join that group – it is so nice. Secondly, the color selection was fabulous. I bought mine at Wool and Company, and they wound the skeins for free (as always).

My Arbor colors are “Kilmt” (gold) and “Thaw” (silver gray) and I think I made good color choices. It’s not super expensive yarn for the nice quality. It will need to be hand-washed, but how often do you need to wash mittens?

Glissade mitten pattern knitting
Getting beyond the cuff

The Glissade Mitten Pattern is for sale on Ravelry by Virginia Sattler-Reimer and I believe it is one of her newer patterns. She also has a very popular mitten called Tettegouche mitten which has many colors. She has a hat with the same name which is featured in the Milarrochy Heids book which I bought a while ago.

This mitten pattern is fun. It starts with a Latvian Braid, which I think looks really nice. (The designer includes directions for making the braid.) I think one reason a braid is used at the beginning of the cuff is to keep it from rolling.

Knitting the Thumb

The pattern is in chart form, and the thumb is shown separate, which took me a bit to figure out. The thumb stitches have to be added at a certain point in the pattern, which takes some getting used to for a newbie like me.

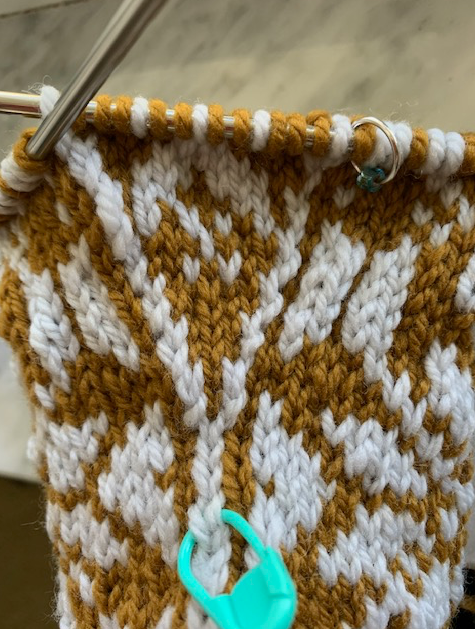
You can see my thumb placement knitting in the photo below. It was easier for me to add a marker so I would know exactly when the thumb stitches begin.
Thumb stitches on mitten knitting
I placed a marker at the beginning stitches of the thumb area

It’s tough to know gauge with mittens until you get far enough along to slip your hand through the DPNs. I began using size 3 DPNs, as the designer used – I switched to size 4 after the thumb – because the hand seemed to be a bit tight.

thumb knitting for mitten
Getting started on the colorwork thumb

I did okay for my first colorwork thumb. It did get a bit hairy at times, but all in all it was completely worth it because I love the outcome! I used a marker for the BOR, and added one in the center of the pattern, just to help keep me on track.

Love the color, love the yarn, love the fit, and love this pattern!

Here you can see how the side line of the mitten carries onto the thumb.

Inside thumb
Pattern on inside of thumb continue along the side of the mitten as well

I Love This Mitten!

Although I still have one more Glissade mitten to knit, I look forward to having a pair of these. The fit is perfect, but I did end up going up to size 4 DPNs once I put the thumb stitches on hold. I tend to be a tight knitter.

When I do the next mitten I will do the cuff in a size 3 and then change to a size 4 for the hand and thumb. It’s the only change I’ll need to make. (That worked well on #2)

I have not washed and blocked it yet – I am waiting for the second mitten to be knit.

Love my first colorwork mitten
Love this!

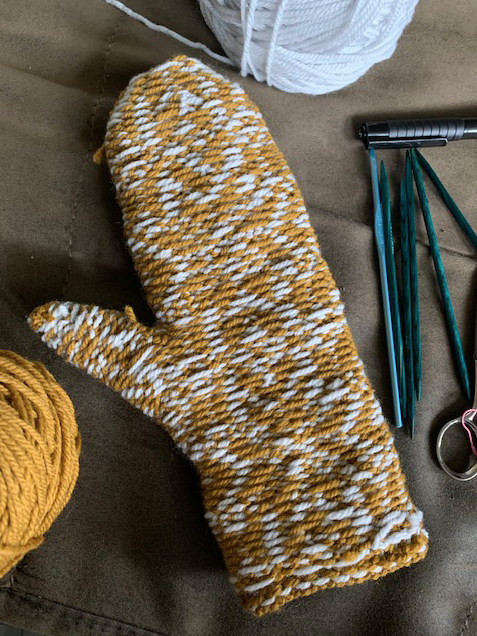
When doing stranded colorwork knitting, the inside of the mitten looks like the image below. It makes for a bit thicker fabric than plain knitting.
wrong side stranded knitting Glissade mitten
Wrong side

I am trying to be a better “pairs project” knitter, where I finish two mittens, two socks, etc., but I have to love what I am knitting for that to happen. I can’t see wasting time knitting something I dislike.

Finished today! My first pair of hand-knit, full colorwork mittens. They still need to be washed and blocked, but they fit well and look decent. In fact, I really enjoyed this knitting project. It was quick, even for me.

I did not knit every day. I have to work also, but the pair only took 13 days. Haha… some knitters can knit 3 pair in that length of time! Still, I am happy that I have a new pair of mittens AND I finished before the knit-along ends (March 26th).

hand-knit mittens in gold and off-white
Washed and blocked and ready to wear

Inspired to Knit More Mittens

Once I knit a project that I enjoyed, and turned out wearable, I want to do more. The Brooklyn Tweed Arbor yarn is so fabulous that I have my eye on a new mitten pattern in DK yarn. It’s called Fiddlehead, and is very popular. The DK weight works up quicker than fingering, and that is a good thing for a beginner.

In fact I might write a page full of DK and Worsted weight patterns.

Frogging the Moose Hat

Frogging is a knitting term meaning “ripping out”. I have tried to knit this Moose hat twice with different colors of yarn (link to pattern below).

First I knit a yellow beginning row then brown for the brim. I tore that out. The pattern sample hat is white with two contrast colors, but I didn’t want a white hat. I was also trying to use up stash yarn.

I thought this would be a quickly done FO using up DS sharing HOTN within a day or two. Instead I had a TOAD! (Don’t understand Knitcabulary? Read this fun post at Knitfarious.)

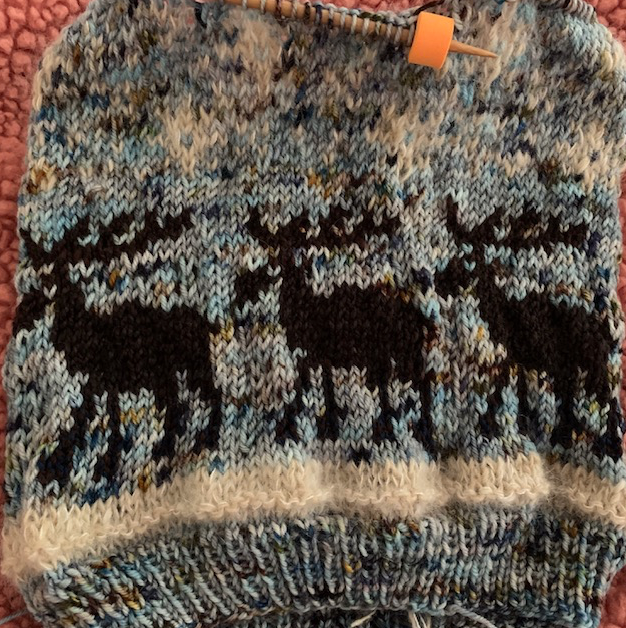
This time I used Yarn Cafe Creations merino wool (blue, “The Ring”) with brown Spincycle for the moose motif. For the third color I used an off-white light fingering wool and combined it with mohair (think snow).

Moose Hat knitting
Purl ridge added for texture

I’ve learned how to carry floats with the left and right hand yarns while knitting projects like this. I’m no expert, and this was good practice. No knitting is a complete waste!

Trial and Error and My Mistakes

I did a little purl ridge to give some texture with the white (not a great idea!) and I began the moose design first instead of the trees. Many Ravelry comments from previous knitters mentioned that they should have done the moose first and that the hat gets too long with all the motif sections.

Because I wanted the moose, but no white, I envisioned the moose walking in snow with snowflakes falling above. The pattern actually has a row of trees, then moose, and more trees at the top. Each section is divided by two rows of a third contrast color. If the hat is knit according to the pattern, it will be quite tall.

Moose hat beginning knitting hat
Adding some mohair in the white rows

I Love to Knit Hats… But

The trouble with knitting hats is that you can’t actually try them on until they are nearly finished. The moose stranded knitting area seemed tight, which I guess usually happens with colorwork. From the brim to the main hat area the needle size goes up by 2, and I used a size larger than that because I know I am a tight knitter.

Moose hat pattern
Nearly done with the moose motif

Yesterday I got past the moose rows and wanted to do snowflakes instead of trees along the top. The off-white with mohair blended in with the blue variegated yarn and could barely be seen.

Now the hat was tall enough that finally I could try it on …. and I hated it! It was loose at the brim (I made the brim half the recommended length) and tight around the moose motif section. This is not the type of yarn I want for a hat either! (Note to self: don’t use sock / fingering yarn for a winter hat – unless it’s a man’s cap.)

I’ve decided to frog it. The pattern is not something I will try again, but I have the moose motif to save for another time – maybe a scarf / cowl / or mittens.

Link to the Moose Hat Pattern

Most of the problems I had with this hat were brought on myself and I don’t blame the designer. If you want to buy this pattern, or read comments from other knitters, find it at Ravelry: Beware of the Moose.

Beware of the moose hat pattern knitting project

I prefer my winter hats to be chunky, or at least knit in worsted weight, like my Quarry Hat, Simple Rasta Hat, or Star-topped Hat.

My next stranded knitting project will be a pair of mittens when I join the Woolly Thistle KAL.

Woolfolk Tynd Yarn Stranded Motifs Cowl

Knitting a small cowl using Woolfolk Tynd yarn in colorwork motifs

This small wool cowl was a spur of the moment knitting project decision. I do not have a pattern to share as I made it up as I went along.

The idea bloomed when I came across the Glacier Park Cowl pattern by Caitlin Hunter at Ravelry and saw that she had used Woolfolk yarn in two colors to create it. I knew I had stashed away two skeins of that same yarn. My cowl is not in her pattern, but I did use up (nearly) my Woolfolk Tynd yarn!

stranded colorwork cowl
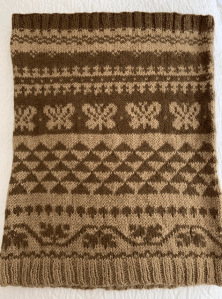
I used Woolfolk Tynd yarn in brown and tan to make this knit cowl

My two skeins of the super-soft Tynd are dark and light brown colors, and I’m not sure of the numbers (Tynd colors are numbered, not named). Probably this was on sale somewhere at some point and I bought it not knowing what I’d use it for. The yarn is so very soft that a cowl is the perfect project.

A recent purchase of the book 150 Scandinavian Motifs gave me the incentive to do some math and find designs that would fit my cast on numbers. Then I screwed up and forgot my cast on, or counted the first row incorrectly, and messed up some of the rows.

I began with the lighter color as my main color and switched just before the butterfly row and made the dark color my main color. I did this to use up the yarn more equally. I can’t locate my leftover yarn, but I did use most of each skein to finish this cowl.

stranded colorwork cowl
Motif spacing error

I do love the Glacier Park cowl pattern (click the link above to see that beauty), but not for these duller colors. So I made up my own design which was really good practice doing stranded colorwork. And I did make a lot of mistakes! No biggie… a cowl hides mistakes well.

In the image above you can see where my butterfly row did not line up exactly with the stitches I (thought) I had counted, so I had to add a little wavy section to carry the yarn.

Below I am showing my goof up on the row above the butterflies where somehow my counts were off. Most of these motifs came from the book, but I did make some up myself.

two color stranded knit cowl in Tynd yarn

Just thought I’d share the stranding that went on inside the cowl. I didn’t have many ends to weave in because all the yarn was carried up inside the cowl.

Fun Selfies Wearing the Cowl!

I have no one to ask to take photos of me, so I did the best I could getting pictures of the cowl around my neck. My messy gray-hair braid kept getting in the way!

wearing the cowl
knitted cowl

Knitting this cowl was a little sidestep from knitting my Fine Sand sweater and finishing up my Quince Wrap. It was a quick knit and a brain challenge (although not too tough) to figure out which designs would fit around the cowl. Sometimes I need something different on the needles.