Knitting a Colorwork Sweater in Plotulopi

Knitting a pullover sweater with a made up colorwork design using Plotulopi and Lettlopi wool.

For a while now I’ve been a bit lost as to what to knit next. I began the thrummed mittens and lost interest (because I never wear mittens in Florida) and finished up my Meadow Moon sweater, and now… what?

Colorwork / Fair Isle is my love, and I have all these plates of Plotulopi so lets use them! I’m still trying to use up stash yarn, and combine the yarn with a good pattern.

Plotulopi Frost Grass green plates of yarn
Frost Grass plotulopi plates

I dug out the Lopi 40 book because I have some Lopi yarn to use up. After knitting the Farfuglar pullover, and Clacks mittens, I have light blue and a tiny bit of white. I had ordered some rust orange (Apricot) Lettlopi as well as a brown color.

After skimming through the Lopi 40 book, which has many lovely projects, I decided on a vest. It is shown on children, but has sizes for adults. I figure I can do colorwork around the bottom, to the underarms, as the pattern does, and then finish with solid plotulopi. (It is a bottom up vest.) But I want to choose my own charts and colors.
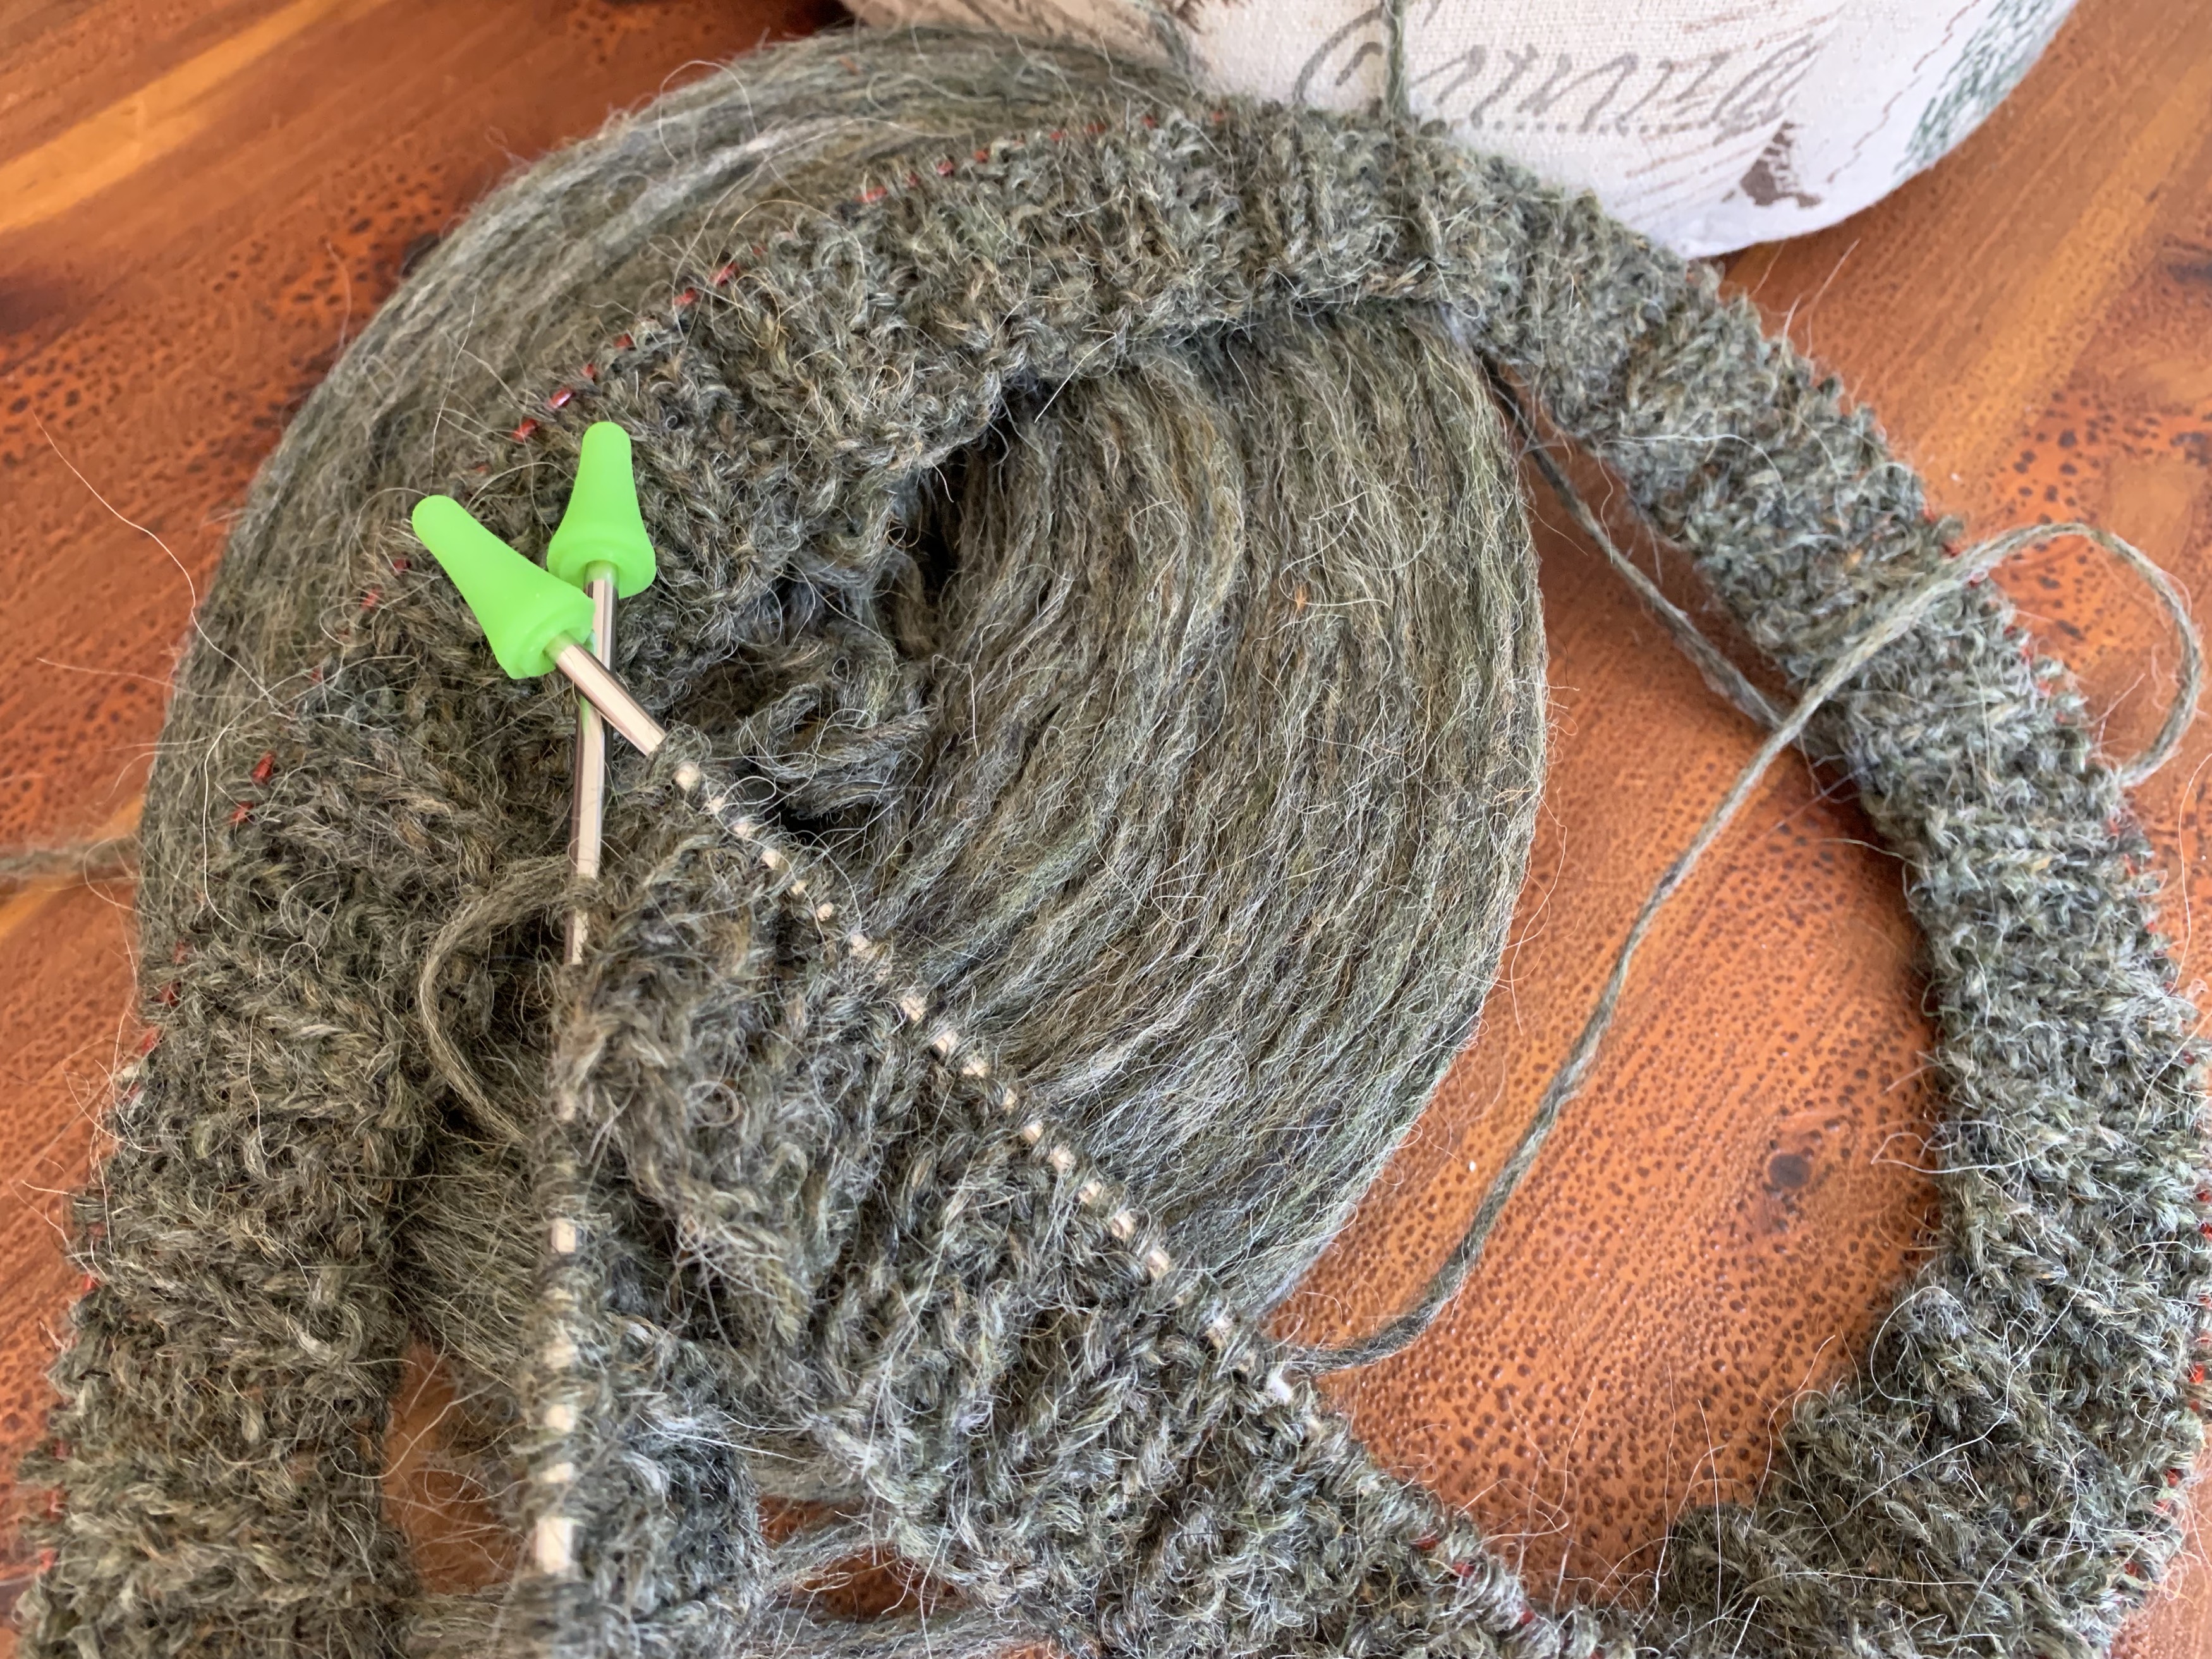
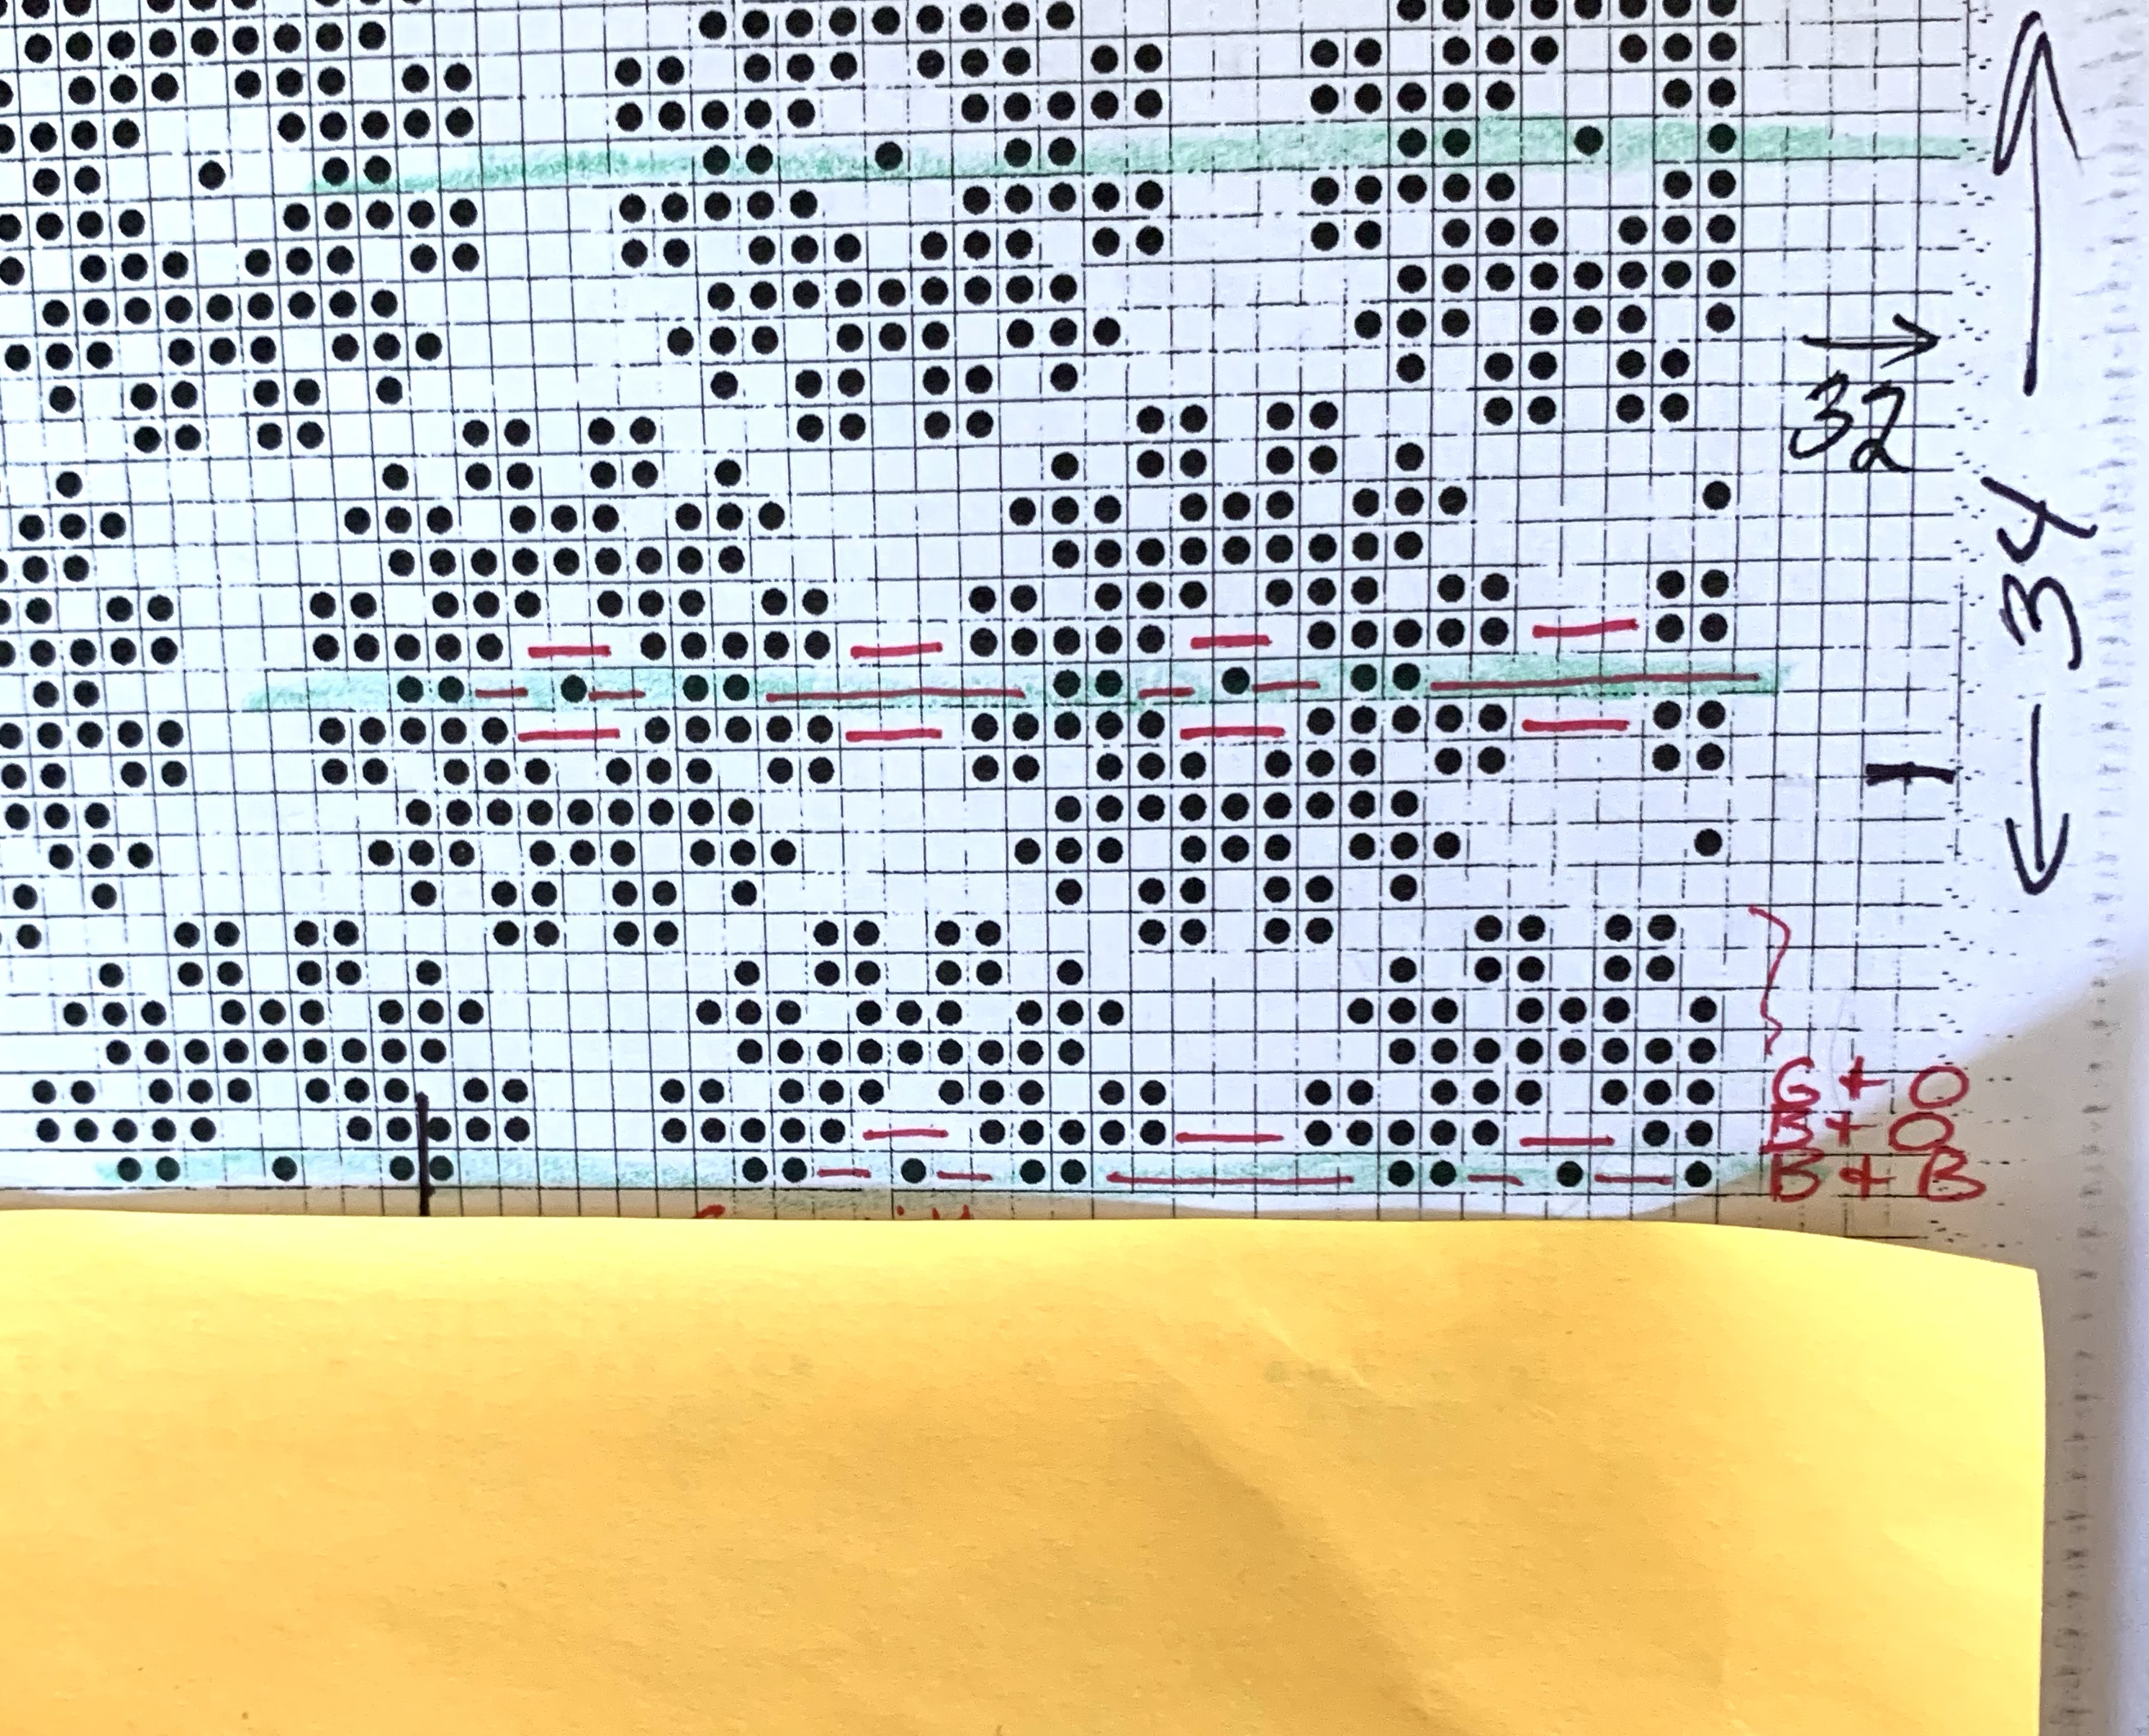
Yarn Being Used

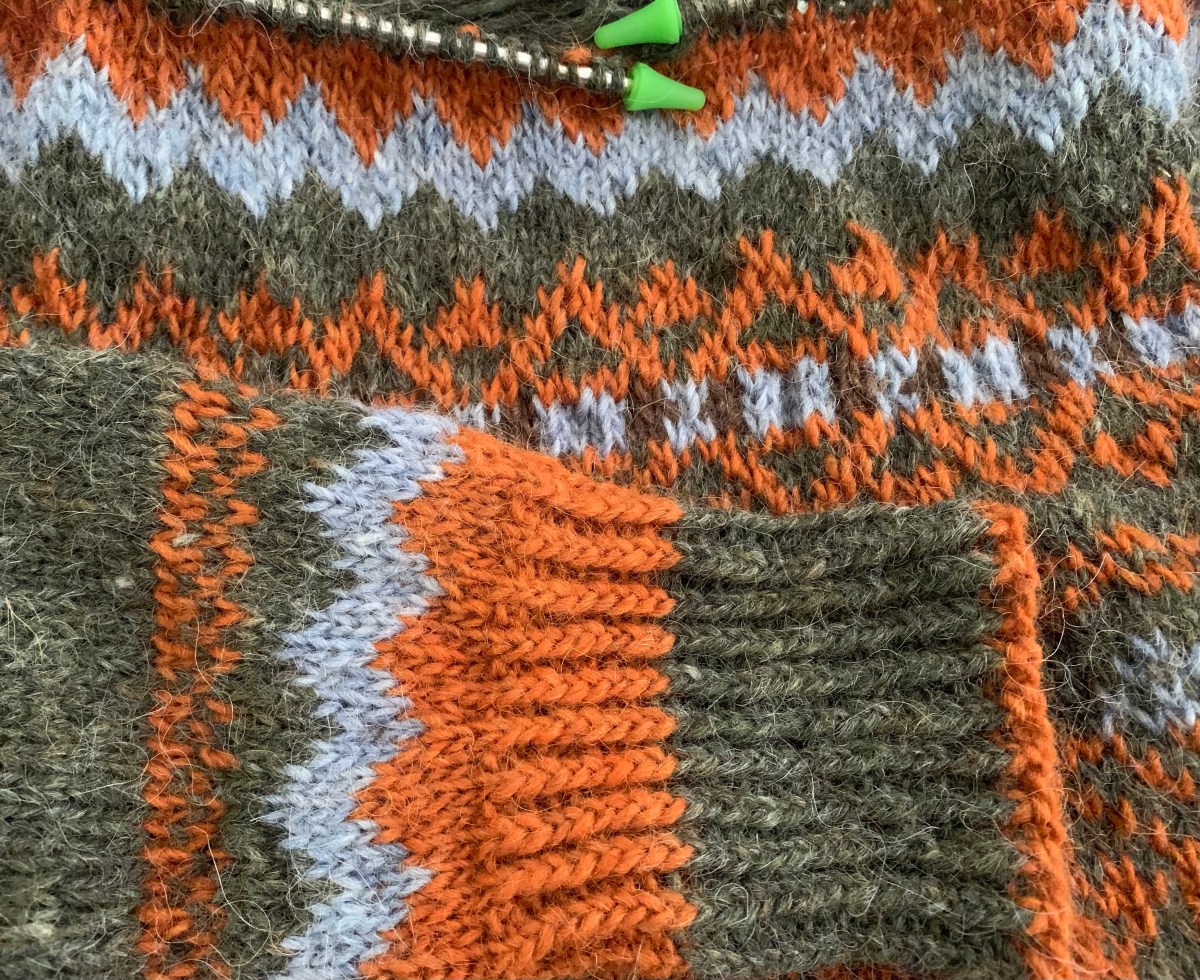
Because I have a lot of Plotulopi in “Frost Grass” green, that is my main color. The main contrast color is Apricot Lettlopi with a bit of Acorn brown and Air Blue Lettlopi in the center of the flower motif.

The “frost grass” color is really lovely, and I think a perfect name for this green yarn.

The Plotulopi is unspun and breaks easily. I must unwind it before pulling to knit. It does spit splice together well, which I’ve done when it unexpectedly breaks. I was worried about doing the colorwork and having to carry this yarn, but so far, it’s been okay. I am very careful not to tug on it.

The Lettlopi does not have this problem. I’m unsure how easy colorwork knitting would be with only Plotulopi yarn. Seems like it would be difficult. Unknitting, or tinking, can be tricky.
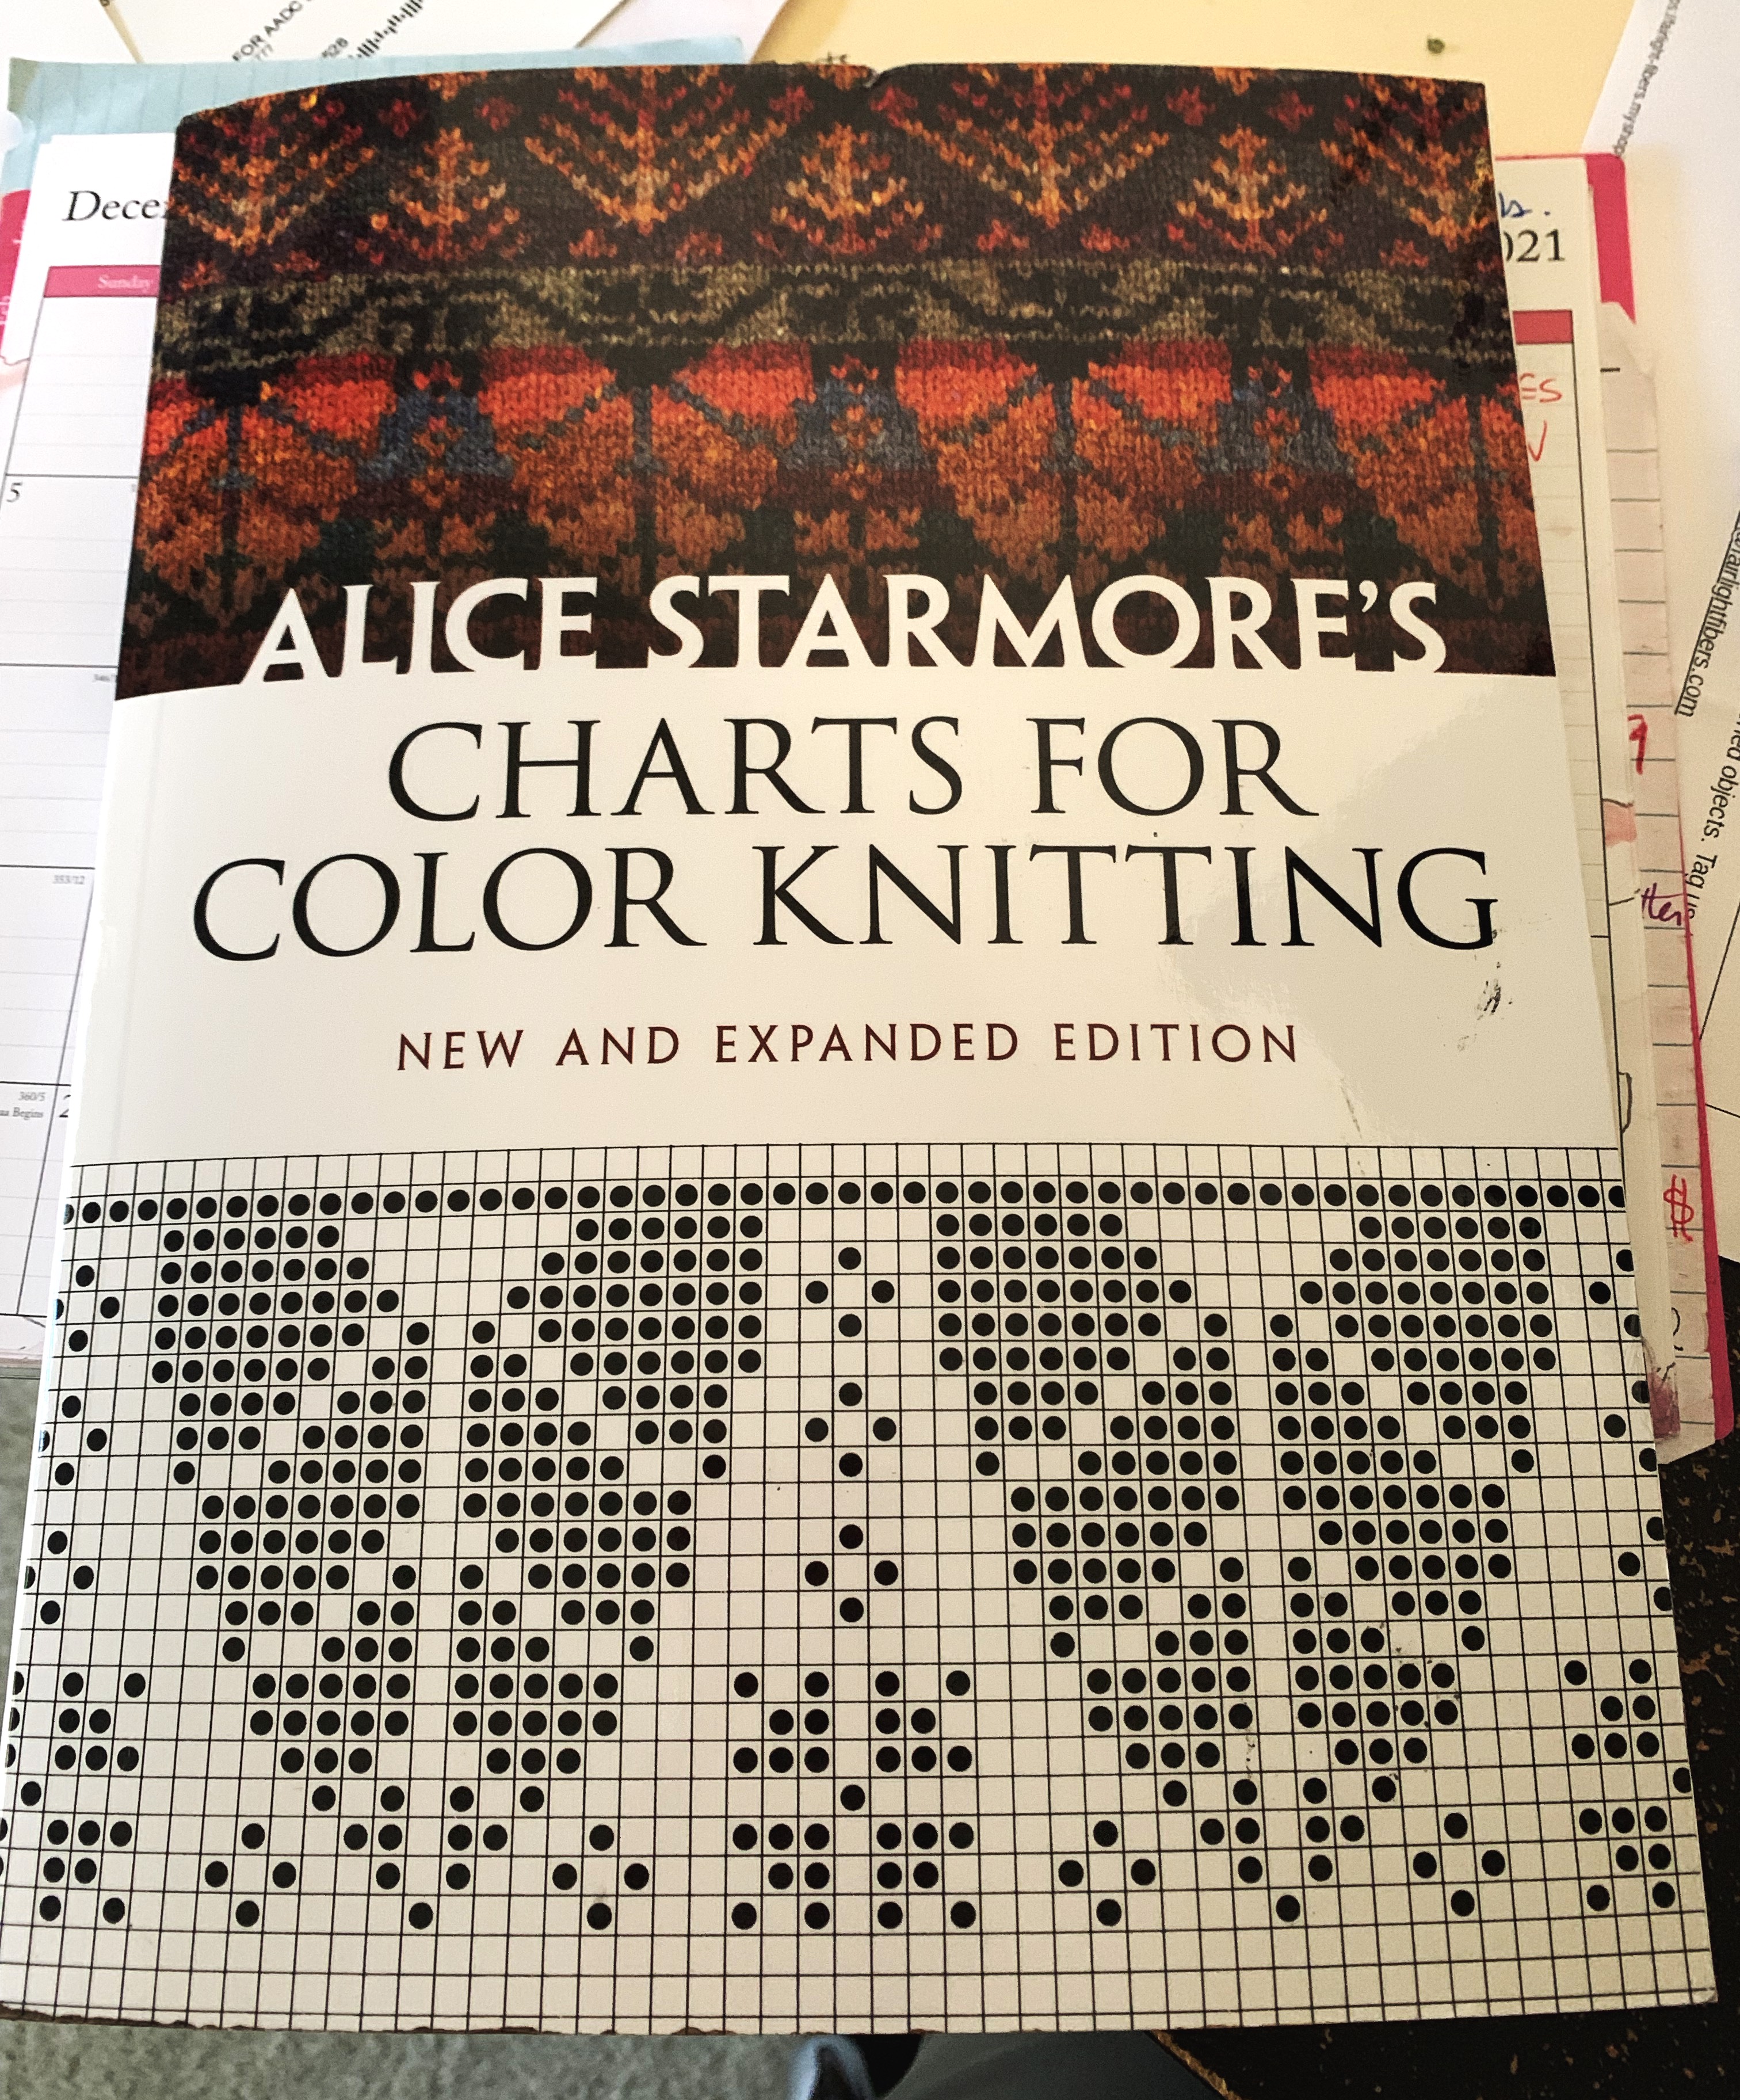
Alice Starmore’s charts for knitting book

Finally, I settled on a pattern, which was taken from Alice Starmore’s “Charts for Color Knitting” book (This is an affiliate link to Amazon). I will knit the floral pattern for the length of the body and the top will be solid green.

The Knitting

I cast on for the body ribbing (knitting bottom up) with green, using a size 4US needle – 195 stitches. My ribbing choice is not typical 2×2 and needed to be divisible by 5. The ribbing is from my Gansey knitting book and is more of a 2×3 rib. It goes like this:

Row 1: K2, *[P2,K3] repeat * until last 3 stitches, P2, K1

Row 2: P1, K1 *[P2, K1, P1, K1] repeat * to last 3, P2, K1

This wasn’t a good idea for this yarn. A normal 1×1 or 2×2 would have been fine.

Staka vest in Plotulopi

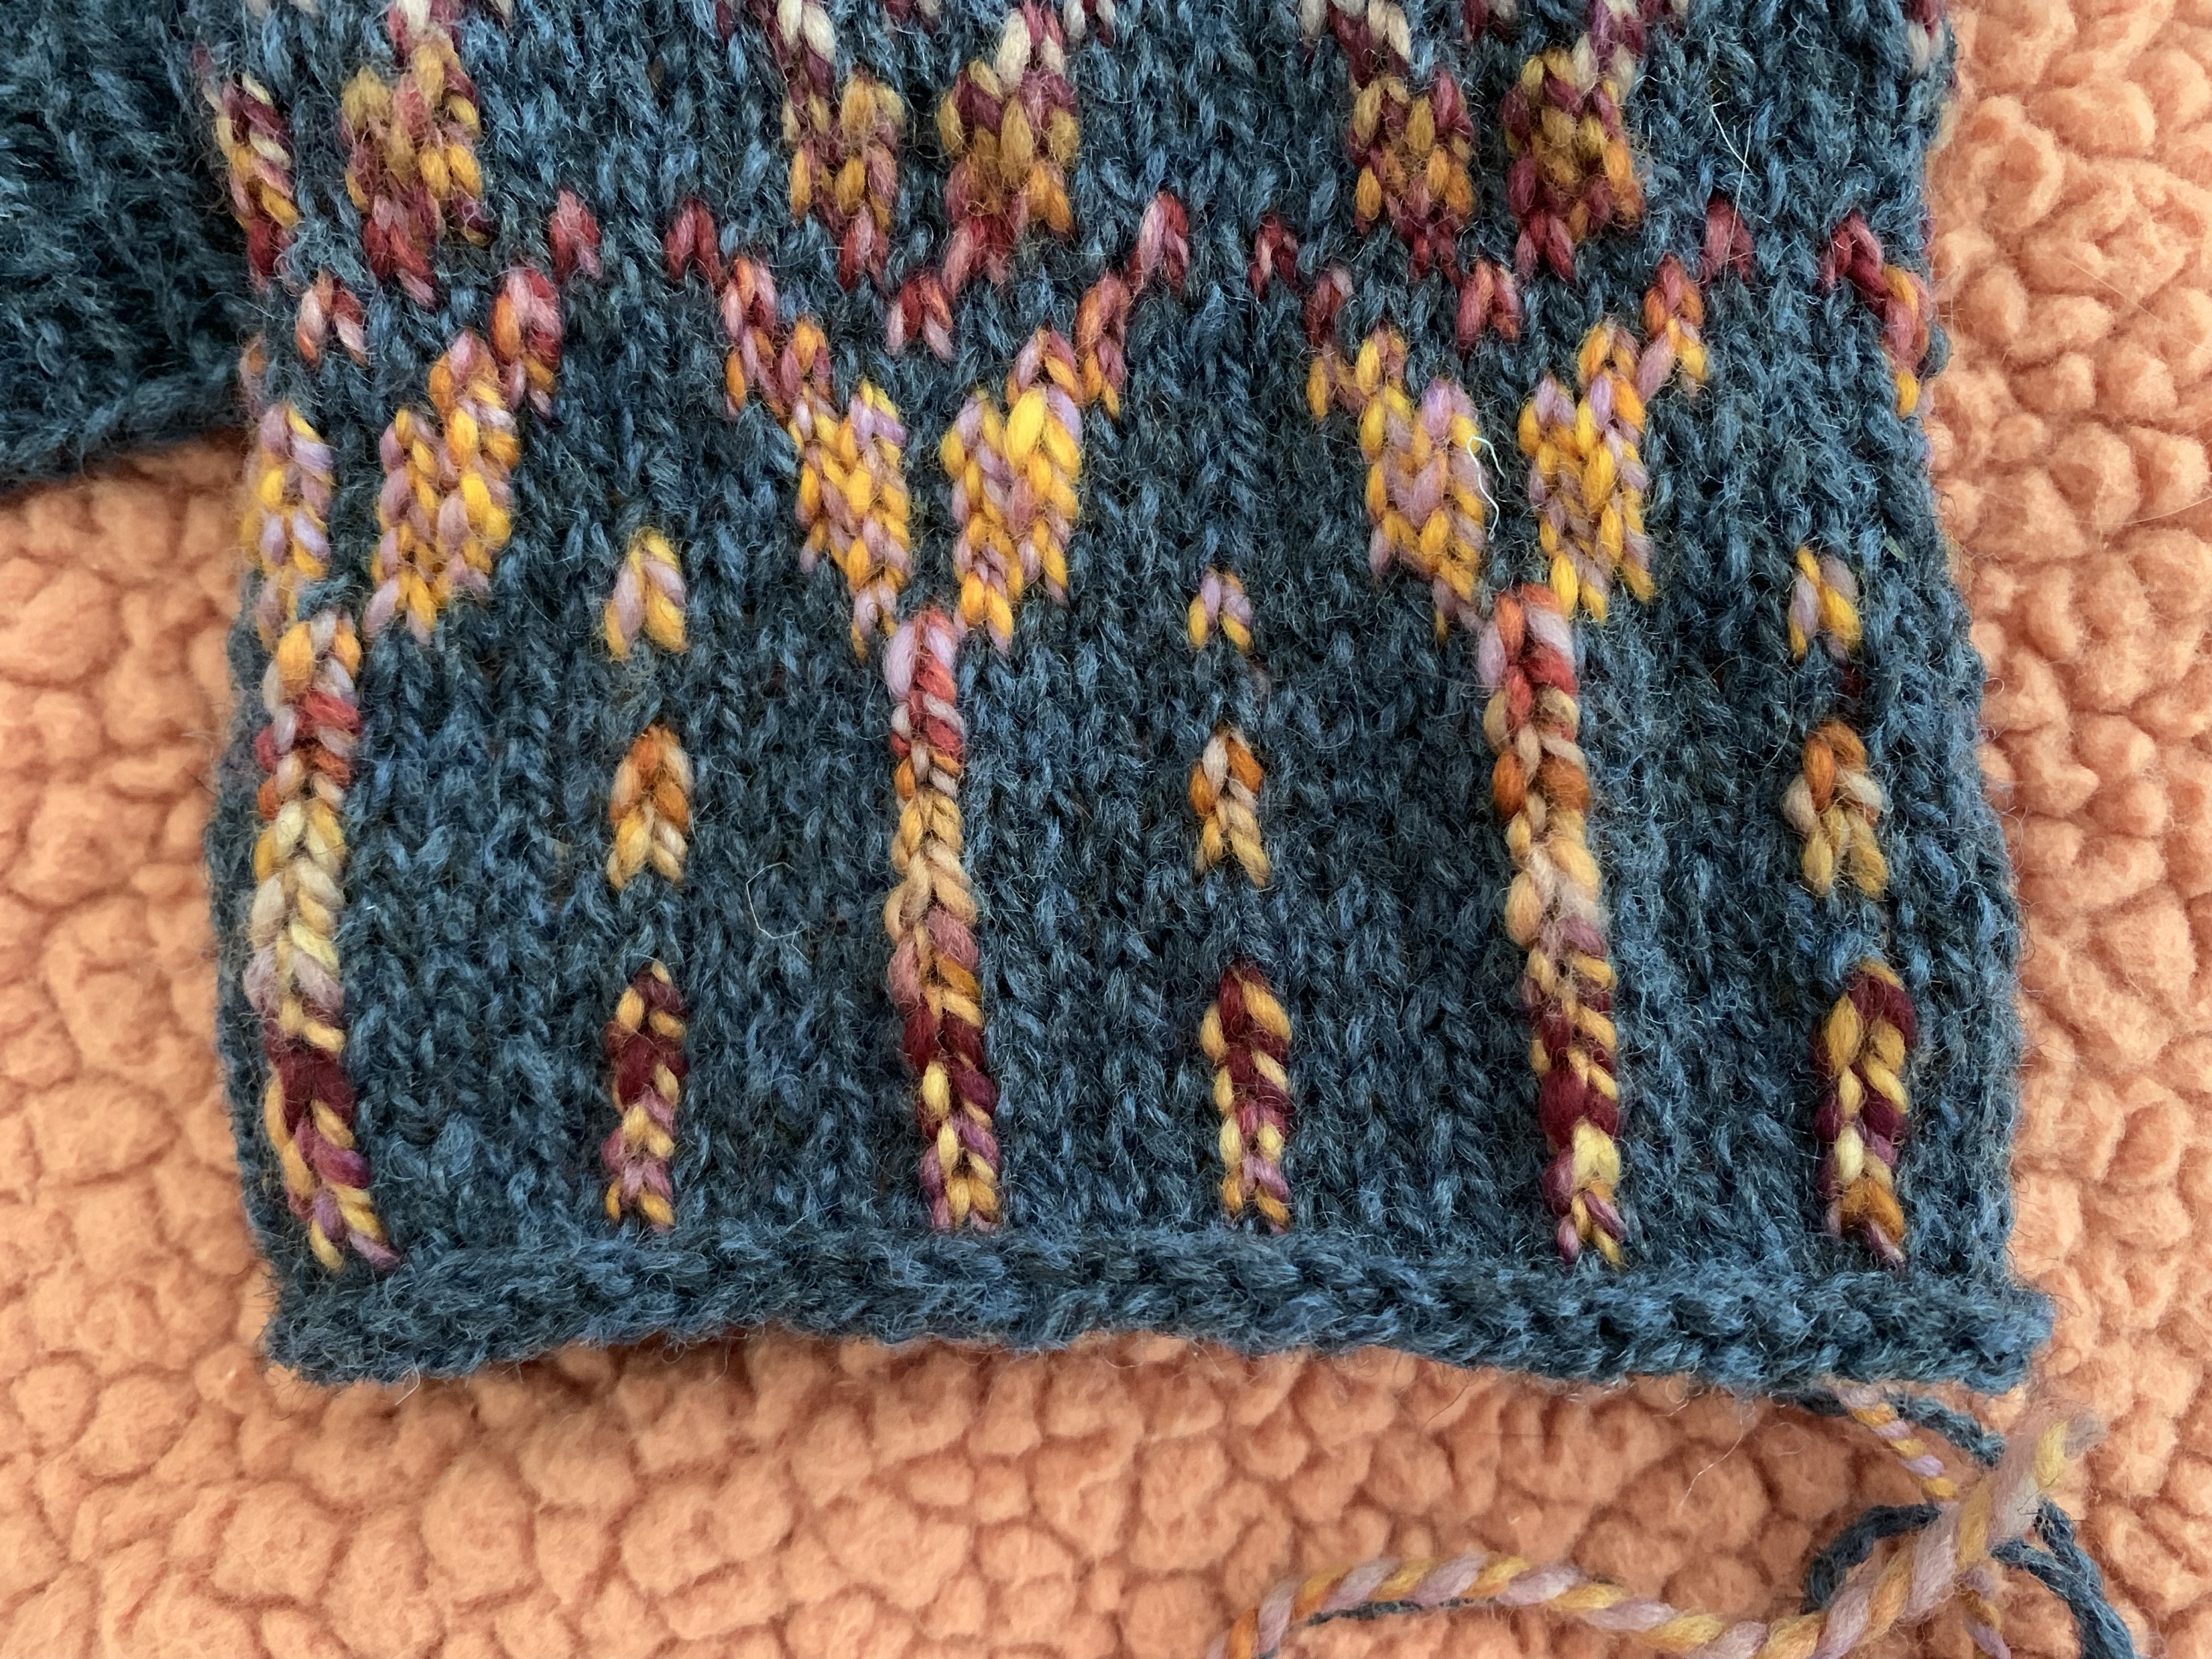
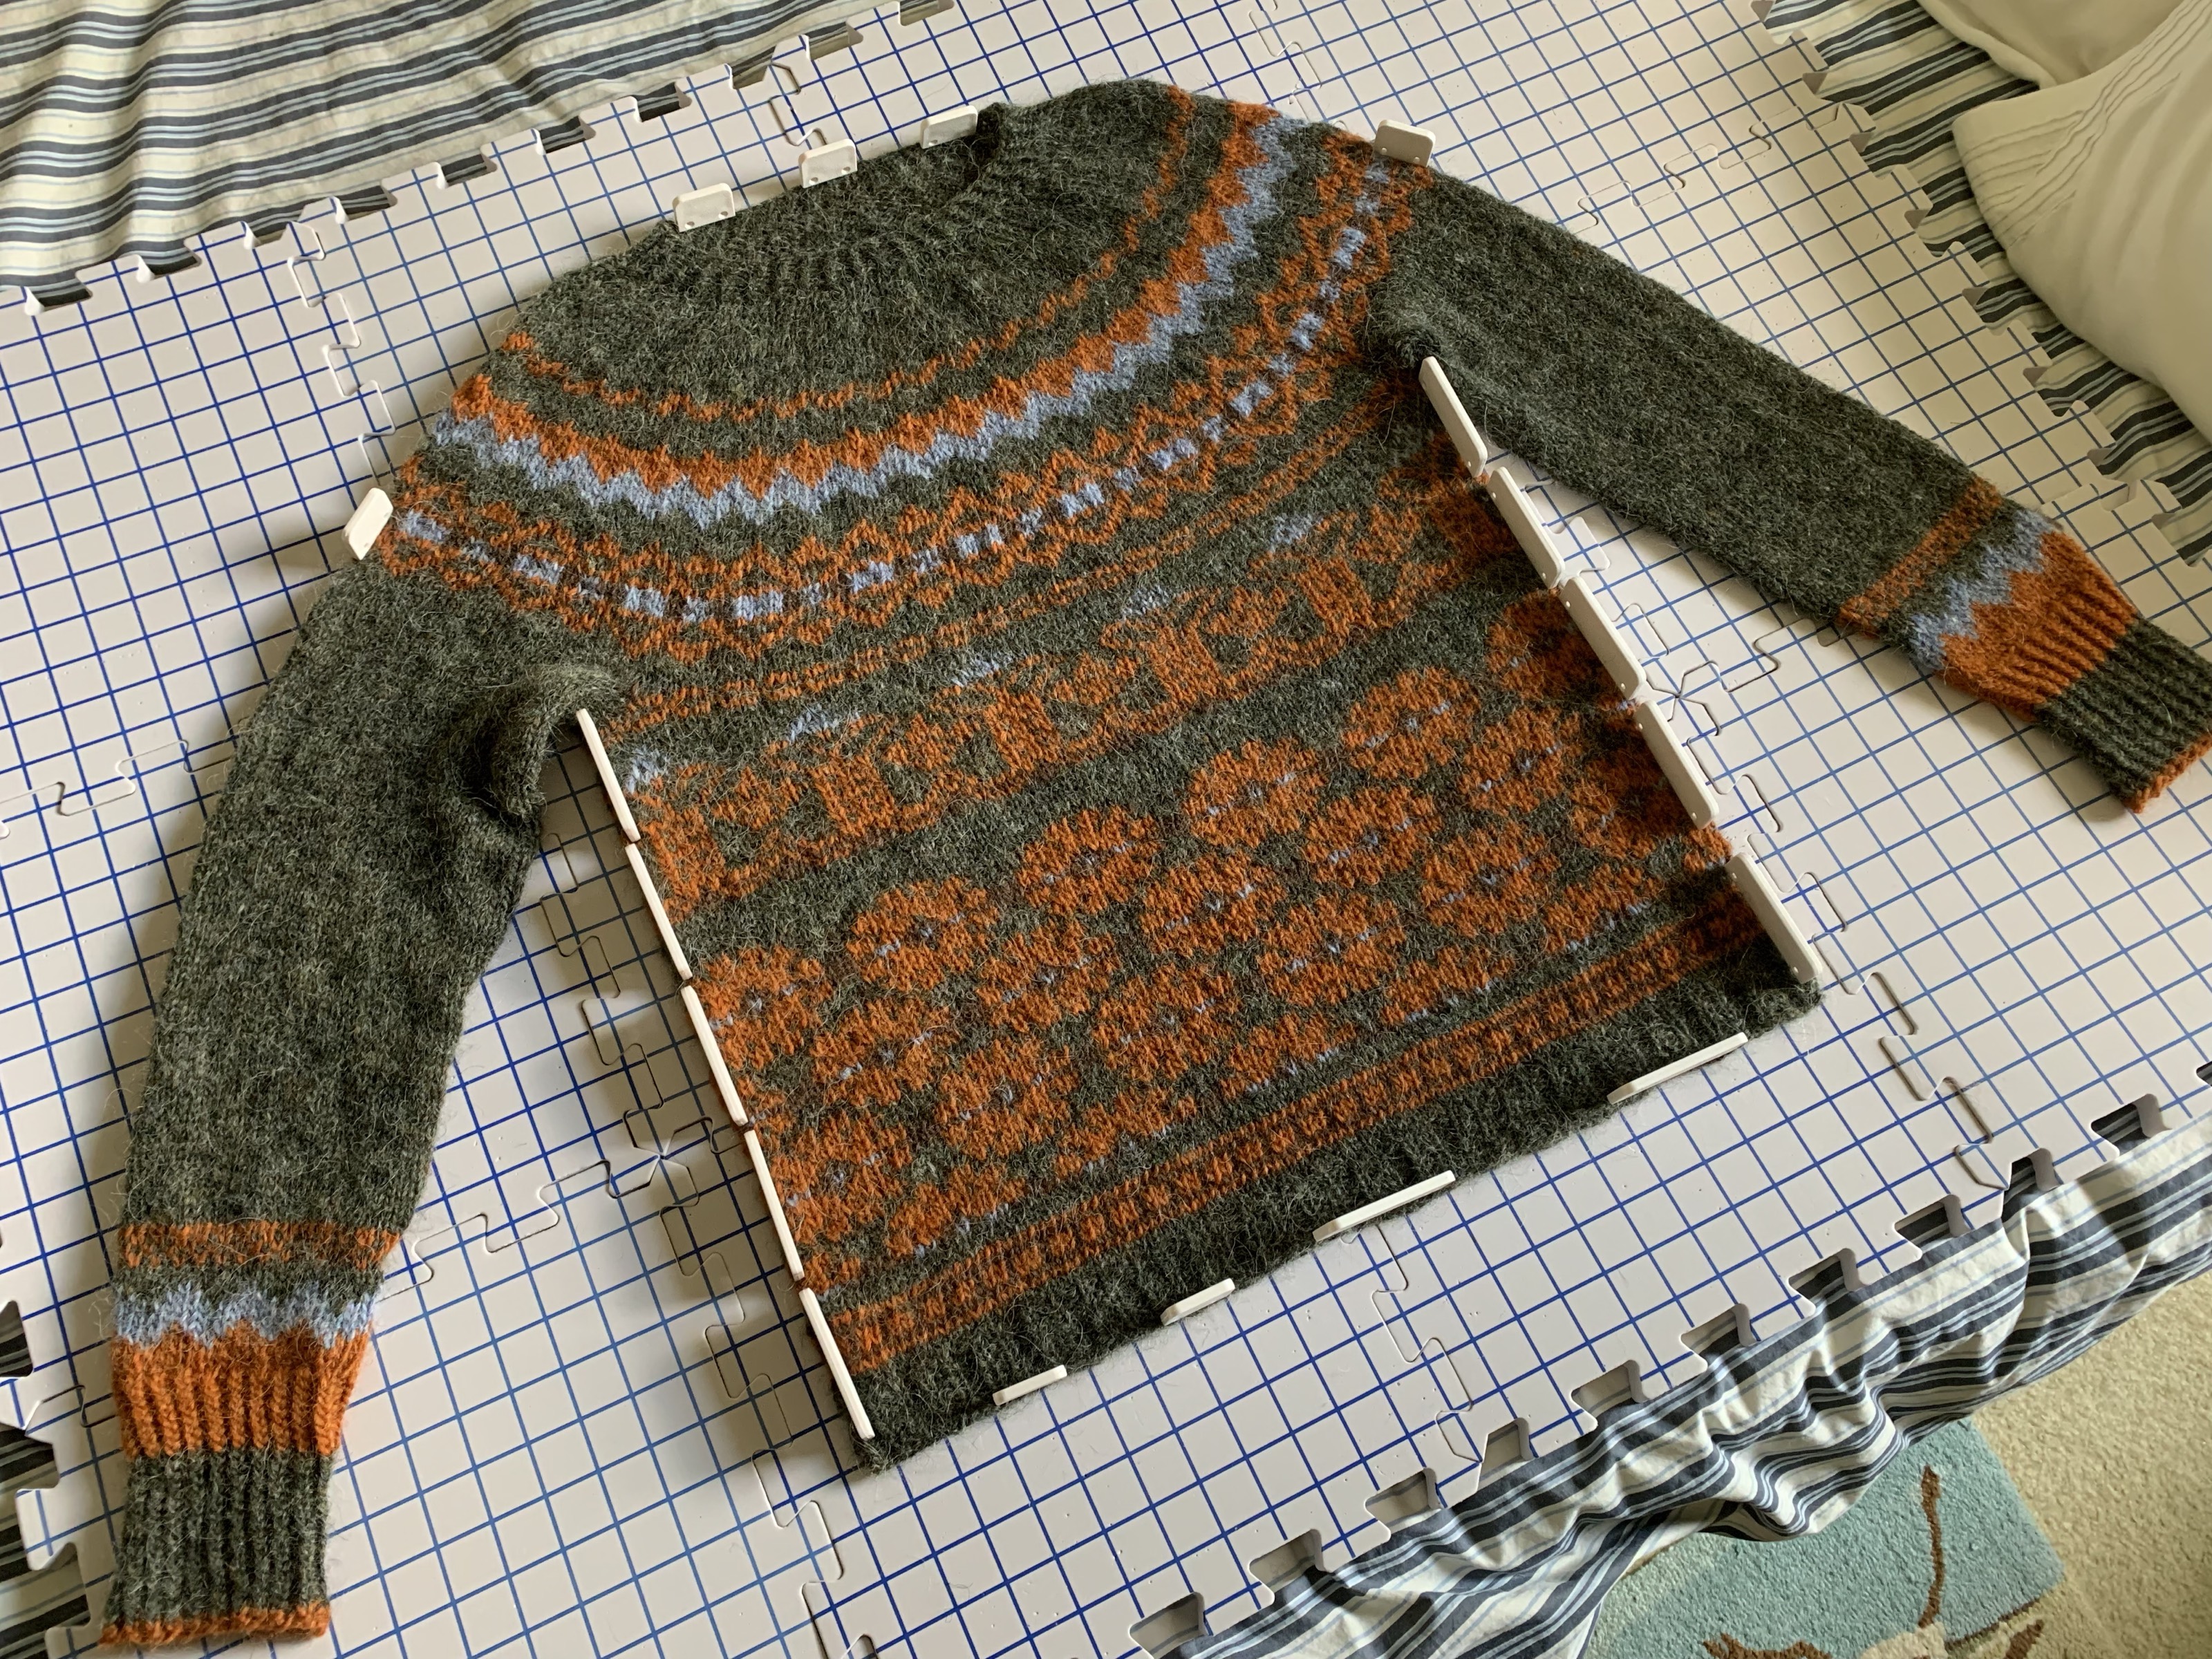
Then, after switching to the main needle size 7US, I reduced the stitches from 195 to 192 and began the divider row of little squares in orange (Apricot). The floral pattern is in 32 stitch repeats, which also fits into 192 stitches – I should have gone up a needle size here because this area of the sweater pulls in a bit.

The flower center three rows are brown with orange, brown with blue, and brown with orange. Then I go back to using green as the MC.
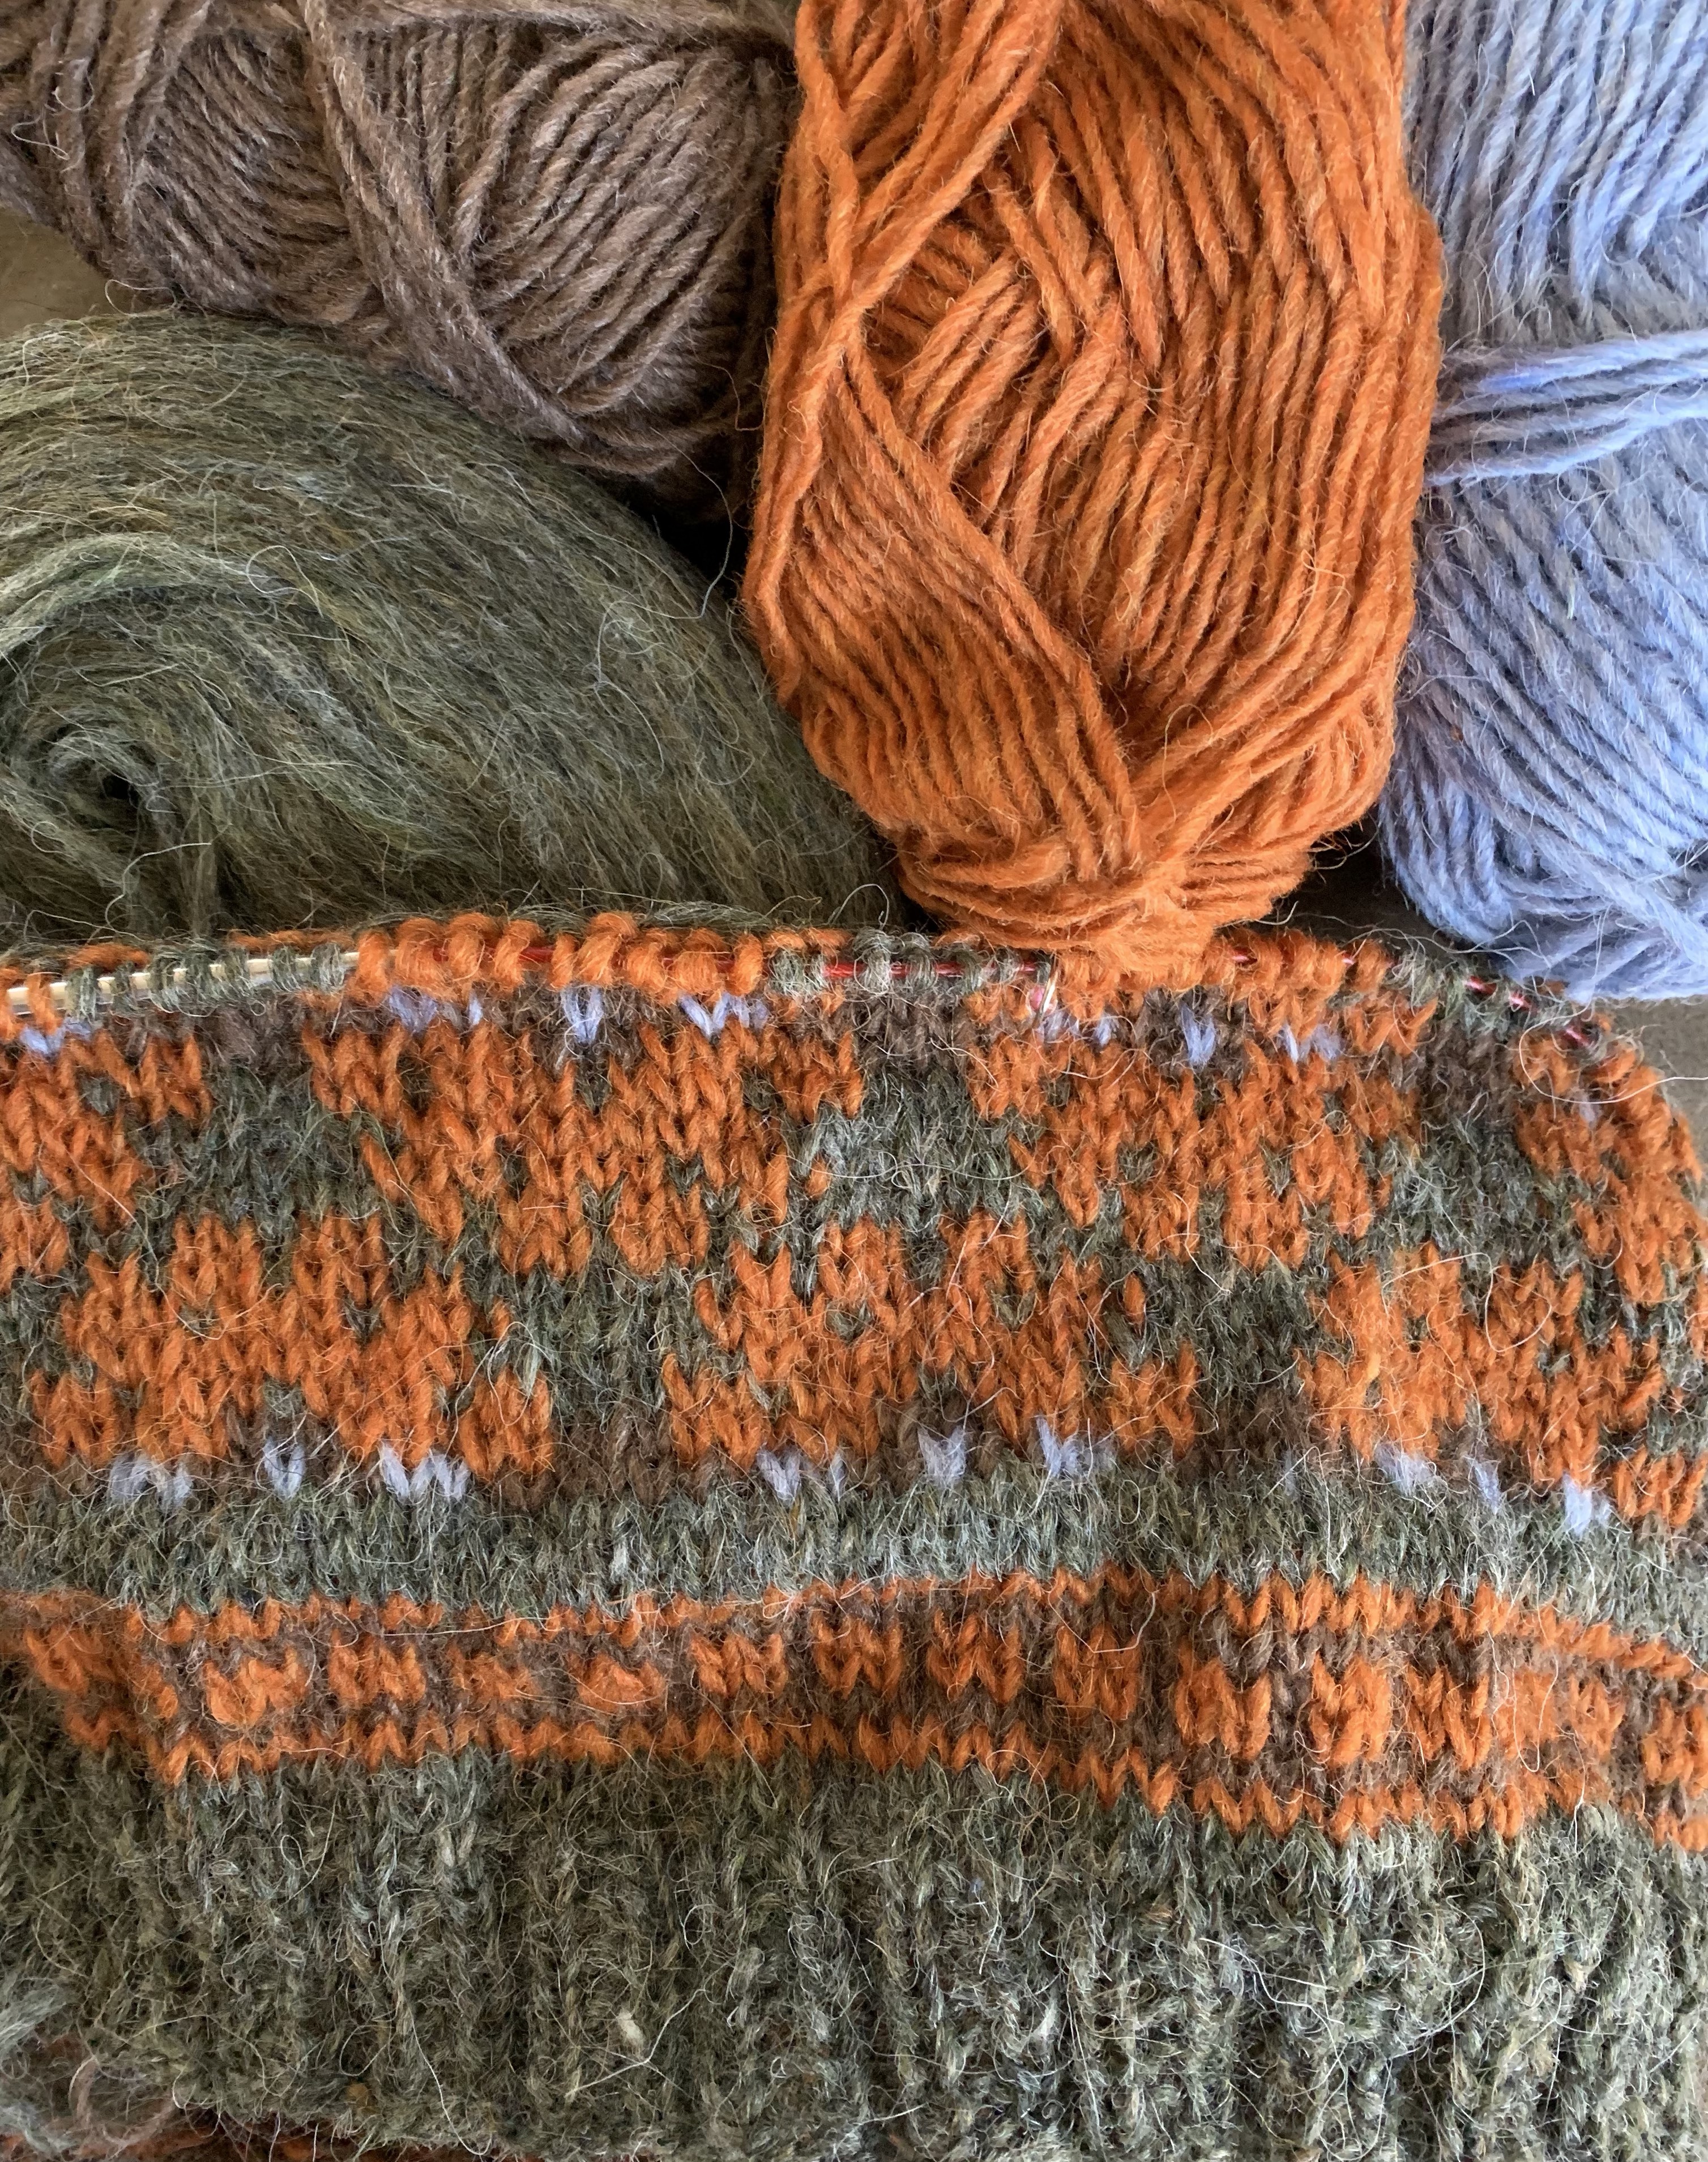
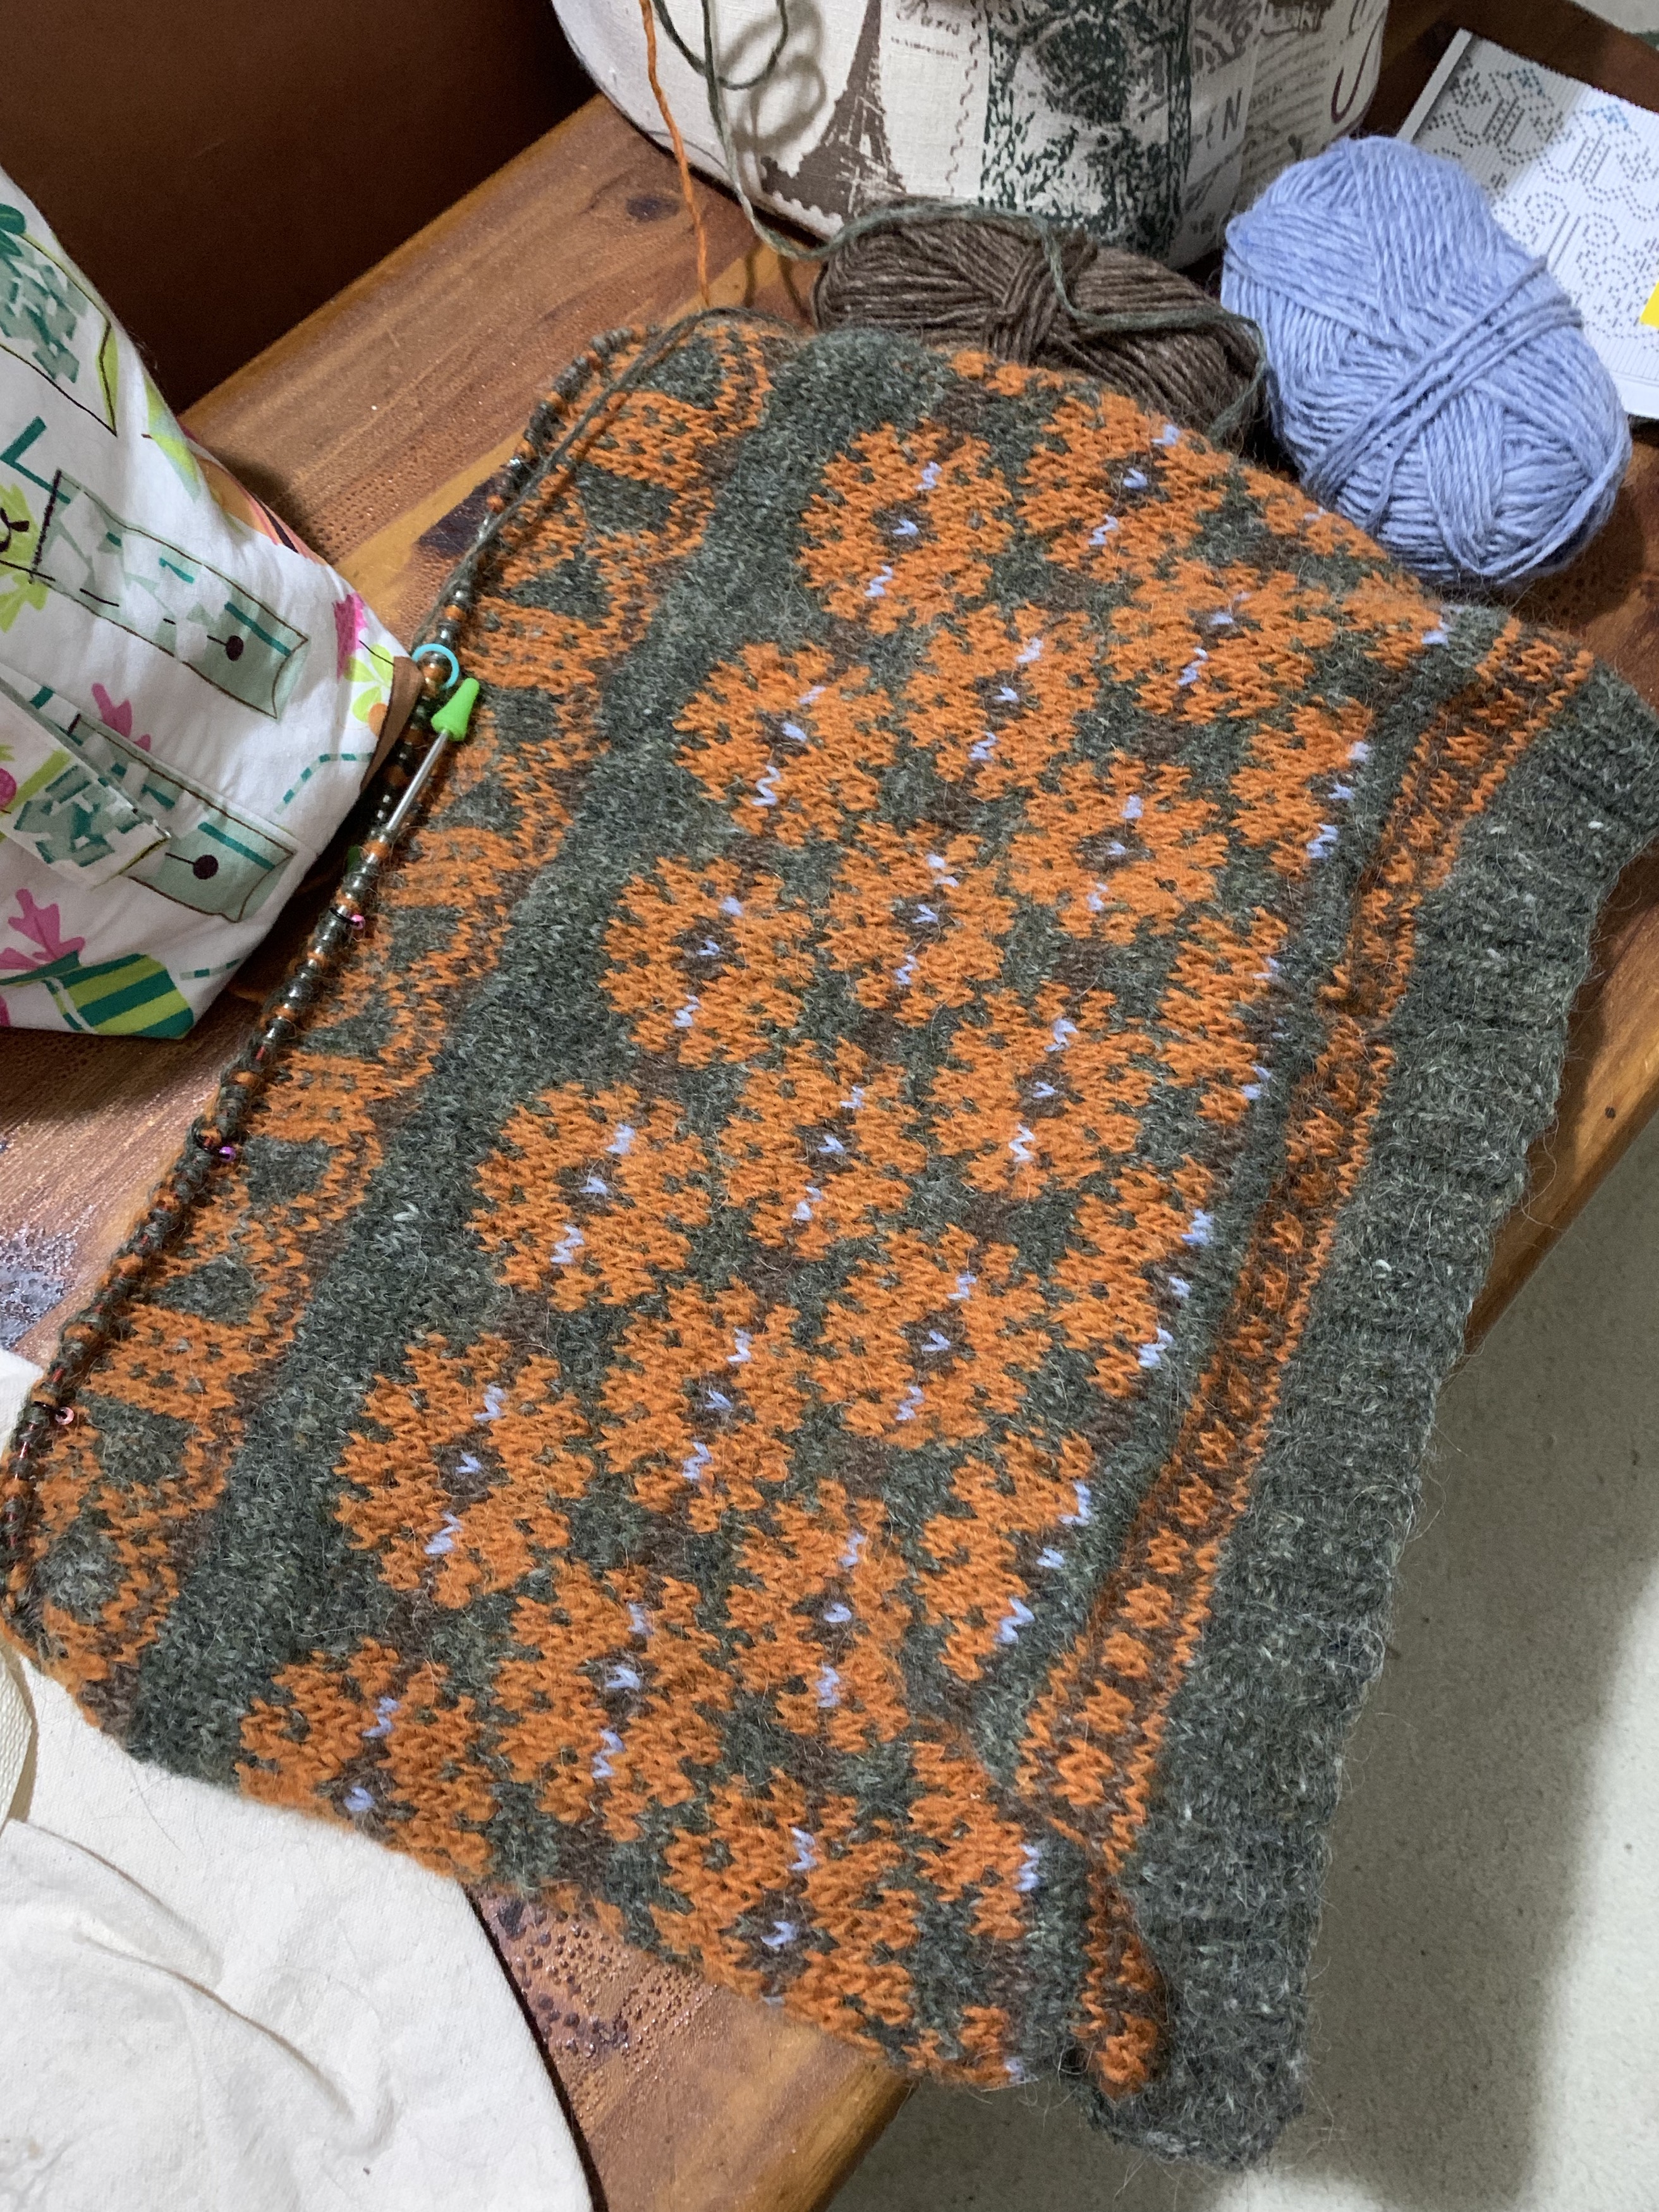
After finishing all the colorwork, I am still at 192 stitches, for size large, and will continue following the pattern from the book.

The Vest Becomes a Sweater

Unfortunately I have swapped out my vest for a bottom up sweater. I cannot understand the vest knitting directions. But I do know how to knit a bottom up sweater. Farfuglar was knit with similar yarn and in a similar size, so I intend to follow those directions and include some colorwork along the way. This sweater will end up being a total experiment! The Farfuglar sweater does not include short rows for the back, and I will definitely be including short rows.

I know that colorwork can make for a tighter fabric so I’ll have to be careful there. I really would have loved to have a vest, but I need a pattern with better directions for my first try.

Now I have continued on with a new chart motif to make the body longer.

Vest becoming a sweater

Attaching the Body and Sleeves

I wanted to use more orange, but was running out with only one skein left. The sleeves became solid green after the cuff area colorwork.

The neck is a simple k1tbl, p – around for about an inch. Then, I was finally able to try it on. The sweater is tight around the body due to all that colorwork. I have the underarm grafting to do and some ends to weave in. Once it’s washed and blocked, I will see how it fits.

Wearing the Sweater

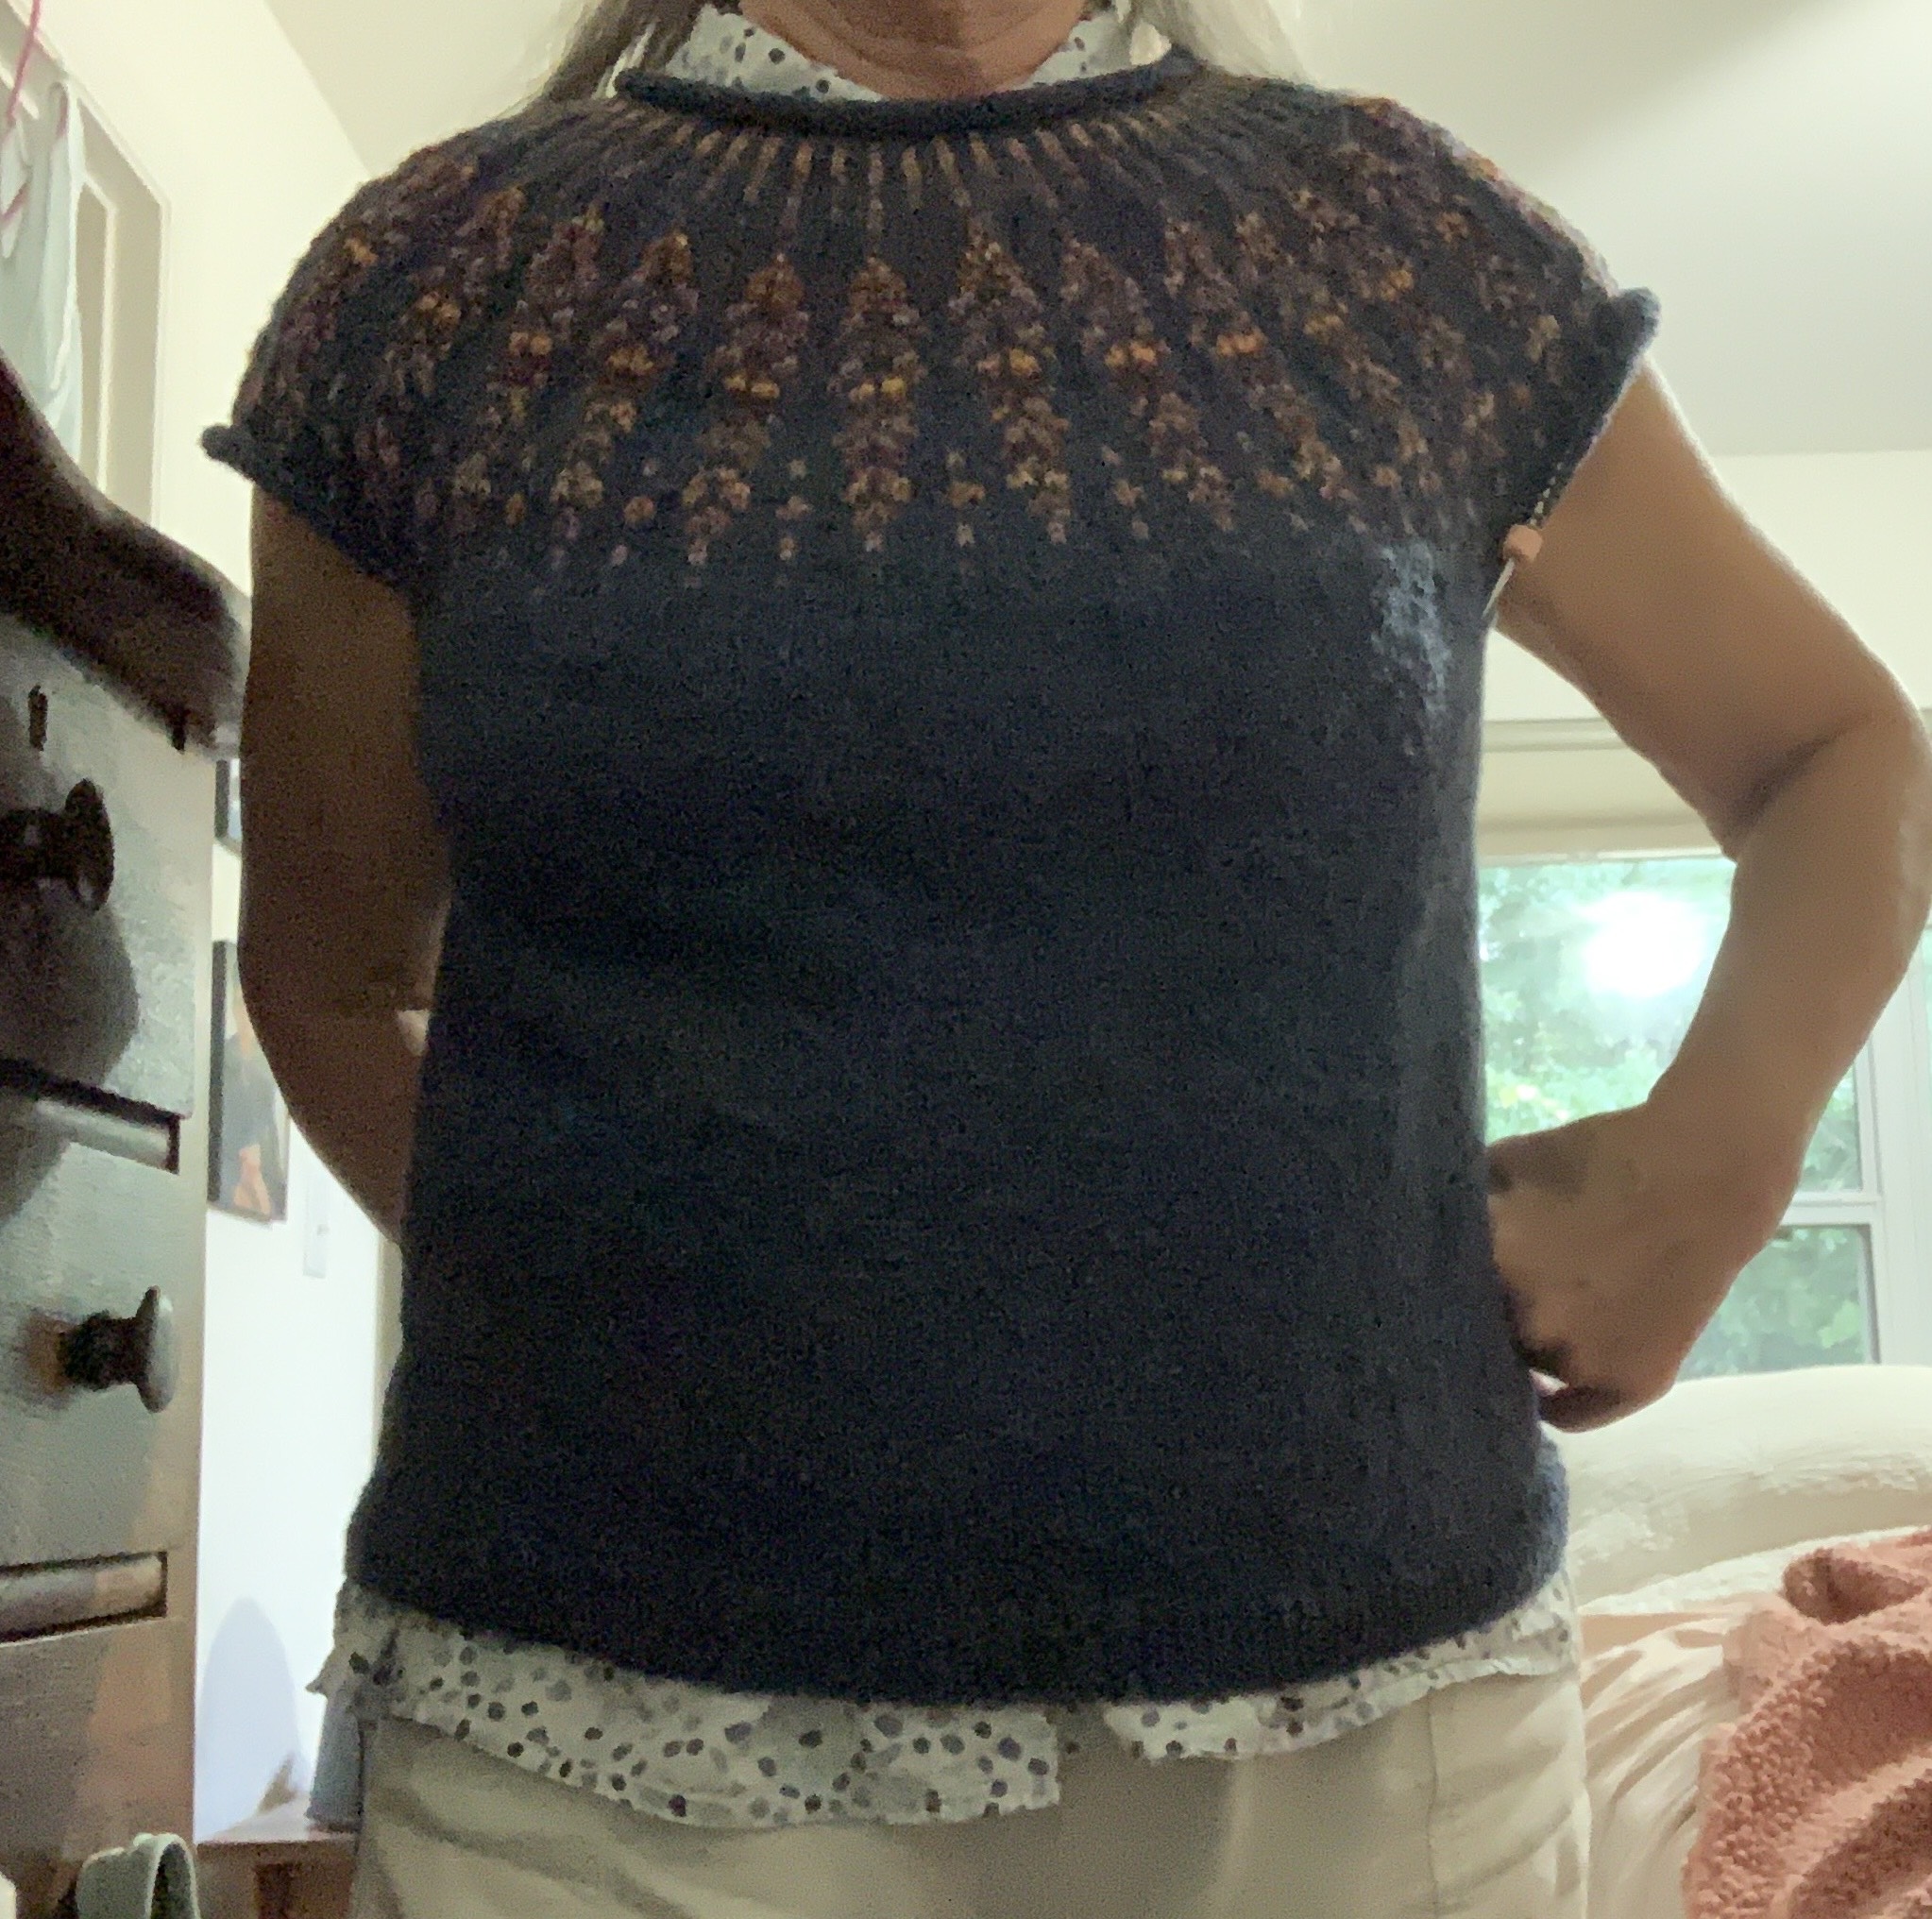
Finally in January 2023 I got some photos of myself wearing the Lopi Sweater. It is very comfortable. The flower colorwork area is a smidge tighter than I would like. If only my belly would shrink a little. Anyone else wish this?

If you are wondering about the comfort of this wool against the skin, I find it to be fine. Yes, I suppose it is a bit scratchy but I don’t mind it at all. Wool is a bit too hot – okay, a lot too hot – for Florida, but occasionally we have some cooler days.


Please keep reading the blog…
Something went wrong. Please refresh the page and/or try again.

Meadow Moon is My First Jennifer Steingass Pattern

A while ago I decided to make 2021 a year for knitting sweaters. Now we’ve entered 2022 and I am finishing up my projects on the needles.

I’ve seen the Jennifer Steingass patterns around and love many of them. Her Ravelry store is Knit.Love.Wool and her sweaters have colorwork yokes, cuffs, and bottom hems. Many of her designs look to be nature inspired with patterns that resemble leaves, stems, and feathers. The pattern I chose looks like stems of wheat coming down from the neckline.

Sweater Knitting is an Investment

Choosing to knit a sweater means an investment of money as well as time. The sweaters I have knit have generally required around 1200 yards of yarn. Depending on the type of yarn purchased, it can be over $100 in material. Choosing a good quality (non-superwash) yarn is worth it. Wool will hold it’s shape and the sweater won’t stretch like crazy when it’s washed.

I purchased seven skeins of Rauma Finull wool in blue and decided on a hand-spun skein I already had as my contrast color. I had no idea how this variegated yarn would look when combined with the dark blue. So far, I think it’s looking quite good. I did not want a completely opposite yarn color for the contrast. With this yarn I have no control over what colors are coming up on the skein. It’s fun to see the colors emerge.

The Meadow Moon pattern is well-written and very easy to follow. This is big. I’m also knitting another sweater and the directions are difficult. Some designers go the extra mile to help knitters and some don’t. I’m learning to avoid some popular designers who have made me unhappy by not going that extra mile.

After the Fun Colorwork…

The body is a slog… it has taken a while for me to complete. Finally I bound off the ribbing and tried it on. Fit seems perfect. On to knitting the sleeves. At least there will be colorwork at the ends.

Although round and round knitting can be tiresome, it is great for car trips, late night television knitting, and knitting outdoors and soaking up the sun. I like the fabric being created, and would probably knit more sweaters like this one.

Meadow moon sweater knit
Body is done!

The first sleeve is finished. The decreasing was easy and looks nice and I followed the directions for length, which seems to be perfect.

One thing I changed was the bind off. I found the i-cord bind off directions in the pattern to be difficult. I began with it, but it didn’t look good. Possibly, I was doing it wrong. So I did it my way.

My i-cord bind-off resembles the one Stephen West shows in his video here. Except, I only cast on 2 – to the left needle, not 3, which follows my sweater pattern more closely. Then, *knit one, k2tog tbl, slip both stitches back to the left needle. Repeat from the star.

This bind-off takes some time to do, but it does leave a nice rounded edge.

With one sleeve to go I can see the light at the end of the tunnel

Finishing Up My Sweater Knit

None of these photos are great, but here I am wearing the sweater BEFORE washing and blocking. The middle photo is AFTER the wash, and taken in the sun to show the colors of the contrast colorwork. All the bunching of the colorwork became flat once it was washed. Sleeve length is perfect for me.

The sweater is a perfect fit. I would do more short rows because I have a hard time figuring out which is the front / back!

The yarn has created a lovely, lightweight fabric. I think this is one of my favorite knits so far. *Also, it has become the most worn hand-knit sweater I’ve knit so far. It fits perfectly and is very light weight and comfy.


Read about what else I’ve been up to in my knitting world…

Fair Isle Wrist Warmer Knitting

Some knitter I was admiring mentioned that she liked to knit wrist warmers to match her sweaters. She used some of the leftover yarn so the warmers would match. I thought this was a wonderful idea! That is all it took for me to search for wrist warmer patterns.

The design is just a tube to fit the lower arm, so how difficult can it be? I wanted to knit colorwork, because I enjoy it. This type of accessory would be perfect for when I wear my Cobblestone cardigan. The sleeves are very wide which allows cool air to go right up my arm.

With quite a few projects unfinished at the present time, I really hate to begin something new, but Fair Isle pulls at me. There is great fun in combining colors and patterns to see how they turn out.

I began the wrist warmers by following a free pattern (Fair Isle Cuffs). It is written to knit flat (hmmmm?) but I wanted to knit around. My plan was to follow the designer’s chart to make things easy. Of course, things changed, as they usually do.

Yarn Colors Chosen

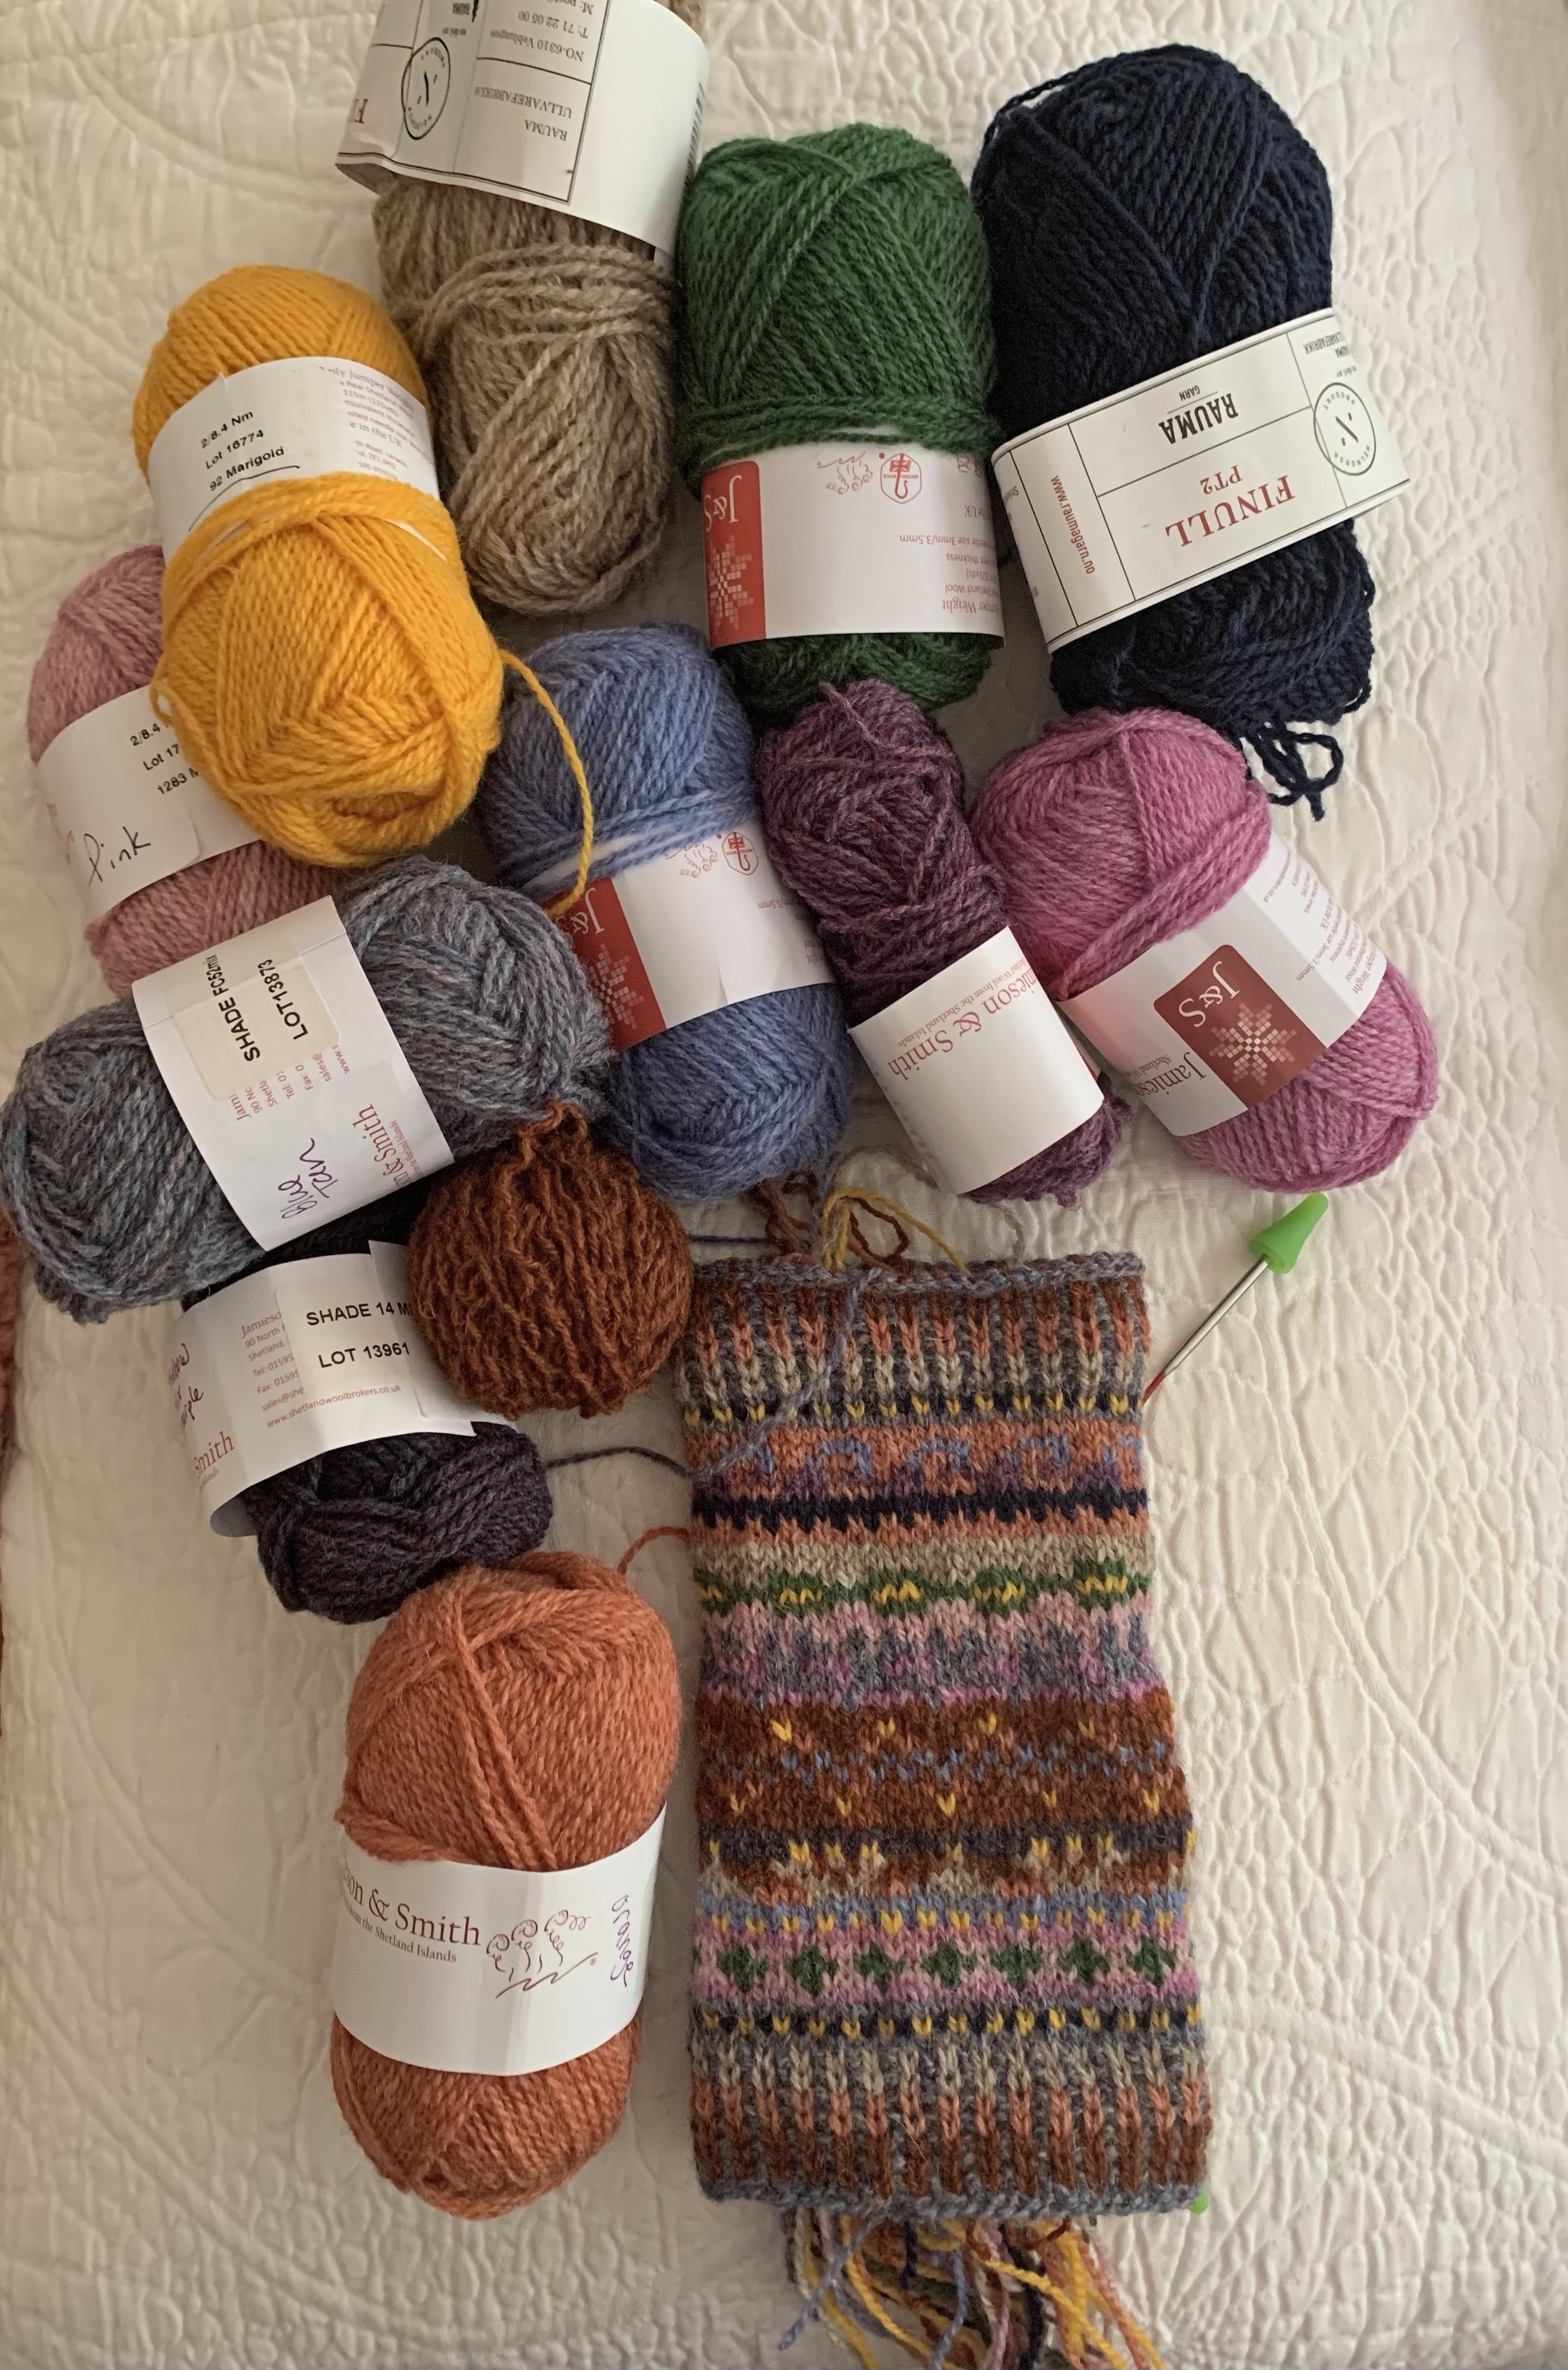
I decided to use many colors in this pattern – 12 to be exact! Most of the yarn is from Jamieson & Smith, but two skeins are Rauma wool and one is Tukuwool (the dark rust color). My only real plan was to mirror the colors on each end when knitting the corrugated rib.

Knitting Fair Isle wrist warmers

I began with a cast on of 64 and used a size 2 US needle. I love my 9-inch circular needles and use them as often as I can. No DPNs are needed! Yay…! About halfway in, I reduced the stitches to 60 by doing a couple of k2tog’s on two rows. I wanted a 60 count because it is divisible by many numbers.

The pattern says to discount the first and last stitch if knitting in the round. For some reason pattern chart ended up not matching evenly for me, so I gave up following the chart provided and went rogue…! I have a lot of good books that contain charts and began using those.

With a final count of 60 stitches, I could knit any chart that contains a repeat number that divides evenly into 60, and there are a lot of them.

BOR and All Those Ends

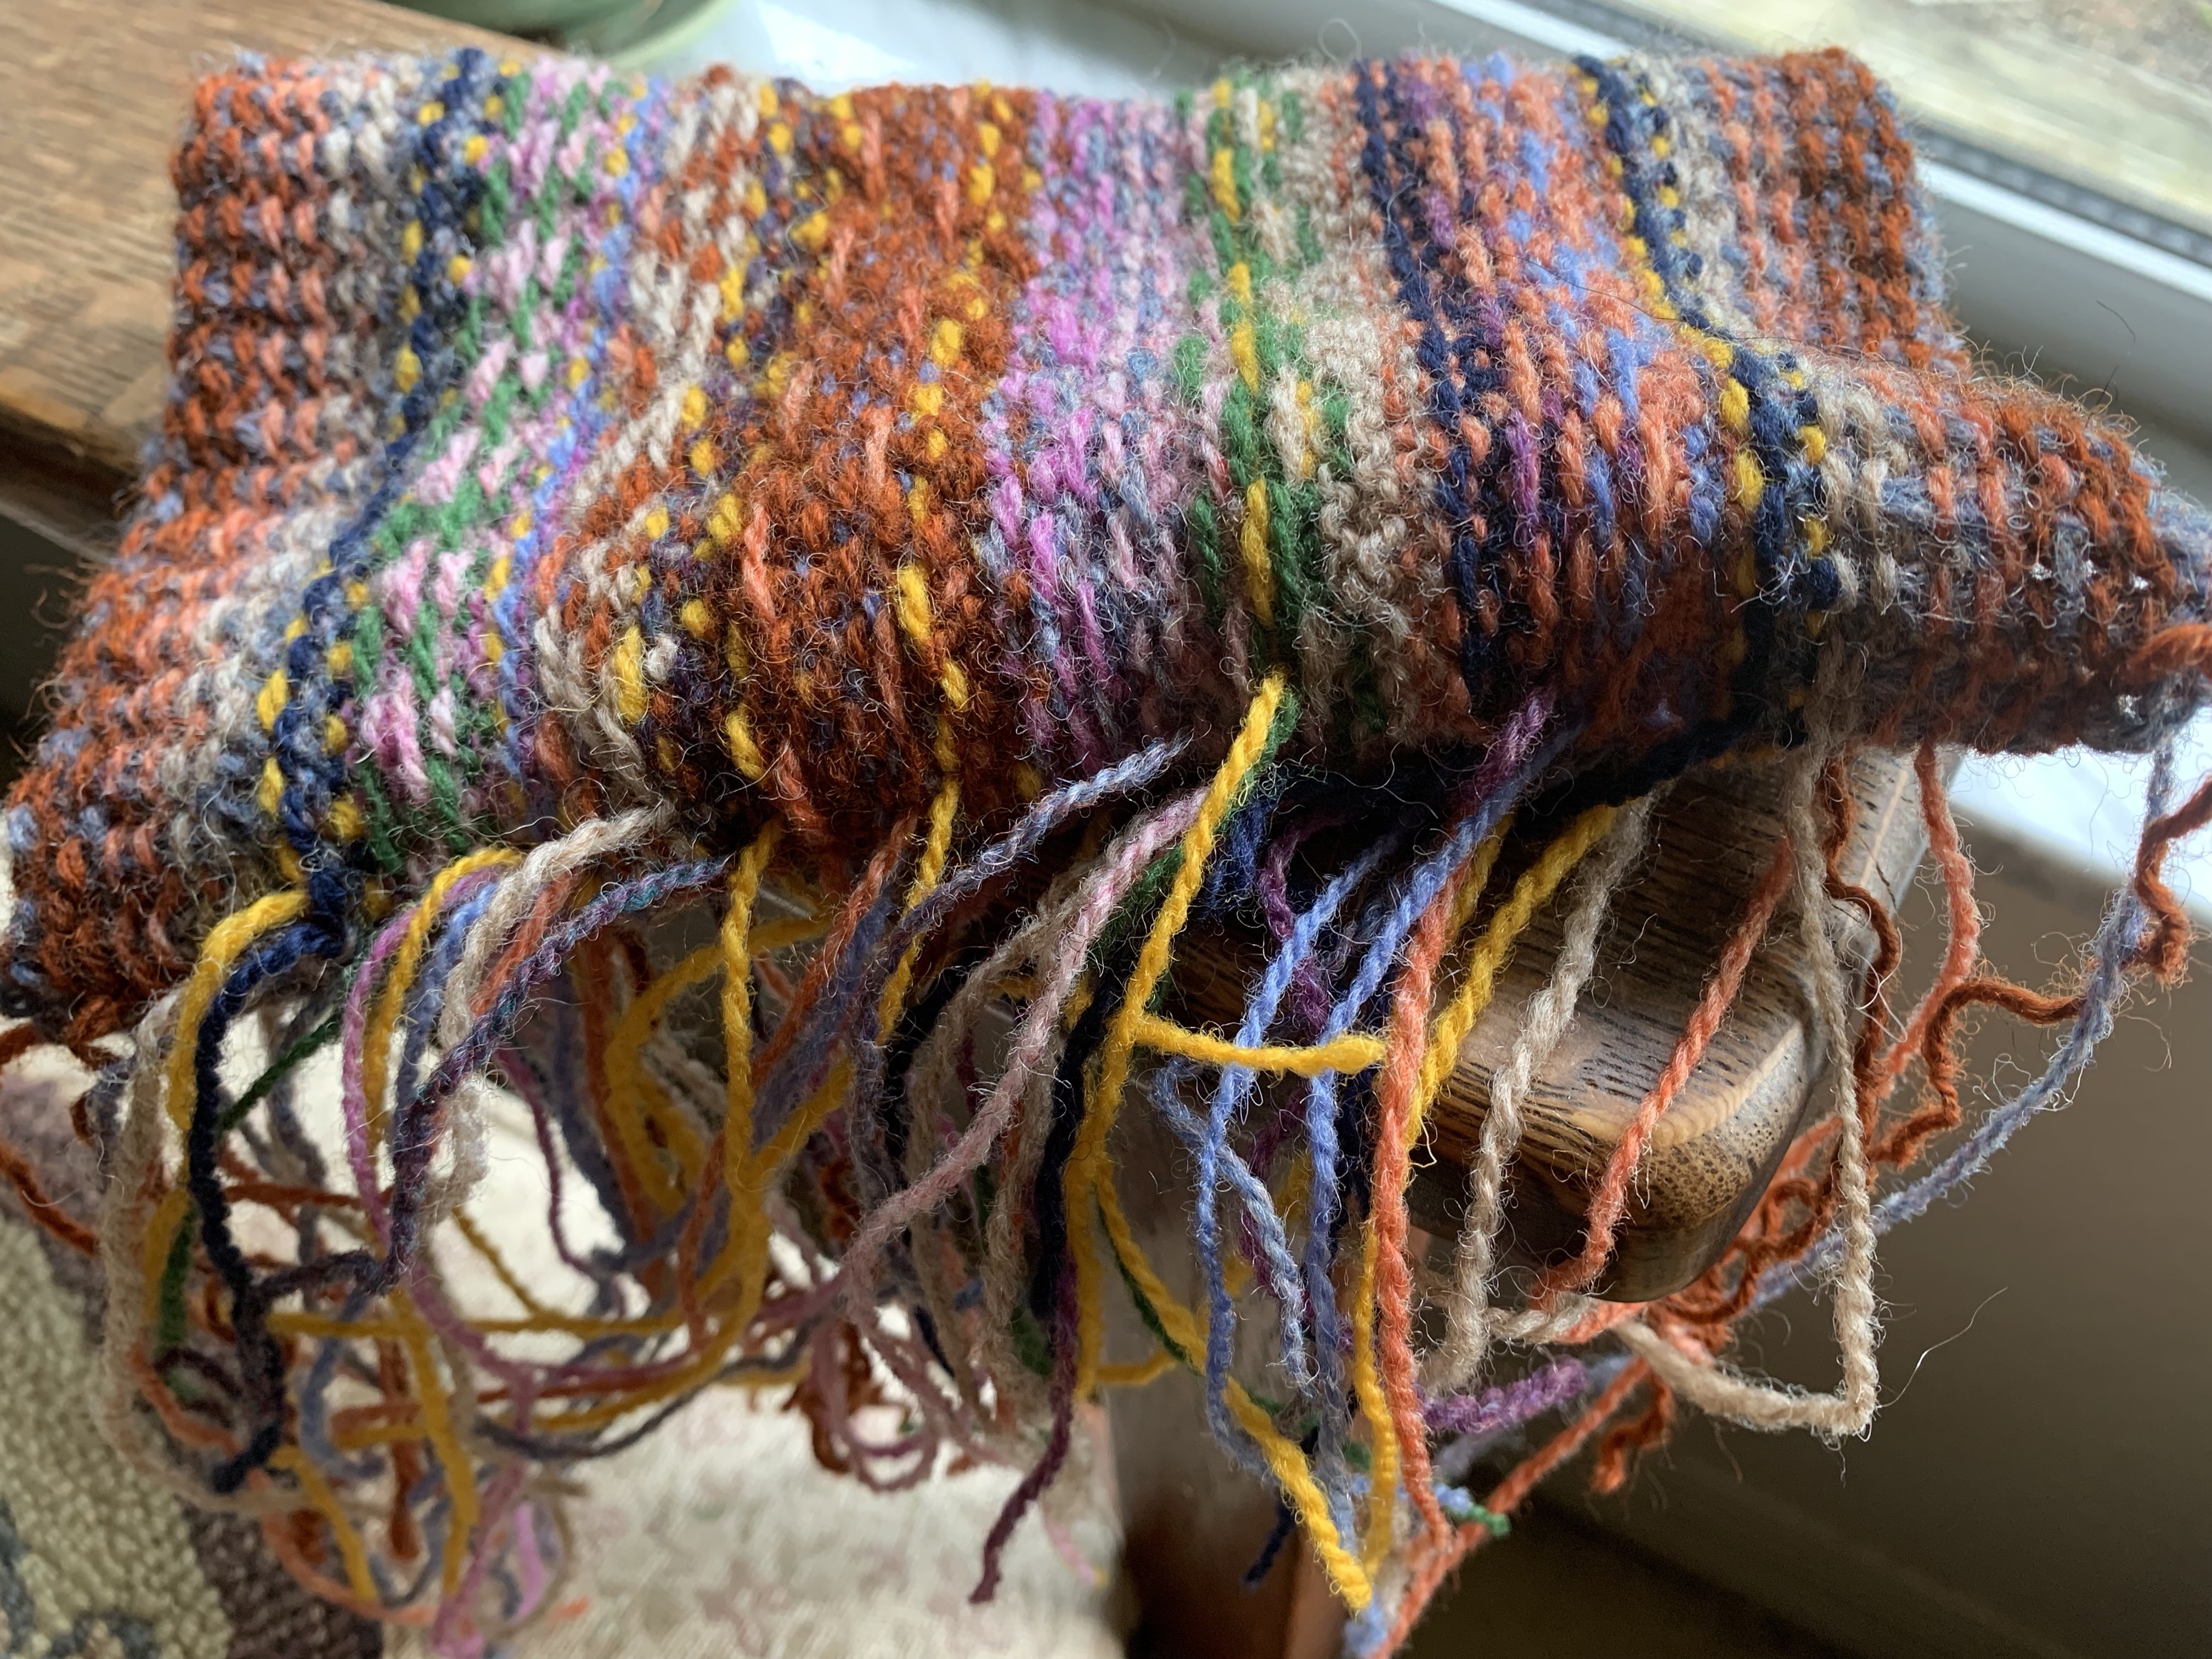
Here is a look at the join, or beginning of round stitches. Once the massive amount of ends are woven in, this will look better. I’ll close any gaps. Washing and blocking will even it all out better too.

Anyone who does a lot of colorwork knitting must learn to love (or at least like) weaving in ends.

  • Knitting Fair Isle wrist warmers
  • Knitting Fair Isle wrist warmers
  • Weaving in ends on Fair Isle wrist warmers

Making Wrist Warmer Number Two

My plans for knitting the second wrist warmer include using the same twelve yarn colors and matching the ribbing. Other than that, all I can say for sure is that the patterning will be different – at least in places.

Wrist-warmers are now done and washed. The pattern at the wider end (arm end) begins the same but then takes it’s own course. I enjoyed trying out different color combos and love that no DPNs are required.

Please Read On

I have a lot more to say about my knitting, so please keep reading!

Something went wrong. Please refresh the page and/or try again.
A Hat Pattern For Those Who Raise Backyard Chickens

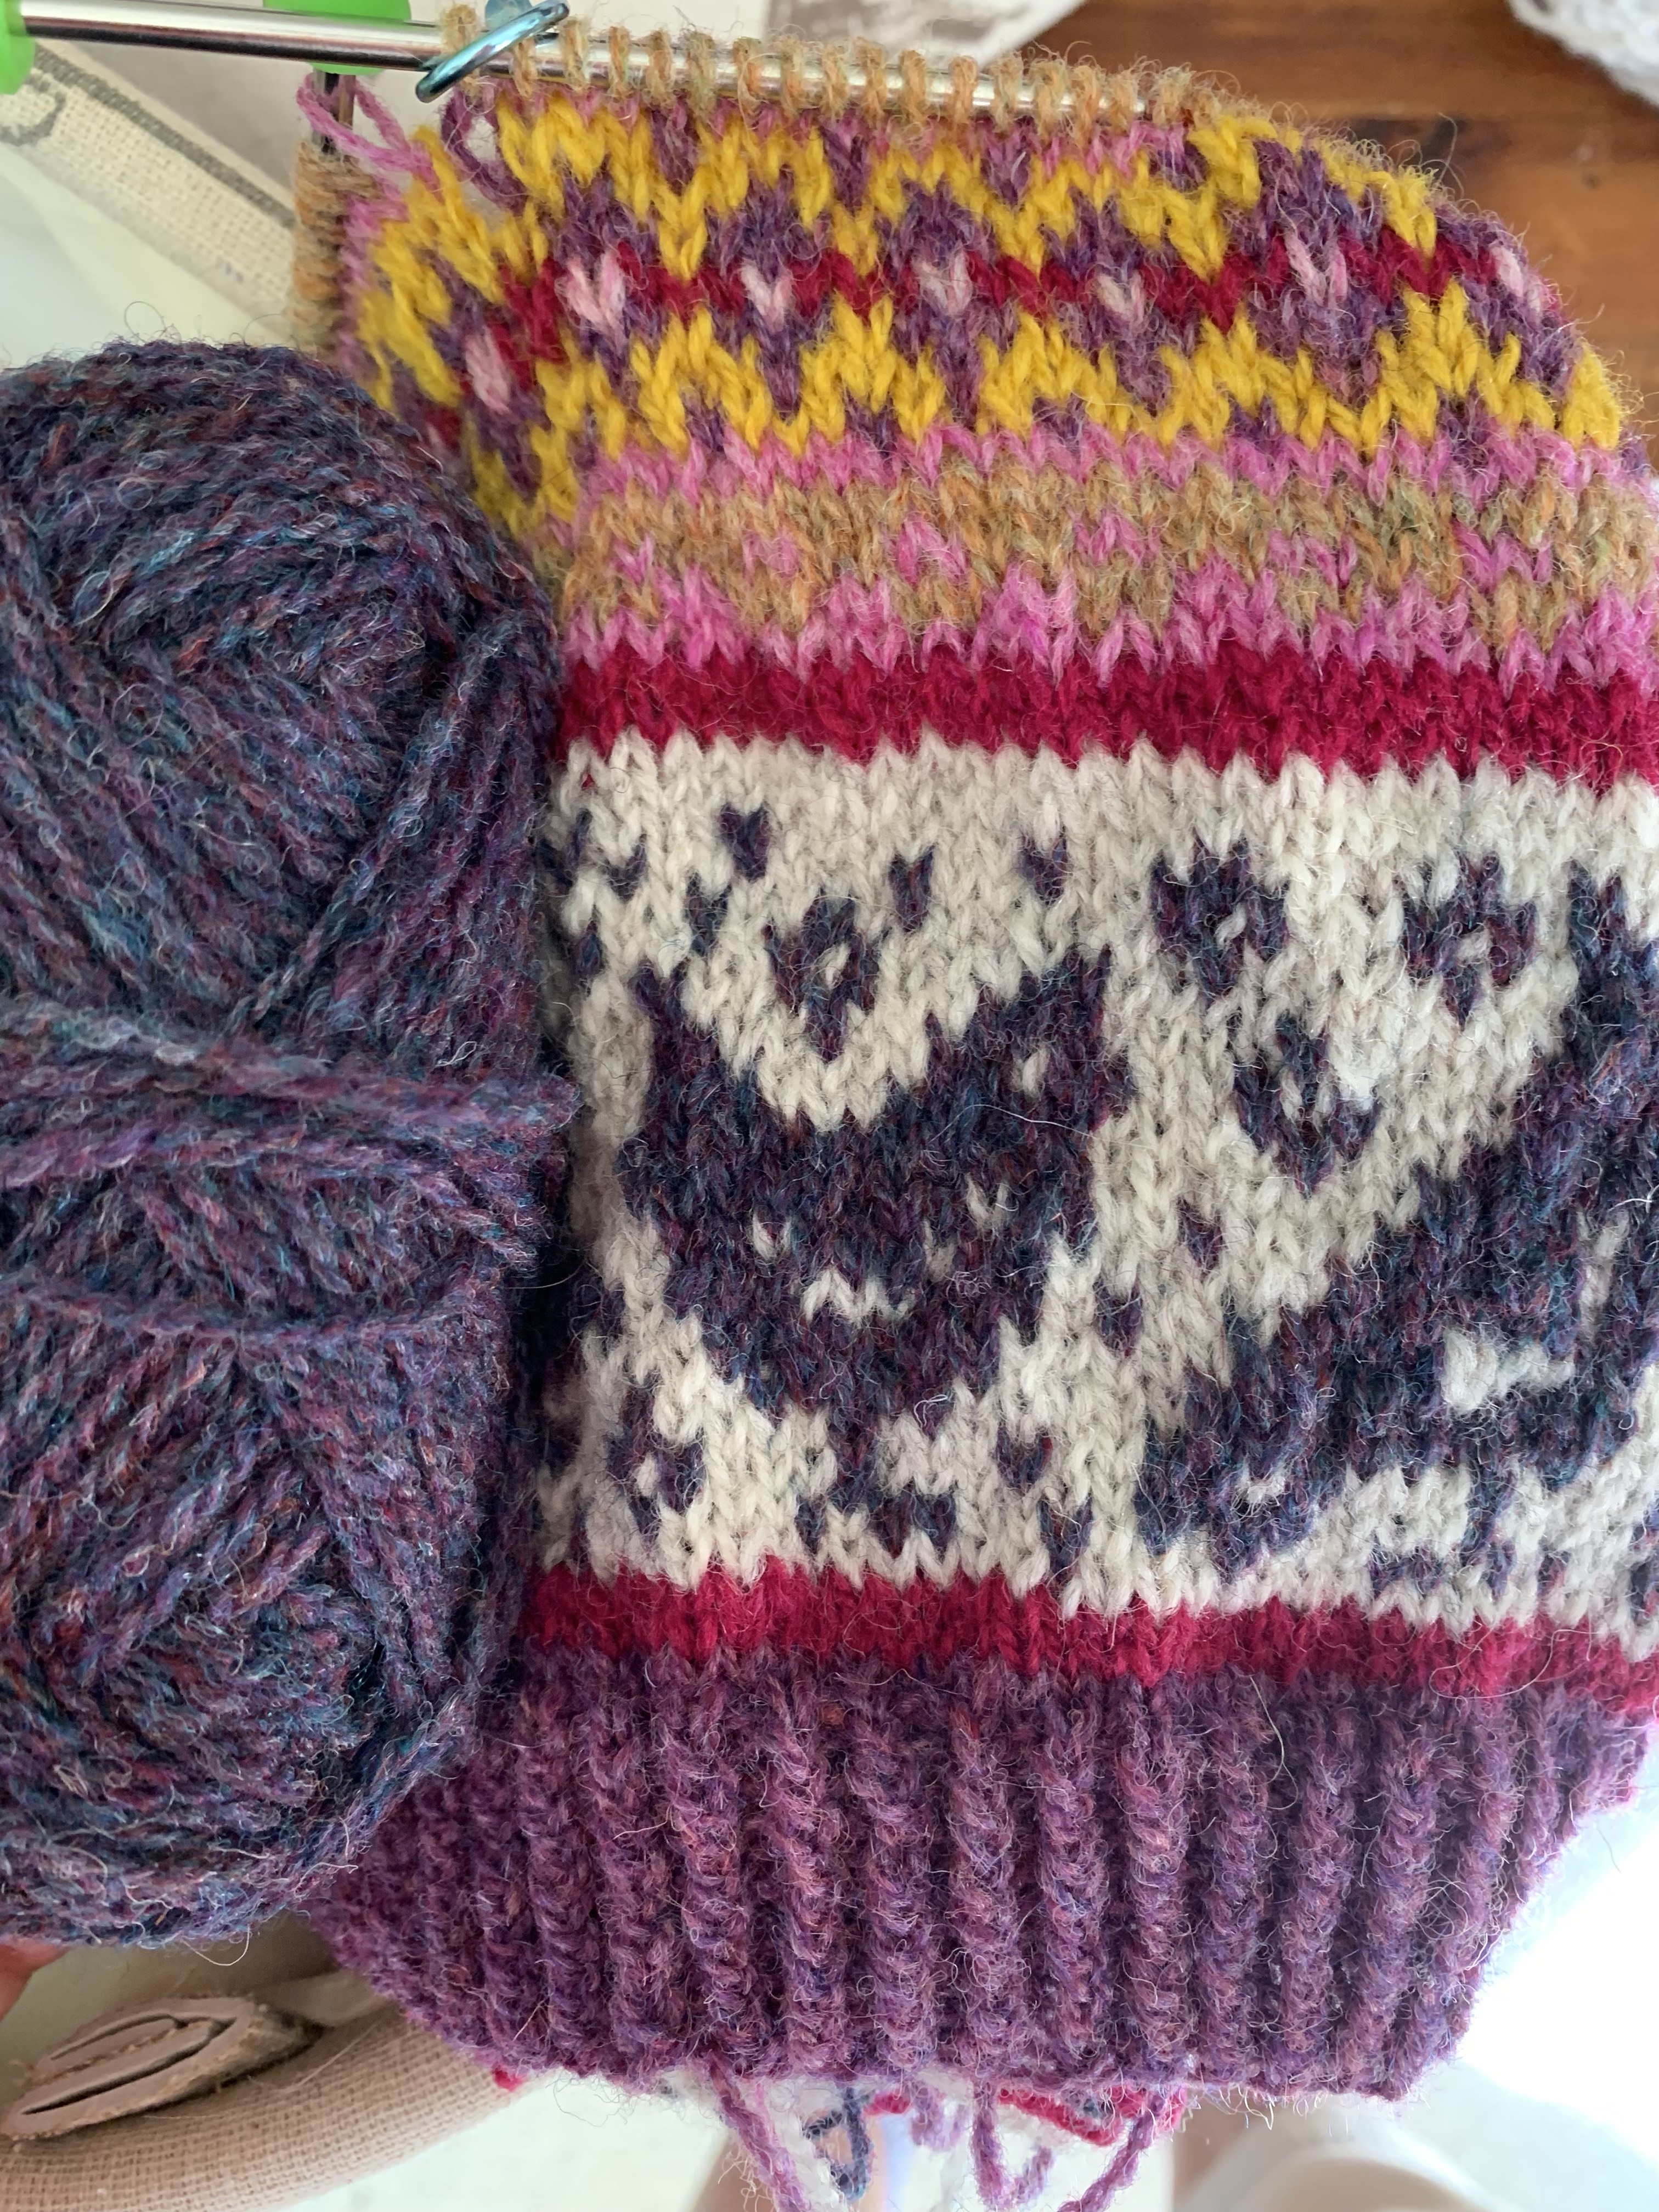
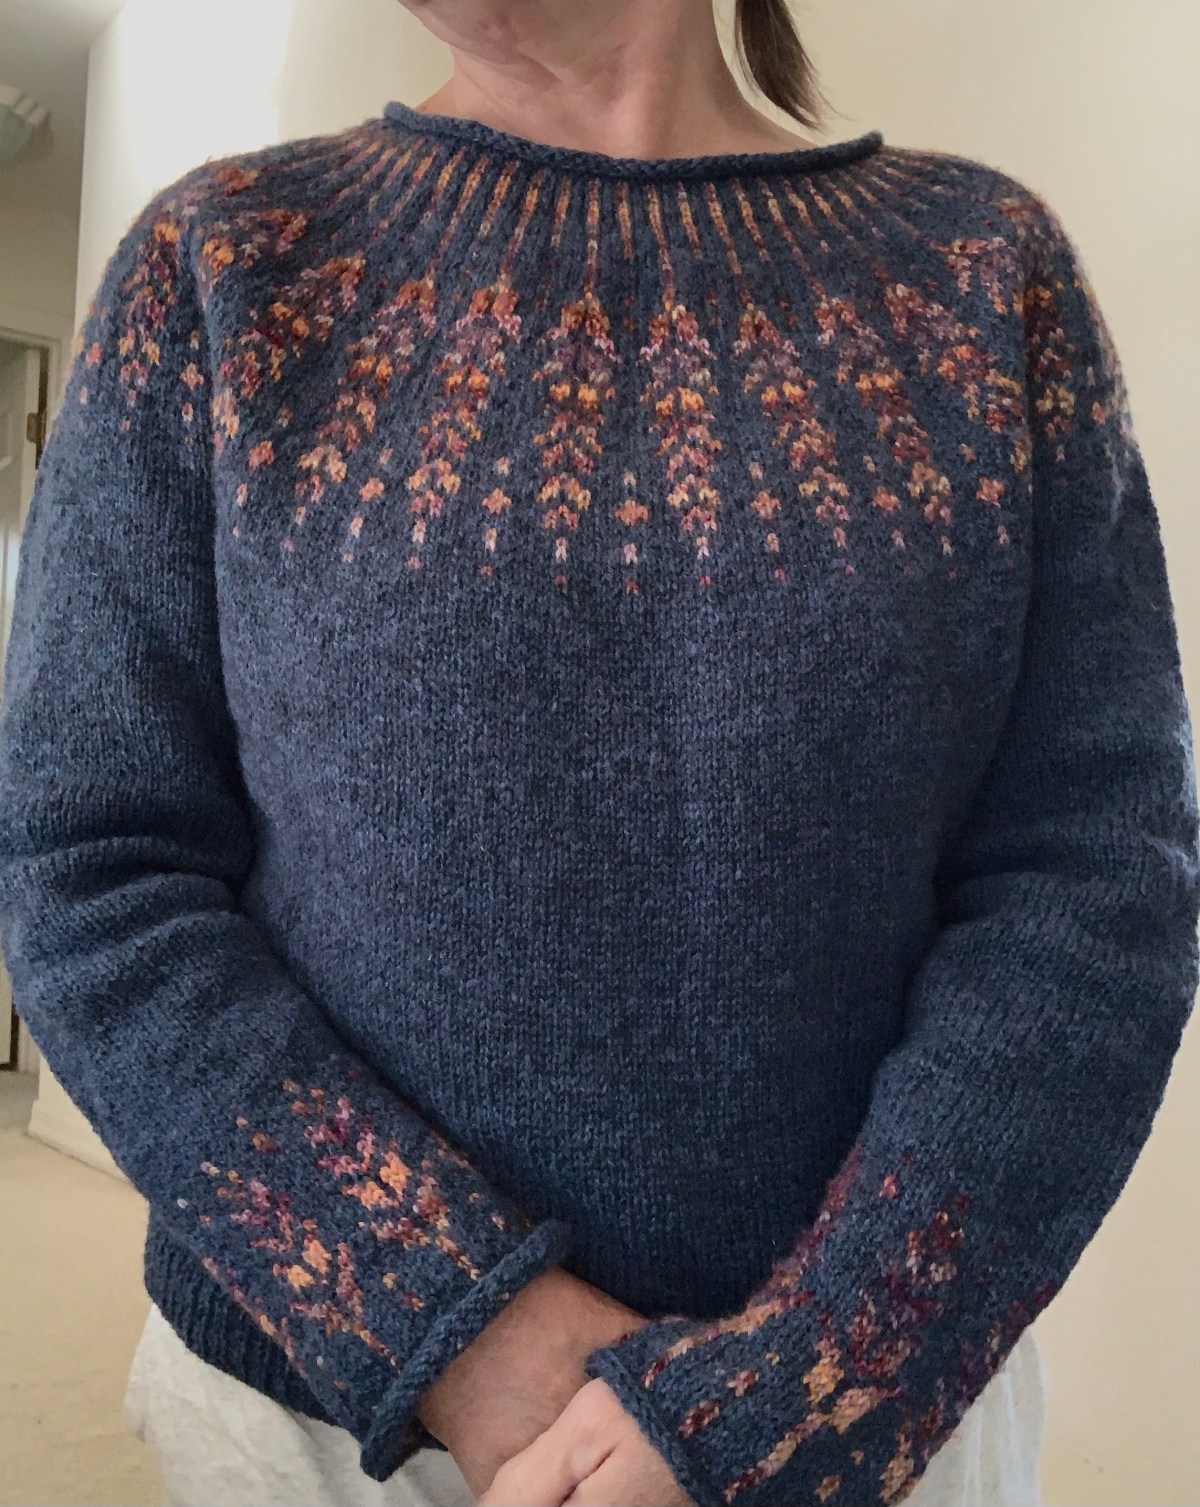
I’m knitting a fun little hat with a motif of chickens! The stranded colorwork pattern is called the Solstice Glow Hat and is by knitwear designer “Bunnymuff”, who is Mona Zillah.

A link to the pattern page is at the bottom of this page.

Jamieson and smith purple mix yarn

The yarn I am using is Jamieson & Smith 2-ply Shetland wool combined with some Rauma. Mona (the designer) uses gorgeous Gathered Sheep Yarn. I would buy it in an instant if it was available in the US. If you are in the UK, check it out. But, the J&S is also very lovely, with some wonderful coloring.

Yarn: FC14, dark rainbow mix purple is the color I used for the chickens. I don’t leave my yarn in the sun, just used this sunny spot to show colors better.

wool yarn in the sun

This is my first hand-knit project for 2022. I did my cast-on January first. When I saw this cute hat pattern a while ago, I knew I had to make it one day for my daughter. Anyone who raises backyard chickens would just love it!

The pattern includes more than just chickens. Geese and pigs charts are included with this pattern. They could all be included on one hat – perfect for farmers..!

Finished Knitting

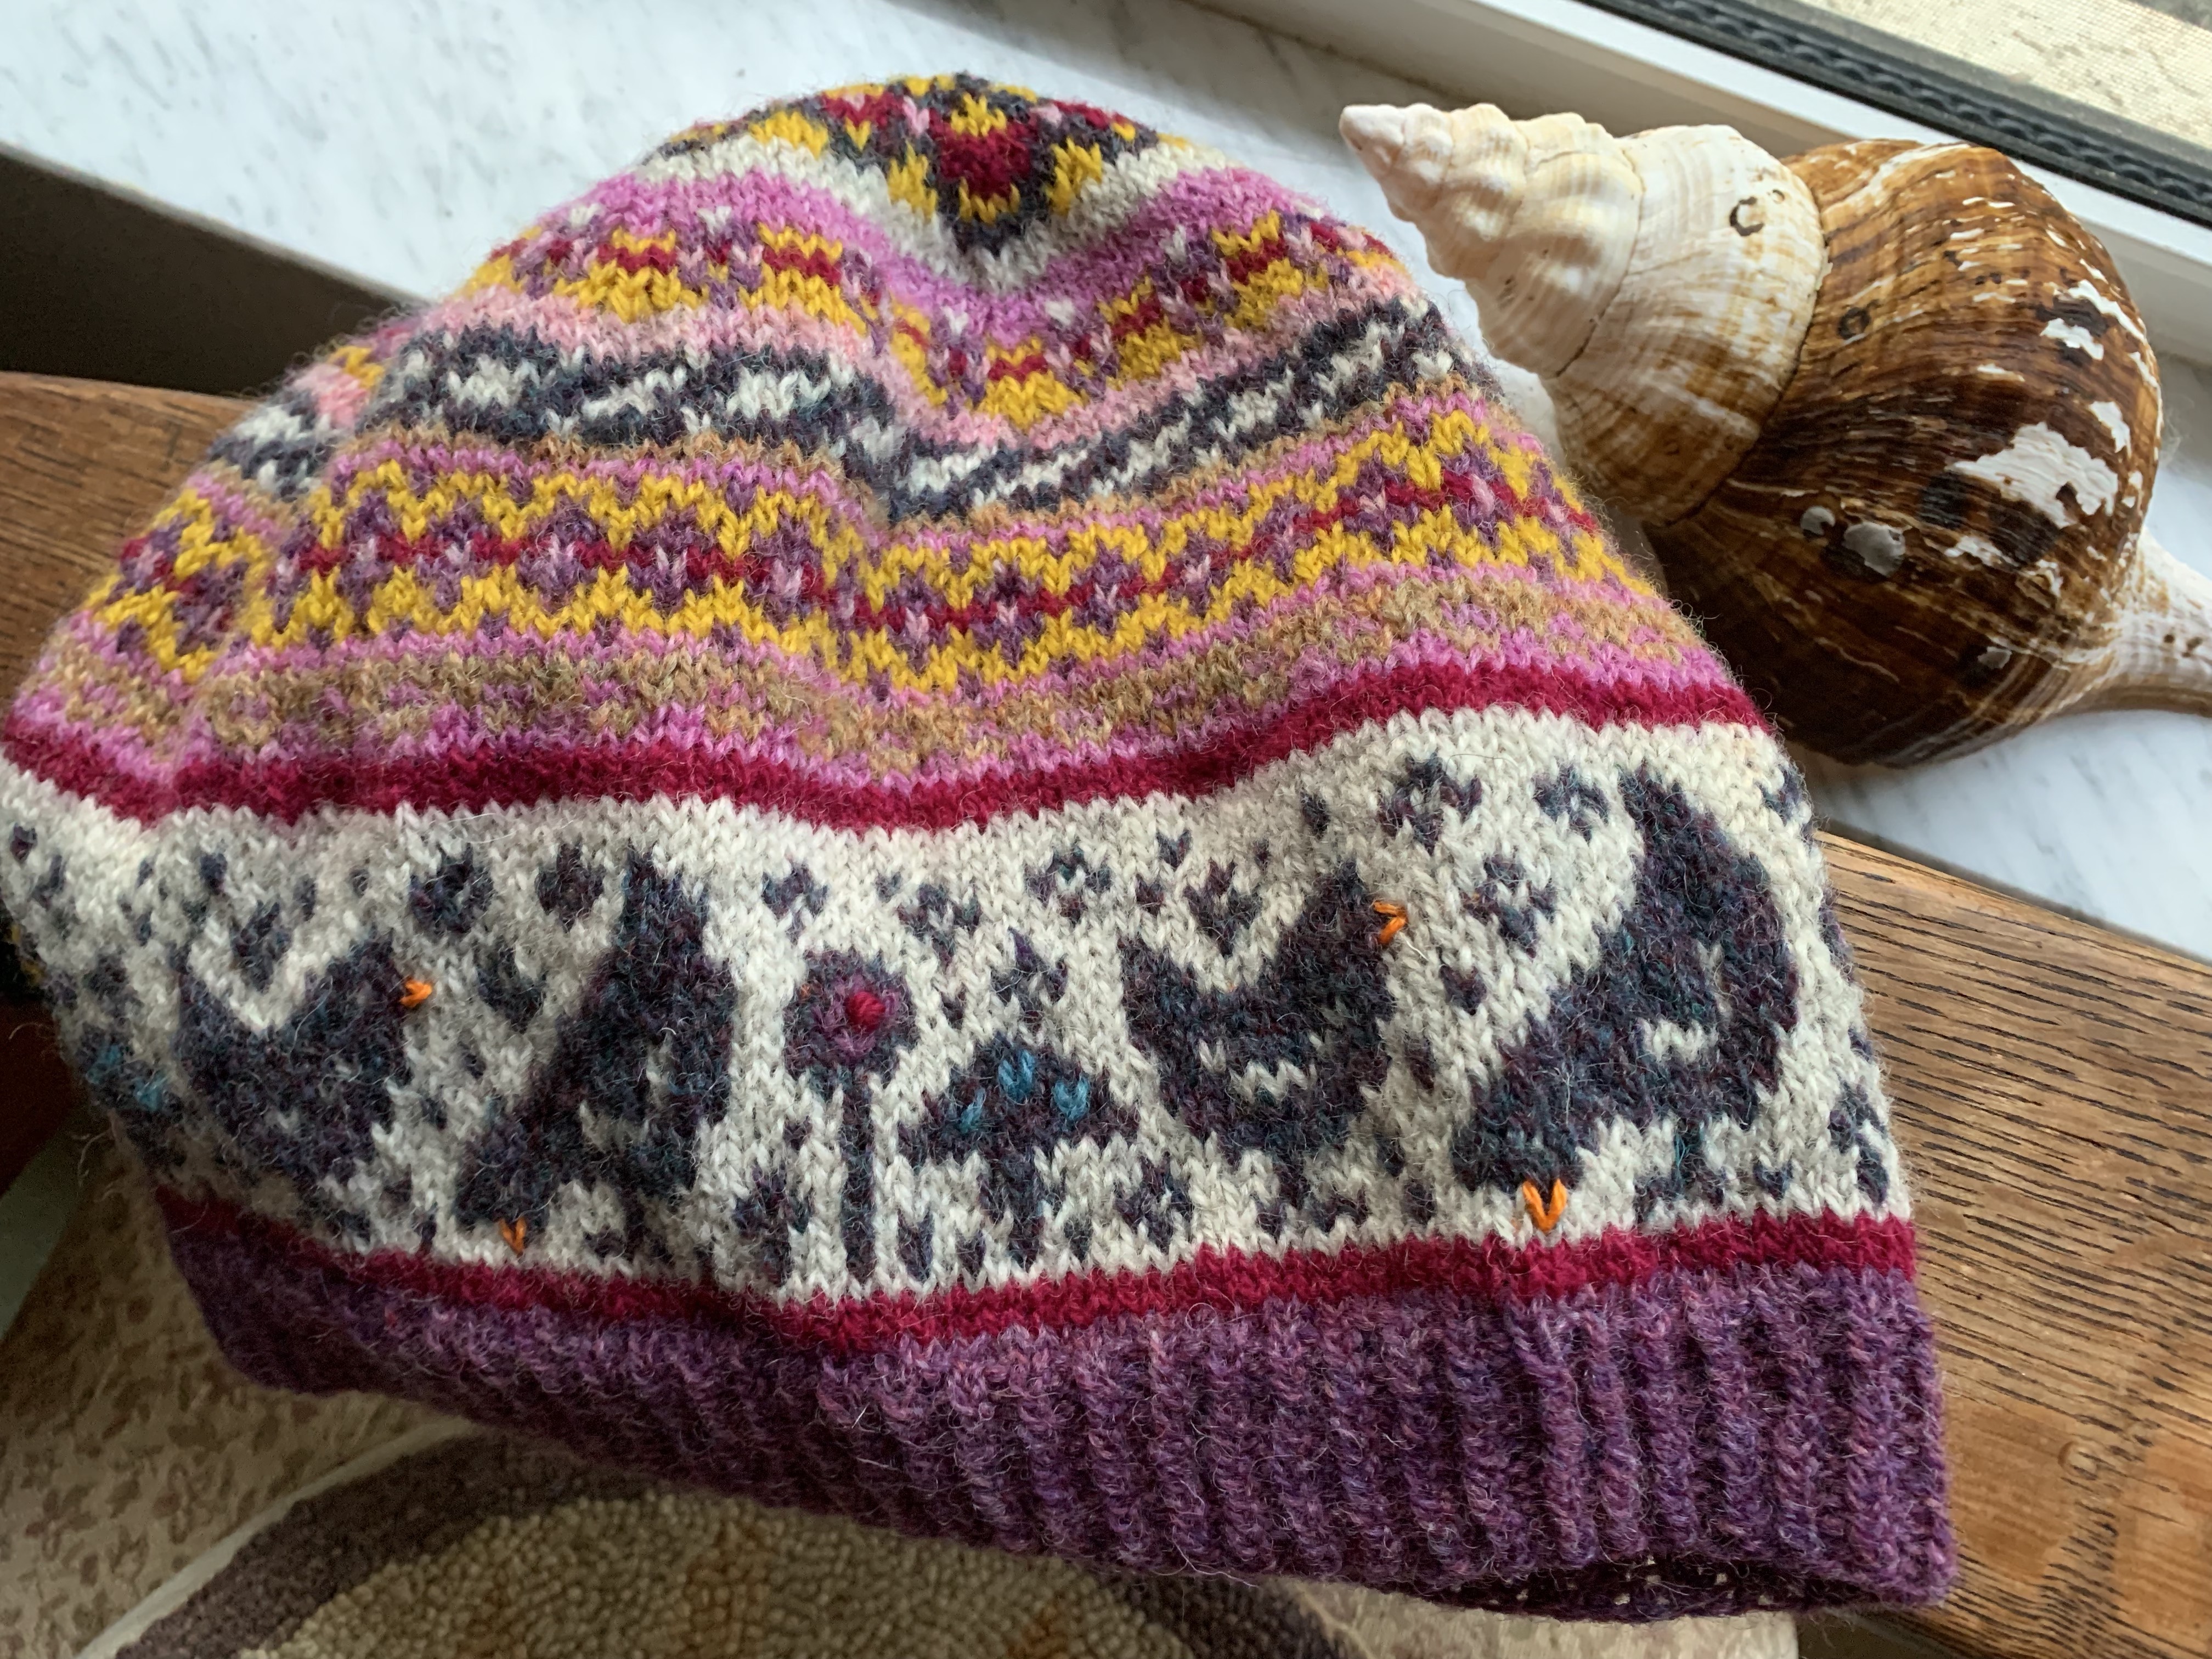
I’ve finished knitting the hat, but it’s not done. I still need to add the duplicate stitches on the chicken motif and weave in all those ends. Colorwork is such fun and all the yarn ends, from changing colors, are just part of it. Once it’s washed and blocked the puckers will come out and the hat will be smoother.

The chicken motif is meant to be enhanced with embroidery, called duplicate stitch.

The pattern designer explains how she used this technique to finish each of the animal motifs, so you are not left in the dark wondering where to begin. This Very Pink Knits video shows how to do duplicate stitch at about six minutes in.
Hat is Done… Duplicate Stitch, Washed and Dried

Altogether, the hat knitting was completed in nine days. It fits me fine, but might be a little big for my daughter.

Final Words on the Solstice Glow Hat

After knitting the chicken chart section I went a bit off pattern and added some other colorwork patterns of my own. I found it difficult to follow the yarn color placement because my pattern printout is in black and white. The hat calls for a Main Color yarn and five contrast colors.

I chose to do my own thing for a few rows in the center. This is not anything against the pattern. I love Bunnymuff patterns and have already knit a few.

The Stellar Parallax Mitts were great fun (learned a new corrugated rib). The Keramos Cowl had some embroidery (a first for me). It seems I always learn something new when I knit one of her patterns.

More Patterns by Bunnymuff

This designer includes wonderful directions in her patterns. If you like this type of knitting be sure to check out Mona Zillah’s Ravelry Store where all her pattern designs are on display for sale.

This chicken motif hat will be sent to my daughter in New Hampshire. She is building a coop and hopes to begin raising backyard chickens sometime this year. I think she will love it!

Click here to Get The Solstice Glow Hat Pattern

Backyard chickens, hens as pets
Photo credit: Pavlofox @ Pixabay