Beginning My House Renovations, Part Two

Shortly after I moved into the yellow house (June 2011) I began searching for someone to fix it for me. I was new to the area, and new to the state (see my first post on this subject if you haven’t already read it). I knew almost no one. I took a chance on a young man named Brandon who had a fairly new siding company. He said he would also put in new windows. He was easy to work with and ended up doing a nice job.

Replacing the Siding

Brandon began by removing the old clapboard siding on the front of the house which had been absorbing water for a while. Beneath it the wood was rotting and had to be replaced.

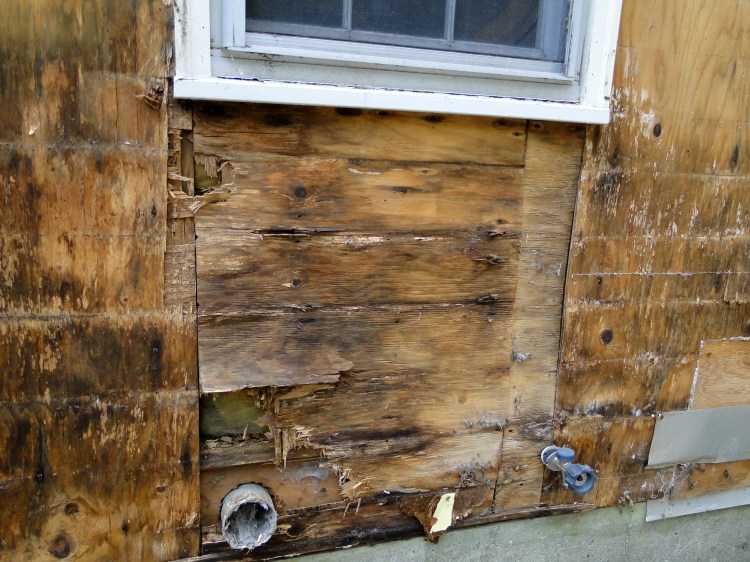
My house with the old clapboard siding removed to show rotted wood.
My house with the old clapboard siding removed
Rotting wood on the front of the house beneath one of the old windows.
Old rotted wood on the outside of the house

In the photo below you can see how the siding was bad and I had to cover the cement steps with plastic because there was a leak that went down into the basement when it rained. When Brandon replaced the siding, he addressed and fixed this problem.

Damaged front door
Unusable front door – covered with tarp when it rains

Working on The Garage

While this scaffolding was up, we had a freak, early season snowstorm! It was Halloween and in New Hampshire where I lived we got tons of snow. Further south where Brandon lived they got lots of ice. Because his power was out and my yard was buried, the renovations were put on hold.

scaffolding
Scaffolding for siding the garage area

Below is a photo of that freak snowstorm at Halloween. Many trees had still not lost their leaves at the end of October like this oak in my front yard.

fall snow storm
October Snowfall 2011

The only good thing about getting snow early in the season is that it melts away quickly.

At some point while Brandon was working on siding the front of the house I hired some guys to replace my garage doors. Elite Doors was recommended to me by a contractor who was working on my little deck at the time. They came right out and when I had a problem with something later on (can’t remember what), and fixed it at no charge. They really were very nice and capable guys.

As you can see in the photo below there were obvious signs that the previous owners had tried to keep water out of the garage by building a little ramp out of some black stuff. I also had water problems in winter, but that is another story.

Old garage doors
The old garage doors and old siding

Brandon added a vent to the top of the garage for heat to escape. Once the siding was done and the new doors on the place was looking good!

New garage doors and siding
New garage doors and new siding done!

Front of House, Before and After

Once the work was done, I had new siding on the front and sides of the house. Four widows on the front were replaced with double-hung, easy-to-clean windows and new screens. White shutters took the place of the green. (That yellow and green combo was carried over into the upstairs bathroom.)
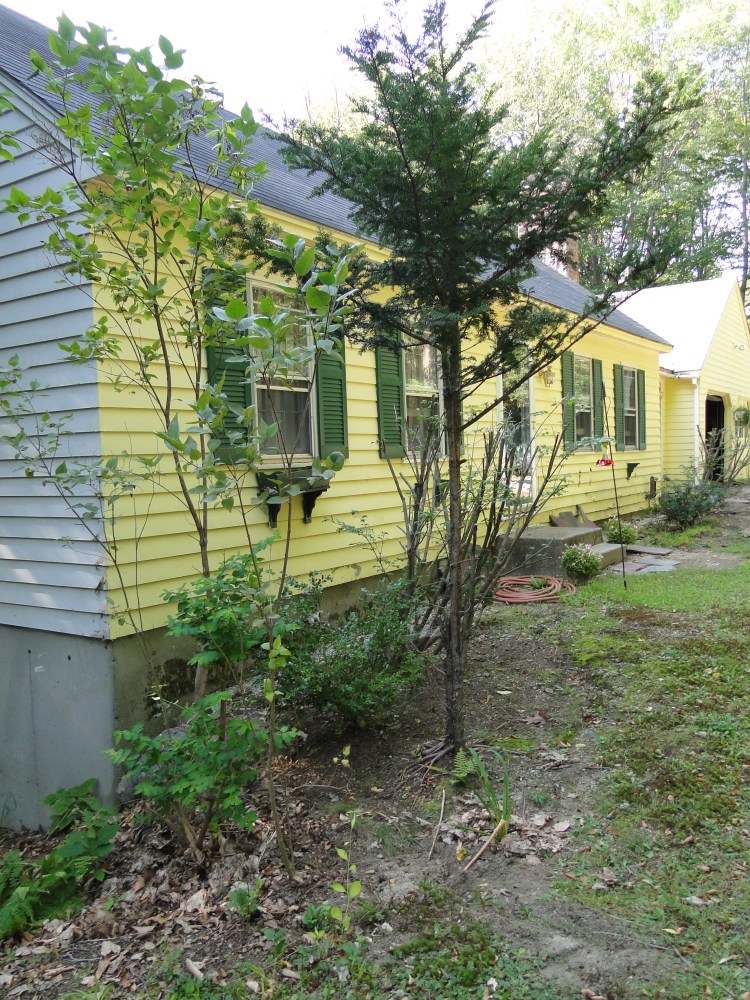
My house as it looked before the replacement siding, windows and shutters.
Front of house before renovations
New siding, windows and shutters
New siding, windows and shutters complete

Free Knitting Patterns, Are They Worth It?

As a beginner knitter, I have searched for “free knitting patterns” to get a feel for stitches, directions and charts. Why would I want to spend money on a pattern that I can’t comprehend and knit once it is downloaded? For beginners, free is probably best to start with.

So is knitting something that is free worth it? Well, yes and no. Be careful where you find those free patterns.

A warning here is to try to find well known knitwear designers who sell patterns but also offer free ones. They care about their patterns because it’s a business for them. Offering free things could very well lead to purchases done the road.

Or, choose a free pattern that has already been knit a lot and has great reviews.

I do understand that starting out we beginner knitters have NO idea who the knitwear designers are. And where do we find reviews and comments on patterns?

This is where Ravelry – an online knitting (and crocheting site) can be a huge help. If you can ignore their politics, it’s an enjoyable place where I’ve learned so much.

My First Hand-knit Shawl Was a Free Pattern

My very first shawl was a free pattern from a designer who offered it with the stipulation that I sign up for her e-mails. The shawl was good practice for me, with wonderful directions, it and brought her a follower. Below is the Spindrift Shawl (a free pattern and my first shawl knit) by Helen Stewart. I still get her e-mails.

Spindrift shawl
My first shawl knitting project

That is not to say that many free patterns work out just fine. Usually they are fairly simple and closely match other free patterns of the same type. Sometimes knitters just like to share something helpful with other knitters.

The Scrappy Bias Shawl (below) is one that gets a lot of knitter’s attention. It is easy knitting and fun. The Honey Cowl is pictured at the beginning of this page, and it is a free, one or two wrap, cowl.

colorful scrappy bias shawl
Scrappy Bias shawl – completed!

For beginner knitters, using a free pattern can be very helpful. Usually they are simple patterns that give us good practice and cost nothing but the yarn. A great place to begin is with Tin Can Knits. I sure wish I had found them sooner in my knitting adventures. They have an excellent bunch of tutorials and a page full of free patterns such as hats, sweaters, mittens and more, for all ages and sizes. Below is my Playdate Cardigan.

Playdate cardigan in size 6-12 months
My experience knitting the Playdate cardigan

Purl Soho

One very good place to start, if you want clear knitting directions, often with video tutorials, is Purl Soho. They sell beautiful yarn, and offer many types of patterns for free! It is one of the first places I found for free things when I began searching. From simple hats and housewares, to sweaters and ponchos, this is an awesome site for free designs and helpful insights.

Beware that some of their pattern stitches are quite advanced, and those wraps and blankets can take a long time to knit.

One place to also find more advanced free patterns (as well as the more simple) is the Espace Tricot collection. They offer a slew of free patterns of all types. The sweater below is one I recently knit.

In closing, I suggest being careful where the free patterns come from. If you begin to knit something that looks good and get toward the end and hit trouble, you’ve wasted lots of time. But, many free patterns are definitely worth knitting.

Knitting Flip-Flop Socks

Until just the other day I hadn’t heard of flip-flop socks. I had begun to try my hand at knitting socks, and asked my daughter if she would like a pair. She said instead she would love a pair of flip-flop socks.

(When I first wrote this page, I followed a pattern that no longer exists. I have linked to other patterns for my readers, but I did not knit those. I hope you will still find my notes interesting and helpful.)

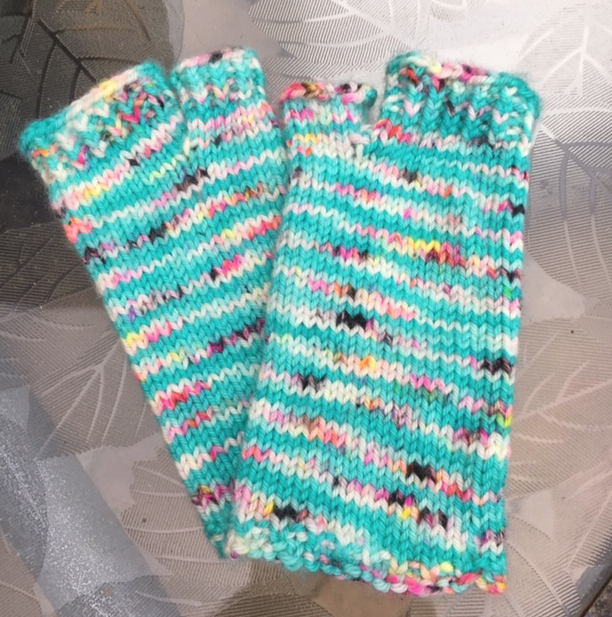
Flip flop socks in aqua blue variegated yarn with open toes and no heel.

My next question, which I thought was pretty logical, was “Why?”. Flip flops are to be worn in hot weather so why would you add socks? As someone who has outgrown flat, floppy shoes and now needs arch support in my sandals, I was obviously out of touch with the flip-flop wearers.

Who Wears Flip-flop Socks, and Why?

It appears that many people who love flip-flopping so much they will also wear their favorite comfy footwear in cooler weather. Because there must be compensation for the toe split, special socks are needed. People of all ages love these socks, and even men will wear them… who knew?

Choosing Yarn For Your Socks

It will not be difficult to find yarn to knit flip-flop socks. Any “sock yarn” will work fine as long as it is washable. I prefer natural, animal fiber, but cheaper acrylic yarn can be used. I knit my socks in DK weight, 100% merino wool. My yarn is Madeline Tosh DK, Hydroponic. I believe this colorway is discontinued, but you still may be able to find it.

knitting flip flop socks
Beginning to knit the second sock

This Pattern is Gone – So….

The FREE pattern I closely followed is called the Arizona Flip Flop Sock, but that pattern is no longer available for some reason. Maybe the sharer was not the original designer, or maybe they no longer have the website, or ??? For whatever reason I can’t give you the link.

SO…. here is a link to another Flip Flop sock pattern which is a free Ravelry download. It is not the one I knit, which changes things. I’ve also listed more socks like this at the bottom of the page. Some are free, and some are to purchase.

Joining in the Round – Switch Stitches

I used US size 2 addi Flexi Flip needles. I had never used this type of short needle before so I had to wing it. I prefer the 9 inch circular needles, but didn’t have any at the time.

Cast on however you like and join in the round as you prefer. Or you can do as I do.

Once all stitches are facing the right way – no twists, and working yarn is coming off the Right needle – drop the first stitch on the L needle and let it hang. Move the first stitch on the R needle over onto the L needle (use the spare needle to do this). Pick up the dropped stitch and put it onto the R needle. Place marker here to mark the beginning of the round (BOR). I used the cast-on tail as my marker.

How to do the flip flop sock pattern cast on with flexi-flips
flip flop sock pattern cast on

Once the stitches are joined, begin knitting the pattern using the free / empty needle. I’m using Flexi-Flips here, but DPN’s, 9inch, or Magic Loop would work.

Joining in the round using Flexi-flip needles

Making the Toe Opening

Most likely at some point, the big toe area will be separated from the other stitches. In the pattern I knit, I had to cast on 3 stitches. The video below helped me do that.

Flip flop socks with big toe separate from other toes

BE SURE TO BIND OFF LOOSELY !!! Or your toe openings will be too tight.

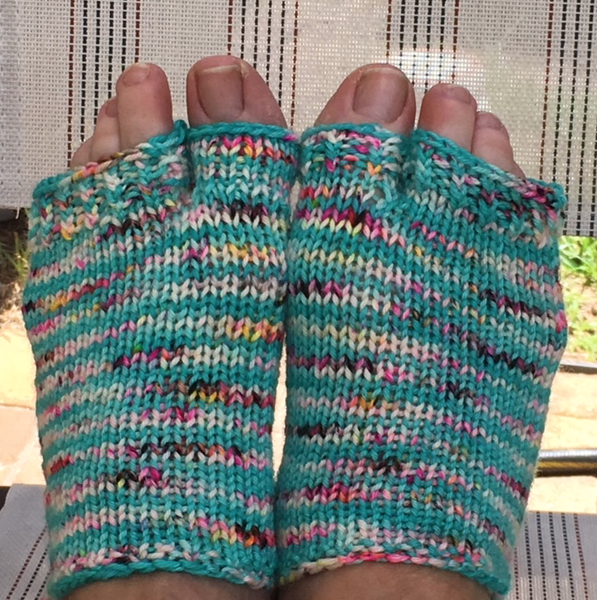
Wearing flip flop socks knit by me.

Here are my finished socks after being washed (below). Now I will pack them up and mail them to my daughter.

Flip flop socks after washing

The photo above was taken after the socks were washed in the washing machine. I let them air dry and they got a tiny bit fuzzy, but remain nice and soft and did not shrink. I had a few ends to re-tuck, but that was all.

I will admit that I dislike knitting socks. I’ve tried various patterns and have never fell in love with knitting them. Many, many people knit loads of socks, and sock patterns seem to be very popular. Knitting one sock can be sort of fun, but then you have to start again and knit the same thing all over again!

The nice thing about the flip-flop sock is that it is a much quicker knit because you are only knitting the sole and toe holders. There is no cuff or dreaded heel to deal with like regular socks. But you still must make two! By the time I finished the second sock, I was ready to celebrate.

I choose this free pattern because I have made socks and I thought I could figure this one out. You should be careful of knitting free patterns because they can end up being incorrect – (share them and then they disappear!). Read my next post about that.

More Flip Flop Sock Patterns

Not all patterns will be the same when you search for “flip flop socks”. Some designers will have you knit the whole sock and separate the big toe. Some have the heel included with the sole / instep area. Other socks are very short and cover only part of the foot.

Here are some patterns I have found and want to share. I have not knit any of these myself.

Knitting The Moon Sisters Shawl Pattern in Orange

I purchased the Moon Sisters shawl pattern in June 2019 (and finished June 2020! – see the end of this post for the update).

This triangle shawl is knit by holding two fingering weight yarns together except for the middle section where the yarns are separated to create a pattern. The cast-on for the shawl begins with a typical shawl cast-on, only much longer than any I’ve ever done. The center pattern is a chart only, which for me was not all that easy to figure out. Fortunately I was able to view what other knitters had done, and that helped. It is a small chart, and once you get the hang of it, it goes along fine.

So besides doing that long cast on and figuring out the chart for the center stitches, you will have to know how to knit / purl through the back loop, and how to “make one” left and right in order to knit this pattern. Most of the shawl will be knitting or purling with that break for the center design.

This pattern can be found on Ravelry – Moon Sisters, by Caitlin Hunter.

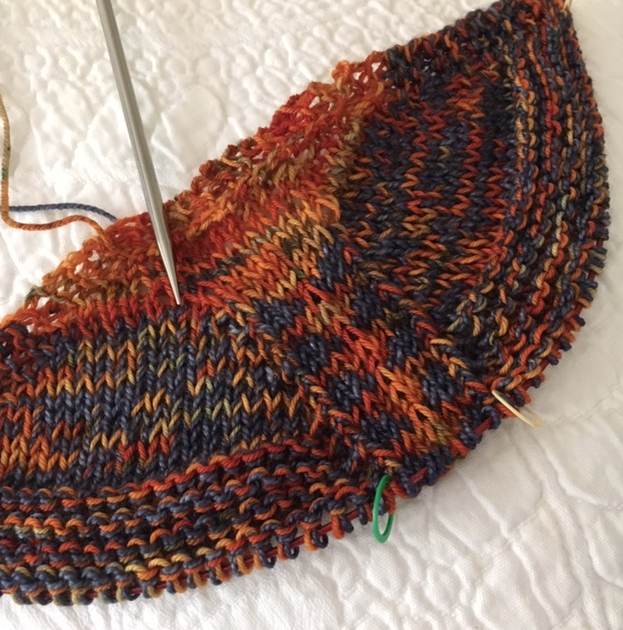
Moon Sisters Shawl beginning the project
Moon Sisters Shawl

The center pattern is a series of triangle shapes which, to me, look like arrows. Because the orange color I am using is variegated and not solid bright orange, occasionally my center stitches are come out lighter. Then, my center pattern does not stand out as much as it should. Still, I love these colors together. My plan is to use up some dark colors in my stash, but the orange will be used throughout.

“10 Questions” Emma’s Yarn, is the orange yarn I’m using.

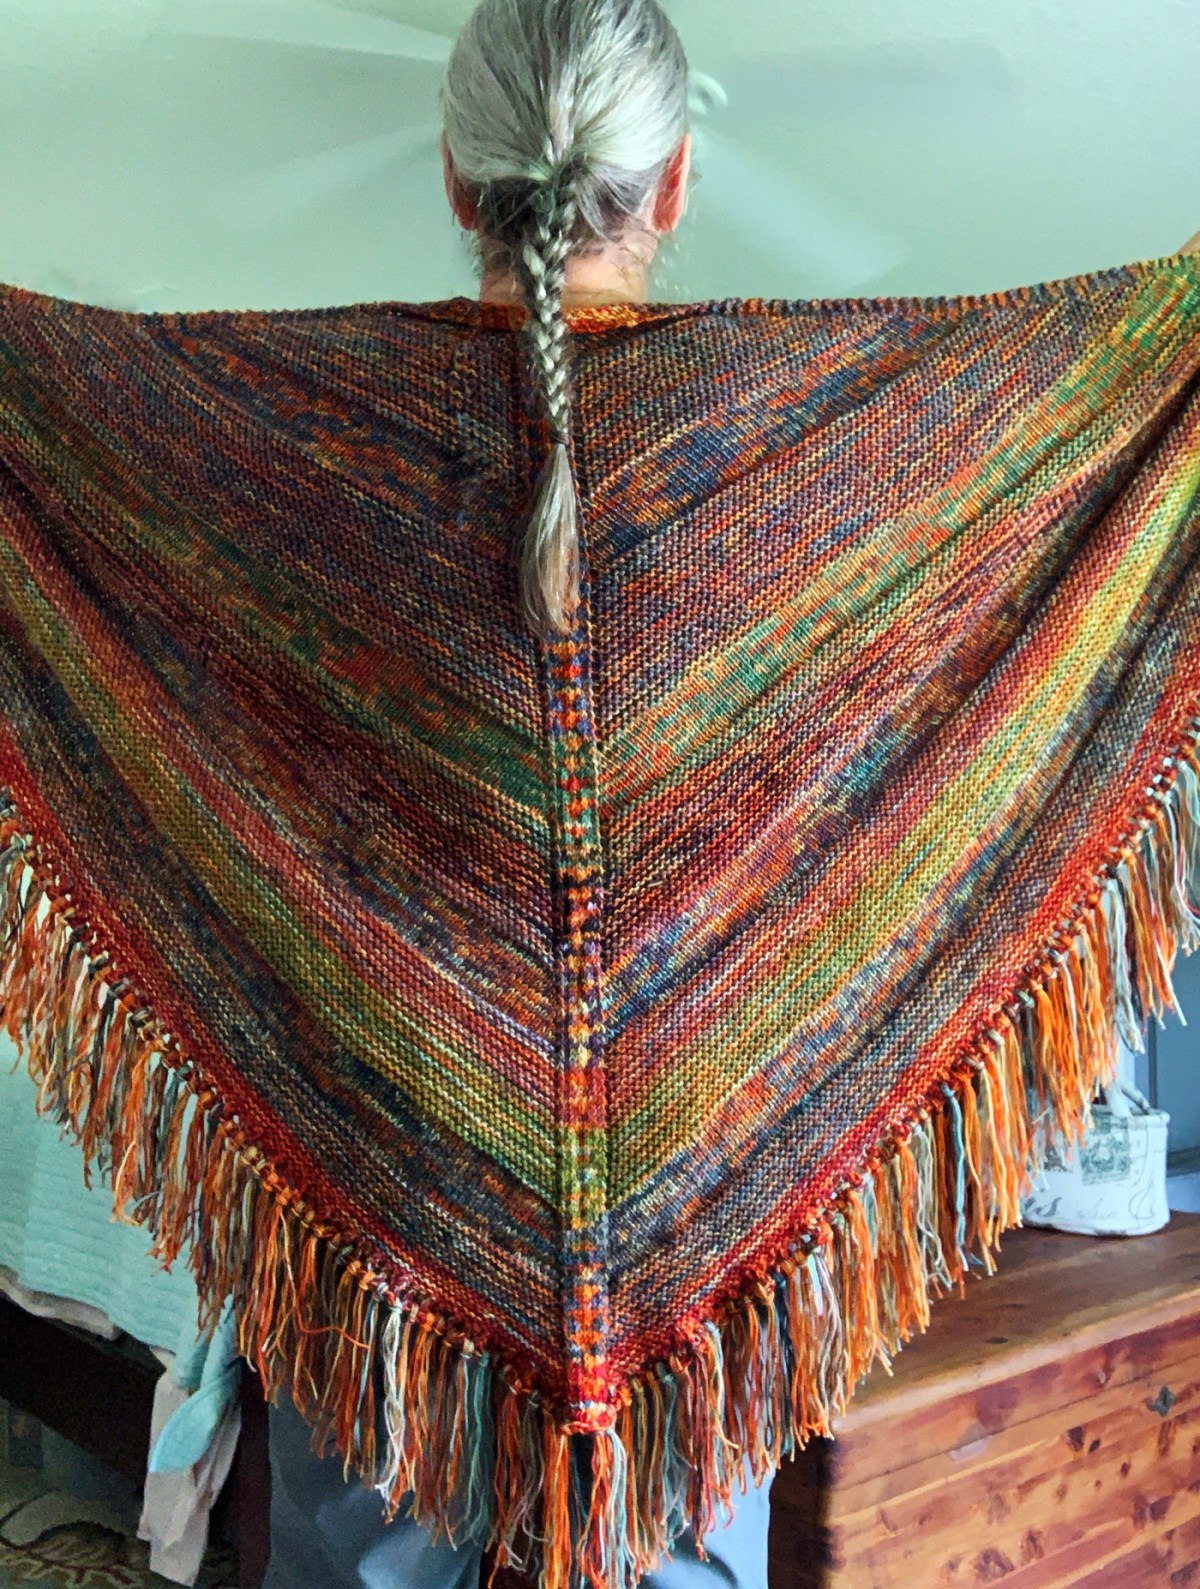
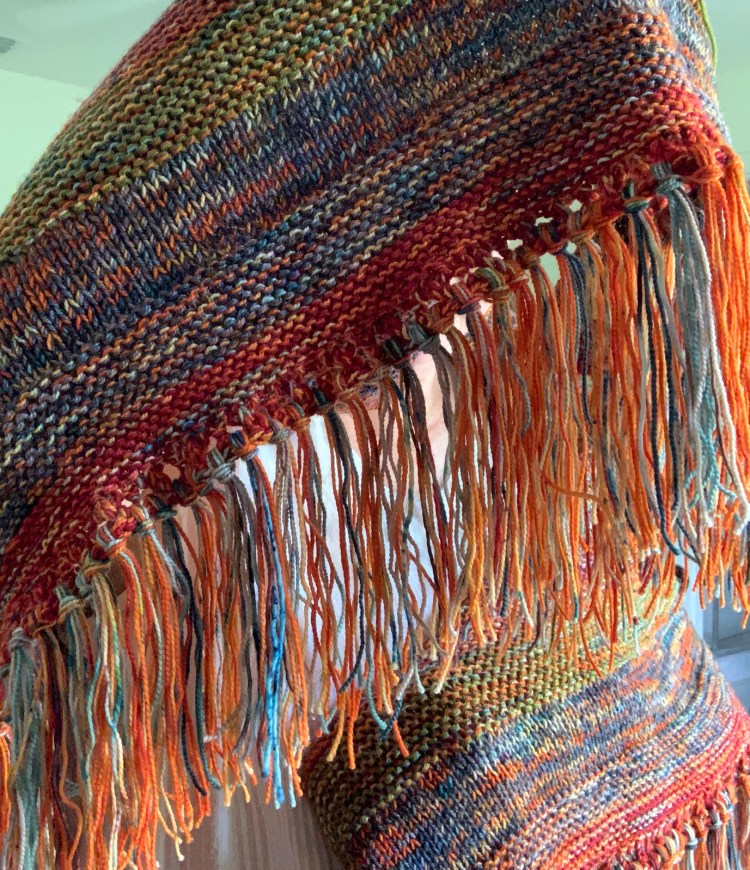
The Moon Sisters shawl is finished with fringe, and I think that is the charm of it. I’m a bit of an old hippie from the 70’s, so fringe appeals to me – sometimes. In this case, I think it makes the shawl even better.

Orange and blue knitting shawl pattern "Moon Sisters Shawl" by Caitlin Hunter
Main color orange is “10 Questions” shown here with Denim blue

While I am knitting this shawl, I was also working on the Quince Wrap, the Fine Sand sweater, and a baby sweater called Playdate. Those are now finished, and so are my Pink Mitts and Winter Morning headband. So Moon Sisters has become my occaisonal go to knitting project. I’m in no hurry to finish it and it’s straight forward enough to do while I watch TV.

As of November, this is where I am with my progress on this shawl. I just added a dark purple (a Wild Iris colorway by Miss Babs) to knit with the orange because I wasn’t liking the green all that much.

I’m still on my first of three skeins of orange yarn so I should have plenty. I’ll keep some of all the colors I use to apply the fringe at the end.

Moon sisters shawl knitting
Getting on with my knitting and added dark purple.

Moon Sisters Has Fringe!

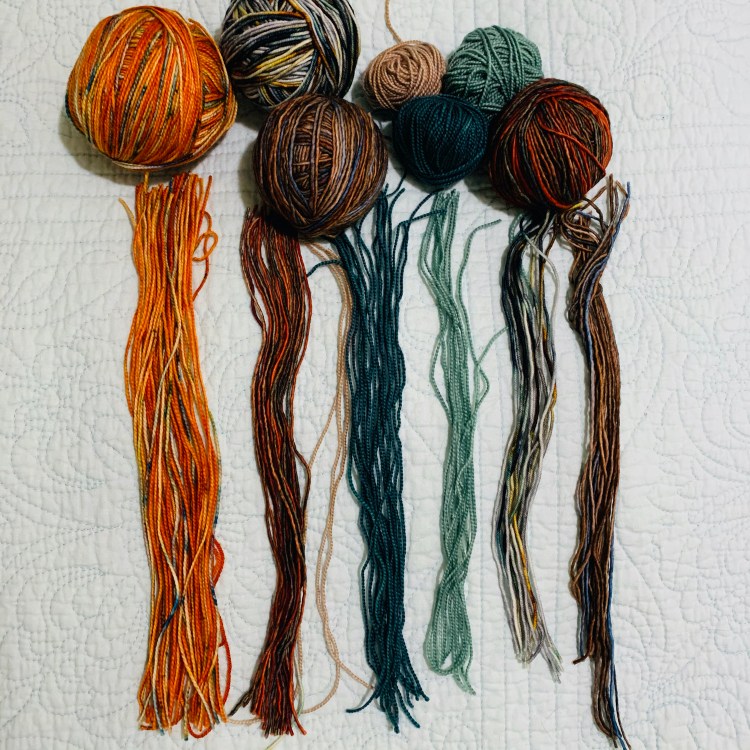
I have yet to wash and block my shawl, but today I got all the fringe attached – no small feat!

I saved a ball of my main color: Emma’s Yarn, in “10 Questions” orange to mix with other yarn for the fringe. I ended up using all the orange.

Cutting yarn for fringe
Scrap yarn for fringe
Fringe on orange Moon Sisters shawl
Adding all that fringe is a job!
Cutting yarn for fringe as Fontana watches
Fontana loves all that string!
Moon sisters shawl finished

I do recommend this shawl, if you like knitting shawls. This one is a biggie. I used all three skeins of orange yarn, and it was held with lots of other colors. I needed to buy a 60 inch circular needle to finish it up, but you could always cut it shorter.

The somewhat boring knitting and purling is interrupted with that little center pattern, which is nice.

It took me a year to finish this, but I kept putting it aside to work on other things. Tomorrow I will wash it, and it will be ready to wrap up in – just in time for 100+ temps… LOL.