Knitting the Fine Sand Sweater Pattern

After knitting my first pullover sweater Umpqua by Caitlin Hunter, I decided to try a cardigan. I chose Fine Sand, by Heidi Kirrmaier because I could knit it in a light weight yarn suitable for my Florida climate. At least, that is my hope. Also it is knit top-down, so that is something new for me to try.

Part 1 (of 2)

This post has photos and comments about beginning the sweater and knitting to the short rows. I’ll finish up on the sleeves and bind-off on another post (Part 2).

Miss Babs was having a sale on the Tarte fingering weight yarn, which is made up of washable merino wool, nylon and tercel. Sounds sturdy and washable, which should make a nice sweater. (Yes, I love this yarn, and the color is wonderful!) The pattern called for DK or Sport yarn, so I knit up a swatch using a needle two sizes larger and I got close to the gauge. I’m hoping the sweater will be a bit large in the end. I don’t wear tight clothing.

Casting on a top-down sweater pattern "Fine Sand"
Center back marker of Fine Sand cast on

This is the Franklin blue, and it’s very close in these photos to the actual color. And I have never been disappointed with any Miss Babs yarn. I knit a Mystery KAL Shawl with Miss Babs “Woodbury” yarn, which was soft and pretty.

Dark yarn is not as fun to knit due to difficulty in seeing stitches (my eyesight is not great), but I love this dark blue. Also the pattern is fairly simple, with no crazy lace stitches, so it shouldn’t be a problem. I can only knit dark colors during the daylight when stitches are easy to see.

Miss Babs Tarte yarn in "Franklin" colorway.

What I’ve Learned From This Pattern

First of all this pattern is written very differently than any other I’ve followed (ya, that ONE other… hahaha). Charts are substituted for complete written directions. These are not knitting charts, like in colorwork, but charts with letters which are used to take the place of changing repeats / number of stitches for each row.

I always read through a pattern and highlight the parts I will need to pay attention to, such as repeats in a row, or info for my chosen size. I’ll admit that when I saw the first page of instructions, I had to spend a few minutes figuring it out.

Right off the bat I had to learn how to do the RLI (right lifted increase) and LLI (left lifted increase). Specific instructions for how to do those are included in the pattern and links to video help are included too. The LLI gave me a bit of trouble at first and I lost count on one row, but every row contains stitch counts (thank you!) so I was able to easily add those stitches back in.

Separating The Body and Sleeves, How To

To separate the sleeves a bunch of stitches must be moved to waste yarn. That was easy enough to do using a darning needle and white yarn to be a contrast to the dark blue. The pattern called for a cast on of stitches and that threw me for a bit. Here’s what I did:

Turn the work to the wrong side. Yarn will be coming from the L needle. Use the R needle to begin a knit stitch but when it comes off the needle pick it up with the L needle (from the bottom) and let it stay there. Do this for the number of stitches called for in the pattern. For this sweater in my size I had to cast on 6, place marker, and cast on 6 more.

The video below is the one I followed. Begin it around 2 minutes for this type of knitted cast on. As he points out in his video, this is how to make a buttonhole!

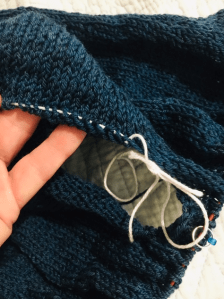
Ridge of extra cast on stitches which became part of the armhole
The cast on edge at the armhole
Armhole stitches are on hold while I continue working the body.
Armhole stitches on hold

As of the beginning of July, 2019 here is where I am on my Fine Sand (photo below). I’ve passed the tricky armhole area and now the knitting will be pretty straightforward for a while. Next I will have to reacquaint myself with short rows. I love the yarn. I would definitely buy Tarte from Miss Babs again.

Along with this project I am also working on the Quince Wrap and Moon Sisters Shawl.

My first sweater was a bottom-up project and this is a top-down. With my cool new needle tips – those things that keep the knitting on the needles – I can try on my sweater as I go.
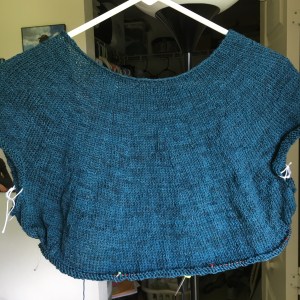
Fine Sand sweater knitting
Fine Sand sweater knitting with armholes on hold
Fine Sand sweater knitting project
Front of Fine Sand sweater in progress

Adding a Contrast Color at The Bottom

When I reached the last few rounds (rows 1-6) toward the bottom, I began adding the moss green color. Although it looks more gold in my photo, it really is green. The blue is also more teal.

Now that I am finishing up the repeats the short rows come next to create a longer back section. I think I am going to change that and do a longer squared off back leaving slits between the front sections and back of the sweater bottom. I can picture it in my head but not sure I should try it. I may chicken out and follow the pattern. (Yup, I chickened out!)

Once the sweater bottom edge is done, I will go back and finish the sleeves. The other day I began to knit one of the sleeves with the blue color I was using for the bottom. This pattern calls for 3/4 sleeves which I like. In the photo below one sleeve is still on the white place-holder yarn and the other is in the knitting stage.

By the way, I love those stitch stoppers! Mine are by Cocoknits and I bought them at Webs (that is where the link goes). I can easily try on this sweater as I go without worry about losing my stitches.

Finishing the Sweater With Edging

The Fine Sand pattern gives directions for finishing the sweater with a knit edging. The edge is curling so it does need something. As I looked through the finished Fine Sand sweaters at Ravelry, I have found a couple that had really pretty edging. I’ll be there soon, so I need to decide.

Learning About Plies in Yarn

I’ve been relatively clueless about plies of yarn. Probably like most beginner knitters, you jump in and buy because of color!

And….Sale yarns… don’t you hate them? They call to me and say “What a deal! Too good to pass up!” And yes, I am a sucker. Without any idea what on earth I will do with the beautiful bargain yarn, I buy and stash and hope some wonderful pattern will spring to mind.

When I purchased my latest deal yarn, I was hoping to knit a baby blanket. I wanted “baby” colors and since there is no baby on the way in my family, a neutral color would work best. I also wanted to try my hand at a “center out” blanket, because they look so cool (not so easy to begin). Also I would be learning a new knitting skill.

Mrs. Crosby single-ply Satchel yarn in color way Dogwood
Ball of single-ply yarn by Mrs. Crosby

The super-sale yarn I bought the other day is a single-ply by Mrs. Crosby in an off-white mixed with other pastels colors. The type of yarn is Satchel, color name is Dogwood. I am not really thrilled with the color, but I am knitting up a swatch. I had recently made a little baby hat with animals using a similar sock yarn by Madeline Tosh and did not like the outcome. I think it’s safe to say I don’t like single-ply yarns. Or maybe I just don’t know how to use them.

Vogue Knitting book
My new Vogue Knitting book

I now own the new, hardcover, Vogue Knitting book and I love it! (I bought a used edition on sale and it’s like new!) Already it has helped answer some of my knitting questions, and it’s just fun to read. Unfortunately it really didn’t help much with how to choose a ply. It did describe plies, but there were no suggestions for choosing single, double, or more plies for knitting – not that I have found anyway.

Help With Choosing Plied Yarn

Plies are single strands which are twisted together to give strength to the yarn, so the more plies, the stronger. Am I correct? It seems to make sense. I understand what plies are, but not how to choose the number of plies for projects.

Since there is usually such good yarn places online to find information I went to Mason Dixon Knitting and found a wonderful explanation of ply! She even uses the Mrs. Crosby yarn as an example of single ply, and she knits up swatches to compare single, two and three ply yarns. It was a fabulous article.

After reading the explanation, it appears that 3-ply yarn is the best for stitch definition and performance. Sometimes yarn descriptions simply say “plied”, so what then? If yarn is made from three fibers, they would be 3-plied, I assume. I will keep learning.

My Experience With Major Exterior Home Renovations, Part One

Why I Bought a Fixer Upper

Years ago I began this blog when I had moved back to New England. I wasn’t much of a blogger and even I can’t find what I am looking for! While I’ve been trying to fix up my old posts, and link the stories together, I decided it was easier to simply re-do the whole experience and organize my home renovations photos and information in one easy place.

It’s easiest to begin at the beginning. At an age when I should have been close to retirement and starting to really enjoy life I was thrown another curveball.

The Quick Backstory

I was alone with my 13 year old son (he was born very unexpectedly when I was 41) when I had saved enough money for a downpayment to buy a home of my own. I had divorced my husband of nearly 30 years after he lost everything we had (having only lived in NH for a year and a half) and put me in the poorhouse. With bad credit (thanks to him) and a bankruptcy on my credit history, I knew getting a home loan would not be easy. So I saved up to show that I was serious about buying a house.

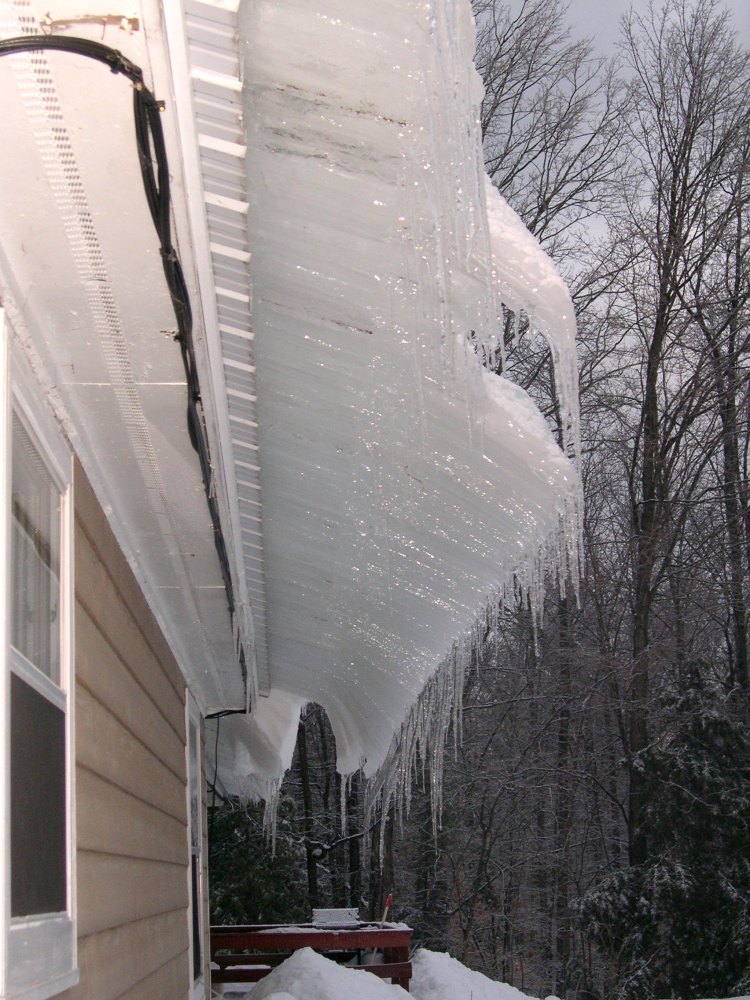
Ice sliding off the metal roof
Thick layer of ice sliding off the metal roof of the duplex

Renting Vs. Buying a House

Before the downfall, I had lived in a home of my own since 1981. Going back to renting was horrible for me. I hated the fact that I had no control over how I lived. The Duplex was quite nice, and my landlady was wonderful, but it was a rental. We got along very well (she lived in the other side of the house), but her house was they way she wanted it. It belonged to her, not me.

She had put on a metal roof which created huge overhangs of ice in winter. It got so bad that I wouldn’t use my side door for fear of being killed if it decided to let go at just the wrong time.

I also hated giving large chunks of money to someone else every month so they could live in their house. I was getting nowhere while renting. And even though the small duplex was nice enough, there was no garage, so I had to clean off my Tahoe for every storm and move it for the snowplow.

The House I Chose to Buy

I couldn’t afford much of a house, so my expectations were low, but I wanted a place of my own. Because renting was so expensive, a mortgage payment would be about the same amount, but I would be building equity and not throwing money away.

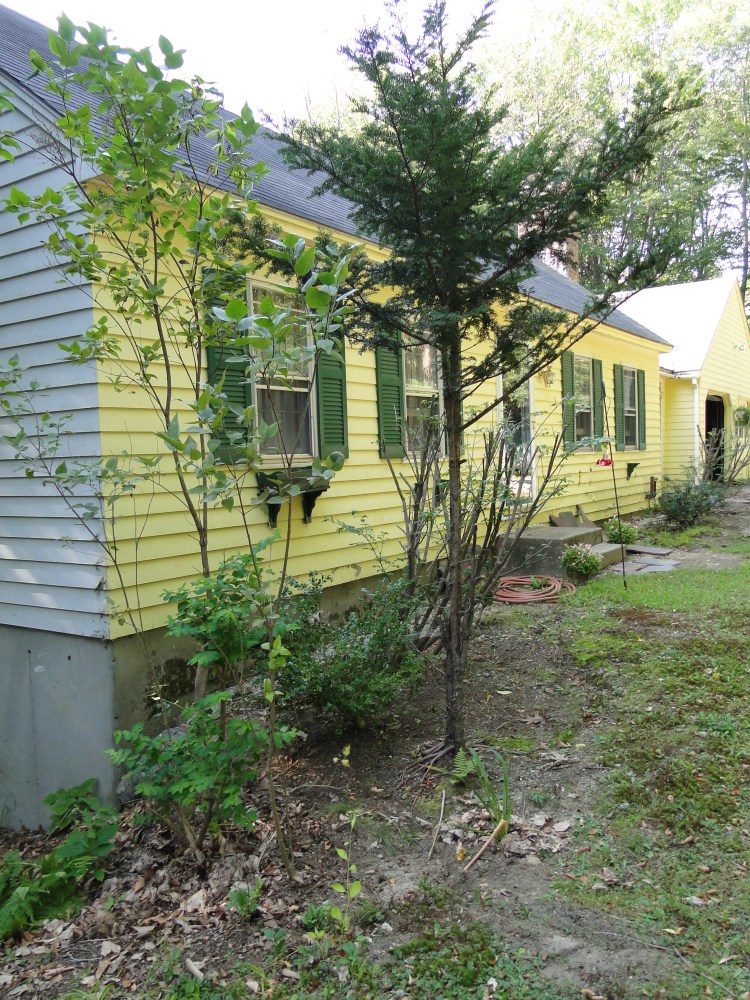
The yellow house was the third one I saw with my Realtor and although it was in desperate need of repairs, I liked it far better. It was in a nice neighborhood in a quaint town and it was in my son’s same school district. From the outside it didn’t look too good.

Then I went inside.

Yellow house in need of repair
The house as it looked before I moved in

My yellow house had obvious problems, some of which can be seen in the photo here. The clapboard siding was buckling where it had obviously stayed very wet for a while. The garage doors were falling apart and there was an ugly ramp at the mud room door. The green window boxes were rotting.

When I first walked in the front door with my Realtor, big ants were all over the living room floor. Despite all these things, as I walked through the house I fell in love. The kitchen had been done over it seemed, and it was huge! The living room was small, but cozy and had a fireplace where I could install a woodstove.

glass slider with caution tape
No access to the backyard because the steps are missing

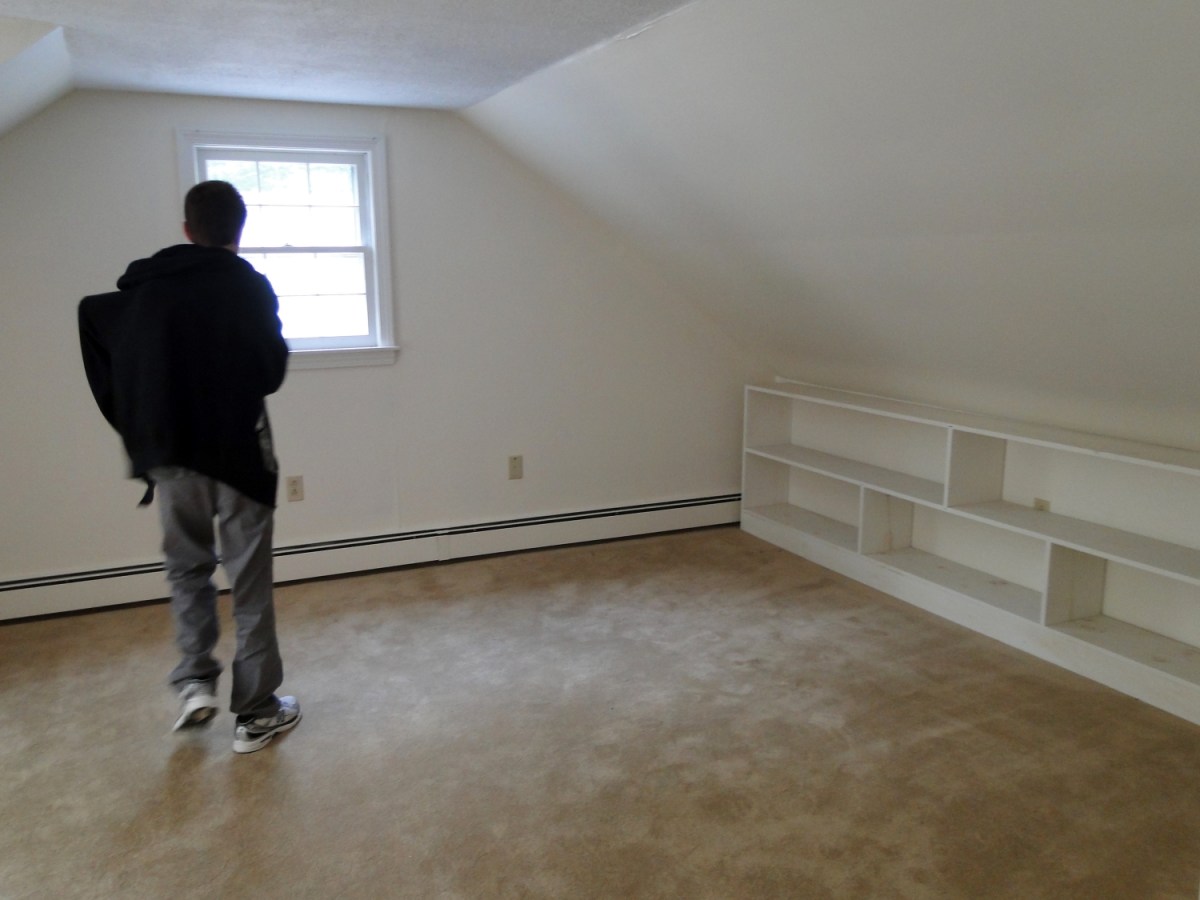
The two rooms upstairs were very large with a good size bathroom upstairs as well. With two more rooms downstairs, I chose one for my bedroom and the other for my home office. It was perfect! In fact this house checked off all my boxes – two bathrooms (with windows!), a garage (two car!), a mud room, big basement, home office, and beautiful kitchen. I saw great possibilities here. I bought it.

Read Part Two

Beginning My House Renovations, Part Two

Shortly after I moved into the yellow house (June 2011) I began searching for someone to fix it for me. I was new to the area, and new to the state (see my first post on this subject if you haven’t already read it). I knew almost no one. I took a chance on a young man named Brandon who had a fairly new siding company. He said he would also put in new windows. He was easy to work with and ended up doing a nice job.

Replacing the Siding

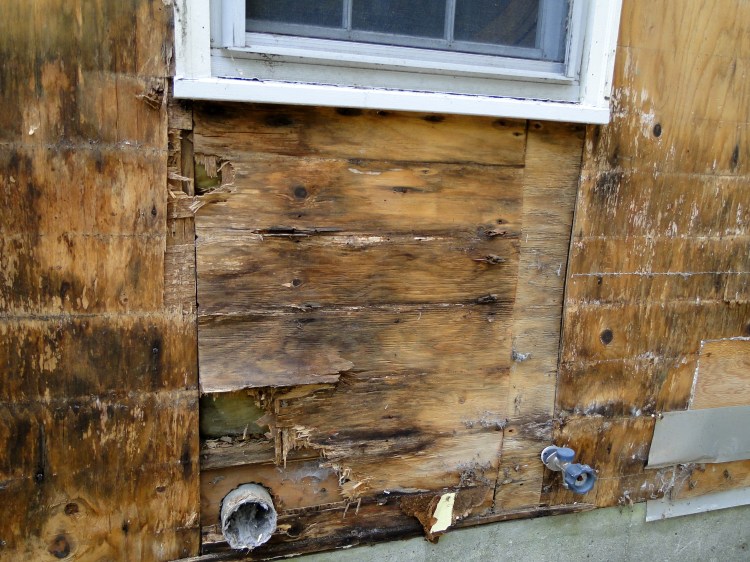
Brandon began by removing the old clapboard siding on the front of the house which had been absorbing water for a while. Beneath it the wood was rotting and had to be replaced.

My house with the old clapboard siding removed to show rotted wood.
My house with the old clapboard siding removed
Rotting wood on the front of the house beneath one of the old windows.
Old rotted wood on the outside of the house

In the photo below you can see how the siding was bad and I had to cover the cement steps with plastic because there was a leak that went down into the basement when it rained. When Brandon replaced the siding, he addressed and fixed this problem.

Damaged front door
Unusable front door – covered with tarp when it rains

Working on The Garage

While this scaffolding was up, we had a freak, early season snowstorm! It was Halloween and in New Hampshire where I lived we got tons of snow. Further south where Brandon lived they got lots of ice. Because his power was out and my yard was buried, the renovations were put on hold.

scaffolding
Scaffolding for siding the garage area

Below is a photo of that freak snowstorm at Halloween. Many trees had still not lost their leaves at the end of October like this oak in my front yard.

fall snow storm
October Snowfall 2011

The only good thing about getting snow early in the season is that it melts away quickly.

At some point while Brandon was working on siding the front of the house I hired some guys to replace my garage doors. Elite Doors was recommended to me by a contractor who was working on my little deck at the time. They came right out and when I had a problem with something later on (can’t remember what), and fixed it at no charge. They really were very nice and capable guys.

As you can see in the photo below there were obvious signs that the previous owners had tried to keep water out of the garage by building a little ramp out of some black stuff. I also had water problems in winter, but that is another story.

Old garage doors
The old garage doors and old siding

Brandon added a vent to the top of the garage for heat to escape. Once the siding was done and the new doors on the place was looking good!

New garage doors and siding
New garage doors and new siding done!

Front of House, Before and After

Once the work was done, I had new siding on the front and sides of the house. Four widows on the front were replaced with double-hung, easy-to-clean windows and new screens. White shutters took the place of the green. (That yellow and green combo was carried over into the upstairs bathroom.)

My house as it looked before the replacement siding, windows and shutters.
Front of house before renovations
New siding, windows and shutters
New siding, windows and shutters complete