Understanding Knitting Pattern Theft and Its Impacts

Pay for your knitting patterns. Never accept a copy, or you are actually breaking the law. Designers work hard to create those awesome patterns for us. It’s only a few dollars, but designers need to earn from their creations to keep their small business afloat.

Ever since I knit a little scarf using Pascuali yarn, I have added this company to one of my favorites. The company uses sustainable practices to create the yarn they sell. I have opted in to receive their newsletter. A recent article entitled, “Sharing Isn’t Always Okay” got my attention. It is about the protection of intellectual property, such as knitting patterns, and how patterns should not be shared. Please click the link and read the page if you are wondering what it’s all about.

I was happy to read the article by Pascuali, and can absolutely sympathize with knitwear designers who’ve lost money due to “sharing” of patterns. Getting the word out will be helpful for those who never knew sharing patterns was not a good thing. Knitting patterns are relatively cheap for all the work that usually goes into them. Give the pattern writers the money they deserve, and send knitter friends to the purchase page. It’s only right.

My Own Experience With Copying

I know all about this because I also do online design work. I do not sell knitting patterns, but I sell my graphic designs. I work for a print-on-demand company called Zazzle that uses my designs to sell on products. I make a small royalty for the designs. I’ve been doing this, and mostly making a pretty good living from it, since 2008.

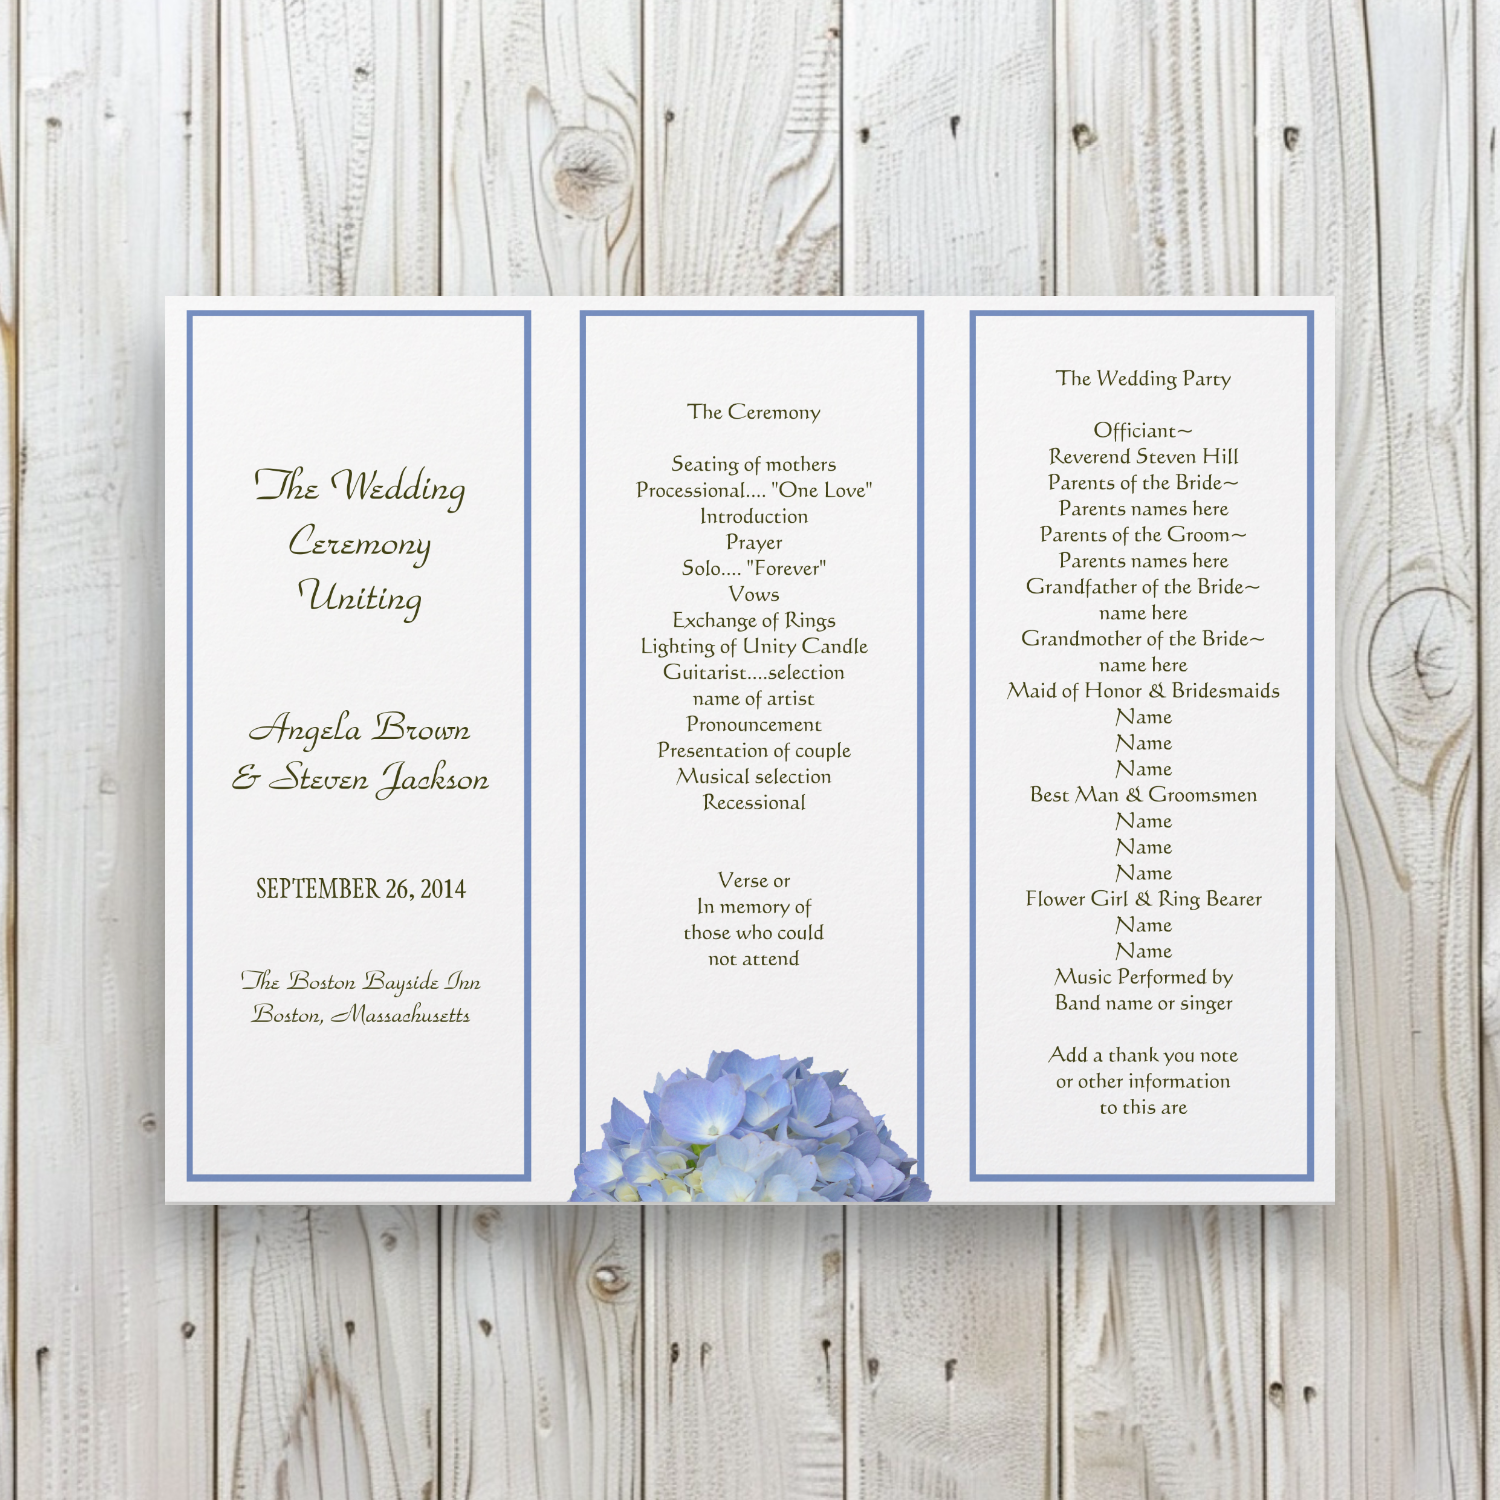
Whenever I see a sale, in my shop, of one invitation, or one wedding program (see below) I know it will be copied. Who buys one of these things? In all fairness, a bride may want to see the invitation in person before ordering more, but I seriously have not seen someone come back and buy hundreds after buying one. The buyer wants a deal. They will copy it and distribute it instead of paying for the required amount.

Zazzle design program thievery
This program was a recent single item sale. Who would fill out all the information and only distribute one program at their wedding? This will surely be copied by the customer.

Even though I can now offer my designs as instant downloads, for one price, to have as many as needed, I still see single invitations being sold. Either people don’t understand that they are doing something illegal, or they don’t care.

It annoys me. Just like I’m sure it annoys knitting pattern writers. We spend lots of time and effort to create something unique and sellable. Whenever that “thing” is shared, copied, and handed out willy nilly, the designer loses money. If you do this, you are stealing. A creation (pattern / design / and much more) is protected as intellectual property.

A while ago I had pillow designs stolen from my Zazzle online store. Someone was taking screenshots and then using the images to sell their own pillows at Amazon. The designs were mine, and they had no right to do that. I used up a lot of valuable time creating take-down notices at Amazon. Sometimes I had to do that over and over before the pillows were gone.

Really, if you work online, and share things for sale, you will become familiar (unfortunately) with thievery.

Sometimes readers of this blog will ask me for a pattern. I always send them to the designer’s page if possible. I’m also skeptical of some “free patterns” and especially those that disappear. Were they actually a rip off of a pattern designer and they got caught? Maybe, and maybe not. I am never going to share a purchased pattern. Buy it for yourself. I write this blog to help knitters decide which patterns they might like to try.

When shopping online we all need to be careful. Making copies takes income away from the designer who is counting on it to keep their small business afloat. Think about this when you pay $6.00 for your next well-written, size-inclusive, and easy to follow, knitting pattern. Someone worked hard to create that for you!

Thank you for reading.

More yarn stories:

Something went wrong. Please refresh the page and/or try again.

Yarn Selections From Harrisville Designs For Two Sweaters

More yarn has been added to my stash. I do have patterns in mind for it, but of course buying is quicker than knitting.

After I finished knitting the latest Warm Up sweater, I knew I wanted to have another. The Warm Up is an easy pattern and is perfect for worsted weight yarn. I have a particular affinity for yarn that comes from a place I love.

Peace Fleece yarn now comes pre-washed and it is squishy and soft. I used three colors to knit my Warm Up #2. The red tones were something new for me. Usually I stick to more earthy and neutral colors.

I saw this yarn in person when I visited Harrisville Designs during a trip back to New Hampshire. I knew I wanted to knit more sweaters using it.

Harrisville Designs is a yarn company located in an old mill in Harrisville, New Hampshire. I lived near enough to shop there, but at the time I knew nothing about this place. I wasn’t much of a knitter back then. I couldn’t wait to stop in when I was back in the area for a visit. But I need to buy the yarn online so I don’t get to see the colors in person.

I don’t remember what happened, but as soon as I saw the Siberian Midnight colorway, I wanted it. The yarn is black with white specks throughout. I believed it would knit up into a pretty pullover.

Of course the yarn, in the Siberian Midnight colorway, was hard to find. It seemed to be sold out everywhere. Then I found it for sale at Firefly Fibers and bought enough for a new sweater project. They also had some Daylights yarn for sale, and I bought enough of that for a different sweater. I chose the colorway Chirp. I’m thinking I will try to knit a cable sweater with the lighter color.

Peace Fleece and Daylights yarn
Peace Fleece – worsted and Daylights -DK

I now have two new sweater patterns in my queue. I just need to find a cable pattern I think I can handle.

Keep Reading

How to Add the Tassel to The Doublemassa Hat

How to make a tassel for a knitted hat. Finding a way to attach the tassel to a lined hat with no underside access.

Making a tassel is not difficult, and I was looking forward to making the one for my Doublemassa. But there was a problem. How is a tassel added to this type of knitting project?

I have now assembled the tassel (and it’s far from perfect looking). But, my big problem is how to add it to this hat. Ordinarily, when finishing up a hat, you have an underneath, or wrong side, where the yarns are pulled through and tied off under the crown. The Doublemassa is knit in a way that the underneath can’t be accessed. It is completely closed up. The pattern is no help.

Tassel Making Video

It was hard to envision tassel making in the Hat’s On book where the Doublemassa pattern is found. This video on YouTube was very helpful. However, I still must figure out how to add the tassel to my finished hat.

One of the Doublemassa knitters mentioned opening up the top of the hat and making a big knot to tuck through. Then, she closed up the top again. I ended up doing this, but a little differently.
My Tassel

I wrapped both yarn colors 60 times around a six inch cardboard. I tied two strands of yarn around the top and then braided the 4 strands. I wish I’d used more strands for this.

Next I wrapped the blue yarn around the tassel.

I do not have a bodkin (Amazon paid link), which is a special flat “needle” which is used by the woman in the video. My larger sized embroidery needle worked fine. This is used to wrap the tassel and tuck the yarn down inside.

After my washed hat was dried, I noticed that two stitches at the very top were loose and not bound off! Somehow they did not unravel (wool is so awesome). It left a small opening.

Adding the tassel was a challenge, but I simply did as one of the other knitters mentioned. I made a big knot and pushed it through the top. My dropped stitches mistake turned out to be the thing that saved me. Then I used the two yarns, one blue and one off-white, to close up the top tightly. I wove the ends down through the hat and cut the yarn.

A Better Way to Attach The Tassel

Now that I have done it, I feel lucky that it worked out. And I know that there is a better way to achieve this. The pattern simply says make a tassel and attach it – which is very unhelpful.
My advice is this: When knitting the last rounds of the crown, do NOT close up the top of the hat. Leave a tail and tuck one tail down inside the hat. Put the open stitches onto plastic holders, or waste yarn, for washing.

Make the tassel and wash the hat.

Once the hat is washed and dried, open the top and tuck the knotted end of the tassel braid down into the hat. Use the remaining yarn tail to close up the top.

Alternatives

A few of the Doublemassa hat knitters decided to begin knitting the hat with the colorwork. By using a provisional cast on, the lining of the hat could be knit last. This would do away with the need to begin the hat with a tiny disappearing loop cast on, and magic loop knitting.

It also makes adding the tassel easier. Then, the tassel would be washed along with the hat. I’m not sure how that would work. It could take a while for a tassel to dry.

Have you knit this hat, or one like it? Do you have ideas about adding the tassel?

More knitting stories…

Getting There on the Doublemassa Knitting Project

An update on my latest hat knitting project. This one is a very long hat called the Doublemassa.

The dark blue yarn skein is just about finished up. This morning was quite chilly for a March morning in Florida. I was bundled up in my newest Warm Up sweater, hat and mitts while I checked on the garden and filled the bird feeders. I decided to show my progress on the Doublemassa hat.

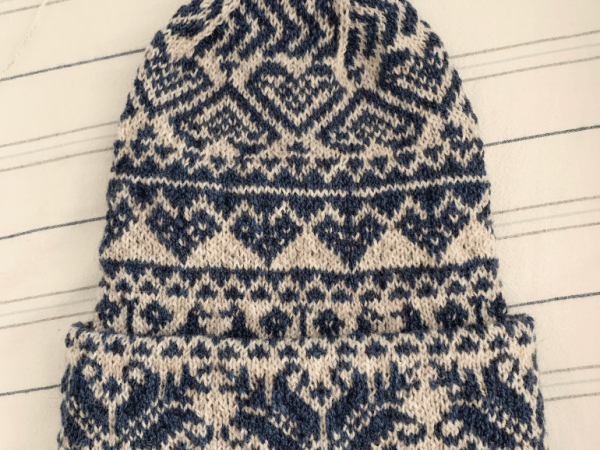
Fair Isle tube hat knitting in navy blue and off-white.

As you can see this is a very long hat! It looks huge, and I am hoping it will fit properly.

The colorwork designs are pretty cool, and I just finished up the birds rows. When looking at this hat finished, on Ravelry, the brim will fold up to either the birds or the hearts (which I have not even begun yet)!

Here is how the hat will fold: From the top of those snowflakes down, everything is tucked up inside. Then the snowflake brim part will be folded out and up. The snowflakes will cover most of those two colorwork sections above the snowflakes. This creates 4 layers of fabric at the brim. I’m not good at visualizing this and can’t wait to actually do it.

Even though this hat is already quite long, I have many rows of colorwork left to knit. It’s been a very fun pattern, as I love doing Fair Isle. The Rauma yarn is quite awesome as well.

As I knit more, I will be attaching a new skein of blue, and will probably need more of the natural color eventually.

If you have knit the Musselburgh hat, the Doublemassa hat style is very similar. It is more involved because of all the colorwork, but begins at one end and makes a tube to the other end. The Musselburgh can be worn inside out, as if it were two hats, but this one is worn on one side only. It will have a tassel too!


Let’s Keep Knitting!