Today is Easter and my son is grilling ribs. I made southern style potato salad and we will eat outside later. It’s hot here in Florida so I have the AC on.
My other children are spending the day with their better half’s family. Did I say that right? They are in New Hampshire and Kentucky. Anyway, like every other holiday, nothing special happens here. We eat and drink and relax.
Years ago the kids and I would dye eggs using food coloring, or one of the popular store bought ways to dye eggs. It was fun, and we made memories. Funny, but I don’t remember their father being a part of any of it.
When my kids were small I would hide eggs (for the Easter Bunny) and put little notes inside which would have clues as to where to find the next egg. It was a treasure hunt, which took a lot of planning and organizing. At the end of the hunt there would be a big Easter basket which I had put together for each child. Usually there would be candy and a wrapped, special gift.
One year when my youngest son was small, he and my grown daughter searched for eggs in the woods near our rental house. Usually I didn’t put eggs outside because of animals, but this place was in the woods and it was perfect for a good-weather egg-hunt. I wrote down the number of plastic eggs I hid, and I think we came up one short although they looked and looked, and I couldn’t remember all the spots, so it may still be there. It could contain a dollar bill or maybe a quarter!
When I was a kid, my father used to do the same type of treasure hunt notes thing for me and my sister. None of my kids have kids of their own, but if they ever do, they may carry on the tradition.
The little Playdate cardigan by Tin Can Knits is a wonderful pattern with excellent directions that will broaden a beginner knitter’s horizons!
The Playdate Cardigan pattern comes from Tin Can Knits. I bought and printed out the pattern a few days ago and have since been working my way through this cute sweater. The pattern has size adjustments from 0-3 months to 4XL…. so you can knit it for just about anyone.
I chose to knit the 6-12 months size. I’m using a 16-inch circular and 5 double-points in the same size. Another smaller needle (with same size dpn’s) is needed for the ribbing. My yarn is Emma’s Yarn, fingering weight, Super Silky in “Malibu”. I would not have chosen silky yarn if I was buying a skein to knit a sweater, but I wanted to use stash yarn for this first attempt. I would choose a favorite baby sweater yarn next time.
Creating Pockets
This is a bottom up pattern, but it begins with pocket sections. As I read through the pattern, the pockets were confusing to me. I’ve never done pockets. HINT: To knit a 2-color sweater begin the ribbing with the contrast color. But the pre-made pocket sections will be behind the work, so the main color can be used.
First thing to do was to knit two little rectangles which would become part of the pockets. I almost decided not to add pockets just in case I couldn’t figure it out, but I’m glad I used them. Because first, they are easy to add, and second, they make the sweater look cute!
Getting started on “Playdate” baby sweater
Once the bottom of the sweater is begun, the little rectangles will be added to the long needles and create the backing. The top stitches will be knit into the regular line of knitting.
Placing stitches of pocket onto long needles
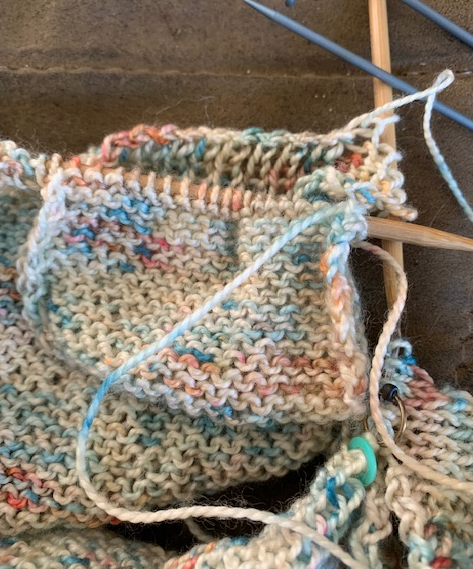
The K1P1 ribbing for the top front of the pockets is created first, then bound off. See the back of the pocket above and the front below. The little rectangular backs will later need to be sewn down to actually create the pocket.
Ribbed edge of pocket with backing added to needles
The Back and Shoulders
Once the front is knit to length, the back stitches and one shoulder will go on hold. I used some metal stitch-holders (they were my grandmothers) which work well for holding small amounts of stitches. I always have trouble picking up my stitches when I hold them using yarn. From here, each shoulder area will be knit, along with the back – separately.
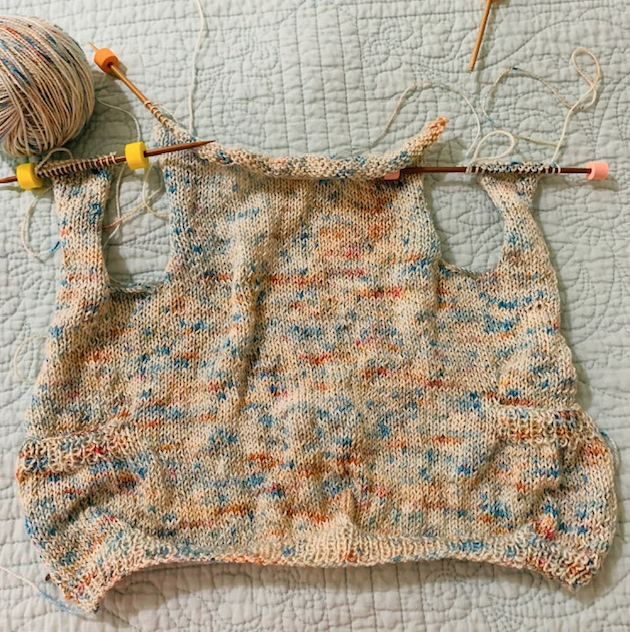
Shoulder and back stitches on hold while knitting other shoulder stitches
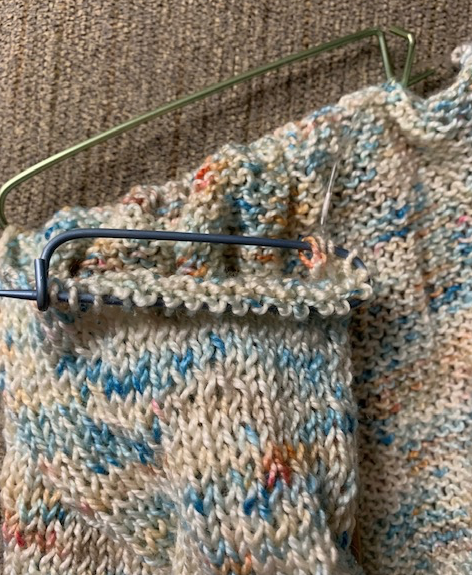
I used DPNs to hold the shoulder stitches because my sweater is so small. The pattern directions say to work the stitches, ending with a RS row and then “break the yarn leaving a long tail”. I guess they figure you will know enough to keep those stitches on hold, but you need an extra needle for that (or yarn). So it helps to have double-points handy with good stitch stoppers(Mine are by Cocoknits and they work great). The same thing happens for the neck and I left my stitches on the main circular needle for that longer section of knitting. I used 2 double-points for straight knitting the first shoulder section.
Shoulder parts of Playdate on hold using three needles
Once the back and shoulders are the correct length, they will be stitched together. I tried 2 different methods here, and decided I liked the Kitchener stitch – as shown in slow motion by Very Pink Knits – which came out pretty smooth. I sat in front of the computer while I did it so I could watch her video.
Ready to connect at shoulder seams
Kitchener stitch joining back and front at shoulder
Shoulder seem, wrong side of kitchener
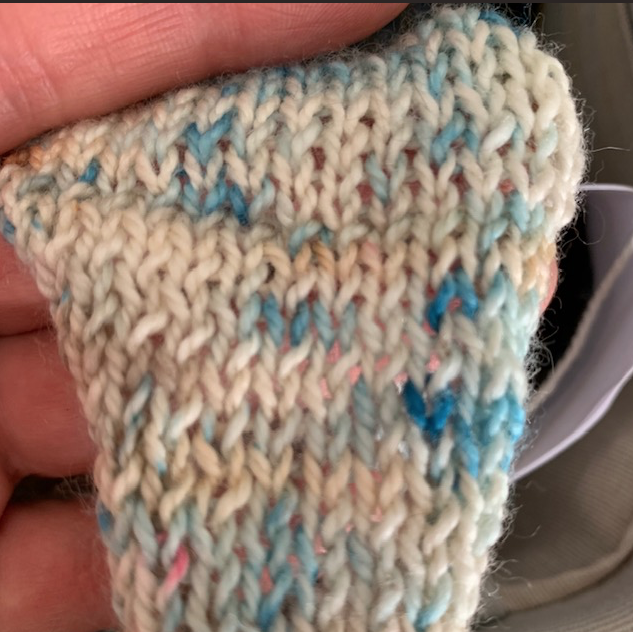
All the edges are curling up badly, which is par for the course when knitting stockinette. I had the same problem on the Fine Sand sweater, but after washing and blocking it looked great.
My front and back knitted sections are now attached at the shoulders
On To The Sleeves
As I went around the armholes picking up stitches, I picked up a few more than was suggested just so there would be no holes. On the next couple of rows I decreased back to the correct number. I was able to knit one sleeve within a few hours time. I think I like making this little sweater. It’s finishing up fast and looking pretty cute!
Getting there!
A long, circular #3 needle was used to pick up the required stitches around the sweater front opening. A #3 was suggested for the bottom ribbing and sleeve cuffs, but I used a #4. The rest was knit on a #5. I didn’t check gauge because the end size did not matter to me.
Knitting a Button Band and Doing Buttons
This is my first attempt at doing a button band around a cardigan. It means placing the buttonholes evenly and making each hole the correct size for a button. Thanks so much to Tin Can Knits and their excellent page all about knitting a button band. I will definitely be referencing it during this phase of knitting. My buttons are on order from an Etsy shop (Ginger Mint Collection) because I have no place local (that I know of) to buy buttons.
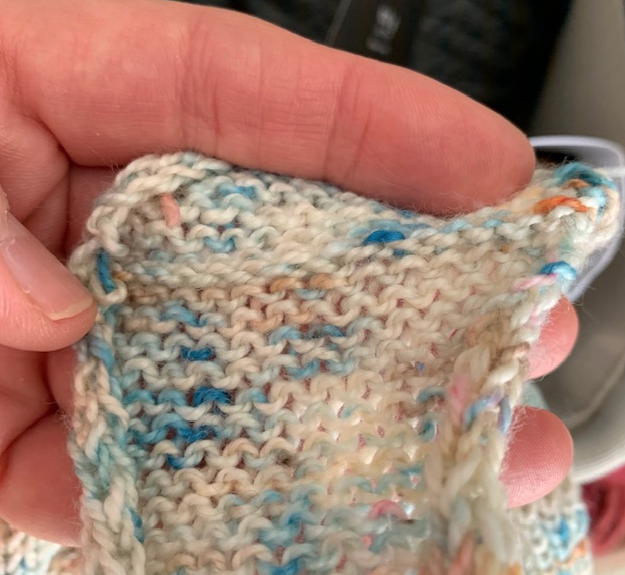
In the meantime, I decided to knit a little swatch and try out a couple of buttonhole sizes. Once my buttons come from Australia I can see which of the sizes to knit on this cardigan. I’m not sure which set of buttons I will use, but hopefully one of the button designs will match well.
I’ll keep this swatch for reference and have added a tag with info as a reminder. I did the 2-stitch buttonholes because a good size button will fit through.
Measuring buttons
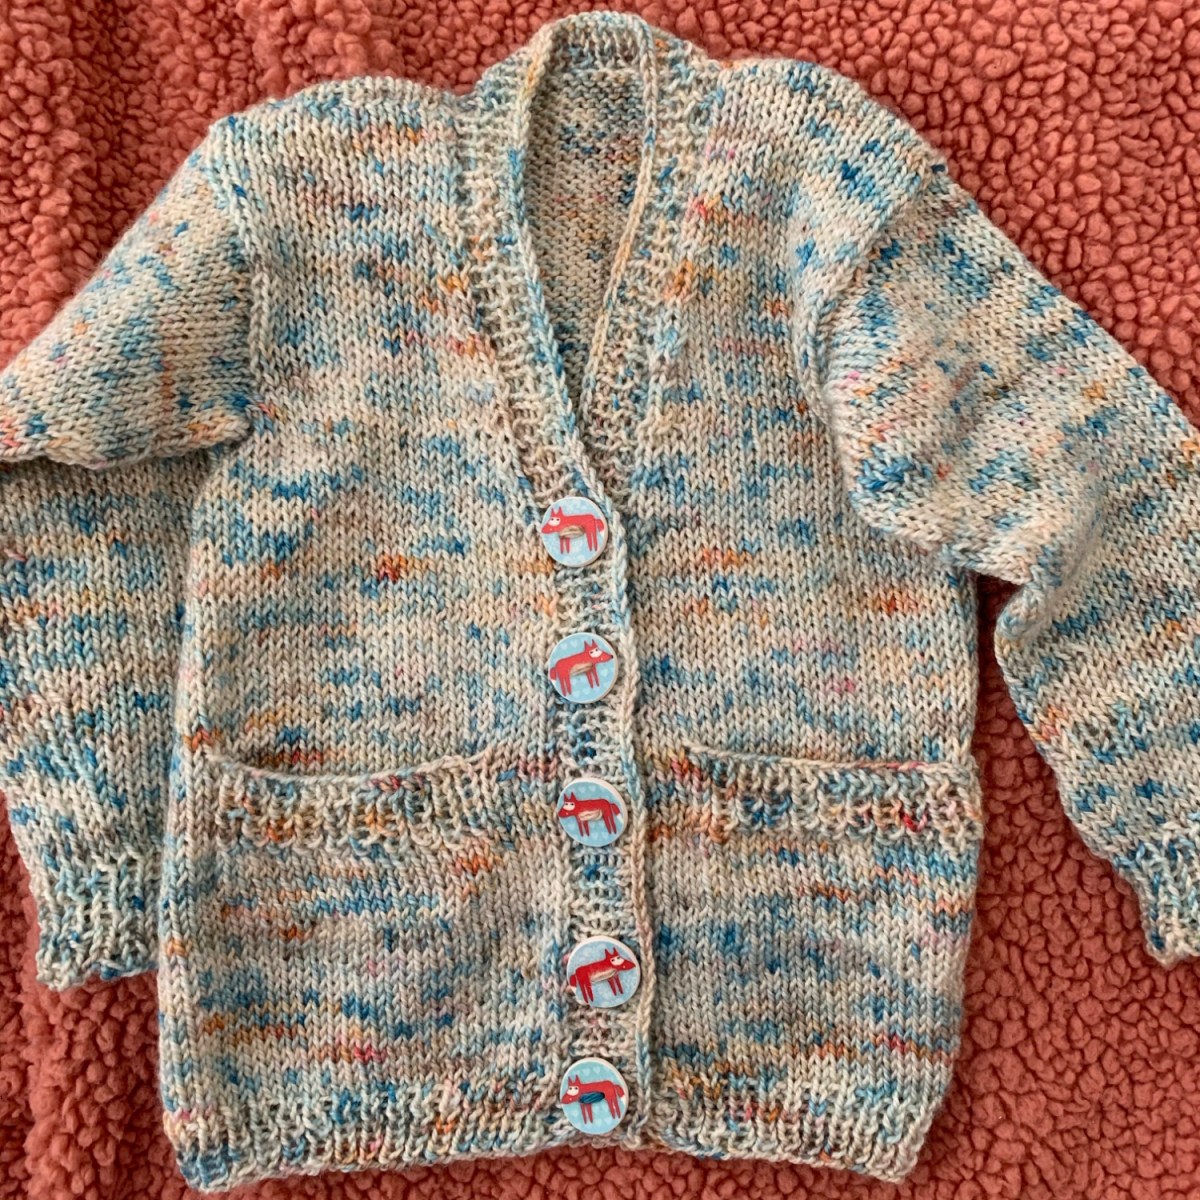
Until my buttons come, and I’m sure they will fit the size holes I make, this sweater will be on hold…. changed my mind. I decided to add 5 buttonholes and continue to finish the band. Today I washed the sweater and when the buttons arrive I will pick the ones I like and add them. *Update: chose the fox buttons!
My experience knitting the Playdate cardiganFox buttons on the Playdate cardigan
Finished! My Thoughts on Knitting the Playdate
This was a fun sweater to knit and I got it done quickly. Here is a link to the pattern once again: Playdate by Tin Can Knits. I learned to make buttonholes and pockets, so that was nice. It’s good to learn new things. I would love to knit this one again – and in October / November 2022 I am, using blue yarn this time.
Tin Can Knits has a book out called Strange Brew with loads of options for knitting pullovers and maybe other things. I just found it for sale at Jimmy Beans Wool and ordered a copy.
When beginning to knit brioche, choose a simple pattern and get some practice. This post has video tutorials and easy pattern links for knitters who want…
Knitting a summer top pattern using some unique cotton yarn called Pascuali Suave. It is surprisingly lovely for cotton, which you would never guess it is.
While writing my page for the Wizzley contest: Things to Do With Kids in New Hampshire I discovered some places right here in my state that I had never heard of, like Stand Up Paddleboarding on the Saco River. Never heard of it, and I’m sure I am not coordinated enough to try it, but what fun!
I no longer have little kids (kinda happy about that) but I remember coming up to New Hampshire from Massachusetts for vacations. We had a little travel trailer and stayed at Newfound Lake camping with friends. We also hit Six Gun City, Storyland, and Polar Caves at some point. I did not include those places in my article. I was more interested in finding great outdoor places to visit since this state is very nature oriented and beautiful. But I included a few science centers as well.
I also didn’t want to forget about the older kids and teens who are harder to please when it comes to vacationing.
This is the first time I’ve ever lived in a house with a small backyard. Growing up my yard was huge. Next to my yard was a big field and beyond my front yard, at the bottom of the hill, was a big garden that belonged to my grandparents. My backyard was bordered by stone walls and beyond them was forest and eventually Mill Hill.
Mill Hill was where, as kids, we went to hike, sled, and goof around. It was owned by someone – don’t know who, but they had cows that would graze in the far pastures that we could see from the top of the largest hill.
Mill Hill was unusual because it was two hills that looked like big roller coaster hills. After climbing through the barbed wire fence at the “valley” part of the hills, we had to choose which hill to run up first. If there was a group of us, some kids would go one way and some the other. I usually chose the right hill because it was smaller with less to see and saved the other, taller one, for last.
The right hill sloped steeply down to the road where the mill was. We could also see the river that wound around under the bridge. That hill also held a couple of wells. They were just covers elevated off the ground a bit and my father had warned us always to stay away from them.
Next, I’d run down the hill and up the other side. Usually there was water (or ice in winter) at the bottom in the valley area so I was careful to avoid that. Then the climb up the left hill to the top where a grand view awaited. The far side of that hill had a long, gentler slope that was dotted with rocks and a few trees. One of the trees was a chestnut tree and once we found an animal trap under it!
I loved to visit Mill Hill. It was freedom to do what I wanted and sometimes I’d go there alone with my dog just to enjoy the peace and quiet and dream about my future and long to grow up. I also dreamed of bringing my own kids up there to see the place that had meant so much to me as a child.
But, my parents divorced and the house was sold so there was no homestead to go back to and I don’t know what Mill Hill looks like today. I’m sure I don’t want to know.
My own backyard now is very tiny with a drop off into the woods behind. I feel sorry for kids growing up these days without fields to run through, and hills to climb in their own backyards. Even if they are lucky enough to live in a spacious place, they no doubt spend too much of their time indoors.
I’m older now and a small backyard to take care of sounds very manageable, but a part of me wishes I could look outback past a large expanse of grass and view the stone wall with woods beyond, beckoning me to take a walk.