Learn to Knit, Free Projects, Needles, Yarn and How To Begin

If you are at home more these days thanks to the Coronavirus, you may need to find a hobby to stay busy. How about knitting? Knitting is not just for Grannies! There is much to learn, which means your brain can be challenged for years learning new knitting techniques.

Even if you don’t have someone to teach you, YouTube videos can be a huge help. Getting started is the first step, where practicing on easy projects leads to bigger and better knits.

I’ve written this page with the beginner knitter in mind, with advice for yarn, needles and free project links. The best projects to begin with when learning to knit are simple back and forth projects. You knit one row, turn the needles and knit the next row – or purl.

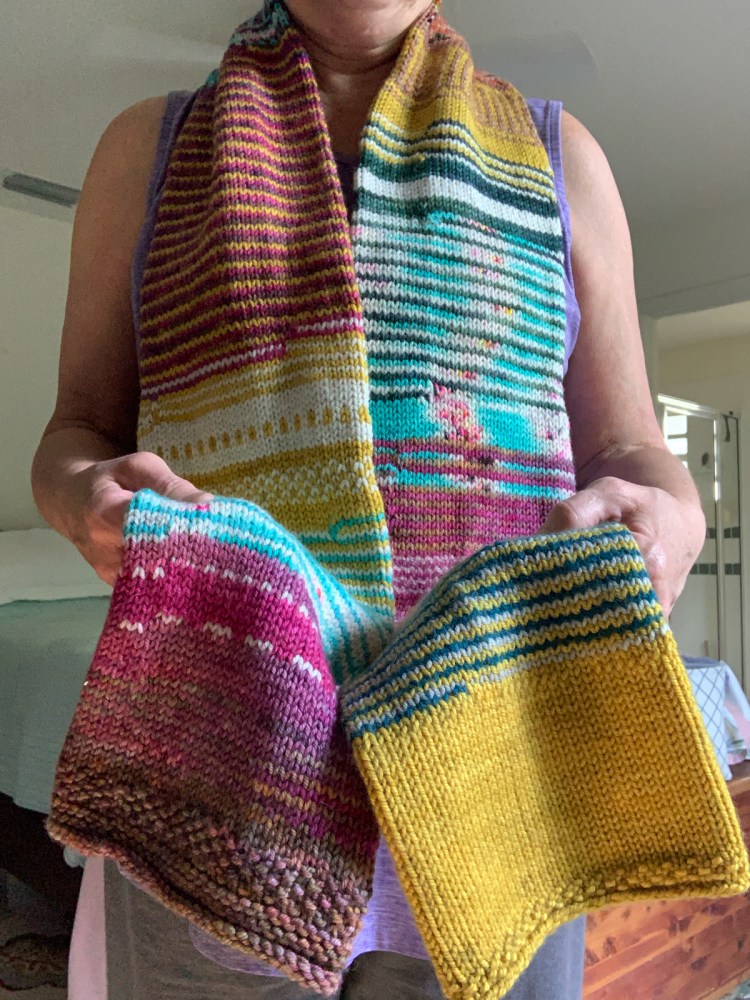
When I lived in New Hampshire I knit scarves. I would cast-on and just go, trying out various stitches along the way to see what happened. I would cast off when the scarf was long enough. But a better idea is to knit smaller projects that are useful, like cloths for the kitchen and bathroom.

Cotton dishcloths hand-knit
Hand-knit cloths hold up well.

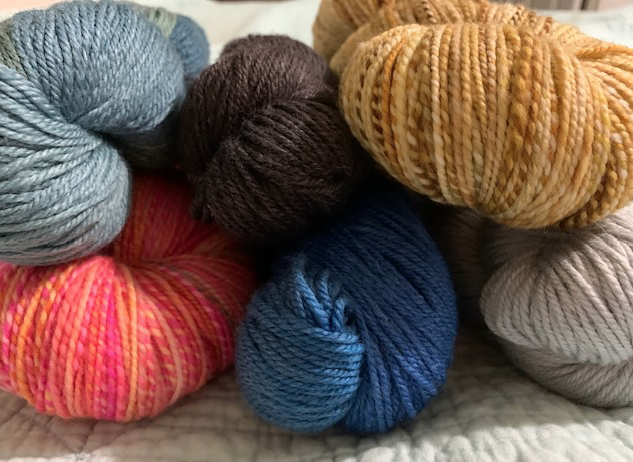
Let’s begin with an easy project, such as one of the dishcloths or facecloths below, which are knit with one color – or a variegated color. Whenever you knit something that will be used to wash with, choose a washable cotton yarn. Cotton yarn will be absorbent and easy to care for, going into the washer and dryer.

Here are some ideas for beginner projects with FREE patterns you can download at Ravelry. Join Ravelry (it’s free) if you plan to do more knitting because it can be a wonderful resource for patterns and help. You don’t have to be a member to get these patterns.

They use little yarn, so are inexpensive to make and in the end, you have a useful item. If it has some mistakes, who cares? This is a great way to practice without worrying about boo-boos.

  • Heart Face Scrubby – knits and purls create a “heart” on this project.
  • Seed Stitch Washcloth – knits and purls create a nubby fabric. personally, I love this stitch and it’s great practice for doing both of the most basic stitches in knitting.
  • Your Own Design: Knit a few rows and purl a row – or knit all rows. Make something up until it becomes the size you want. I have links below for help with CASTING ON and BINDING OFF.

Buying Cotton Yarn

  • Lily’s Sugar ‘n Cream Cotton Yarn – comes as single, affordable skeins, in sets, or on cones. They offer a huge selection of solid and variegated colors. Search Amazon (they have all types) and order online, or go to a local craft store such as Michaels, Joannes, or Walmart. This yarn is easy to find.
  • Key West Karribean Kotten Yarn – The blue and orange striped dish cloth in my photo below is made with this yarn. The colors are super bright and don’t seem to fade as quickly as the other cotton yarn. It does cost more, but I love the quality. This cotton yarn is perfect for making kitchen towel gifts!
Key West Karribean Kotten yarn in bright orange and blue
Karribean Kotten – comes in tropical colors

Needles, Types and Sizes

Straight needles are fine to use for little knitting projects. I had some of my grandmothers old straight needles and I used them when I began. But then I discovered the versatility of circular needles, which is what I mostly use these days.

Circular needles can be used like straight ones. Just pretend they are not connected! Turn the work each time you begin a new row. Once you begin to knit projects in the round, circular needles are needed and you will already have them. So my advice (if you have NO needles) is to buy a 16 inch (length), needle size 5 to 7 US to use to knit your washcloths. Chiaogoo Red are favorites of mine. Later on you can use that same needle to knit hats – most hats (unless they are for babies) are made using 16 inch needles.

Knitting needles come in various lengths as well as needle sizes. Tiny needles such as 0 – 3 or 4 US are used to knit tightly, such as for socks and mittens and / or when using lace and fingering weight yarn. Larger sizes will be used for heavier yarn weights and for knitting sweaters, hats, and bulky items.

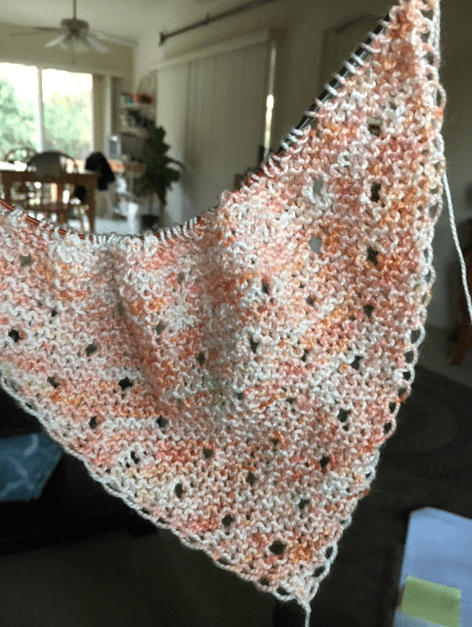
Dewdrop shawl knitting
Beginning the Dewdrops shawl pattern

The Dewdrops shawl above is knit on a long, circular needle. I began knitting at the very bottom point, with only a few stitches. As I went on, more stitches were added and I needed that longer needle. Straight needles are too short to hold that many stitches.

How to Cast-On and Bind-Off

Once you have found or purchased your needles and cotton yarn, this is how you get started.

A simple cast on begins with a slip knot on the left hand needle. Then you will begin adding stitches – as many as the pattern calls for. That is your cast-on number and everything you make requires some type of cast-on. You will “cast on” as many stitches as are needed to begin knitting. The project will always become bigger than your cast on looks!

The video links below are some good ones I found. If you want to search for other cast-ons at YouTube, be my guest. There are many.

Basic Knitted Cast-On – Getting Started With a Knitting Project

There are many ways to cast-on, but all you need is the basics when beginning. I now use the Long-tail cast on, or the Norwegian Cast-on (aka German Twisted cast-on) because it’s faster, but for a long time I did this simple, basic cast-on. The others are more complicated, but you may like them.

From there, you begin knitting the pattern, or your rows of knitting as you choose if you are not following a pattern. When you finish all your rows, you must bind-off to finish the project.

Purl Soho’s Basic Bind Off

I like Purl Soho’s videos because they get right to the point. Also the teacher generally uses larger yarn and needles that make it easier to see what’s going on. Purl Soho also has many FREE patterns on their site, where they also sell pretty yarn – including cotton.

Once you know how to begin a knitting project, you either make up your own pattern / stitches as you go, or follow a pattern. Below I list links to videos showing the two basic stitches needed to create many patterns, the knit and purl stitches. You can do a lot with just these two stitches.

How to Do the Basic Knit Stitch

Anytime a pattern calls for knitting, this is the stitch you do. It’s the base for all knitting projects. These show English forms of knitting where the working yarn is held in the right hand.

How to Do the Purl Stitch

Many knitters dislike doing the purl stitch, but it’s not difficult and you will need to do it a lot if you choose to create anything with the “seed stitch” pattern. Purl stitches add texture as well. You can knit one row and purl the next to make the stockinette stitch. Doing this will create a smooth fabric.

Fun With the Knit and Purl

It is easiest to knit a few rows right after the cast on. From there, try some purls. If you alternate a row of knits and a row of purls, you will end up with stockinette.

In my little cloth samples below, I played around with these two stitches. I suggest you search YouTube to find beginner videos. Many knitting sites have loads of advertisement clutter to wade through to get to real information.

My Own Beginner Samples

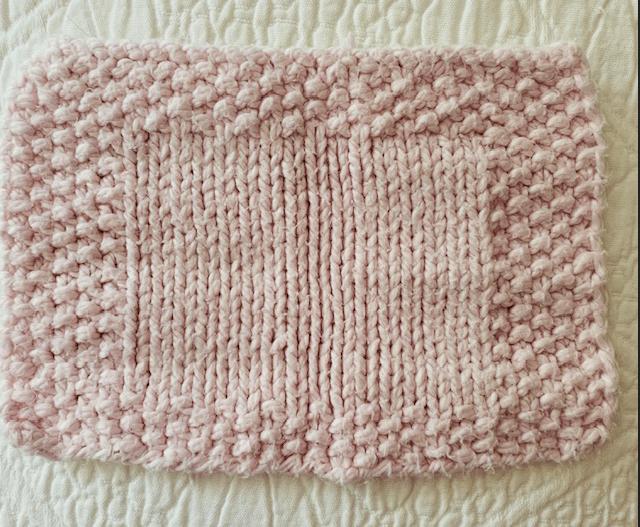
Here are a few of my knitting samples. They are not beautiful, but they gave me practice. To leave a center “flat” area, knit a few rows back and forth – this means to do all knit stitches, for a few rows (4 or 5). On the next row, knit 5 and purl until 5 stitches remain, then knit those five. This way you are making a textured border with center flat (stockinette) stitches.

pink hand-knit facecloth
Center stockinette

On the white cloth I did some alternating knits and purls along the bottom and top borders. In the center I did seed stitch, also called moss stitch. Seed stitch is simply K1, P1 – switch off continuously across each row, but alternate row by row. First center row: K1, P1 (you need an even amount of stitches.) Second row: P1, K1 – your purls will be over the knits and knits will be done over the purls. It creates a pretty little texture.

center seed stitch
Seed stitch or moss stitch

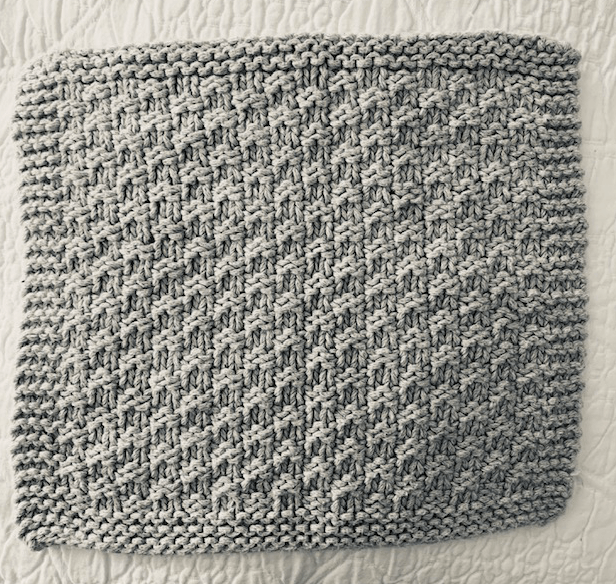
On the gray cloth I made the same type of knit border and then for the center I knit 2 stitches, then purled 2 stitches (K2,P2). On the next row I did the same thing so the stitches lined up. On rows 3 & 4, I did the opposite (P2,K2). This is a double moss stitch.

Simple knitting facecloth
Two knits and two purls

As I knit my little cloths, I used various types of yarn. I honestly don’t remember what they were! I still make little cloths because nighttime knitting for me needs to be simple.

Want Something Bigger to Knit?

If you are not interested in little facecloths or kitchen items, check out my page on free shawls. You may never feel the need to wear a shawl, but they are popular choices in the knitting world AND the easy ones are great practice for beginners.

Try your hand at adding new colors and using variegated yarn on the Scrappy Bias Shawl. Learn what to do to make lacy holes appear in rows when knitting the No Fuss Shade-Loving Shawl.

The Kitchener Stitch For Socks, Mittens and More

There is a lot more to knitting than picking up a pair of needles and choosing a pretty yarn. If you have done any amount of knitting yourself you will understand. I have learned a lot as I’ve knit various projects over the past year and a half.

One aspect of knitting you will undoubtedly come across if you knit mittens, socks or even sweaters, is the Kitchener stitch. It is usually done with a tapestry needle to either close up a mitten top (see below), sock toe, or stitch something together seamlessly. (See my Playdate Cardigan page also where I used this stitch on shoulder seams.)

Kitchener stitch at top of mittens
Glissade mittens

Basics of the Kitchener: End your knitting with even number of stitches on each of 2 needles. Do a set up stitch, and then begin the Kitchener. It weaves both sides of the project together without making a seam. If you look at my mitten tops, it appears that my stitches flow over the very top of the mitten like magic!

I have not done the Kitchener stitch often, but there is a good YouTube video by Very Pink Knits which has helped me to understand it better. She has a little mantra she says while stitching. She shows it on a sock toe, in slow motion, which is very helpful!

My Glissade mitten tops look pretty good, if I do say so myself. When I first tried this stitch, I practiced on something that didn’t matter.

At first, this stitch drove me nuts. I really hated it, but after practicing, it’s really not that bad. I just have to go slow and pay attention. A lot of videos don’t tell you what to do with the last two stitches, but this video does.

Now, whenever I have a pattern that calls for this stitch, I write that little saying on the pattern itself so I don’t have to go look up the video when it’s time to do the Kitchener.

Learning to Do Colorwork Knitting the Correct Way

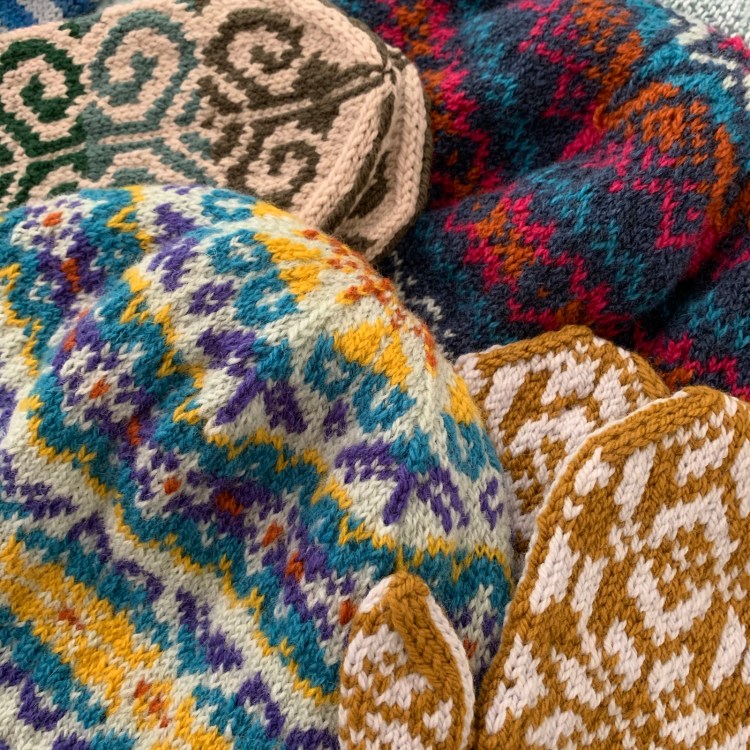
For the mitten knit-along I am doing, colorwork knitting is a requirement. The pattern must include more than one color for this KAL, and the mittens I am knitting have three. Once you know the basics of doing colorwork, also called stranded knitting, the project will end up looking good instead of a mess (like mine used to be).

Colorwork Basics

I have a little experience in knitting colorwork. Basically you are knitting with two or more colors and using them to create an image or pattern. Yarn is held in both hands, with left hand using the prominent yarn, and right hand holding the “background” yarn color.

However, if there is a long bunch of stitches in one color only, it means the other yarn must be carried along until ready to use. Because you can’t just let it droop and create a long “float”, or unattached length of yarn, you have to know how to “carry a float” for both the left and right hand yarns. This is knitting talk for catching the unused yarn with the used yarn to bring it along correctly. And it is done differently for each hand (color).

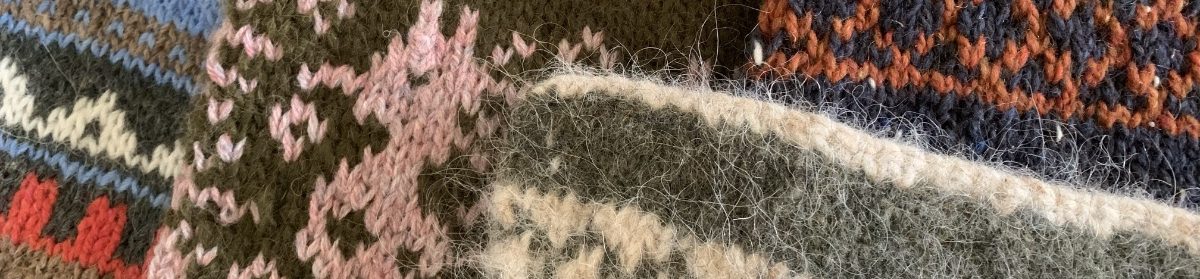
Moose colorwork knitting
Moose motif

For instance, when I knit this moose motif I had to carry yarn colors over numerous stitches. When knitting the rows of brown for his body, I had to carry the blue yarn and catch it up while I knit the brown so as not to leave a long strand drooping along the back of the hat.

Carrying floats when knitting
Catching the floats for the moose motif

Catching floats is not difficult and once you know how to do it, it becomes simple. I suggest you knit something where you can practice this over and over until it becomes second nature. I’m getting more practice now while I knit the Milet mittens.

Beginning to knit the Milet pattern
Casting on

YouTube Tutorial for Catching Floats

Knitting in the Round, Choosing Needles, Size Issues

My new year knitting program is going to include smaller projects, namely socks and mittens. I began The Woolly Thistle Mitten KAL (knit-along) this month (2/2020) and while knitting my mittens, I’ve used 9 inch circular needles, Flexi-flips and DPN’s. Here is my opinion on all three.

A Look at 9-Inch Circular Needles

I really like the little 9 inch circular needles. I think I first used them when I made a little baby bootie (never made the second bootie!) But they were too big for the cuff of the bootie so I used DPNs. I also used them to knit the sleeves of the Polliwog Popover baby sweater sleeves.

Here you can see my Latvian Braid (first one I ever made) using two yarn colors on a 9 inch needle. I think Fontana is unimpressed, but I had fun making it. After doing a Latvian braid on the Milet mittens using Flexi-flips, I realized a 9-inch circular makes for a neater braid.

Latvian braid knitting
Fontana and my Latvian Braid

Overall, I do love using the small 9-inch circular needles. Yarn holders for the ends of the needles are necessary, and the tight circumference can tire my hands quicker, making them ache. Also my colorwork knitting is very sloooow on tiny needles because the stitches are so small and tight.

I have the ChiaoGoo and Hiya Hiya 9-inch and they are both very similar.

Three-Needle Knitting With Addi Flexi-Flips (Size Problems) and Hiya Hiya Flyers

Both Addi Flexi-flips and Hiya Hiya Flyers brands come as a three-needle set. You knit with two needles holding the yarn and use the third to knit. A bit like DPN’s but with fewer, and longer, needles, that flex.

Addi has different tips on the end of each needle so you can knit with either sharp or blunt points.

Flexi flip needle tips are blunt or pointed
Addi Flexi Flips – One needle with two tip choices – sharp or blunt

Using the 3-needle set is easier than DPN’s as there 1 or 2 fewer needle changes, depending on the number of DPNs used, but I still have some trouble with the beginning of round stitches. See my braid rows below and how the BOR colors are off. I do have trouble adding a 3rd needle to start a row.

Beginning of round difficulties
My braid is off a bit using the 3-needle combo

Also with only two needles holding the work, I found that I was dropping stitches, so I began to put stitch blockers at the end of the needle not being used.

I have both brands and the needles are similar. The tube connecting the needles is a little longer on the Hiya brand, and Addi’s needles are a little longer overall. Addi’s come in a tube and Hiya’s come in a plastic bag.

Addi’s Incorrect Sizing

But I want to warn you of one crucial difference and it has to do with needle size – dimension.

When I began knitting my first Milet mittens, I ordered (what I thought was) a size 1.5 US set of Addi Flexi flips. I ordered them from Wool and Company and they were listed as size 1.5 US – no mm size was mentioned. However, when they arrived, the tag simply said 2.75mm (see tag below). I had to look it up, and come to find out 2.75mm does not equal 1.5, it equals size 2. The needles were too large.

So I checked my older pair of Flexi’s which actually says 3.0mm / US2. (See the photo below) BUT…3.0 mm does NOT equal 2, it equals 2.5 US…!!!!

Size difference in Flexi flips
Incorrect mm to US sizing in FlexiFlips

I went back to my order form at Wool and Company to make sure I did not mistakenly order the wrong thing. I did not. I kept the size “2” needles since I didn’t have that size, but I still needed a 1.5 size for my mittens. So I looked at other places online. The small size needle is hard to come by but Amazon had them and advertised them incorrectly also. Or should I say, they were advertised as Addi Flexi Flips advertises them.

Jimmy Beans Wool was where I saw the only notice to customers that the sizes of the Flexi Flips were off. They mention that the smaller size needles are off in the product paragraph. I wasn’t crazy – the needle sizes are not true to advertising. And only 4 of the smallest sizes are listed wrong – all other sizes seem to equate correctly.

If you buy according to the metric system you are fine, but those of us in the US will be using the wrong size needles unless we compare the mm size to US sizing.

The Basic DPNs

I have a heck of a time beginning any small item using DPN’s (double-point needles. With all those pointy sticks in the way, it’s not fun to keep track of where I am and what I’m doing.

Using wood double-pointed needles to knit a sock.

I think it’s actually a little better when using very small needles to knit socks or mittens. The Snowfall sock pattern below has a repeat pattern that fits nicely on four, size one, metal, DPNs. But I did cast on using a 9 inch circular and knit the ribbing before changing to DPNs.

knitting socks with size one dpns
Sock knitting using double pointed metal needles.

Magic Loop

Many knitters use the Magic Loop method to knit in the round. I have looked into it, on YouTube, and found a toe-up sock example, which I may try one day soon.

I can’t give an opinion on the Magic Loop method because I have never used it. Basically you use a long circular needle, split the stitches, and knit as in the round. Some clever people knit two pair (both mittens or both socks) at one time on the same long needle!

Knitting Inside Out… What?

Something else I have just learned is that when knitting colorwork some knitters knit their mittens, socks, and whatever, inside out! Crazy right? The reason for doing this is to keep the floats more uniform and less tight.

I had to search YouTube for that information as well. Melissa B has a good video explaining how simple it is to knit inside out.

In Conclusion

In conclusion, I’d have to say from personal experience that I prefer casting on with circular needles. If I need to do a Latvian Braid, circular is my choice. If needle size is not too small – say size 0 – 2, I don’t mind knitting along with them either. Normal knitting, or stripes, are easy, but for very small sizes and colorwork, they can make my hands ache.

Beyond that, it really depends upon the project at hand. I still have a lot to learn and new methods to try, and a pair of mittens to finish.