Knitting projects I have completed or have in progress. My thoughts and review of the pattern, yarn, and outcome. Also knitting project ideas to consider or find for free.
The Woolly Thistle mitten knit-along begins on February 13th so I need to settle on a pattern to knit. I had thought I would knit the Helianthus mittens, and downloaded the pattern to browse. The thumb is difficult because the thumb chart is not with the mitten hand chart. Am I supposed to overlap it? And how? Seems difficult to follow a chart when one part is in one place and the rest in another. (This is why I decided to NOT knit the Helianthus, and stick with the Milet pattern.)
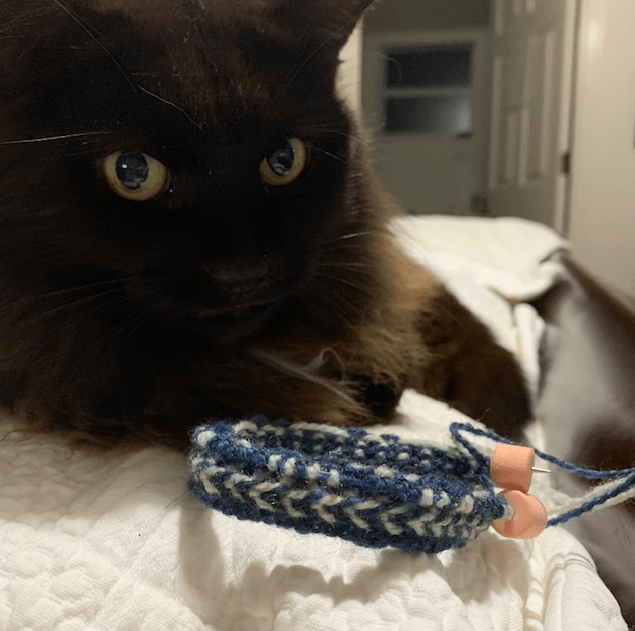
The Helianthus pattern does give me the opportunity to do a Latvian Braid, which I tried. I love the look of it! I was using a 9-inch circular needle and the knitting was slow going, but the end product is pretty sweet! The pattern has clear directions for making the braid.
Fontana and my first Latvian Braid!
I’m using Rauma Finul PT2 yarn in colors Dark Petrol Heather (blue #4123) and Very Light Green (#4106) in the image above. If I decide to continue with this mitten pattern, I will probably begin over with a prettier color match up. It’s a floral design, so it really should be “flower” colors. The pattern designer knit it in orange and yellow.
The Latvian braid is created by simply knitting and purling rows but carrying the yarn certain ways. It’s very easy, just tricky when working with such small needles and tight stitches. To knit 2-color mittens like these, one needs to know the correct way to do colorwork.
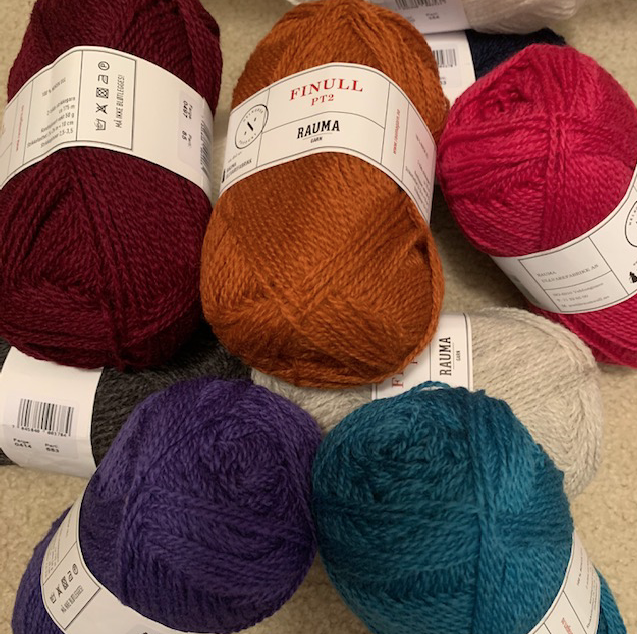
Adding More Rauma to My Stash
Now that my new Rauma yarn has arrive, (The Woolly Thistle has super speedy shipping!), I will choose three new colors and cast on a new Milet.
I’ve seen way too many mitten patterns that I would love to knit – or attempt to knit. My first choice was the Milet Mitten pattern which I began and is turning out large (see my trial mitten). The pattern is easy enough to follow that I think I could have a good end result AND get the pair finished by the end of the knit-along – which is March 26th.
More Mitten Patterns Using Rauma Wool
Here are more mittens (and a couple fingerless mitts) I’ve had my eye on which use Rauma yarn, or similar. If my first pair of colorwork mittens come out okay I may go for it and knit all of these. If it ever snows in Florida, I will be ready…!
Snovotter, by Skeindeer Knits (snowflakes)Fingering
Sionnach Mitts (Fox Face) by Nina Pommerenke – these are cute!! Fingering
If you want to join the knit-along, sign into Ravelry and find The Woolly Thistle group. The rules and such are listed in the forum. There will be prizes, and pattern discounts, but the fun is seeing what everyone makes, and trying to keep up with your knitting! Cast on days are February 13th and 14th.
Thoughts About This Mitten KAL
As time has passed, and I’ve browsed tons of mitten patterns, and read lots of forum posts, I began to doubt if I would participate in the KAL. Forums can be cliquey and in this case, I feel that there are loads of participants – so many that getting lost in the crowd is very possible.
However, knowing that many people, from all over the world, are casting on, and knitting mittens specifically, while I am too… is encouraging.
So Cast-on day was February 13th… see how it went. I amusing the maroon and blue, with white, for my mittens.
New wool yarn to add to my stash
I know that KAL’s are advertising disguised as camaraderie. Shops and yarn and patterns are mentioned in forums and on Instagram as hashtags abound. It’s all about sales in the end, but for a few weeks we can believe we are simply buddies, in the knitting trenches together, working to create a yarn keepsake.
In the end (fingers crossed) I will have a wearable pair of mittens.
I’ve been trying to knit a simple hat for my son, but both times I began recent hats I ran out of yarn for the cast-on! I’m doing the German Twisted cast-on (I have linked to the YouTube video below) and it tends to use more yarn than I measure out for the Long tail cast-on. I keep misjudging amounts… Grrr…! So the hats have ended up being knit for me because my son has a big head!
Mad Tosh “Vintage” and Anzula “For Better or Worsted”
How to Knit This Hat
I made this up myself and here is how I did it.
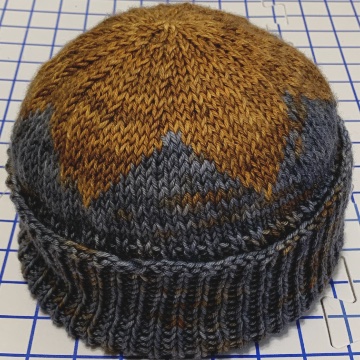
Cast on 102 stitches (this will make a loose hat) using the German Twisted cast on – SEE VIDEO BELOW, or a stretchy cast on. I used a size 10, 16-inch circular needle (and DPN’s) and ended up with a circumference of about 18.5 inches unstretched. My head measures around 22.5 inches, and it fits me well, but it is not tight at all. (It also fits my son fine… oh well, but he doesn’t like the colors.)
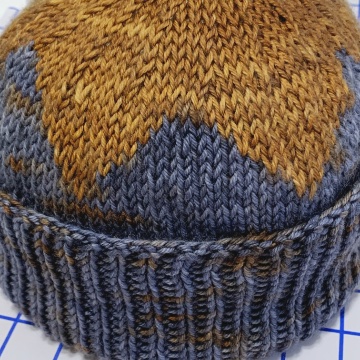
Knit one, purl one ribbing … for as long as you want. I made mine extra long because I was originally going to complete the hat in that stitch. I switched to knitting only (stockinette) for a couple rows and then began the “star” colorwork. I had to learn how to carry the yarn and create long floats for this. View my favorite YouTube video for this here.
102 stitches divides into 6 sections with 17 stitches in each. At the beginning of the round I knit 16 in gray (Mad Tosh Vintage in Antique Moonstone, I think), 1 in brown – around to BOR. On the next row I knit to one before the brown and added brown on each side – knit 15 gray, knit 3 brown.
I continued on this way until the whole top was brown (Anzula “rootbeer” yarn in “For Better or Worsted” – knitting a FREE cowl with this here). Then I began my decreases.
Decreases for top: Row 1: K4, k2tog, PM (place marker) around. Row 2 & even rows: knit around. Row 3 and odd rows: Knit to 2 stitches before marker and K2tog, around. Do this until only a few stitches remain and gather them up with the end of the yarn on a needle, and pull. Weave in ends, remembering that the brim will flip up!
Drying on a cantaloupe
Andrea Mowry and The German Twisted Cast-on
I watched many videos trying to understand the German Twisted cast-on, (which is also called the Old Norwegian Cast-on). The one I have linked to below is by far the best. She goes slow, but not too slow. It is very easy to understand, and use, once you practice.
By the way, Andrea Mowry is an awesome, and successful, knitwear designer. The link goes to Ravelry where her patterns are for sale. Or check out her website at Drea Renee Knits. I have not knit any of her patterns, only because I’m not yet sure I have the skills needed for most of them. Her Throwback cardigan is one of my favorites, but my next pattern may be the comfy looking Oxbow Cardigan.
Somewhat Related: Taking a Walk in Florida’s Winter
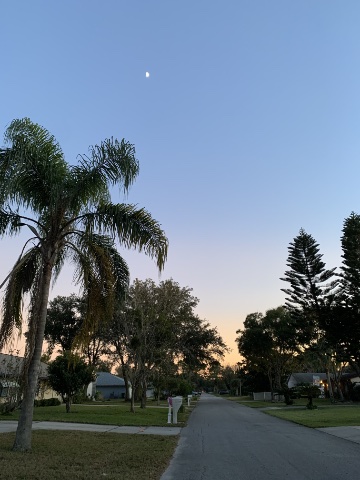
The photo below has nothing to do with this post, but I took it around the time I was knitting the hat and it is mixed in with the knitting photos on my phone. I thought I would share what I saw on a recent walk around my Florida neighborhood in the evening.
Getting exercise is necessary, and I tend to feel unwell when I just sit around and knit, or work online. It’s easy to become preoccupied with knitting, but I do get outdoors this time of year to stretch my muscles. It is a wonderful treat after suffering through the long HOT Florida summer.
Our climate in Florida is nearly opposite to the north, in my mind, because summer keeps me indoors. Except that the summers are worse because you truly cannot do anything much outside. At least in the northern winters there are good days. This is not true of Florida summers. It NEVER cools off.
Taking a walk
December is one of the best months, weather-wise, in Florida. Nights are cool (40’s to 60’s), and days are warm (60’s and 70’s). There are few storms, no hurricanes, and very little rain. Evenings are especially nice and if you have a view of the west, the sunsets are gorgeous. I am not looking directly toward the West in my photo. The bright sunset colors are off to my right – through the trees – but that color spreads across the sky because it’s so flat here.
Anyway, this was a quick glimpse into a Florida winter evening. Happy knitting!
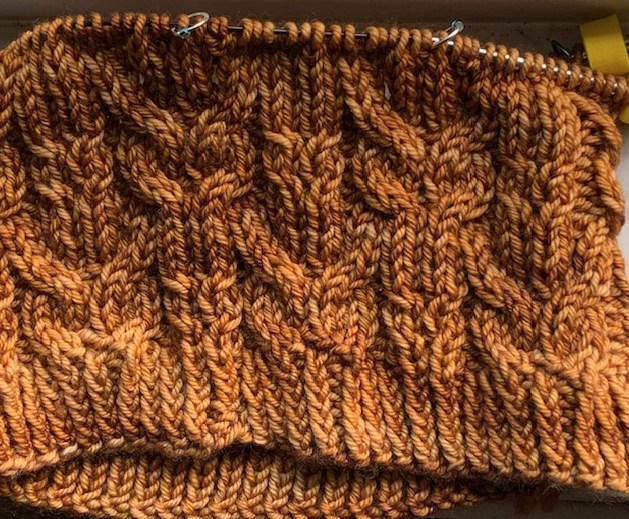
A review of knitting the Namu Cowl with some easy cables in pretty “Root Beer” yarn color way by Annual.
The NAMU cable cowl is such a lovely pattern, and yes folks, it’s FREE! The directions are well-written, and there is also a chart. Designer Knitboop has graciously given the knitting world this interesting project, which can be knit up quite quickly.
Namu is Korean for “tree” and Knitboop goes on to include more info and even a poem on the last page of the download.
The short version of the cowl is small and will fit snuggly around the neck, but it can be knit longer with the correct pattern repeats. I chose to use my new skeins of Anzula For Better or Worsted yarn in “Rootbeer” (Find Anzula yarn at Jimmy Beans or Webs). Choose a soft yarn for this type of garment which will be close to the skin.
The pattern is easy to follow, but a beginner may find it difficult. You must cable and know how to do Yarn Overs with knits and purls.
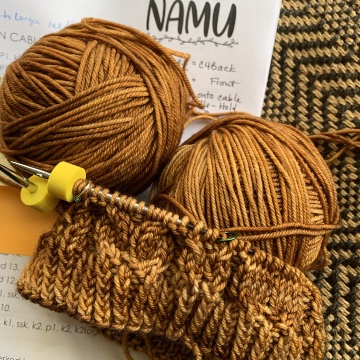
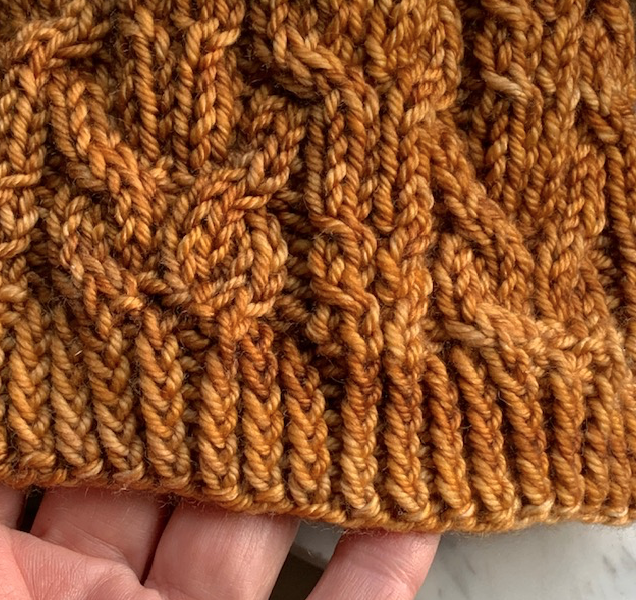
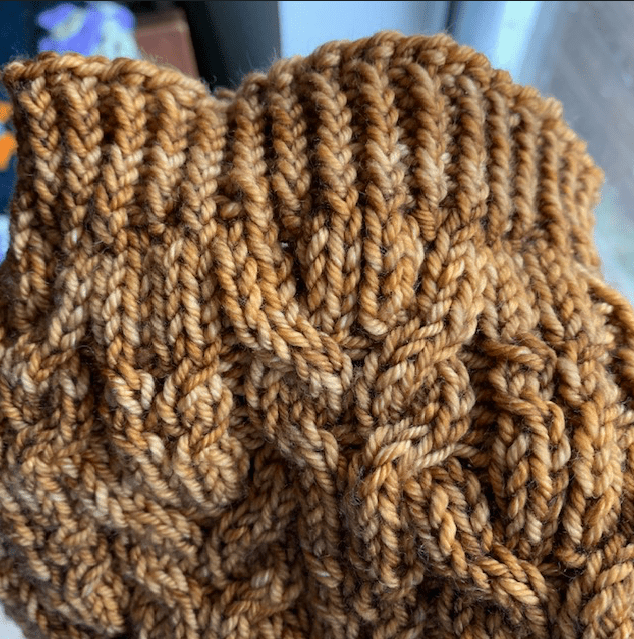
After knitting the ribbing I noticed some pooling of color, which is difficult to see in my photo below, so I began alternating skeins for the cables. I may use one skein for the next repeat of the pattern just to see how it looks.
Pooling of colors
I snapped this photo below once I finished the first cable repeat of 23 rows. I will do these rows once more to finish the cowl, so I’m halfway there!
The “Namu” cowl pattern.
I wanted to mention the pooling of color, which you can see once again as I dropped one ball of yarn to finish off the top portion of the cowl. There was some striping there as compared to the center cable portion of the cowl.
Now about the bind off. It calls for a stretchy bind off which makes sense because it will be pulled over your head. I began with Jeny’s stretchy bind off and it was looking too floppy. So I did regular bind off stitches between Jeny’s. Jeny’s is basically done by adding a yarn-over making 2 stitches to bind off. I used it on the Polliwog Popover for the first time. It still ended up being too wide but wearing that top bind off at the bottom of the cowl – around the neck / shoulder area works well.
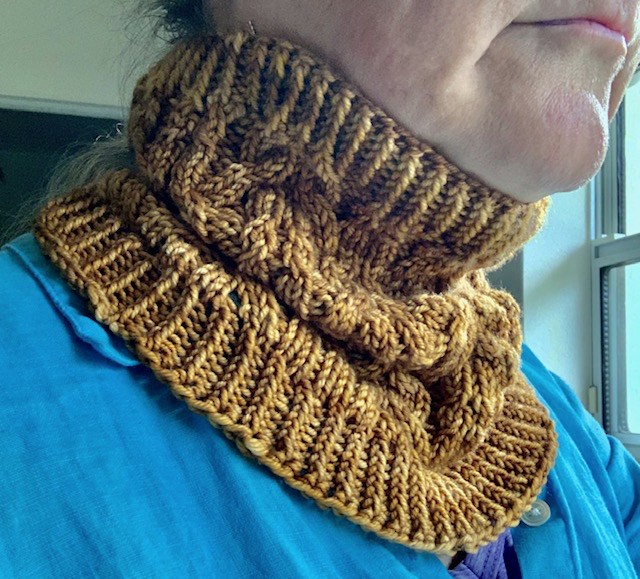
I’m actually wearing the cowl upside down, but it really doesn’t matter with this pattern.
Finished!
Anzula and Other Soft Cowl Yarn Ideas
I used Anzula, but there are other soft yarns to consider when cowl knitting. Here are a few I have used or have researched for softness. Some can be machine washed, but why would you? Cowls are small, and can easily be hand-washed and dried flat.
For such a pretty cable pattern, use a slightly variegated yarn, solid color or ombre color yarn. Too many color variations would take away from the cabling. Also a lighter color will help show off the pattern.
Yardage needed is 220 yards in Worsted Weight yarn. You will need more if you make the longer version.
Madeline Tosh “Vintage” – this link goes to Wool and Company, who ships for free (US only) and will wind skeins at no charge!
The Anzula is so soft and I love this golden-bronze color. I fell in love with Anzula yarn when I knit the Quince Wrap and used gray Anzula (fingering weight) for the edges. I bought it on a whim when the Four Purls yarn truck came to town. Anzula offers a wide array of yarn types.
I have fallen in love with the washable Lorna’s Laces Sportmate yarn. I decided to knit the Polliwog Popover with the gray (Dobson) and blue (Cermak) colors I recently bought on sale. It’s a little sweater with a unique neckline for babies or young children. It is a great pattern for a little boy. The pattern is by Mary Lou Egan and I found it in my copy of “Drop Dead Easy Knits” (link to the book below).
The title mentions easy, so none of the patterns should be difficult – you would think. However, as I have been knitting this baby top, I’ve run into some difficulty.
Polliwog Troubles, Mistakes and My Personal Fixes
First of all let me suggest that whenever you choose to knit a pattern search for possible errata – or changes to a pattern due to direction corrections. A mistake here and there is understandable. No one is perfect. I’ve noticed that patterns often have an errata listed.
Most knitwear designers have test knitters, who will all knit up a pattern and give feedback, including catching pattern mistakes. So the fact that the Polliwog was included in a book, but contains numerous mistakes, is disappointing … and annoying.
IMPORTANT: If you plan to knit this PATTERN, go to the Ravelry Polliwog Popover pattern page where the designer lists the mistakes on the page. Take note of them and make fixes on the pages in the book before you begin knitting. The first mistake was the number of stripes to knit for the body.
But I had more troubles than just the ones listed, so I wanted to share my woes here. In the end, I really like the top. It is soft and cute and works well for a boy or girl. It would be a breeze to knit again now that I have made my changes to the pattern and provided notes to myself.
I may actually sew down those flaps on the front, but I’ll see how it looks after washing.
Polliwog Popover – done!
Check Your Gauge!
First, I strongly suggest you knit a swatch to find your gauge. Usually I have to go up a needle size to make my gauge correct. This time I did not knit a swatch and used the suggested size 4US needle, but I should have used a 3 or maybe even a 2.
The sweater is WAY bigger than even the measurements for the largest size (12-24 months), and now I fear I may run out of blue yarn (I didn’t – see my yarn photo below). I’m following the smallest size (6-9 months) directions. So my gauge is way off. I’m thinking it would fit a one-year old. This is my own fault, and not a fault with the pattern. I should have found the correct gauge before I began.
Knitting Stripes That Align
I was no expert at knitting stripes, but after making all the stripes on the body and sleeves of this sweater, I consider myself an accomplished stripe-knitter. And for the most part, my stripes align pretty well. This is how I did it.
Row 1 (of 3 knit in same color) – when adding / changing colors, bring the new color up behind the old to tug the little area closed.
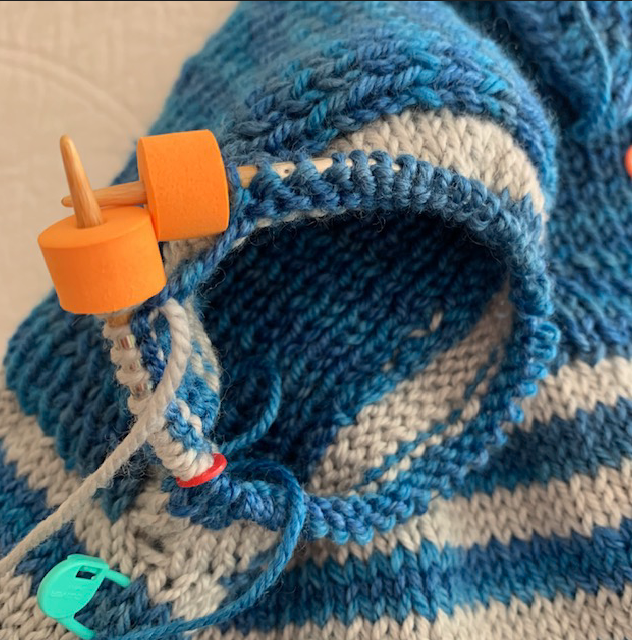
Row 2 – when you reach the BOR (beginning of round) marker, and are ready to begin knitting row 2, lift the right side of the knit stitch below the row onto the LEFT needle and knit through both strands. This will make the first worked stitch of the row look like only 2 stitches when the rest of the row will have 3. This makes the rows of color line up nicely. You can see this in my photo below on the BOR seam of a sleeve.
Row 3 – knit around… begin again at row 1 when you change to the new color.
Aligning the rows of stripes
The Shaping
Once I had the front section shaping on the left shoulder completed, I felt pretty good. I had managed to do the short rows and then knit them up fine.
Shaping the front
My troubles began when I had to do a similar thing on the Right Shoulder. The stitches are opposite and the directions to “slip the stitch and pull the yarn over the needle to create a double stitch” did not work because you end with a purl stitch. Or maybe you just pull the lumpy thing over and call it two stitches ???, but it looked bad. I tried searching YouTube for help and found nothing that made sense.
After wasting lots of time trying to figure out what to do – after all this was going to be the neckline of the sweater – I used my notes from a little scarf I began a while ago. On the Ruffle scarf you create a number of short rows, or wrap and turns. I could do that simple thing when knitting the scarf, so I simply did the same thing for the Popover. I did the same when working the back sections as well.
Short Rows on Right Side Shoulder
Here is how I did my turns on that right side – front and back sections of the sweater.
When I got to the end of the row the yarn was forward because I ended with a purl stitch. I kept the yarn forward, in front, and slipped a stitch from the Left needle to the Right needle. Then I turned the work and brought the yarn forward again. Slipped a stitch once more from left to right and began knitting in pattern back to the end of the row.
Super easy, looked fine, and easy to pick up each knit and purl on the finishing row. No stitches needed to be knit together.
The Neckline Bind-Off
Here is where my blood pressure rose once again. First of all the patterns says, “work a sewn bind-off … as described in the Techniques section”. So I flipped to the back and found the page for Techniques. None of the technique titles were for a “sewn bind-off”. I finally decided it must be the “K1, P1 Bind Off” because it called for using a tapestry needle. I didn’t like the sounds of that.
Reading through the long directions for this type of bind-off I began to have serious doubts about my ability to not mess it up! So I knit up a little swatch in the knit 1, purl 1 ribbing to try it out. I couldn’t figure it out. It was a disaster. So I looked on YouTube. Even watching videos describing this sewn bind-off, and following along on my swatch, I gave up after making a complete mess of it. This was not easy, even after watching a video.
Jeny’s Surprisingly Stretchy Bind-off
I really didn’t want to have to use a tapestry needle, but I knew I would need a stretchy bind off for the neckline. I’d heard of Jeny’s Surprisingly Stretchy bind off, but never bothered to look into what it entailed. Now I decided to see if I could handle it. I’m so glad I did. And yes, it is VERY stretchy, and EASY!
This is a very easy bind-off to use for anyone. Once it was done, I believe it looks just fine. See my photo below.
As is usually the case, I had to watch a couple of videos to find one I liked. Here is a link to the YouTube video for Jeny’s bind off that helped me – she goes super slow considering it’s super simple to knit.
As I’ve read some notes by knitters of this garment, a few have said that the neckline is too loose and flaps open. Now I am wondering if a normal bind-off would work because of the way the neckline overlaps to make an extra large opening anyway. I don’t have a baby to try it out on.
Finished look of Jeny’s bind off
Jeny’s Bind-Off Written Directions
You don’t need to watch the video because it is easy to explain how to do Jeny’s bind-off. And at least now I know how to do it.
Do This: You are ready to bind off – on the right side – and are holding an empty RH needle. Begin by first wrapping the yarn around the RH needle clockwise. This is opposite of how you would make a Yarn Over. Then, knit the first stitch and pass that wrapped stitch over the knit – like a regular bind-off.
Now, wrap yarn clockwise again, which will give you 2 stitches on the RH needle. Knit the next stitch – giving you 3 stitches (my image below). Bind off by passing the first two stitches over the one recently knit. (I did not deal with alternating knits and purls. Honestly I don’t know if I should have. I was so fed up at this point I just wanted to be done!)
With three stiches on the RH needle, slip the first 2 over the last – as in a regular bind-off
Continue to wrap clockwise before knitting, passing two stitches over one, and so forth. Super EASY! And yes, it is also super stretchy. I guess lots of people use this bind off for toe-up socks so the cuff is not tight. Believe me, it works. I think I could get my big head through this neckline!
The Polliwog Sleeves
To begin the sleeve, first the two sections of the shoulder have to be overlapped. Then stitches have to be picked up, sometimes going through two layers of knitting. I used a crochet hook to pick up stitches through two layers.
Also, pick up through nearly every stitch, or the count will be short. I had to re-do my pick ups for this reason. I used DPN’s but quickly became fed up with them and ordered a 9-inch circular needle to finish the sleeve.
First sleeve transferred to new 9 inch circular needle.
I have a few small circular needles for knitting small round things like mittens, so this new size five, nine-inch circular has been added to my collection. They are totally worth it if you hate using DPNs. I was able to knit all the way to the sleeve cuff and bind-off using the small circular needle. (I did a regular bind-off here, not the “sewn bind off”.)
Knitting the sleeve
I will say that I love Lorna’s Laces yarn. The blue color is slightly variegated and looks really nice. I will be washing it in my machine and throwing it into the dryer for a little bit to see how it ends up. (Directions for washing this yarn are: Machine wash cold with like colors. Machine dry until just damp. Lay flat to finish.)
I did not have a lot of blue yarn left, but as I said, the garment turned out large. After washing (and drying) it seems that either the sleeves should be longer or the body should be shorter. It’s hard to tell.
How Much Yarn is Needed?
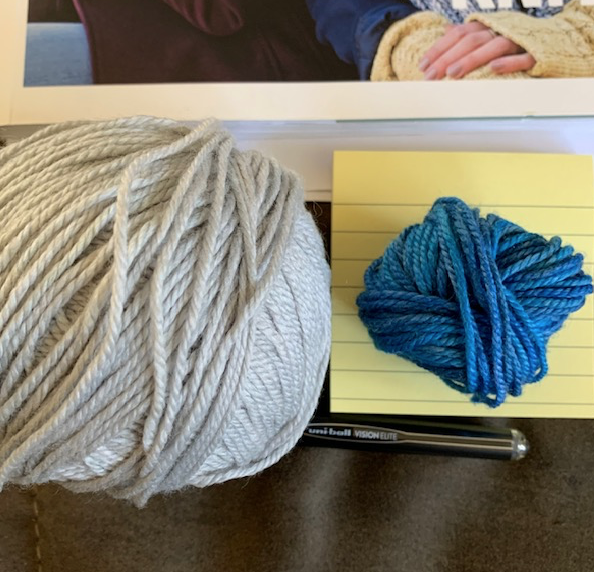
Once I finished knitting, below you can see how much yarn was left of the 2 skeins I used. Each skein has 270 yards and I had leftover yarn. The pattern sample uses Swan’s Island washable wool which contains even more yarn per skein (360 yards) and the pattern calls for 2 skeins of the Main Color – which in my case was the blue. So I used less than 270 yards altogether (blue) – less than one skein. And remember that my sweater came out extra large.
Used up nearly all my blue yarn.
Drop Dead Easy? Not This One
The Drop Dead Easy Knits book contains a wide variety of projects. As others have also noted, in comments on Amazon, they are not all that easy! “Easy” is relative. To a fairly experienced knitter, yes, they would probably be easy. To a beginner, not so much. And maybe the writers meant this when putting the book together.
I don’t consider myself a beginner, as I have knit lots of various items in the last couple of years including two sweaters for myself, but the problems I had knitting this one made it unenjoyable. This Polliwog Popover should be simple, but with the mistakes and issues I’ve had with it, I would not label it as so. It was a headache. However, if decided to knit it again, it will be easier, thanks to all my notes!
More From the Drop Dead Easy Book
If you don’t expect all patterns to be easy, the book is still a good one. When I first searched through I was disappointed to find sweater and sock patterns. I don’t consider sweaters to be easy, and I dislike knitting socks. But then again some knitters may consider these items to be “easy”. And lots of people knit socks. The book offers a very wide variety of items to try, from blankets and shawls, to mitts, hats, bags, and even a dog jacket!
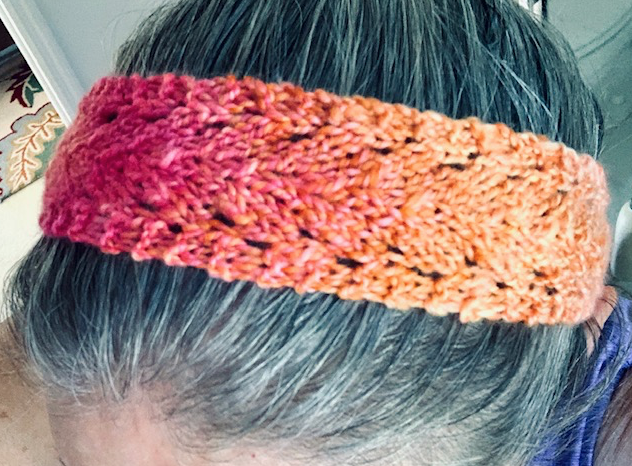
I’ve already knit the very easy Shandy Headband (my photo below). Along with the baby sweater I just wrote all about, these two items are my only experience with the patterns in the book. I will be trying more. It’s a very nice book.