The Umpqua Pattern is My First Sweater Project

This is a big deal for me! I am knitting a sweater…!

For my first hand-knit sweater project I chose the Umpqua Sweater pattern by Caitlin Hunter of Boyland Knitworks. I know so little about knitting sweaters that I have no idea if top-down, or bottom up, are easiest, but here I go. I’m jumping in! This pattern is knit from the bottom up. The fun “arrow” design around the yoke caught my attention and I wanted to knit it.

Gauge is still a bit of a mystery to me. As far as I could tell, while figuring the gauge for this sweater, I needed to go up a needle size. I’m using a size 6 for the cuffs and bottom of body, and a size 8 for all the rest. I’d rather have the sweater fit loosely than tight. The pattern suggests going up a size for the color work (yoke area) if you generally do color work tighter. I have no idea if I should do that, but I don’t have a size 9 circular long needle, so I probably won’t. I’ll worry about that when I get to the color work part of the sweater.

Body and One Sleeve – I’m On My Way!

Here’s a photo of my one sleeve and body. I still have a few inches to knit on both parts, and no, they are not connected. I set them side by side for the photo. I’m happy with the main color (Whole Grain) and I love the Rios yarn. Check out the Malabrigo website and I dare you not to buy their gorgeous yarn. Rios is washable too! I also chose Aguas (dark green) for the trim, and English Rose (dark pink) for the Yoke colors.
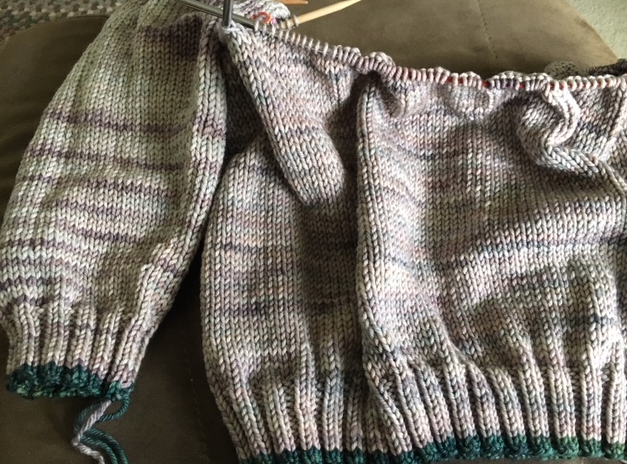
One sleeve and body of the Umpqua sweater pattern using Malabrigo Rios yarn in color "whole grain".

Knitters who are savvy sweater people make all sweater knitting sound EASY. I’m scared to death while I knit this. I’m following the pattern exactly and if I am unhappy with some part (like sleeve length), I may knit another one of these sweaters one day and make changes. This one is really a test for me!

Attaching Sleeves and Body of Sweater

Now both sleeves are done and I put the stitches of the sleeves onto “holders” like the pattern said. One little section of stitches is for the armpits – which will be stitched up at the very end – and the rest of the stitches will be knit with the body.

Purl Soho has an excellent tutorial which explains how to do this, so I added it here. It helped me visualize the parts of sweater knitting. Also, after watching the video, I realized that when I finished up my second sleeve, I should have kept the stitches on my 3 DPN’s and not placed them onto yarn. I had to put the stitches back onto the needles to knit – a waste of time.

Knitting the Umpqua sweater and ready to join the sleeves and body
My finished sleeves and body which are ready to be attached.

Doing German Short Rows at Yoke

Because I was not happy with the look of the short rows I did earlier in the pattern (see photo below where you can see 3 “off” stitches where I did a wrap and turn to shape the back), I decided to try German Short Rows when it came to shaping the yoke.
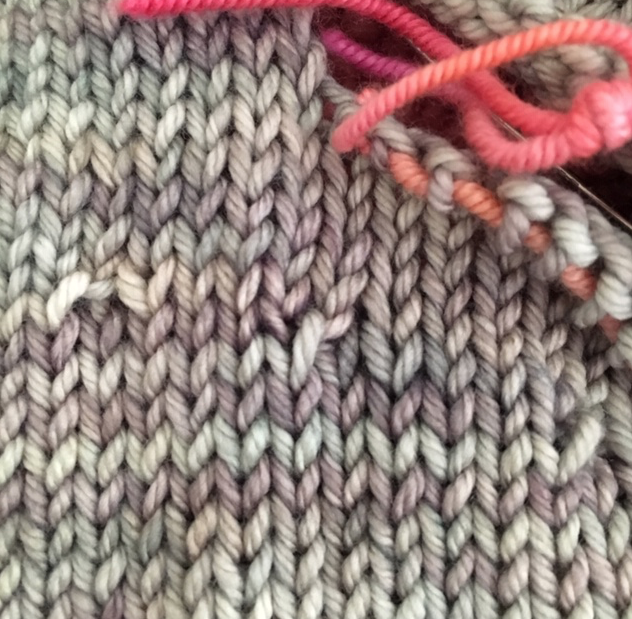
NOT German short rows, but the 3 wrap and turns done for shaping the back.

I had read from some of the Umpqua knitters that they used this type of short row work. The YouTube video below is by Very Pink Knits and it is how I learned to do German Short Rows, which seem simple enough.

However, the sweater pattern itself was confusing when it came to doing short rows. Once I began doing wraps and turns (creating short rows) I had no idea where they were on my needles. Suddenly “Short Row 3” said to “knit to 5 stitches before last wrapped stitch, wrap and turn“. Does that mean the last stitch I wrapped, or the last wrapped stitch I would come to while knitting? I had no answer, so I turned at the first wrapped stitch I came to because the pattern said later on to “work wraps together”. I figured I should not hit a previously wrapped stitch until then. I have no idea if I did this part correctly.
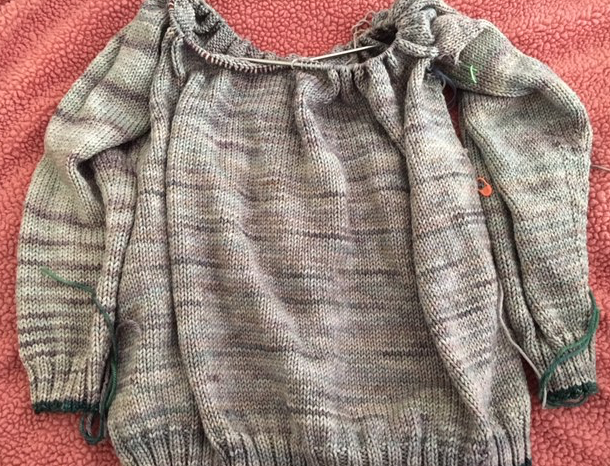
Umpqua sweater knitting, bottom up, nearly at the yoke color work area.
Sleeves attached and almost ready for color work in yoke area.

Now I am nearing the color work area of the yoke, and that is shown in chart form only. Luckily I know how to read a chart for working in the round. I may order more Rios yarn in other colors because I still think I will be cutting it close with my main color (MC). If I substitute a new color in place of the main color for the rows of yoke color, I will conserve the MC yarn for finishing.

Adding Color to The Yoke Area

Below you can see my first rows of the color chart. I did decide to use another color of Rios yarn, which I just happened to have in my stash. I can’t find the tag for it, but it’s a peach color (Peachy?). I’m sticking with “whole grain” which is the MC for between the green rows as the pattern says. The same main color should also be where the yellow / peach color is, but I’m afraid I will run out by the time I need it to finish the neck area.

Colorwork for the yoke of the Umpqua Sweater using Malabrigo Rios yarn in English Rose and Peach color.
Umpqua sweater yoke pattern colors are done
Done with the yoke colors and finishing the neck.

Three-Needle Bind Off For Armpits

The yarn that has been held on stitch holders or extra yarn now needs to be put onto DPN’s once again – Do this on the WRONG SIDE. Holding them side by side a three-needle bind off is done. Watch the video below as it is easier to understand, but it’s very simple to do. Holes will probably remain at each end, but they can be closed up when weaving in the tails.

Binding off on the wrong side of sweater armpit area

I’ve found this tutorial by Purl Soho which shows exactly how to accomplish the three-needle bind off. Don’t sweat it – it’s easy!
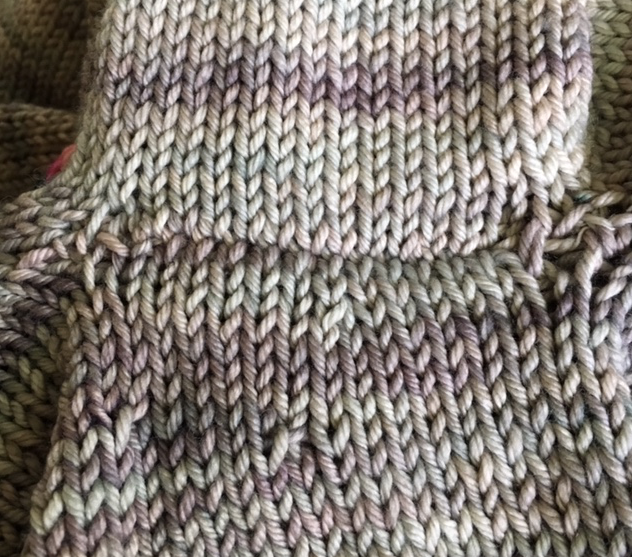
Right side of sweater after underarm is bound off
A neat seam after binding off the underarm area of the Umpqua Sweater. I also closed the holes when weaving in the tails.

Finished..!

On April 7th I finished knitting my Umpqua sweater and I am pleased! It fits.. yay! There is lots of room to move and it would keep me very warm in cold weather, I’m sure. The day I finished, by weaving in the tails and closing up the underarms, it was in the 80’s here in Florida. Not exactly sweater-wearing weather. Because it was hot and muggy, I didn’t wash and block it yet. There is no hurry because I won’t ever be able to wear this garment unless I take a trip North to New England in cooler months! But I did get some photos.
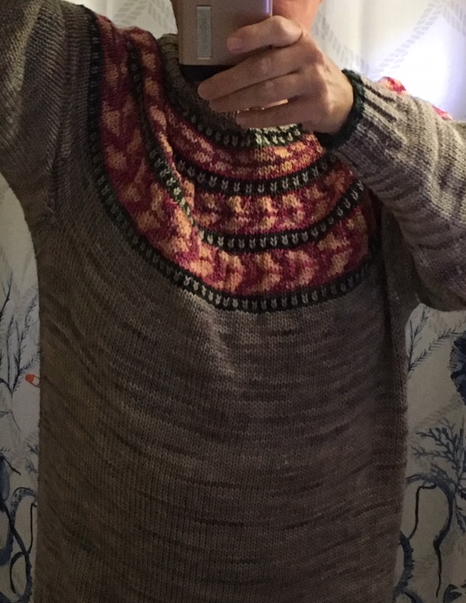
Wearing my sweater for a selfie
Selfie time!

You can see the “whole grain” main color and the peachy colored arrows. Those were supposed to be the main color, but I was afraid I would run short so I used some Rios stash yarn. I do like the addition of color. I knitted size “D” but I probably could have gotten away with one size smaller. Or, I should have kept the suggested needle size and not gone up one.

Umpqua Sweater finished and hanging to show off the pretty colorful yoke and Rios yarn colors.
Hanging with the drum set

I think I did my SSK’s incorrectly, but it’s not super noticeable. Live and learn is my motto.
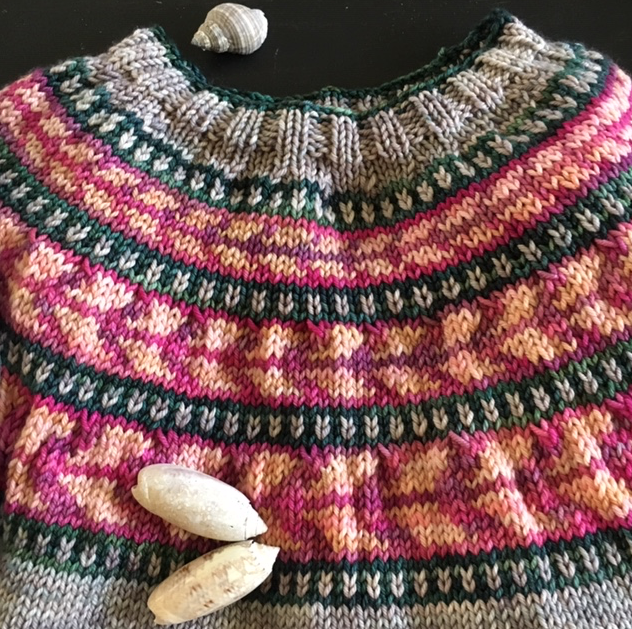
Sweater and seashells – a rock snail and two olive shells.

Collecting and photographing seashells is another hobby of mine. I have a blog about it at Seashells by Millhill.

Knit a Simple Hat and Scarf in Bulky Malabrigo Rasta Yarn

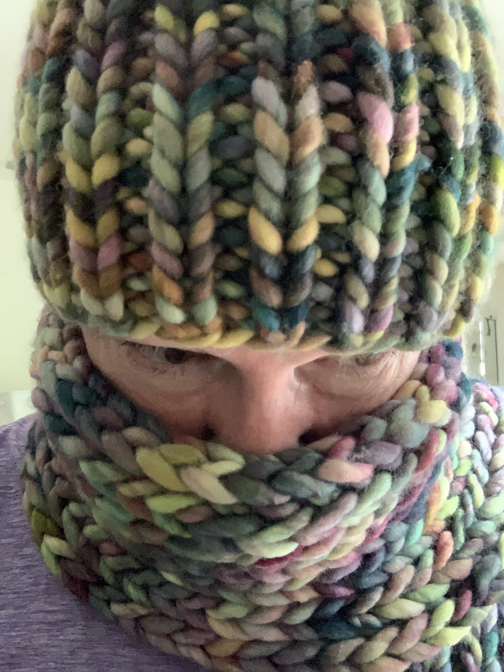
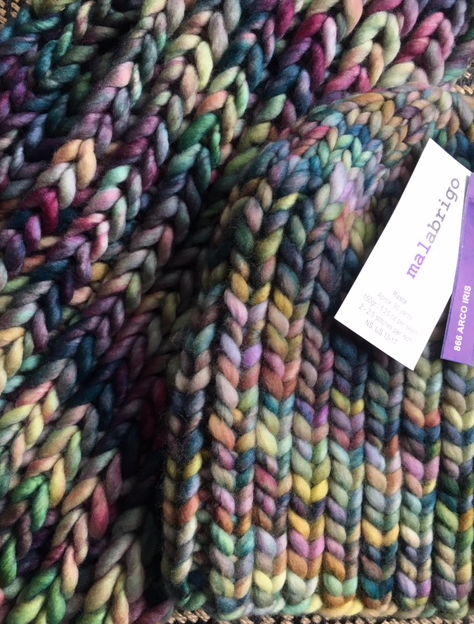
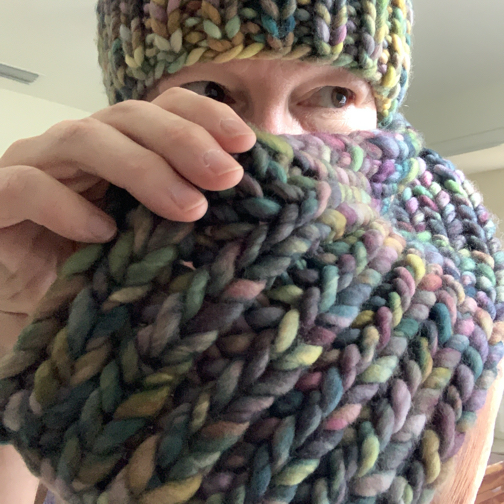
Pictures of my hat and scarf made using Malabrigo yarn in Rasta bulky “arco iris” color way.

I had been wanting to knit something using a bulky yarn. I came across the “Rasta” yarn somewhere and decided to jump in and buy it. What I would decide to make came later.
Although I wasn’t too sure about the colors, I certainly love the feel of the Rasta bulky yarn by Malabrigo. I decided to knit a simple hat and scarf.

Bulky Rasta yarn hat and scarf
Bulky hat and scarf
Screen Shot 2018-05-06 at 11.30.22 AM
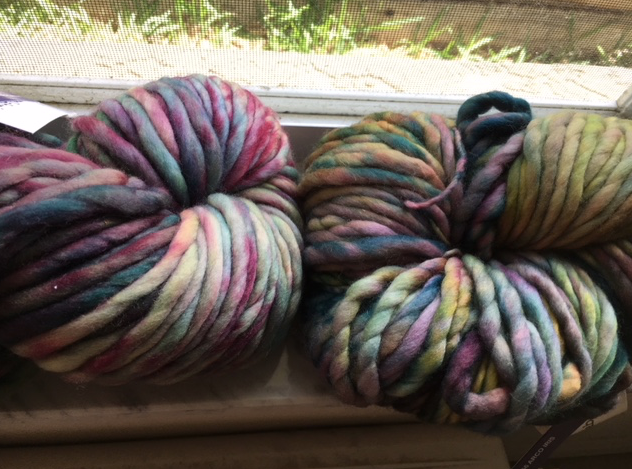
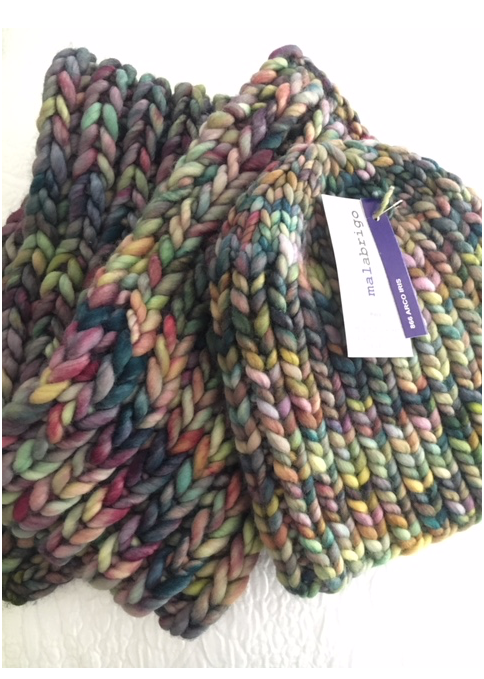
Two balls of “Arco Iris” Malabrigo yarn, bulky

The hat and scarf in my photo was knit using only 2 skeins, but for a longer scarf, I suggest one more.
The only issue I had with this yarn is the color. I received 2 skeins of the same color name, “Arco Iris”, and as you can see in my photo, the colors are quite different.  One skein I liked, and the other was darker. I know this can happen with hand-dyed yarn. I used the “pretty skein” for the hat, and the darker one for the scarf, along with the hat yarn leftovers.
Have faith, this color yarn looks better once it’s turned into an item and the soft, plush feel is a joy to work with. If you can shop locally and see the yarn, I suggest doing that. I have to order online.

knitting divider

How to Knit This Simple Hat

Yarn used: For the hat, I used less than one skein of Malabrigo’s Rasta yarn in “Arco Iris”.

For this hat I used size 13 – 16 inch circular needles and size 13 DPN’s.
Cast on 48 + 1 , then slip the last stitch to the left needle and knit the first 2 stitches together to join in the round – make sure there is no twisting of stitches. This gives you a total of 48 on the needles. Or simply cast on 48 and go from there.

The pattern is simply knit one, purl one around to desired height, then do decreases at the top.

How to Decrease at Top of Hat

Knit around until hat measures about 7 inches – more or less for size needed.

Decrease rows:
1. *k1, p1 (twice), k2tog*, do that 8 times.
2. Knit around
3. *k3, k2tog* around
4. Knit around
5. *k2, k2tog* around
6. k2tog around
Cut yarn long enough and pull through remaining loops and weave in to finish off.

Finished circumference approx. 19 inches, height is 9.5 inches.

It could have a pompom on top if you like that look.

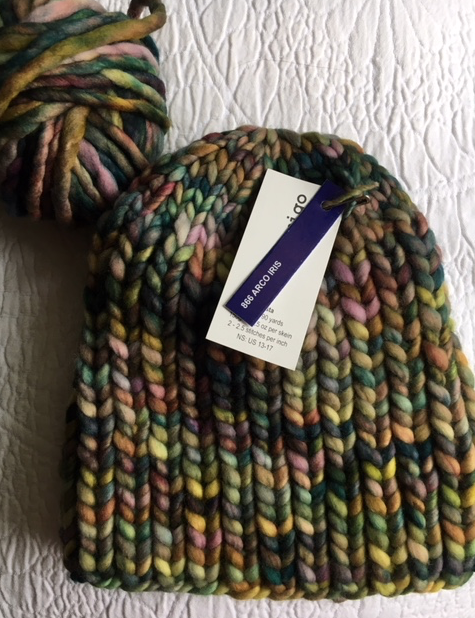
chunky knit hat in rasta
Hat completed, with yarn left over. Use less than one full skein.

How to Make the Scarf

I used US size 9 straight needles. End measurements, 7 inches wide by 40 inches long – used all remaining yarn.  I used one full skein, and the leftover ball from the hat.  (See photo above.)  This is a short scarf, so I suggest using 2 full skeins, or more, if you make it wider and want something longer.

Cast on using the Cable Cast on, which is like a basic cast on, but put the needle under both both strands of yarn. I have a page with videos of various cast-on methods, if you need help.
Cast on 14, or any even number.

Repeats are between the *stars*.

K2, *p1, k1* to last 2 stitches, p2
Next row and all rows: With yarn in back, slip 1 purl wise to begin the row. Each row ends with a purl and begins with a slip purl wise . Doing this makes a neater edge.
*K1b (knit one below), p1*, to the last stitch, p1.

Continue until the yarn runs out and bind off (before you run out, obviously!).

Be sure to hand wash any items made with this yarn.

Screen Shot 2018-05-16 at 2.28.45 PM
Rasta yarn knits up into plush wearables.

I am now working on a similar (but longer) scarf in white Rasta yarn.

Scarf and hat in bulky yarn

Washable Bulky Yarn

When I began knitting with the Rasta yarn I fell in love with the squishy feel and the color changes. Unfortunately this yarn must be hand-washed which can be tricky when the item is large – like a long scarf. The tough part is letting it dry. It must be laid out somewhere for a couple of days because of the bulkiness.

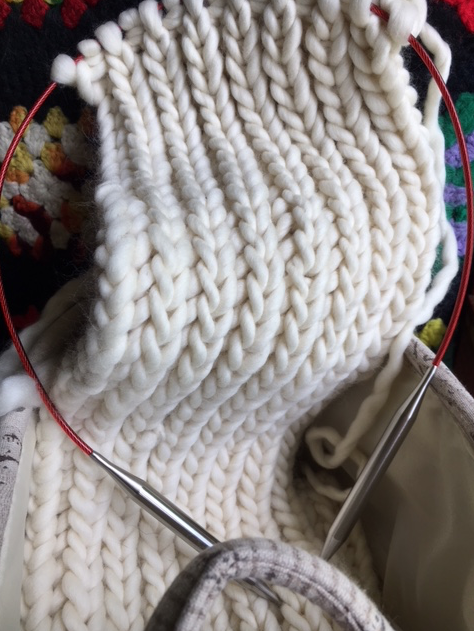
Bulky Rasta scarf white
Knitting a white Rasta scarf

I finished the white scarf shown above (same pattern as the other scarf on this page) and gave it to my son’s girlfriend for Christmas, but I included a note that she had to hand-wash. I felt guilty about giving her something that would be a bit challenging to care for.

Between now and then I have found yarn that is similar to the Rasta but can be machine washed.

  • “Franca” by Manos del Uruguay is 100% superwash merino wool. I have a skein which I have not used yet, but I love Manos yarn. It is similar in look and feel of the Rasta by Malibrigo. You can find Franca yarn at Purl Soho in pretty colors, or search for a sale. I bought mine cheaper at Etsy but there were only 3 color choices.
  • “Fire” by Wool Addicts is a yarn that is new to me, but is now on the top of my list of favorite bulky yarns. I’m using it in dark gray to make the Winter Morning ear-warmer. It is a Superwash yarn made in Italy and it is so soft and lovely.

Once I use the yarns listed here and wash them, I will post an update.

Basics For Machine-Washing Hand-Knit Items

By machine-washed, I mean put into a zippered laundry bag made of mesh and tossed into the washing machine. Tossing an item in with the regular load of laundry could stretch it out. I suppose socks and hats might do okay, but personally I would always use a mesh bag. And most knits must still be dried flat. I’ve seen very few nice yarns that can safely go into the dryer.

Yarn is usually pretty dirty, and sometimes the color will bleed quite a lot in a first wash. This happened to me while washing the Fine Sand sweater. Usually Miss Bab’s yarn does not bleed color, but the “Tarte” I used certainly did. I was glad I hand-washed it the first time. So, I suggest either hand-washing the item the first time, or wash it separately in the machine, with wool-wash. Most people who know a lot about yarn suggest using a cleaner made especially for washing wool. I’m going to look into the best ways to wash hand-knits and write about it one day…!

Keep Reading: Recent Blog Posts