Here’s what I am currently knitting. A couple of easy, free patterns, as well as a hat and sweater.
Because I live in a climate that is seldom considered to be “cool”, I knit with wool year round. I’m not sure what other knitters do, but this is the time of year when all the big yarn sellers come out with cotton, linen and silk yarns and showcase knitting projects for lightweight tops. I really don’t pay much attention to that because most “summer” projects are still too hot to wear here in central Florida.
Currently I am finishing up four knitting projects I have been working on regularly. I like to have a variety of knitting going at once.
The Hidden Gems Shawl
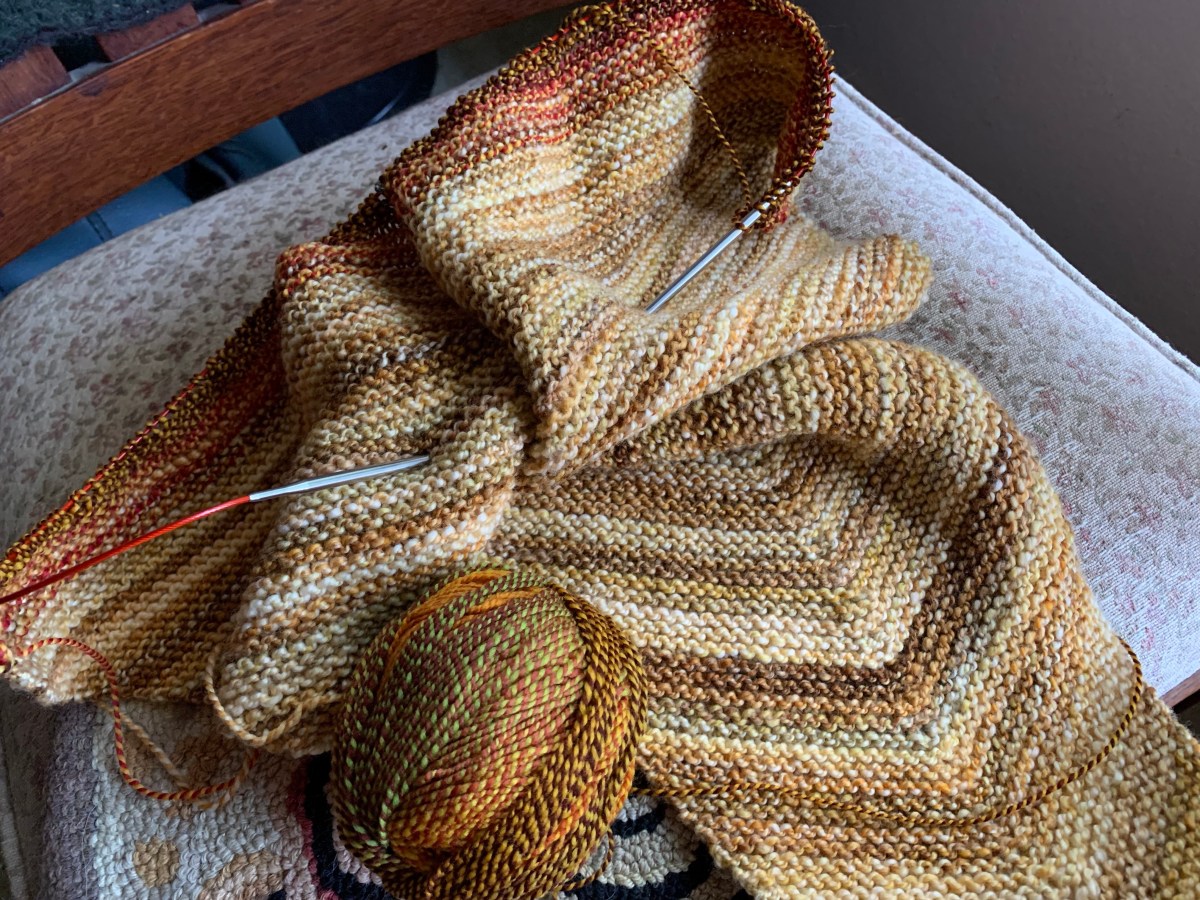
For a while now I have avoided knitting “shawls” because I never wear them. I would love to, but in this hot and humid climate the last thing I want is something around my neck. But, when I saw “Hidden Gems” knit up in hands-spun yarn, I thought it was a beauty and it might be nice to have one.
Hand-spun shawl / scarf
The shawl is more of a scarf in the shape of an elongated set of triangles – larger in the middle coming to points on each end. It is a free pattern, and could be knit using any type of yarn. This pattern would be great for a beginner knitter. It is mostly garter stitch with a few other stitches that would be good practice. You should know how to knit front and back, slip, slip knit, and knit 2 together.
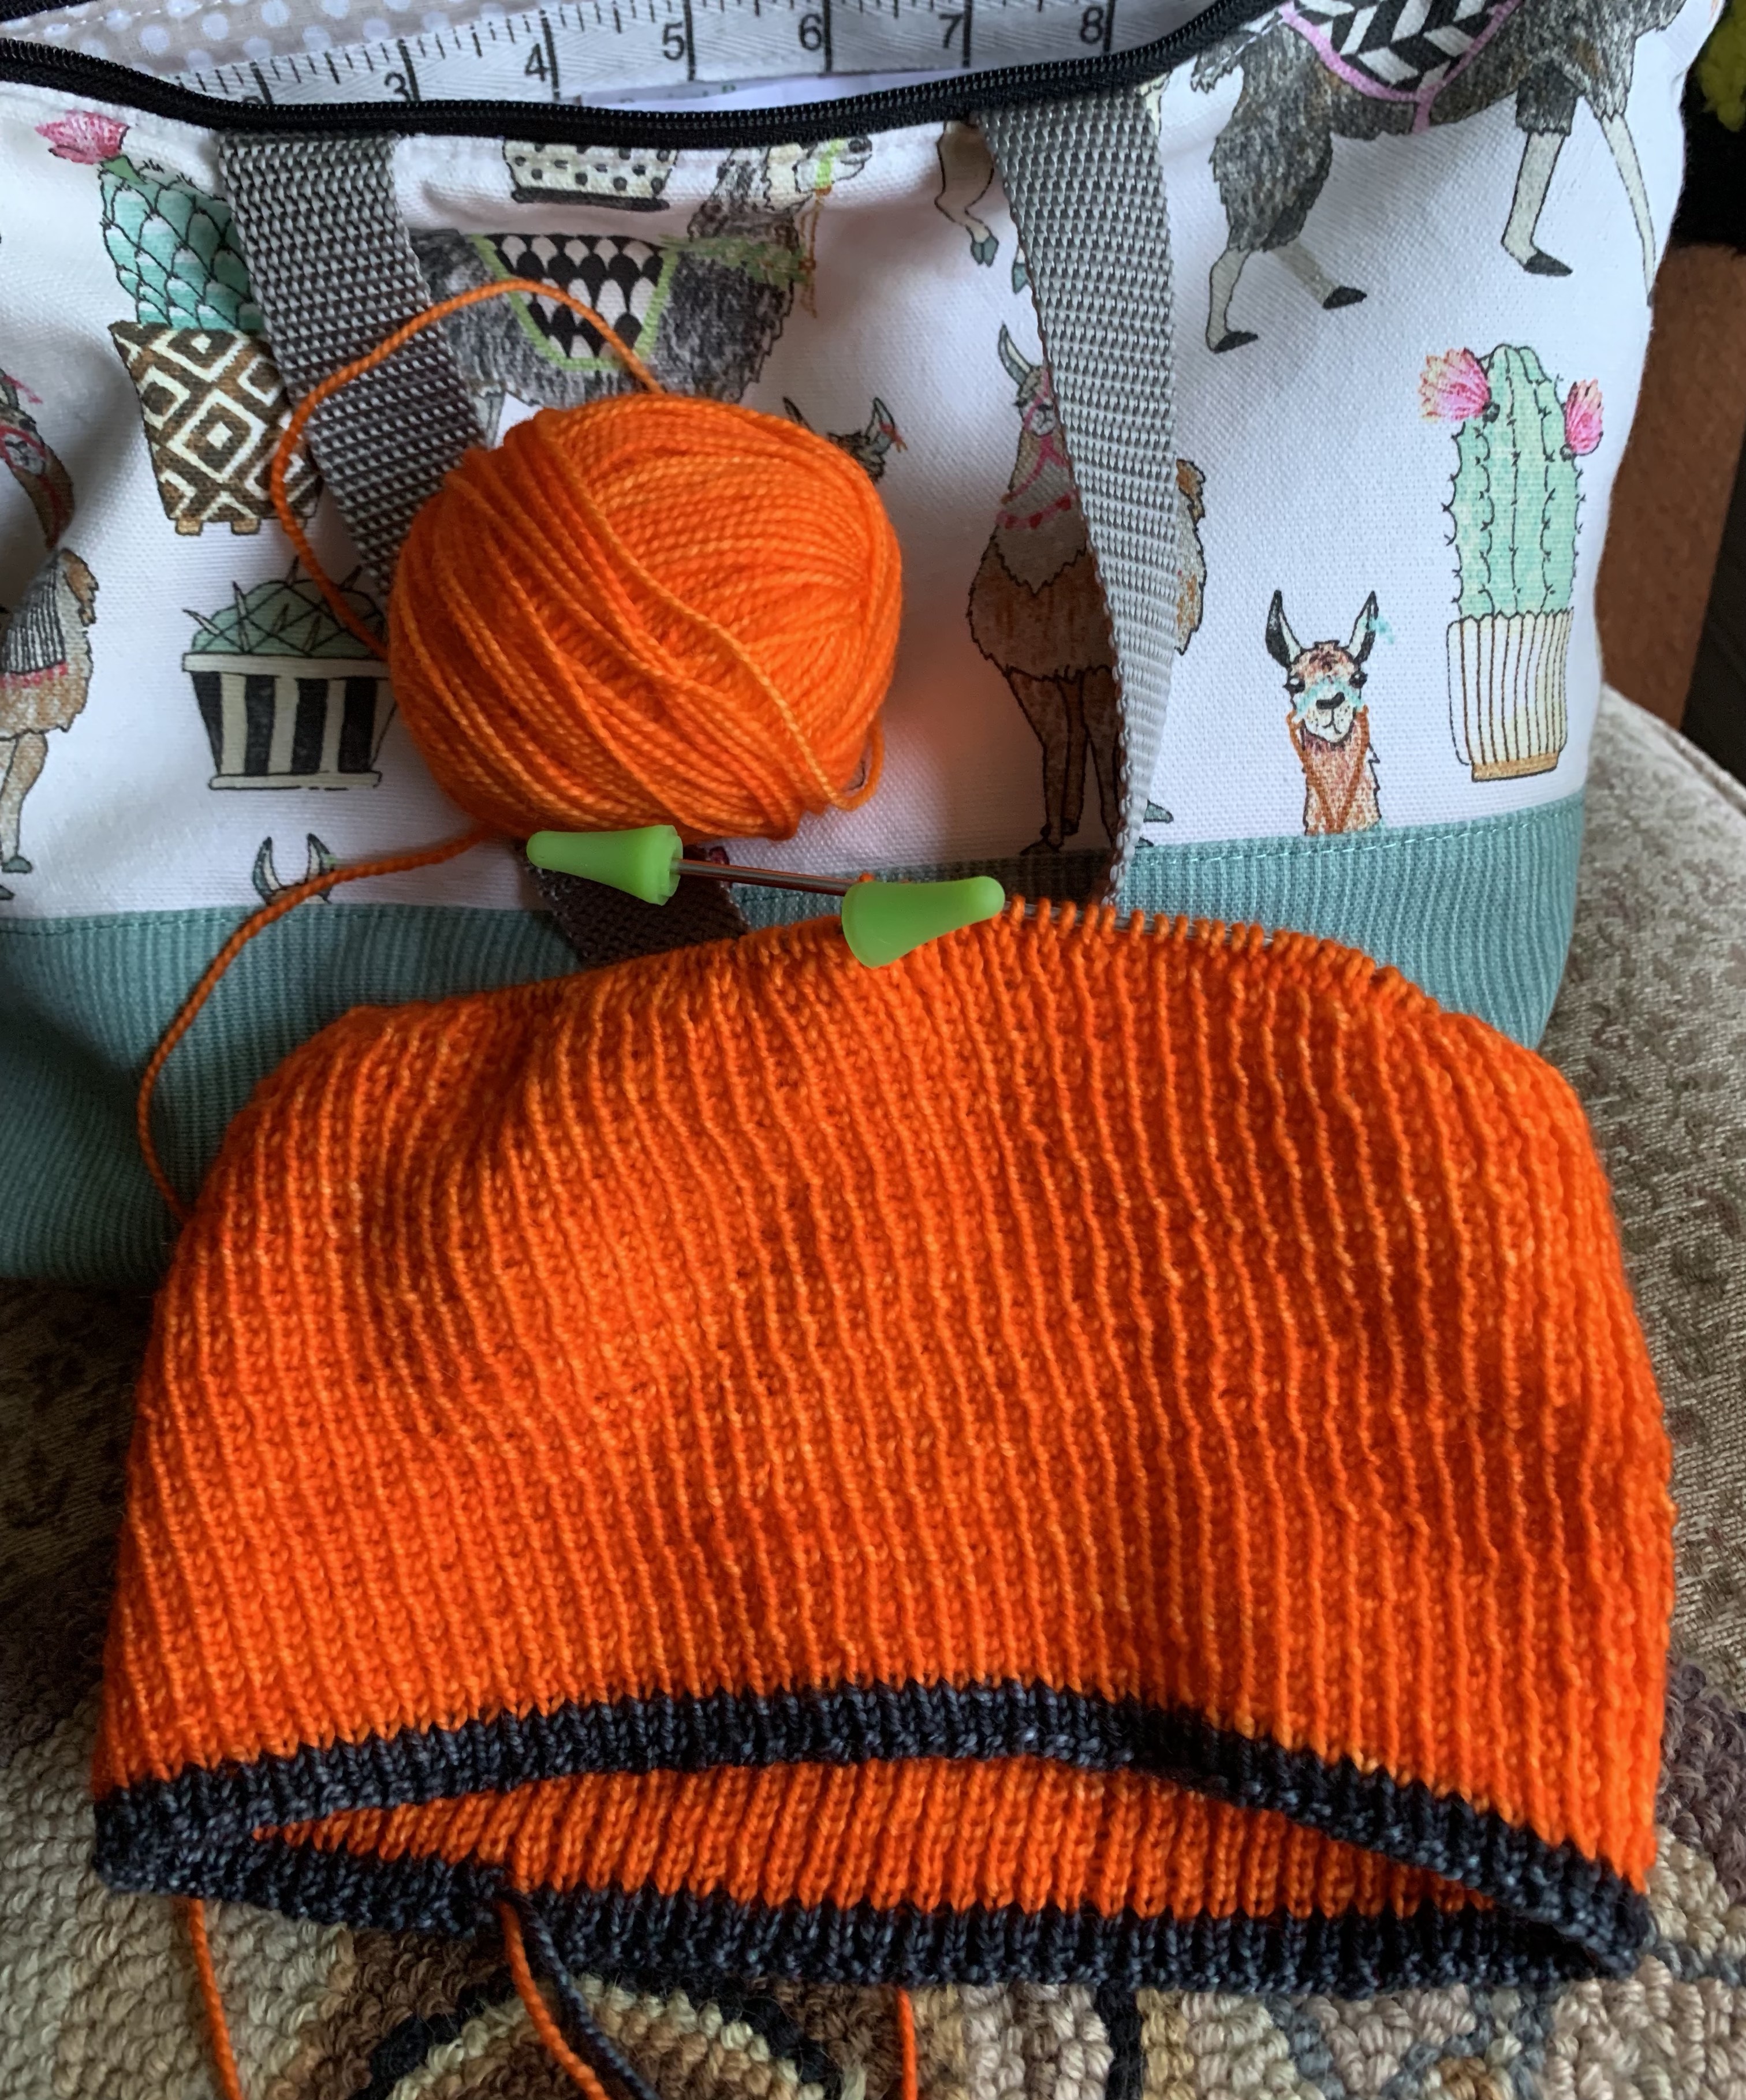
The Orange Slouchy Hat
I have knit this slouchy hat in light blue already. It is a tedious knit that seems to take forever and that makes it great as a take-along project AND becomes a very lovely everyday hat. I have mostly been knitting on this hat while traveling. I no longer have a car of my own, so I ride as a passenger everywhere. It is perfect for knitting this simple 1×1 ribbing.
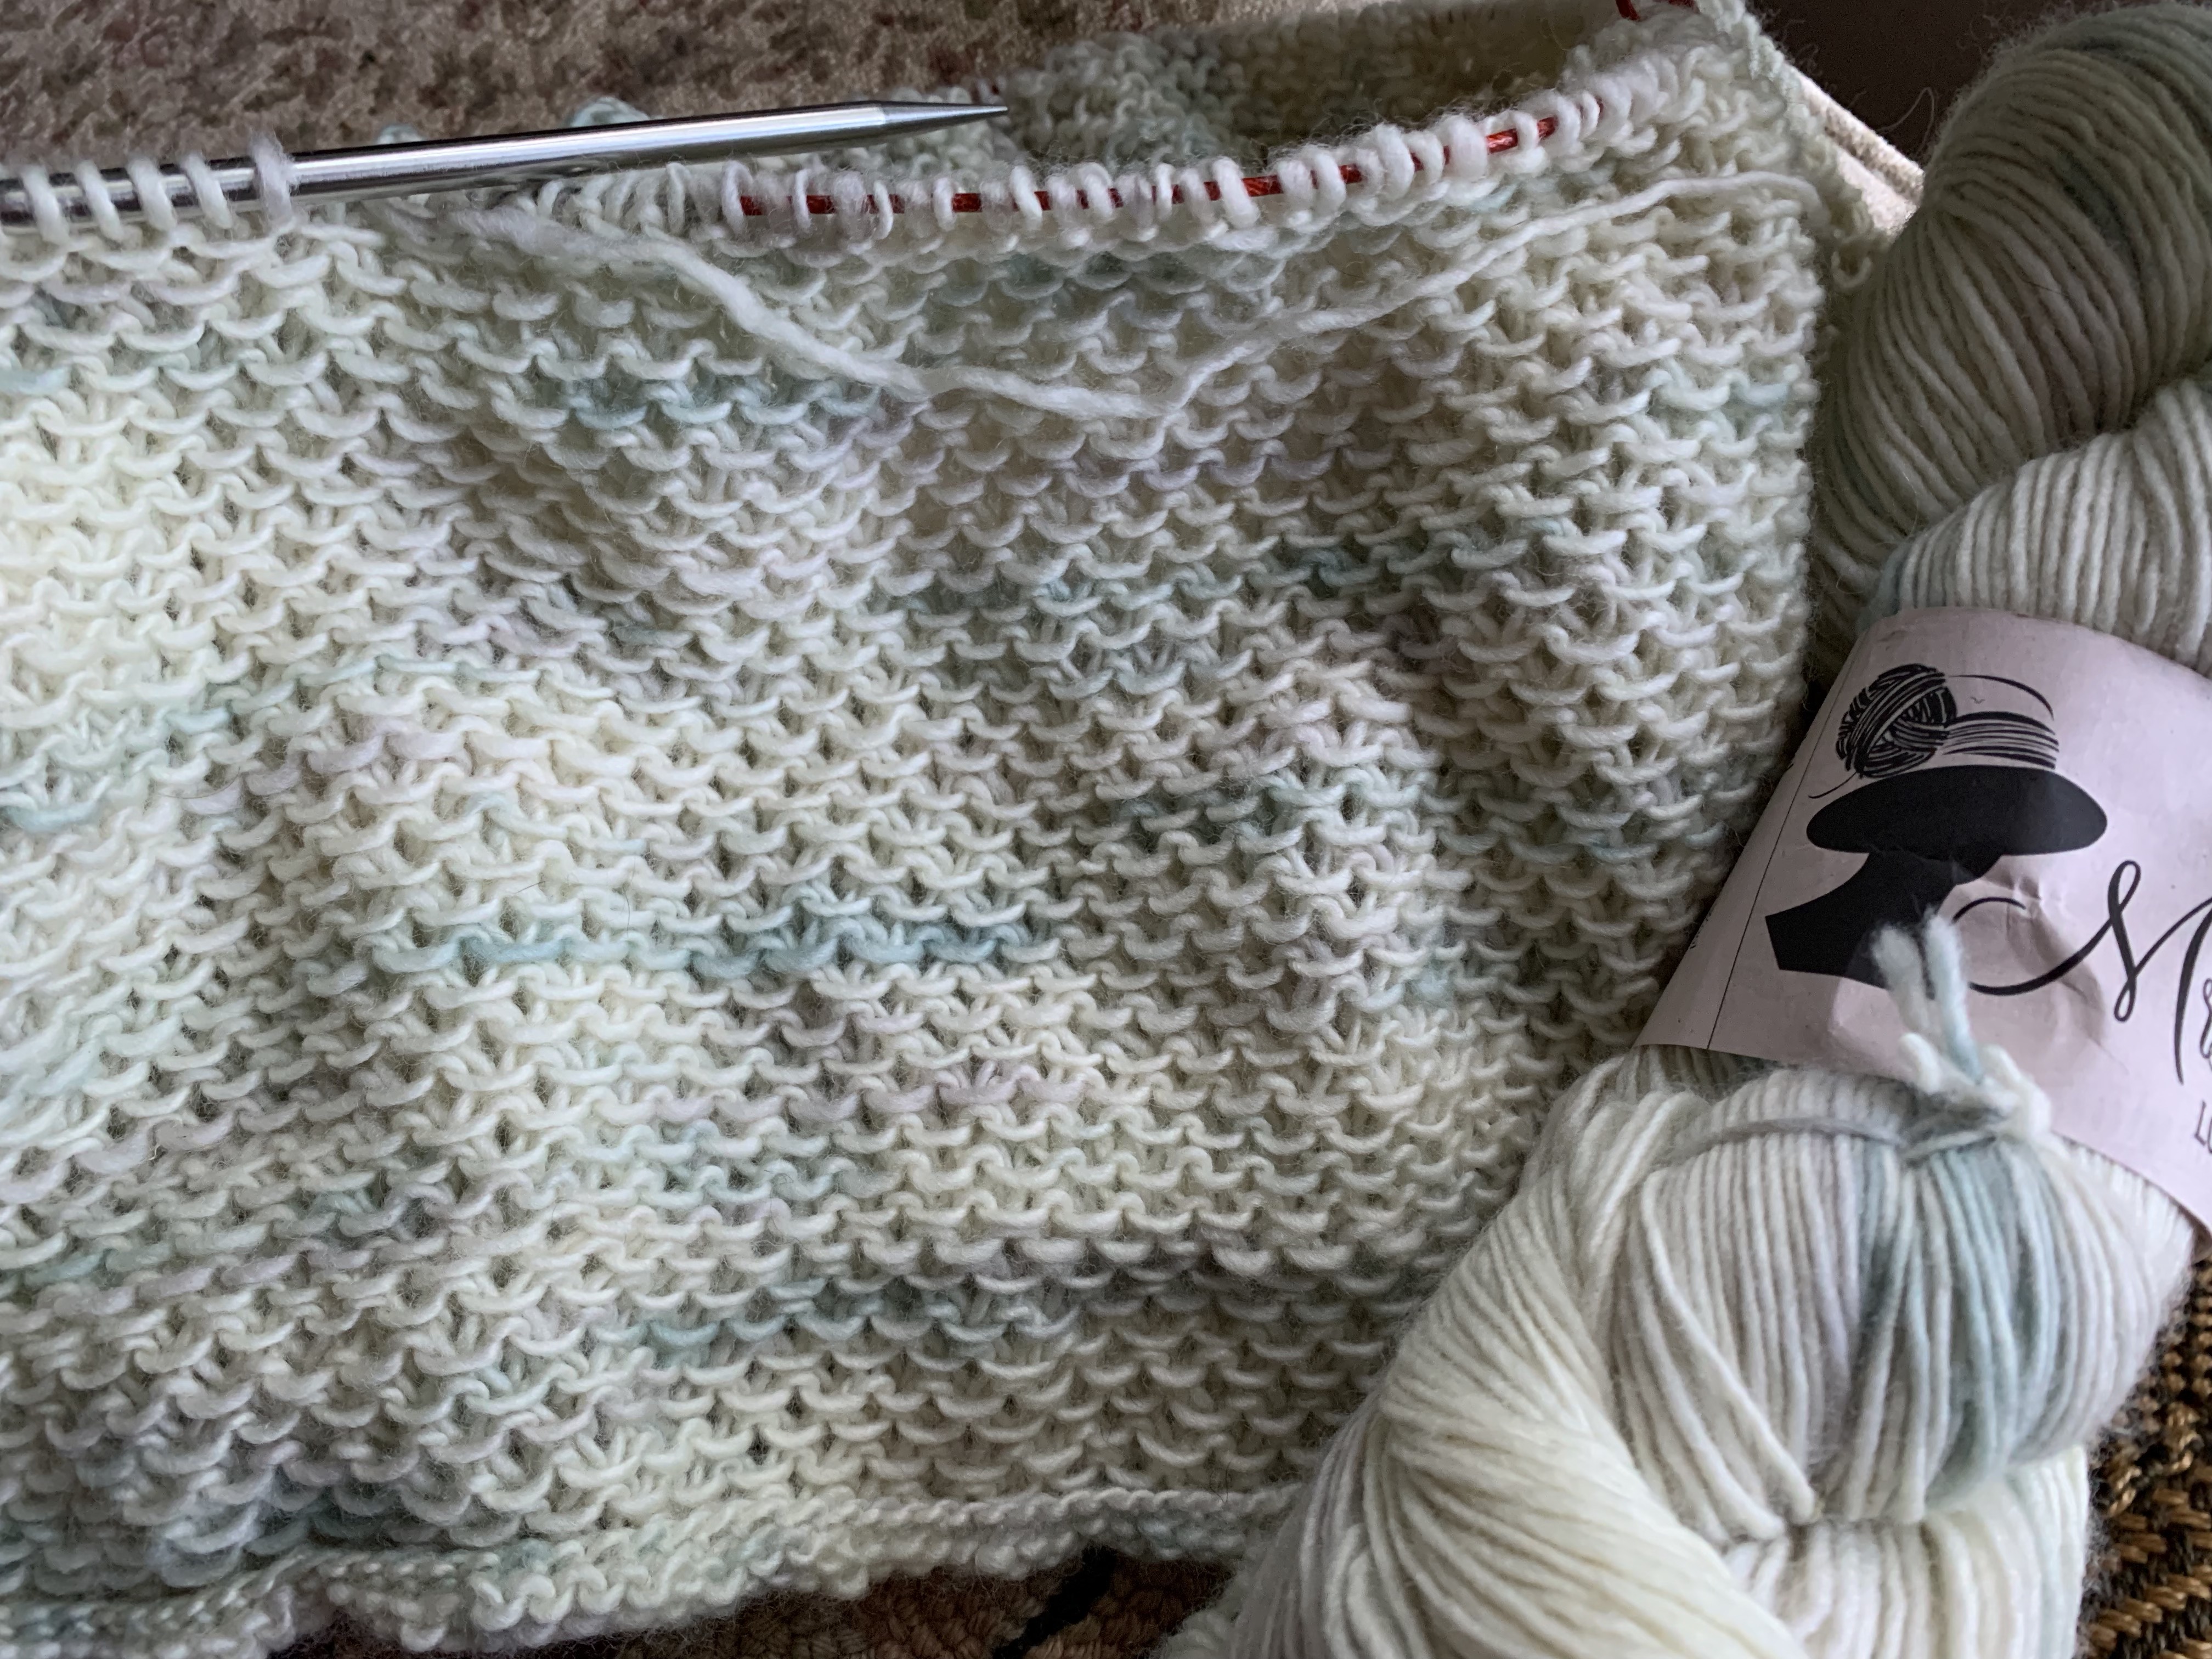
The Honey Cowl
The Honey Cowl is another simple (and FREE) pattern that is perfect for take-along car rides, or TV knitting. This is my third Honey Cowl and it is another good pattern for a beginner knitter to try. Because stitches are slipped, this is a faster knit.
The Lopi Sweater
This sweater started as a vest. The vest directions were hard to understand, mainly because I have never knit a vest. After I knit the body part of the “vest” I had to switch to making it a sweater. The whole thing was pretty much made up as I went along.
As I write this the pullover is nearly finished. I mainly have weaving in of ends, washing and blocking left. There is no pattern for this, but I followed stitch counts (mostly) from Farfuglar.
Yoke patterning of the Lopi Sweater
The sweater is nearly finished, and once that is done with I will look for another sweater to knit. I already have yarn set aside for two patterns, so I will probably begin one of those. The simplicity of the hat, cowl and shawl patterns make them perfect for occasional knitting and there is no hurry in completing any of them.
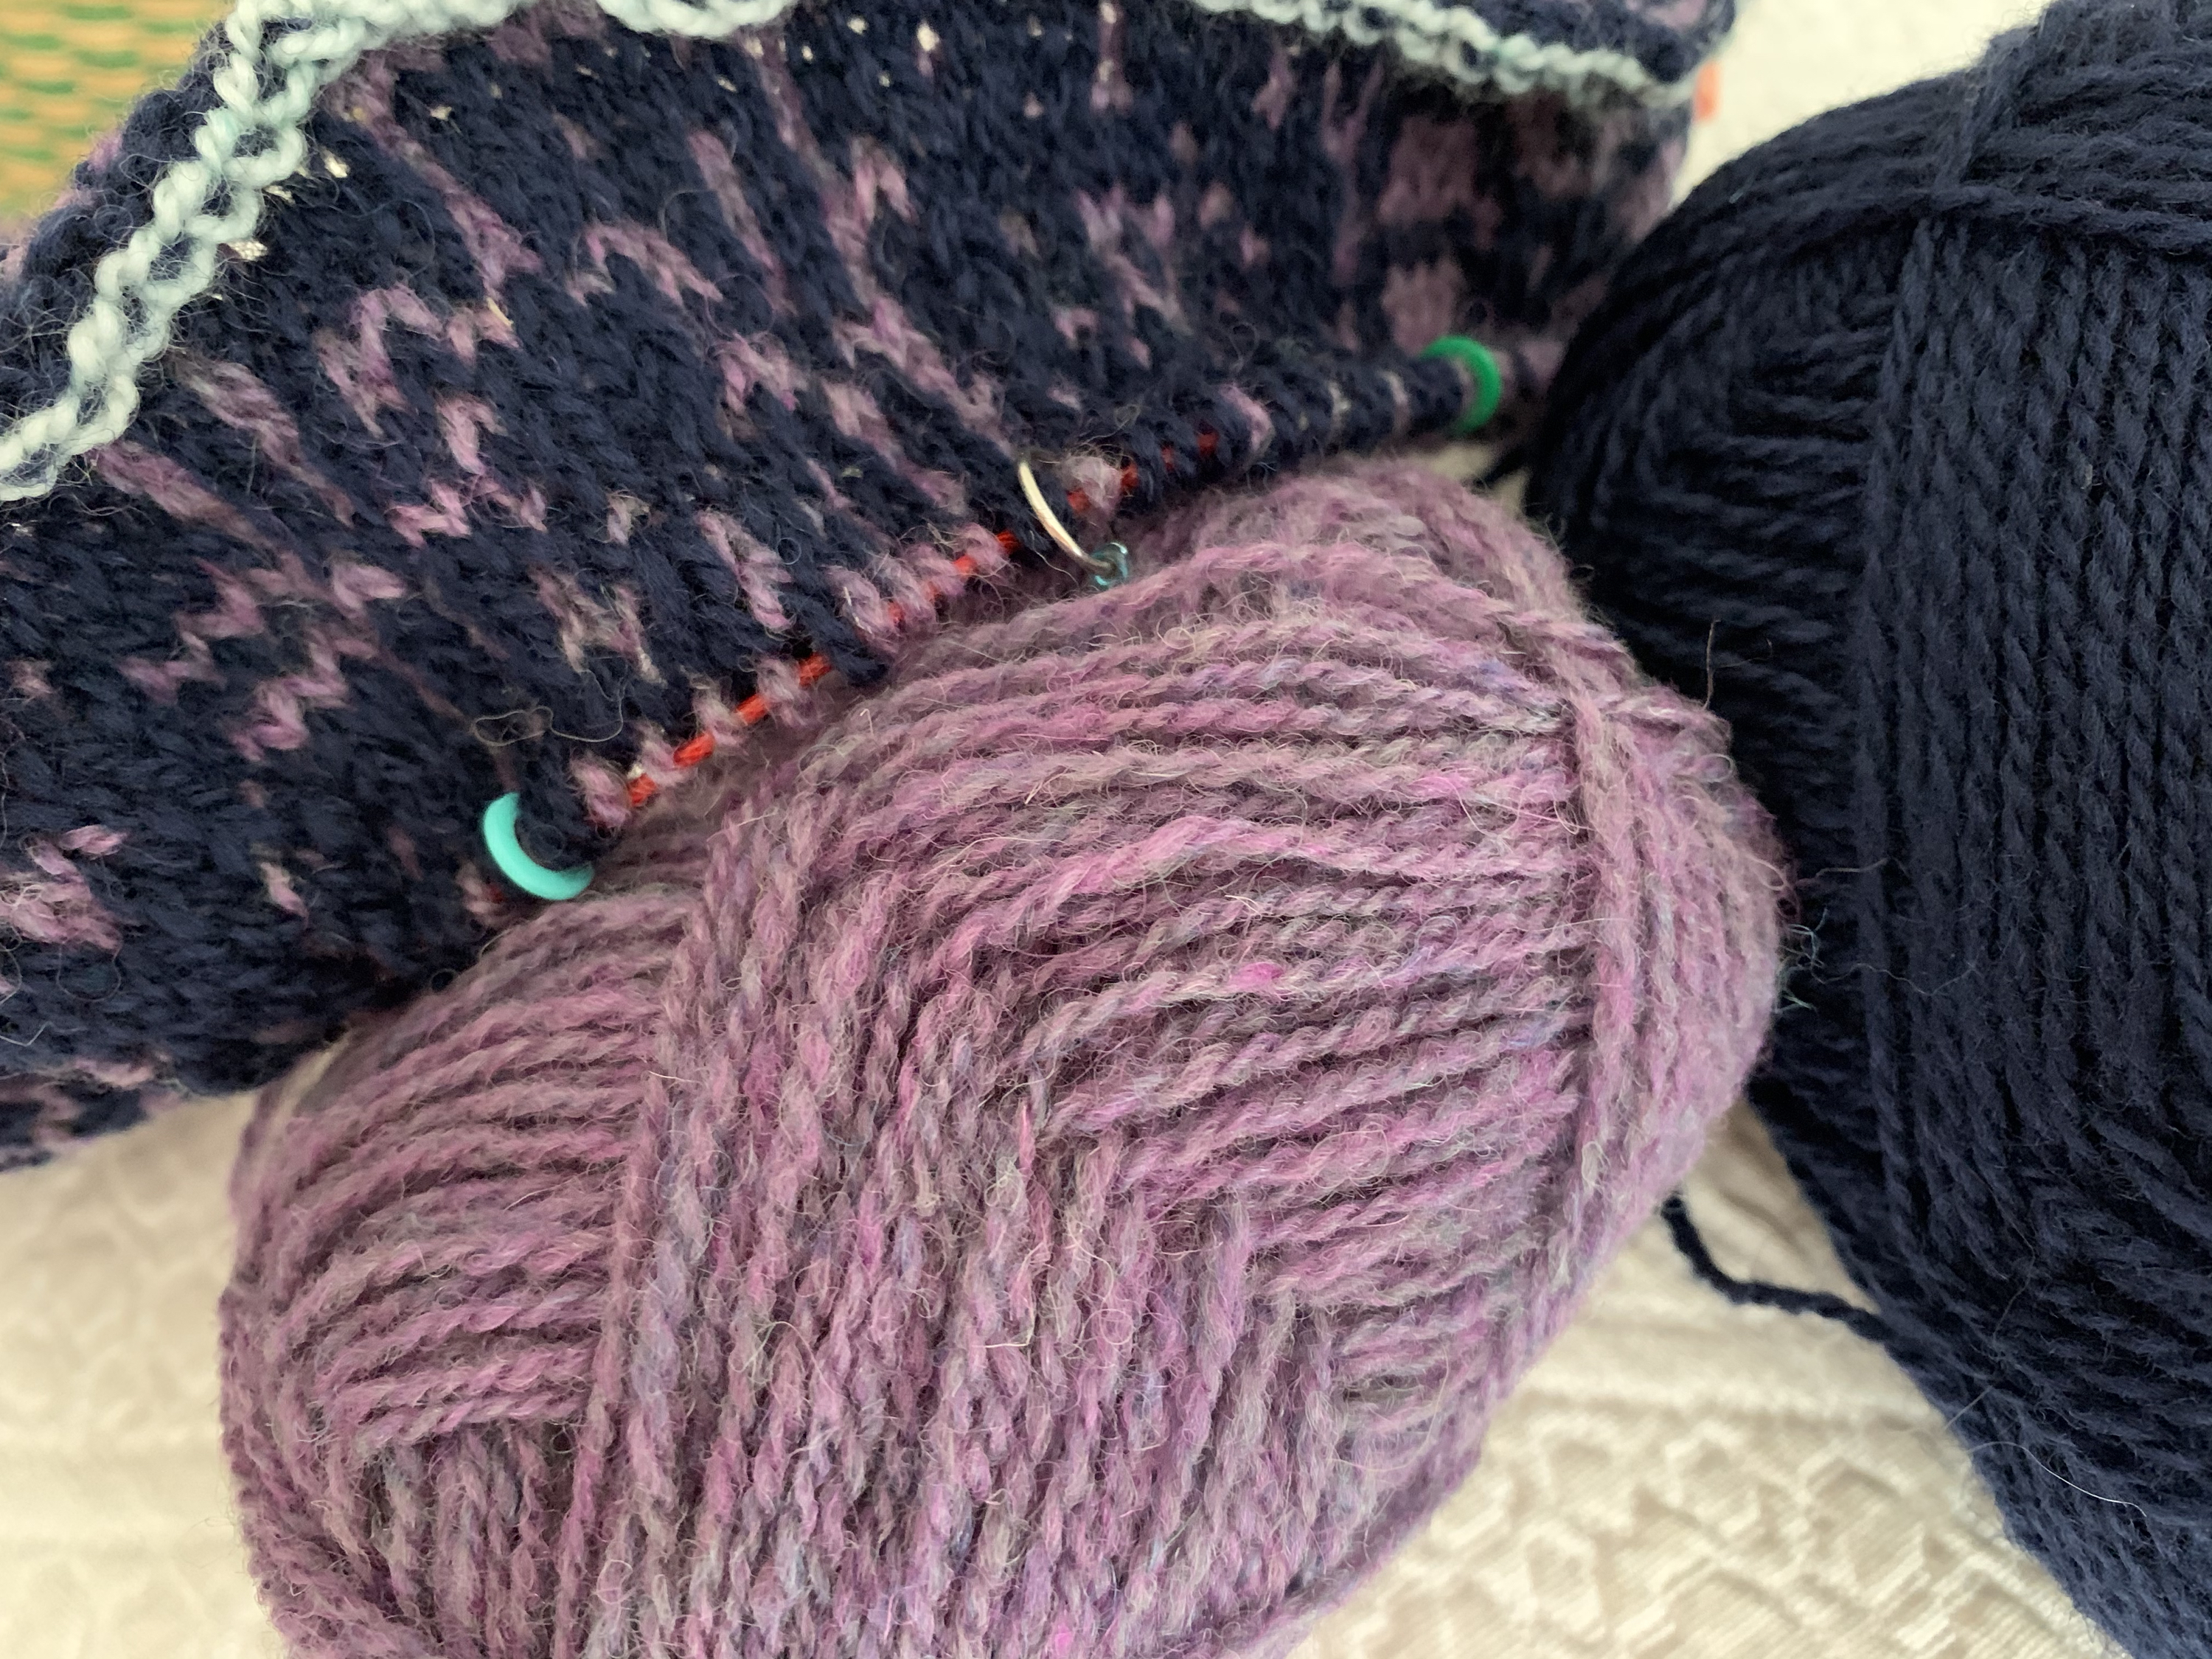
Knitting with wool, using two colors, is such fun. This is called Fair Isle, or stranded colorwork knitting. I was hooked after knitting two of the Katie’s Kep hats, and some mittens for a KAL (knit-along) last winter. Now I am knitting the Keramos lined wool cowl using two colors. What I really like about this pattern is that the wool is lined with a softer yarn.
Designers offer sales during the first weeks of TWTCOLORKAL2021 (a knit-along hosted by The Woolly Thistle), so it’s a great time to find patterns with discount codes! It’s how I found a new favorite designer named “Bunnymuff” and used the discount code to buy two of her patterns.
Lined wool cowl
The one I will be knitting first is the Keramos Cowl, which is a Fair Isle pattern with a lining and optional embroidery. I’m entering this one as a project for the KAL, which began February 19th. The other pattern I purchased is a colorwork hat with chickens! My daughter plans to raise chickens soon, and I will knit the hat for her at a later date.
Pretty wool yarn by J&S and Rauma
My stash of wool includes Rauma Finull and Jamieson & Smith Shetland, which are both fingering yarns and are perfect for any stranded colorwork project. I’m not sure yet which stash yarn I will choose for the lining of this cowl.
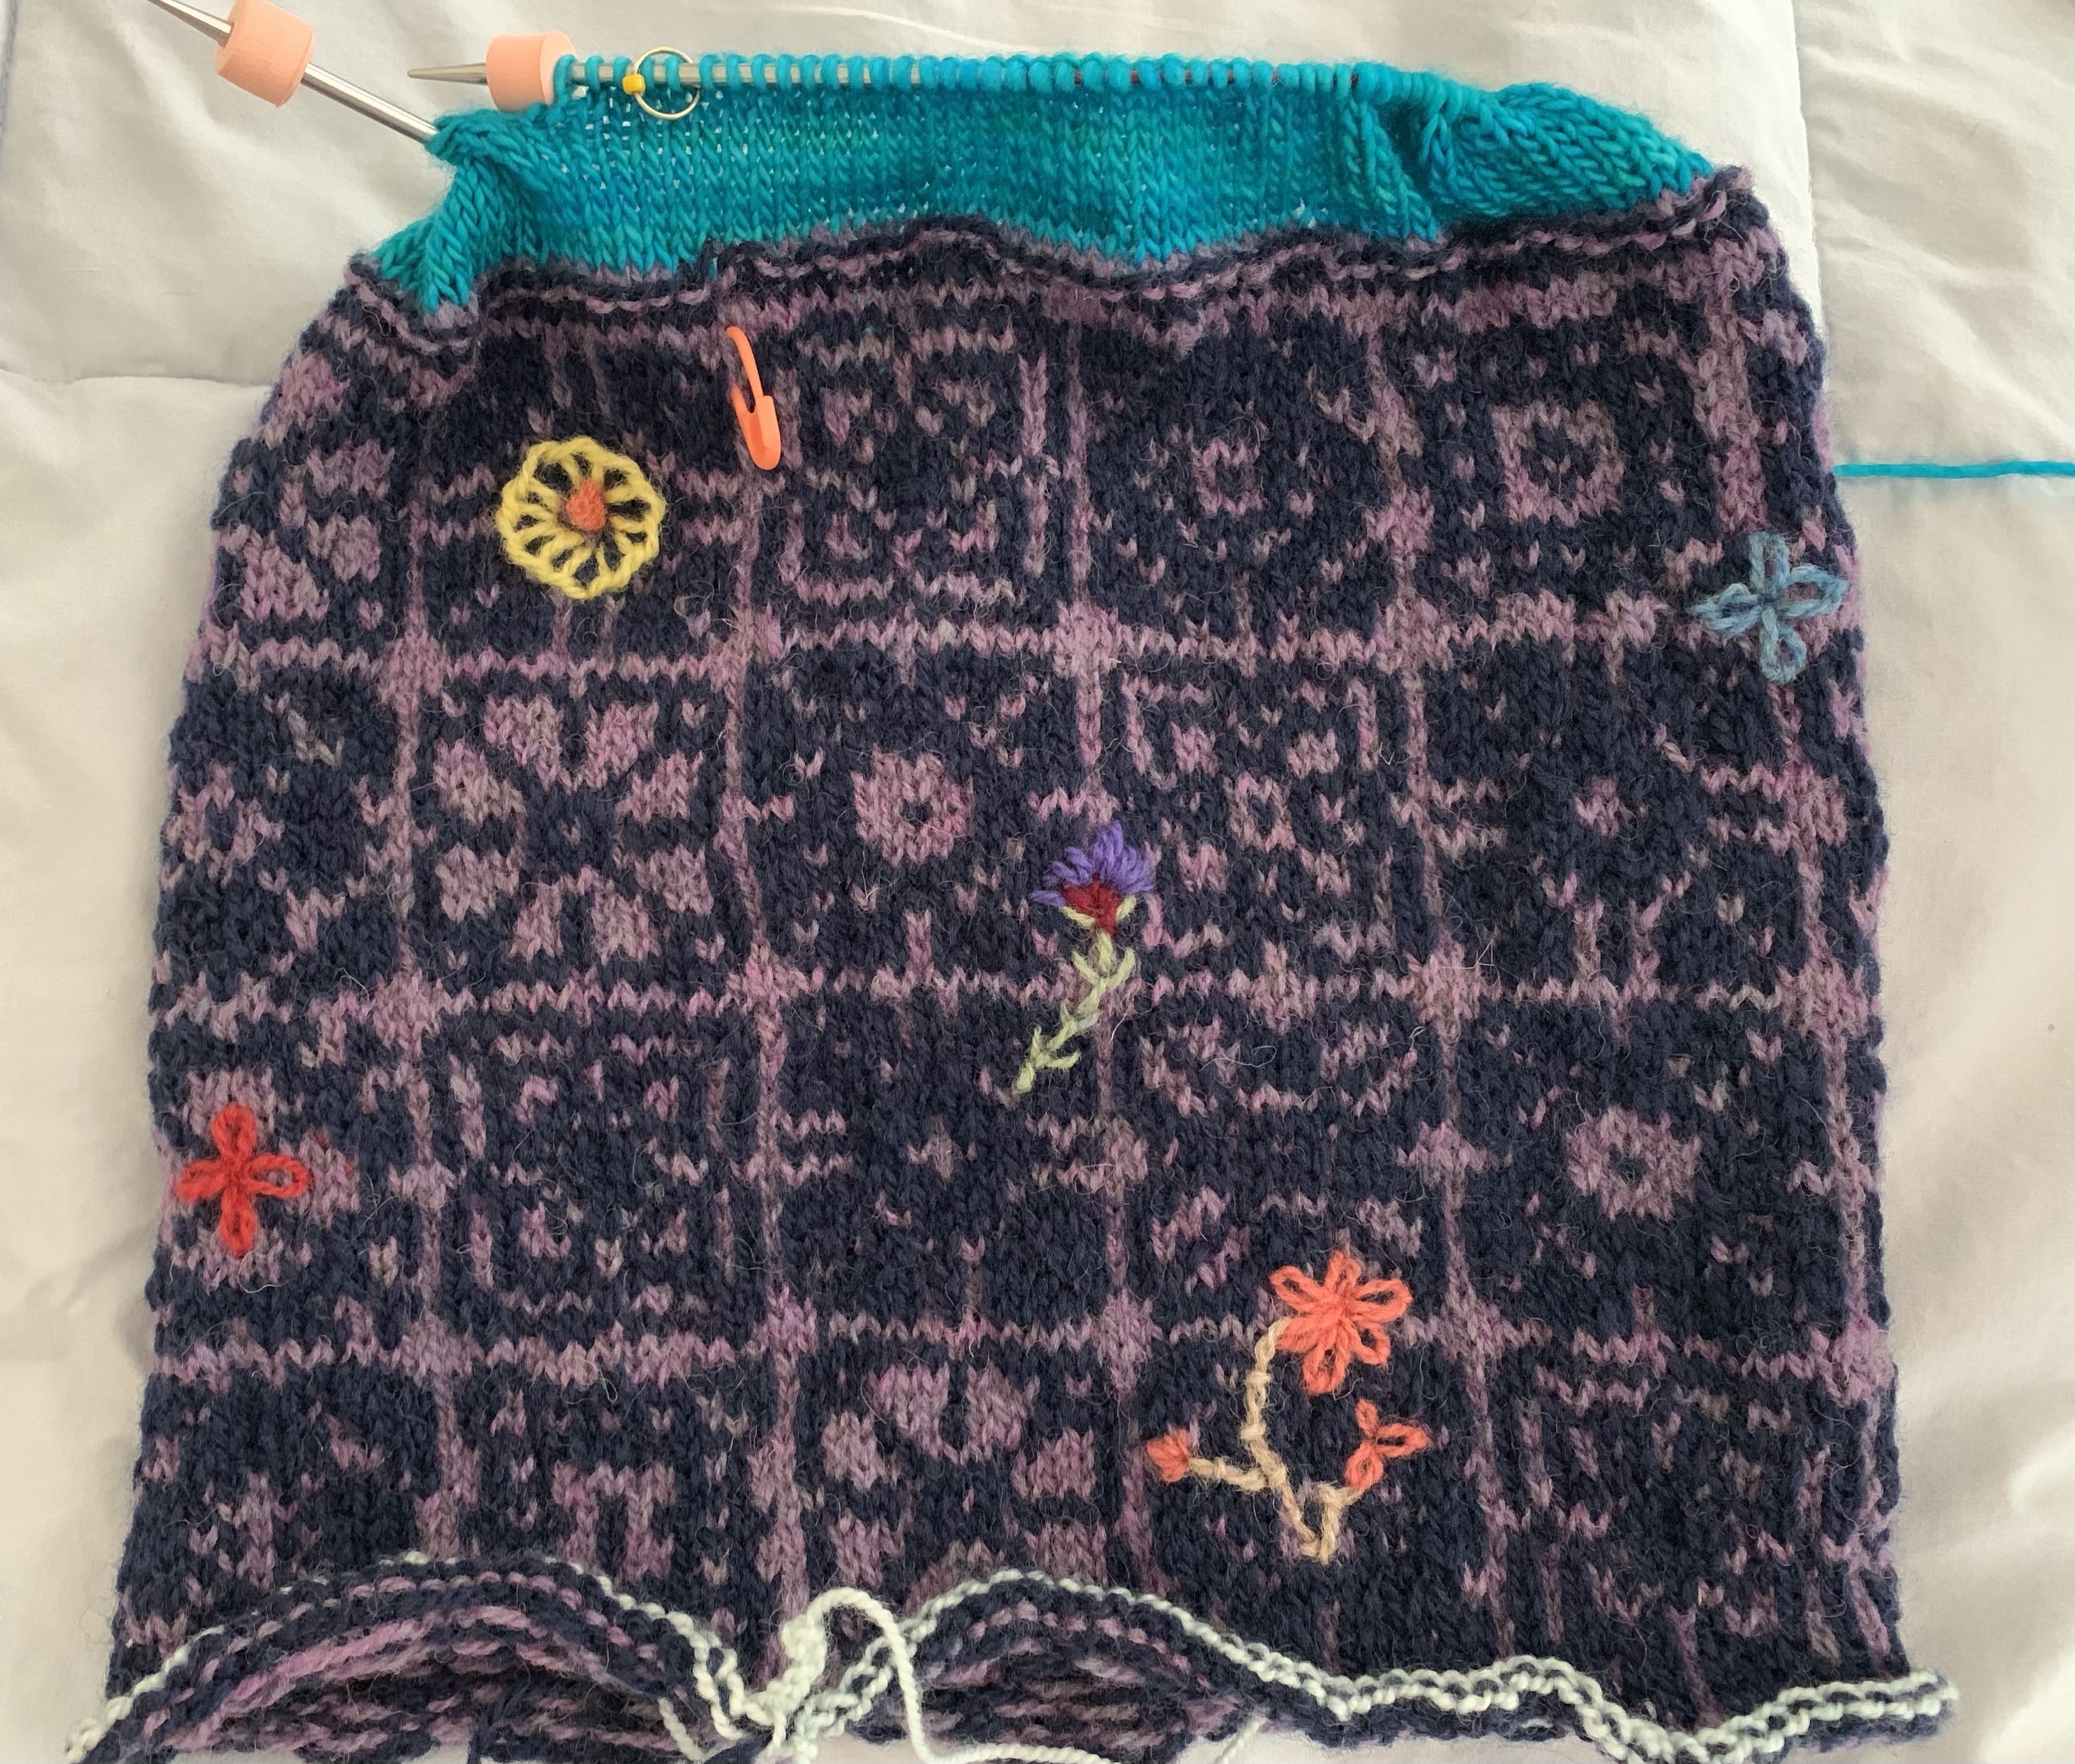
Colors I am using: Jamieson & Smith shade FC9MIX (lavender) and it is so pretty. I’m using it for the background color. Rauma is the dark navy blue yarn, #0449. The embroidery will be done on the foreground color and it needed to be dark.
Keramos cowl, cast on to 16 inch needles.
Needle Length and Size
The pattern says to cast onto a 24 inch circular needle but all I had was a 16 inch. It worked okay, but the stitches were a bit bunched. I ended up buying a 24 inch needle so I could see the stitches more clearly. I also went up in size, and cast-on using a size 3 then changed to a size 4. This is quite a bit larger than what the pattern calls for, but I was afraid the cowl might be too tight if I didn’t.
The cowl begins with a provisional cast-on. Once the front pattern is knit, a lining is created and attached to the bottom, or beginning of the cowl using a 3-needle bind-off. I’ve never done that, *but it was fairly easy. Before the lining is attached by casting off, a little embroidery can be added. Another new thing for me.
Pattern beginning to show on the Keramos Cowl
Notes on Knitting The Pattern Using Knit Companion
The Knit Companion app was a big help when it came to reading and knitting this pattern. If your eyesight is not good this app is invaluable when doing colorwork knitting. At first I had some difficulty getting it all organized as the colorwork pattern spans five pages which must be knit in sequence. As I am still learning all the ins and outs of this knitting app.
Eventually what I did was place silver stitch markers to separate my stitches to show each page of colorwork. To make things easier, and to catch mistakes quicker, I also divided each page chart in half. I used plastic stitch markers for that. This way I could easily see if I was on a new page, or in the middle of one.
I used the numbers section on Knit Companion to mark pages and rows. I used the “notes” section at the bottom to remind myself how I was tracking this pattern. Every time I finished an entire 5-page row, I went back to the first page number and changed my highlighter to the next row on every page before I began knitting. That way, once I went to the next page, the row was ready for me to knit.
The image above is of my Knit Companion app on the iPad. The inverted highlighter shows my row as 19, and I have also kept track using the blue number on the right. The red number 4 is the page I will begin knitting on (Rows 4-8 hold the pattern). As I move through the next pages, I will change that number until after page 8 when I will go back to page 4 and change the row to 20.
Finding gauge for a colorwork cowl is not easy. Basically you need to knit the whole thing and then see how it turns out! Or, if you have colorwork swatches, or more likely whole projects knit up, find your gauge on those. It is not easy to count such small stitches.
Because cowls aren’t as important for fit, I didn’t count anything. I simply chose a larger needle size, because I tend to knit tightly. The cowl could not end up too tight for my neck, and it turned out I was right to do this. Once I had knit a couple of colorwork sections, I measured width and estimate the height.
It turns out that my width around is spot on and matches the sizing in the pattern (21 inches around). My two finished rows of colorwork sections measure about 5.5 inches and the pattern calls for 5 “rows”. But the finished cowl should measure 10 inches high! This means my horizontal gauge is good, but my height gauge is off. All I can do to fix this is shorten the project. This is easy to do on the Keramos because I will knit two more row sections and leave off the 5th row entirely.
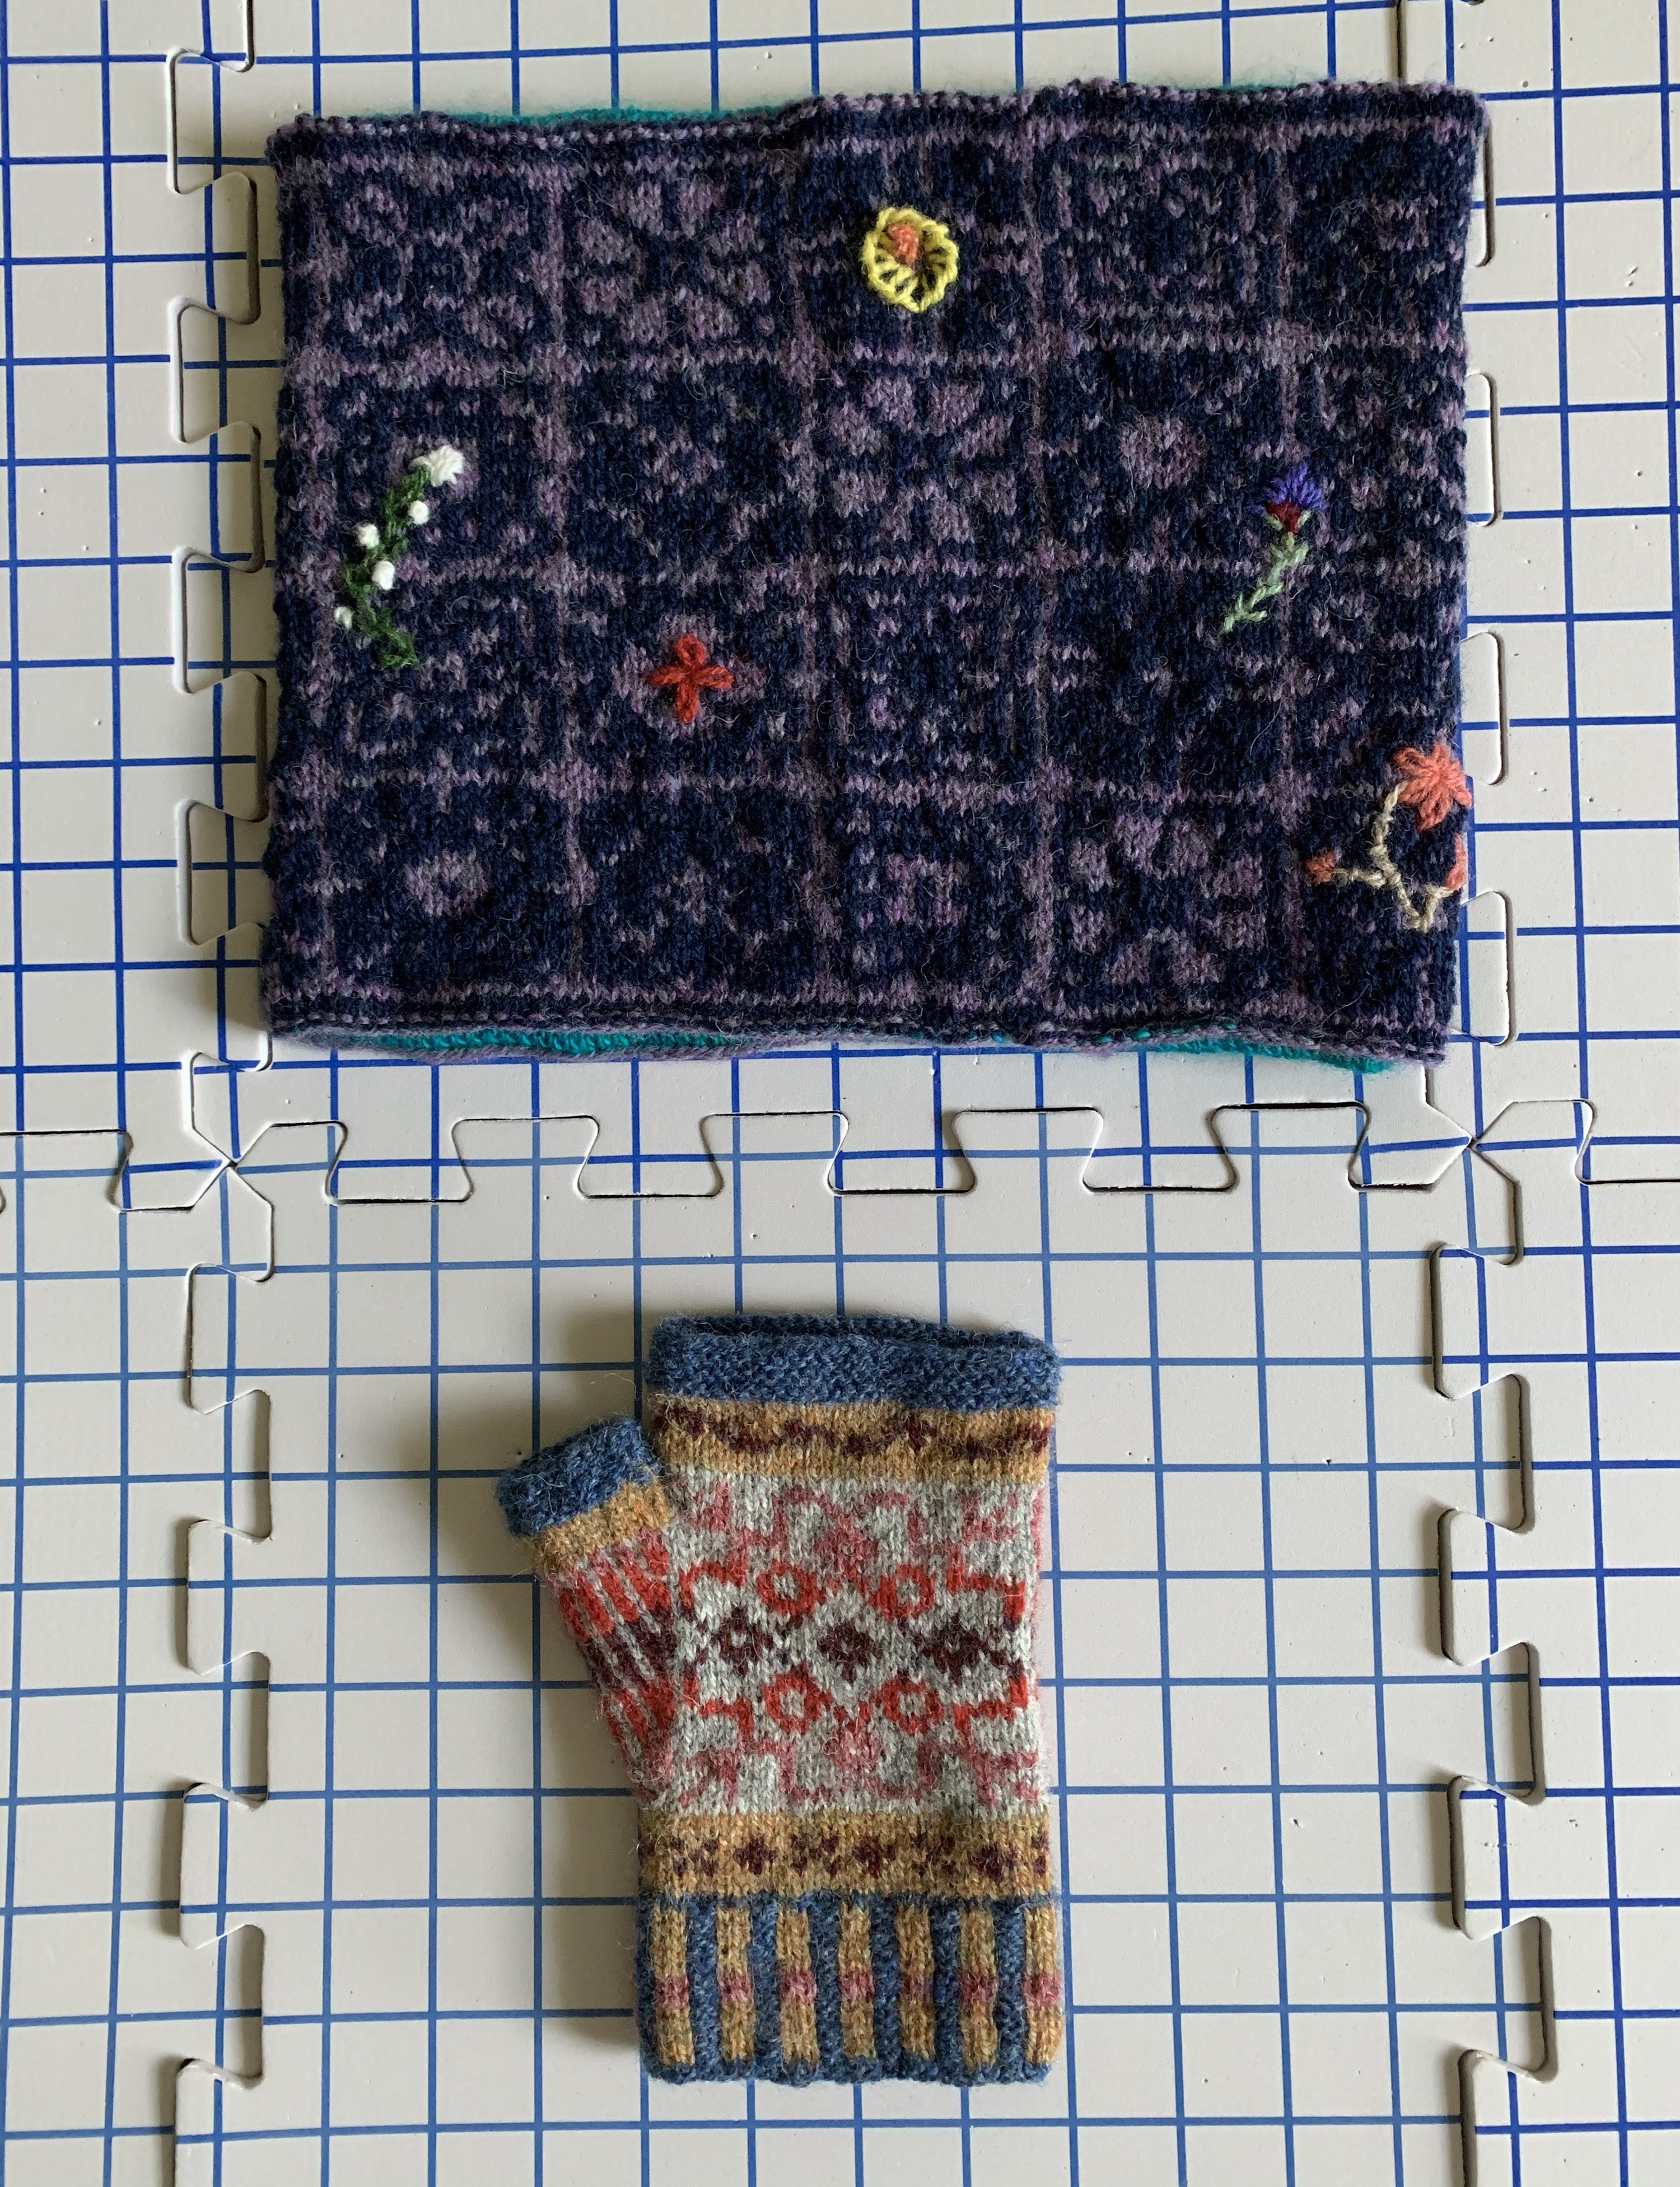
Finding the size on a colorwork cowl
In the photo above, I am comparing my Namu cowl size, which I knit a while ago for size. The Keramos is wider, but will not have the “give” of the cabled Namu, so that should be fine. Colorwork is not very stretchy.
Choosing a Lining Color, and Learning Embroidery
The turquoise blue yarn is a ball I’ve had sitting around. It’s some kind of single ply sock yarn, but that is all I know. The yarn is brightly colored and soft and silky which is perfect for the inside of this wool cowl. Now it’s just knitting along until the liner length is right.
I chose turquoise blue sock yarn, from my stash, for the lining
I stopped knitting after four colorwork “rows”, or sections. My cowl measures 9.5 inches tall. Now the lining will be knit and folded inside to be attached at that provisional cast-on along the bottom. I’m dreading that. It’s a 3-needle bind-off which I’ve never done. (Turned out to be pretty easy!)
Began my blue lining for the Keramos Cowl
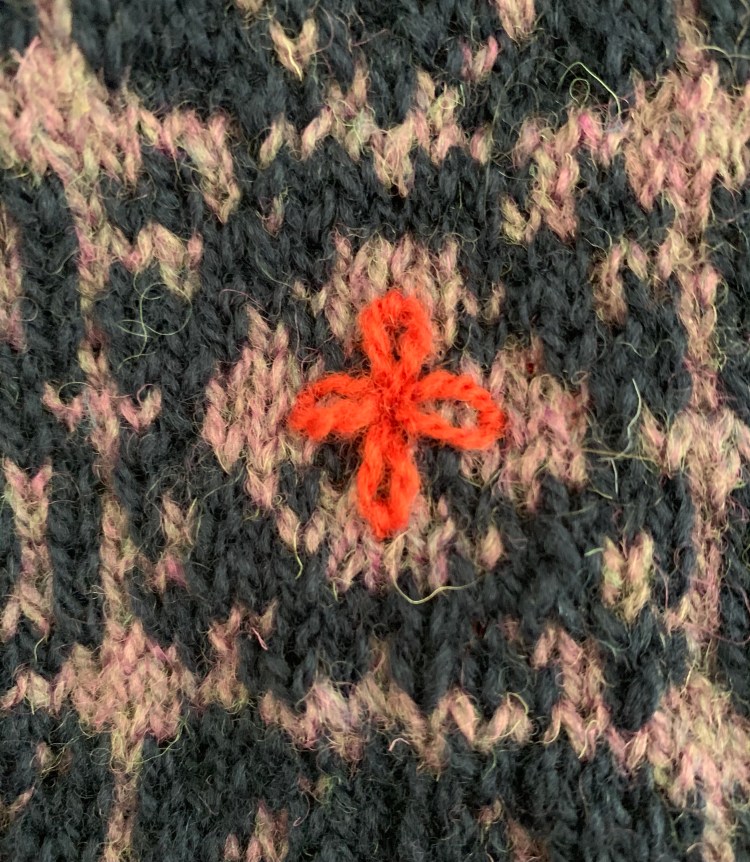
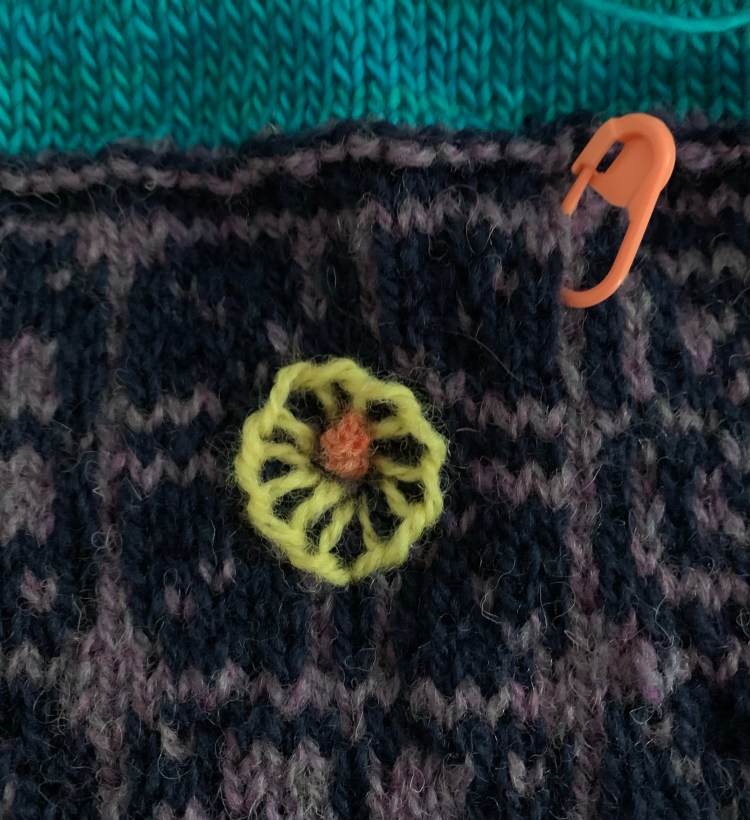
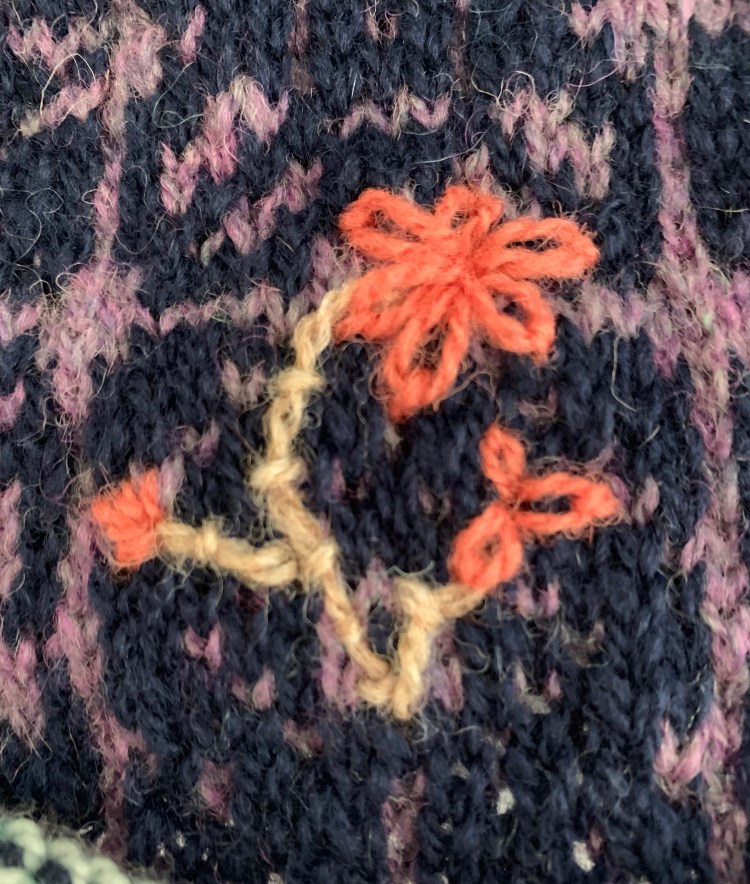
The Keramos Cowl designer, “Bunnymuff” aka Mona Zillah (link goes to her Ravelry Store page), includes cute embroidery on her knitting projects. My first try at embroidery is not exactly cute, but it was fun learning. I did a lot of flower removal over and over just to get these little sewing designs finished! Then, I did a little bee, which I love. I got the idea for this bumblebee from a YouTube image.
My Embroidery Skills Are Lacking, But it Was Fun Trying
My bee!
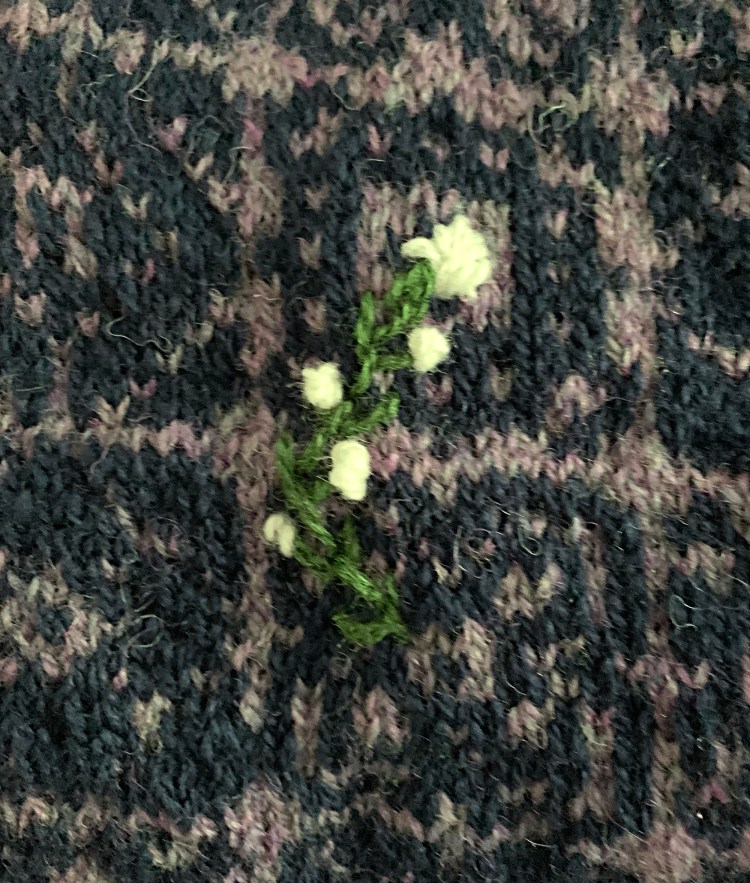
A little purple flower – can you tell?
A simple flower embroidered over my knitting.
Blanket stitch and French knot
YouTube Videos on Embroidery Stitches
After searching through a bunch of embroidery stitch videos on YouTube, I found a couple that were pretty nice so I’ll list them here. Using wool yarn, on a knit surface, is a bit more challenging than embroidery thread on drawn patterns, but you will get the general idea.
Finally I finished up knitting this cowl. It seemed to take a while, but it was on hold for two months when I took my trip to New Hampshire. I brought the Wild Angelica socks to knit and left this cowl behind.
The worst part of this pattern, for me, was picking up those stitches on hold. It was a tedious chore. The three needle bind-off went well, and ended up looking nice. I used the lighter purple color to do it and watched a YouTube video to figure it out.
Drying my knitting projects – Keramos and Fair Isle Mitt
I did try the cowl on before washing, and it is big and thick. Once it’s dry I’ll get photos wearing it (below). This one will definitely keep a neck toasty warm! It feels so good to finish up a knitting project.
Knitting a small cowl using Woolfolk Tynd yarn in colorwork motifs
This small wool cowl was a spur of the moment knitting project decision. I do not have a pattern to share as I made it up as I went along.
The idea bloomed when I came across the Glacier Park Cowl pattern by Caitlin Hunter at Ravelry and saw that she had used Woolfolk yarn in two colors to create it. I knew I had stashed away two skeins of that same yarn. My cowl is not in her pattern, but I did use up (nearly) my Woolfolk Tynd yarn!
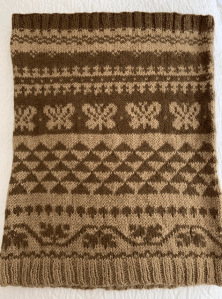
I used Woolfolk Tynd yarn in brown and tan to make this knit cowl
My two skeins of the super-soft Tynd are dark and light brown colors, and I’m not sure of the numbers (Tynd colors are numbered, not named). Probably this was on sale somewhere at some point and I bought it not knowing what I’d use it for. The yarn is so very soft that a cowl is the perfect project.
A recent purchase of the book 150 Scandinavian Motifs gave me the incentive to do some math and find designs that would fit my cast on numbers. Then I screwed up and forgot my cast on, or counted the first row incorrectly, and messed up some of the rows.
I began with the lighter color as my main color and switched just before the butterfly row and made the dark color my main color. I did this to use up the yarn more equally. I can’t locate my leftover yarn, but I did use most of each skein to finish this cowl.
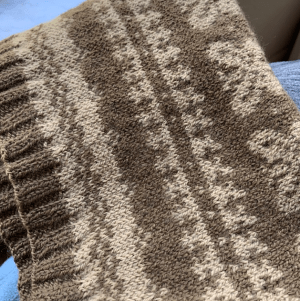
Motif spacing error
I do love the Glacier Park cowl pattern (click the link above to see that beauty), but not for these duller colors. So I made up my own design which was really good practice doing stranded colorwork. And I did make a lot of mistakes! No biggie… a cowl hides mistakes well.
In the image above you can see where my butterfly row did not line up exactly with the stitches I (thought) I had counted, so I had to add a little wavy section to carry the yarn.
Below I am showing my goof up on the row above the butterflies where somehow my counts were off. Most of these motifs came from the book, but I did make some up myself.
Just thought I’d share the stranding that went on inside the cowl. I didn’t have many ends to weave in because all the yarn was carried up inside the cowl.
Fun Selfies Wearing the Cowl!
I have no one to ask to take photos of me, so I did the best I could getting pictures of the cowl around my neck. My messy gray-hair braid kept getting in the way!
Knitting this cowl was a little sidestep from knitting my Fine Sand sweater and finishing up my Quince Wrap. It was a quick knit and a brain challenge (although not too tough) to figure out which designs would fit around the cowl. Sometimes I need something different on the needles.
Finished knitting the Typha cowl. I had trouble figuring the gauge for this because I was not very experienced, but I should have gone up at least one size in needles.
Finished Cowl
I am knitting a cowl in shades of pink – the finished photo above most closely matches the actual colors. This pattern comes from designer Kirsten Kapur and is named “Typha”. The link takes you to the Ravelry page where the pattern is sold as a download.
The cowl is a simple one to create, with the first part being a simple garter stitch. One row of knitting and the next of purling. After that, a simple repeating lace pattern is followed to finish off the cowl. The pictures below came out very “Pink”.
Done a few rows of the lace part of the cowl.
The second part of the cowl is a lace pattern. After knitting a shawl in the Through the Loops Knit Along, this pattern is very simple to follow. And I believe that most knitters with some experience can easily follow the pattern. It is fun to do.
Cowl knit in the round in lace and garter stitch
I will admit that getting started with this pattern was not easy. For some reason my cowl is coming out much smaller than the pattern implies (Go up 1 pr 2 needles size next time!). I did do a swatch to check gauge, but I am not familiar with figuring out gauge and finding it with a lace pattern threw me off. (Now I know to knit the pattern in a 4×4 square to measure for gauge.)
Consequently when I tried to cast on (for first the smaller cowl, and then the larger) the yarn did not reach, so I had to begin over.
My yarn is obviously thinner than what Kirsten used to create her cowl. The yarn she used is Fibre Company “Meadow”, which is listed as “heavier lace”, so I bought “heavy lace yarn” from Miss Babs, thinking it would be the same. I guess not. Live and learn… that is my motto, and once again, I have learned from making a mistake.
So my “long” version will actually be short, and probably not long enough to wrap twice. My plan was to make the shorter version of the cowl to give to my daughter, but now I will keep this one and try again to make a correct size for her.
I do plan to make this cowl again using a heavier yarn and trying to figure out my gauge. It’s a beautiful and unique cowl in the two colors, which gives us many color choices.