After I saw how much my cat Skittle loved sleeping on my son’s new Lopi wool sweater, I decided to knit something for her. I have plenty of bulky wool yarn, which she seems to prefer. To make it interesting, I decided to try knitting a round blanket.
The Vogue knitting book has all kinds of useful information and I recall seeing how to knit shawls of various shapes. One is knit into a circle shape.
If you decide to make a round project like this, be sure you have lots of various lengths and types of needles! As that circle progresses, you’ll need to go from DPNs, to 16”, to 32”, and so on.
Casting On and Using DPNs
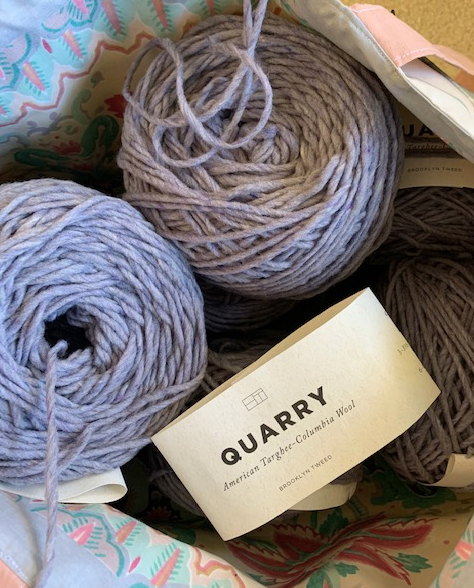
I’m using size 10 double-pointed needles because my yarn is bulky weight (Quarry to begin with, and then Alafosslopi).
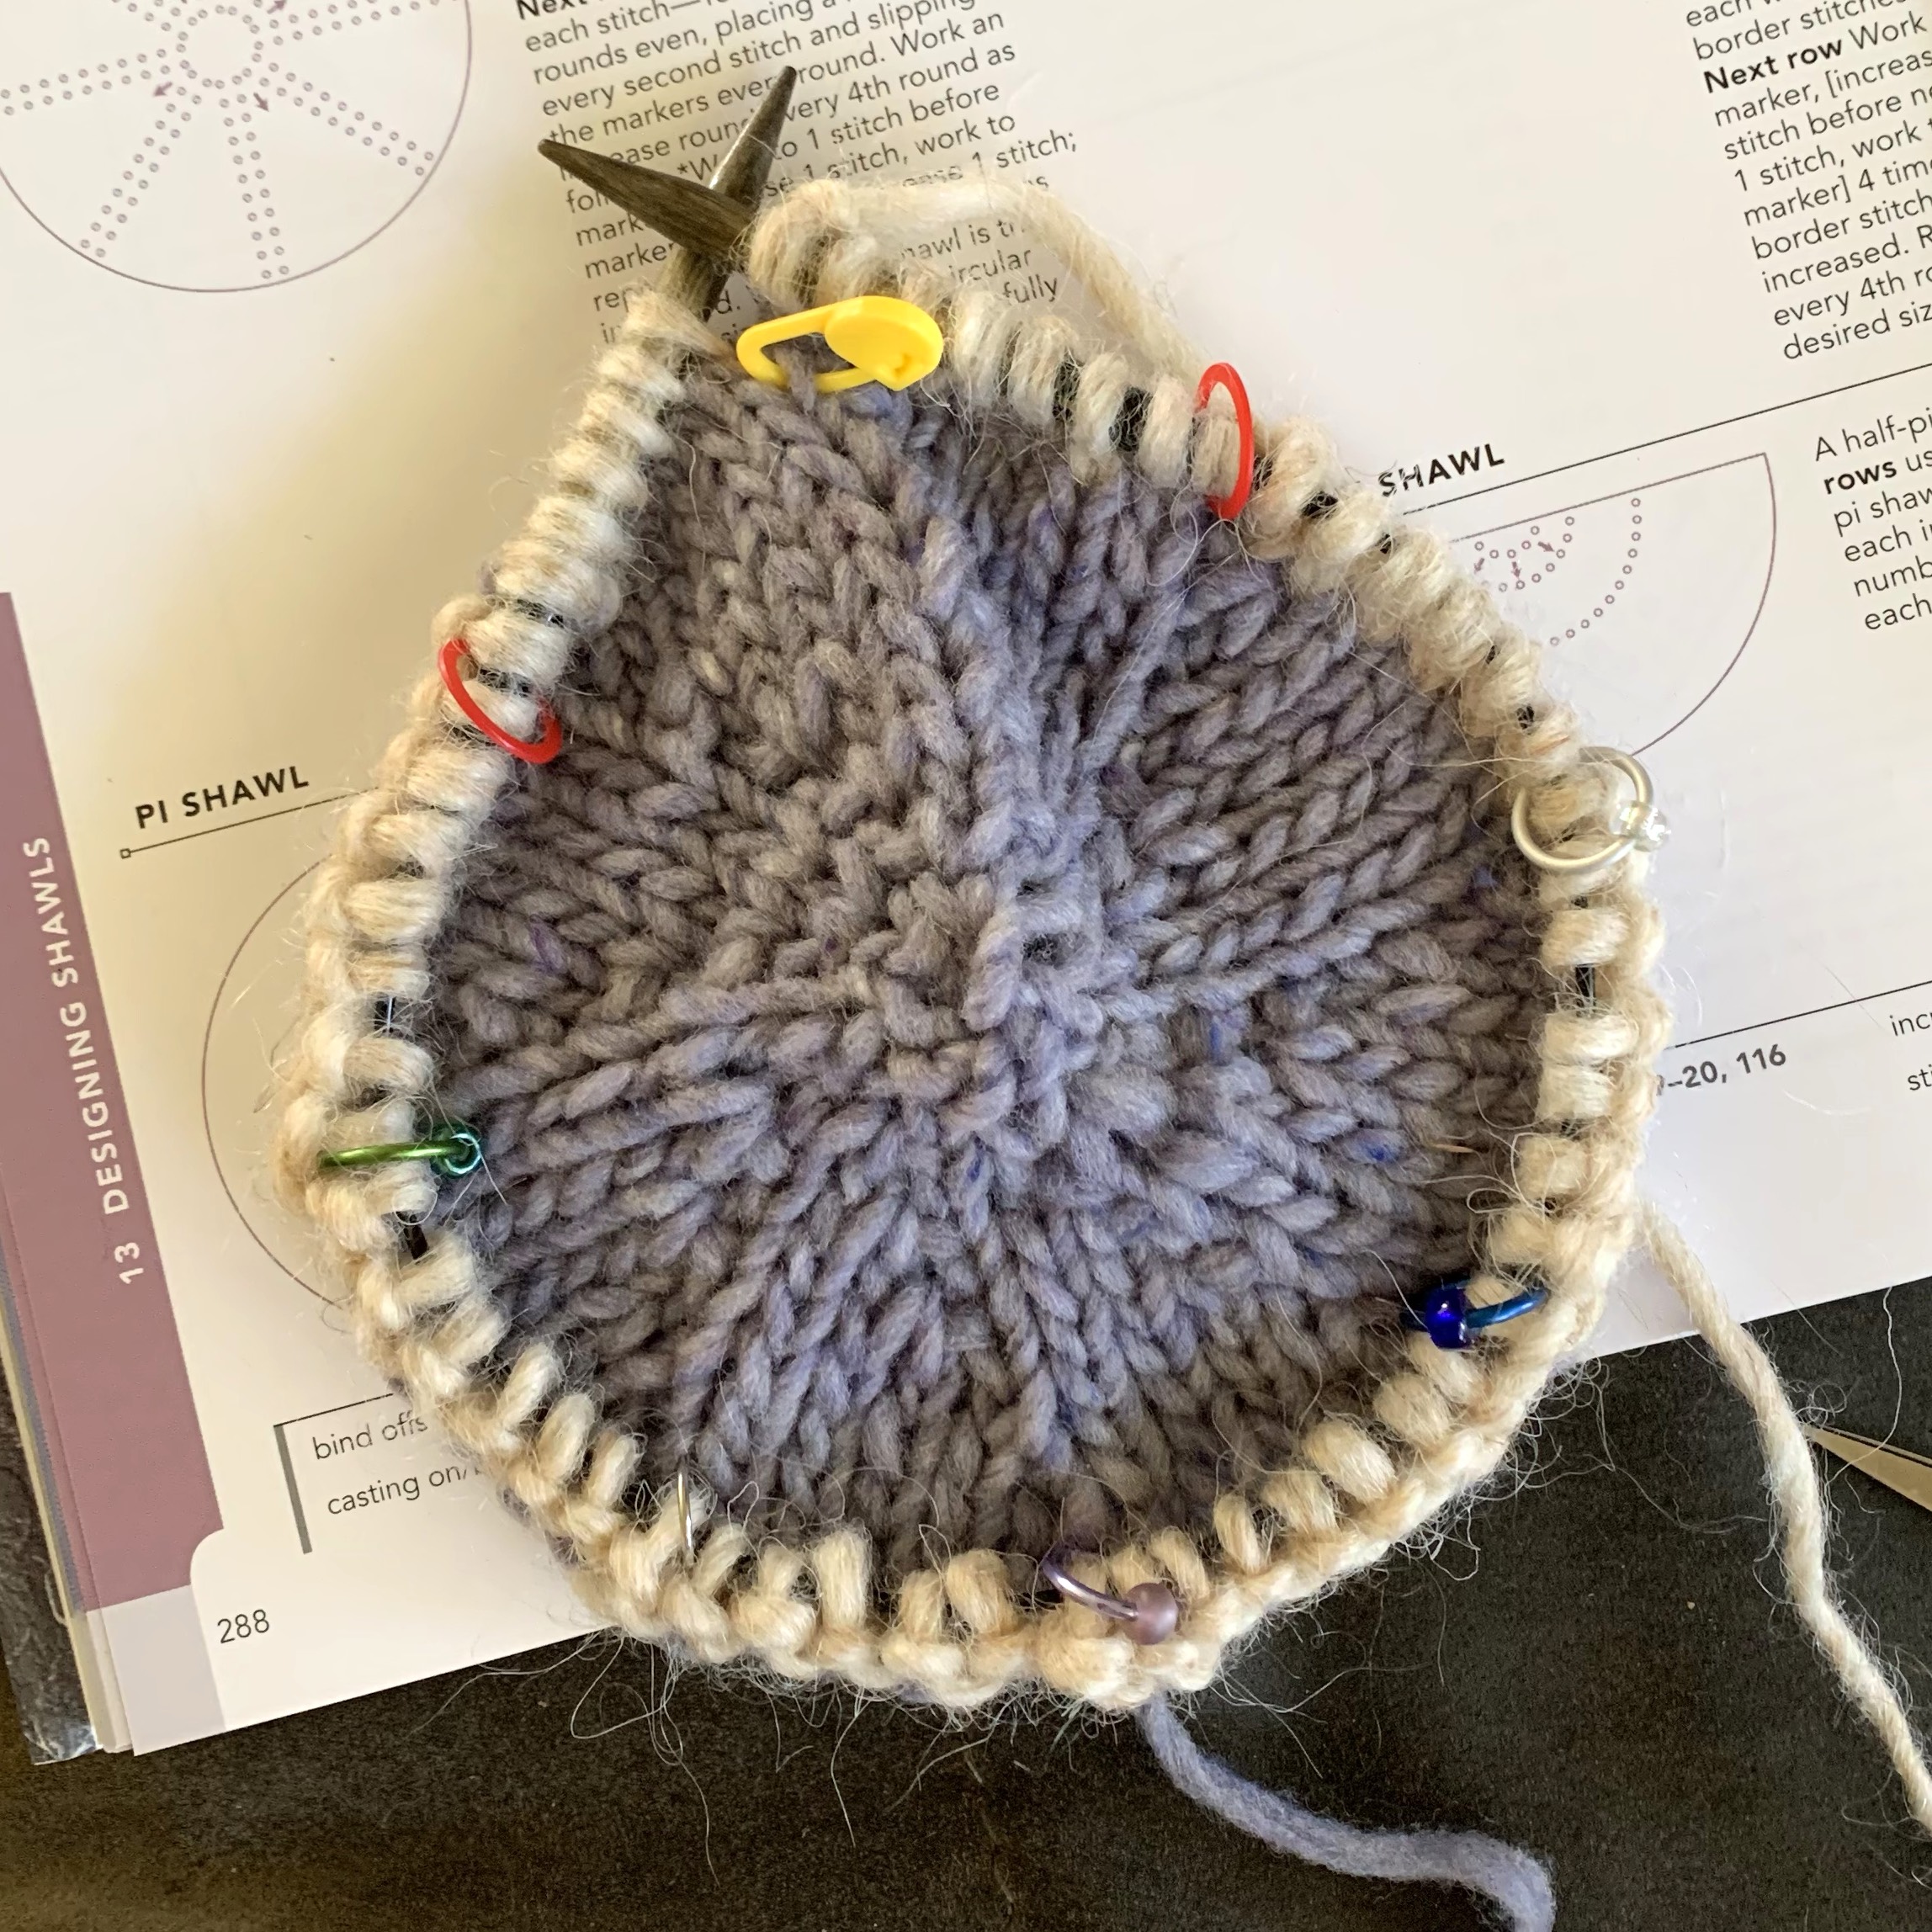
Cast on 8 stitches. I used the Old Norwegian cast-on, out of habit, but maybe a simple cast on would have been better. Move those stitches onto three needles – 3,3 & 2. Join to create circular knitting. I do this by swapping out the first and last stitches that were just cast on.
Knit a round on those 8 stitches. Now make increases in each stitch. Either do a backwards loop, or knit front and back. I did kf&b for my increases – mostly. I did use the backwards loop occasionally to try it out, but sticking to one or the other will probably look better.
Now you have 16 stitches on 3 needles. I used a clip on marker to mark the beginning of the round. (BOR)
Cast on 8 stitches
My blanket will have eight sections and each section will be increased just before the marker for that section.
With 16 stitches on the needles, knit 2 and PM (place marker). Divide the stitches so that a ring marker will stay on the needle to remind you of each section. Each needle does not need the same amount of stitches. Count the BOR (yellow) as one of the section markers and you will increase just before it.
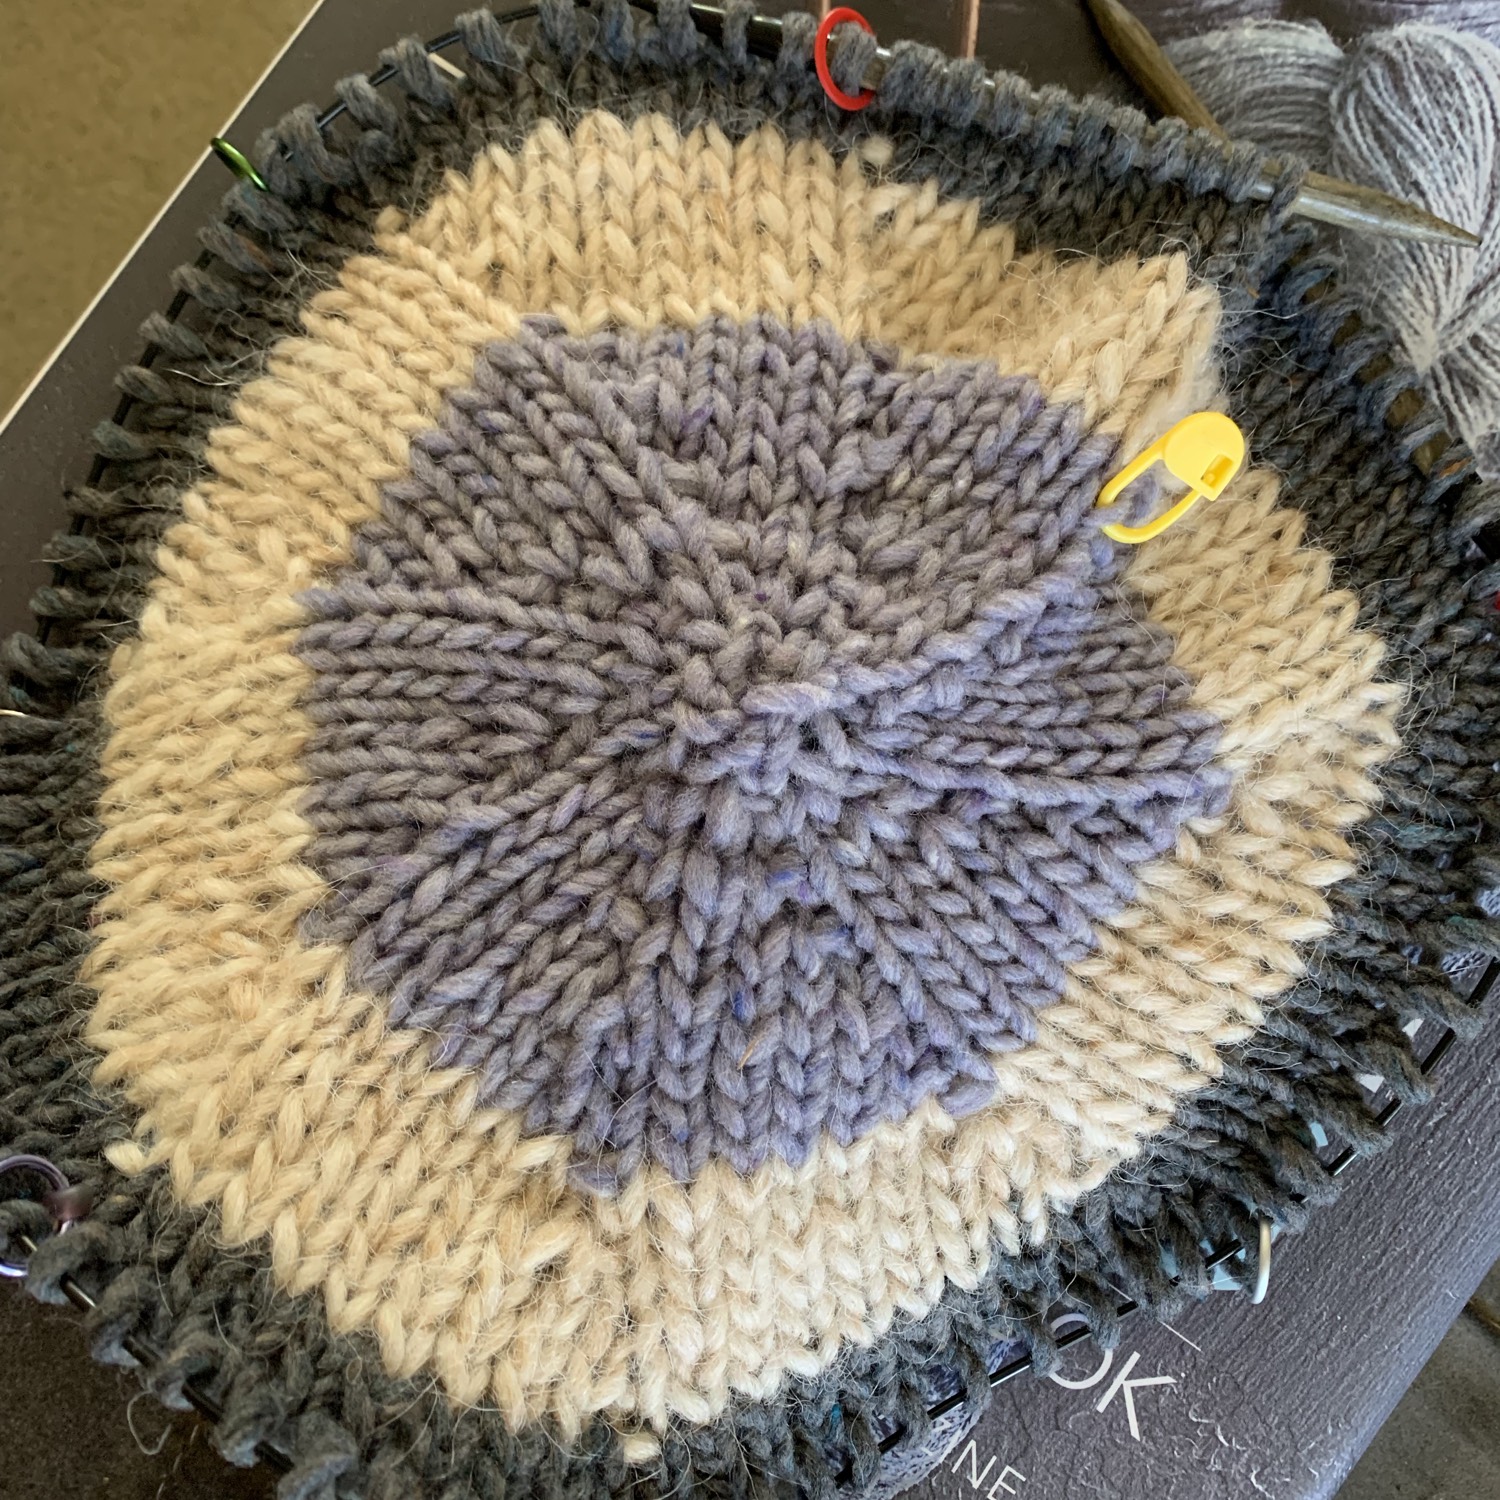
After the 8 section markers are in place, do an increase round. Make one extra stitch (kf&b or backwards loop, or your preferred method) in the stitch just before each marker.
Alternate a plain knitting round with the increase round and just keep going.
As the stitches expanded, I added a 4th DPN, and then switched to a 16 inch circular, ten a 32 inch.
Separate stitches onto four DPNs.I’ve added a new colorNew needle length needed
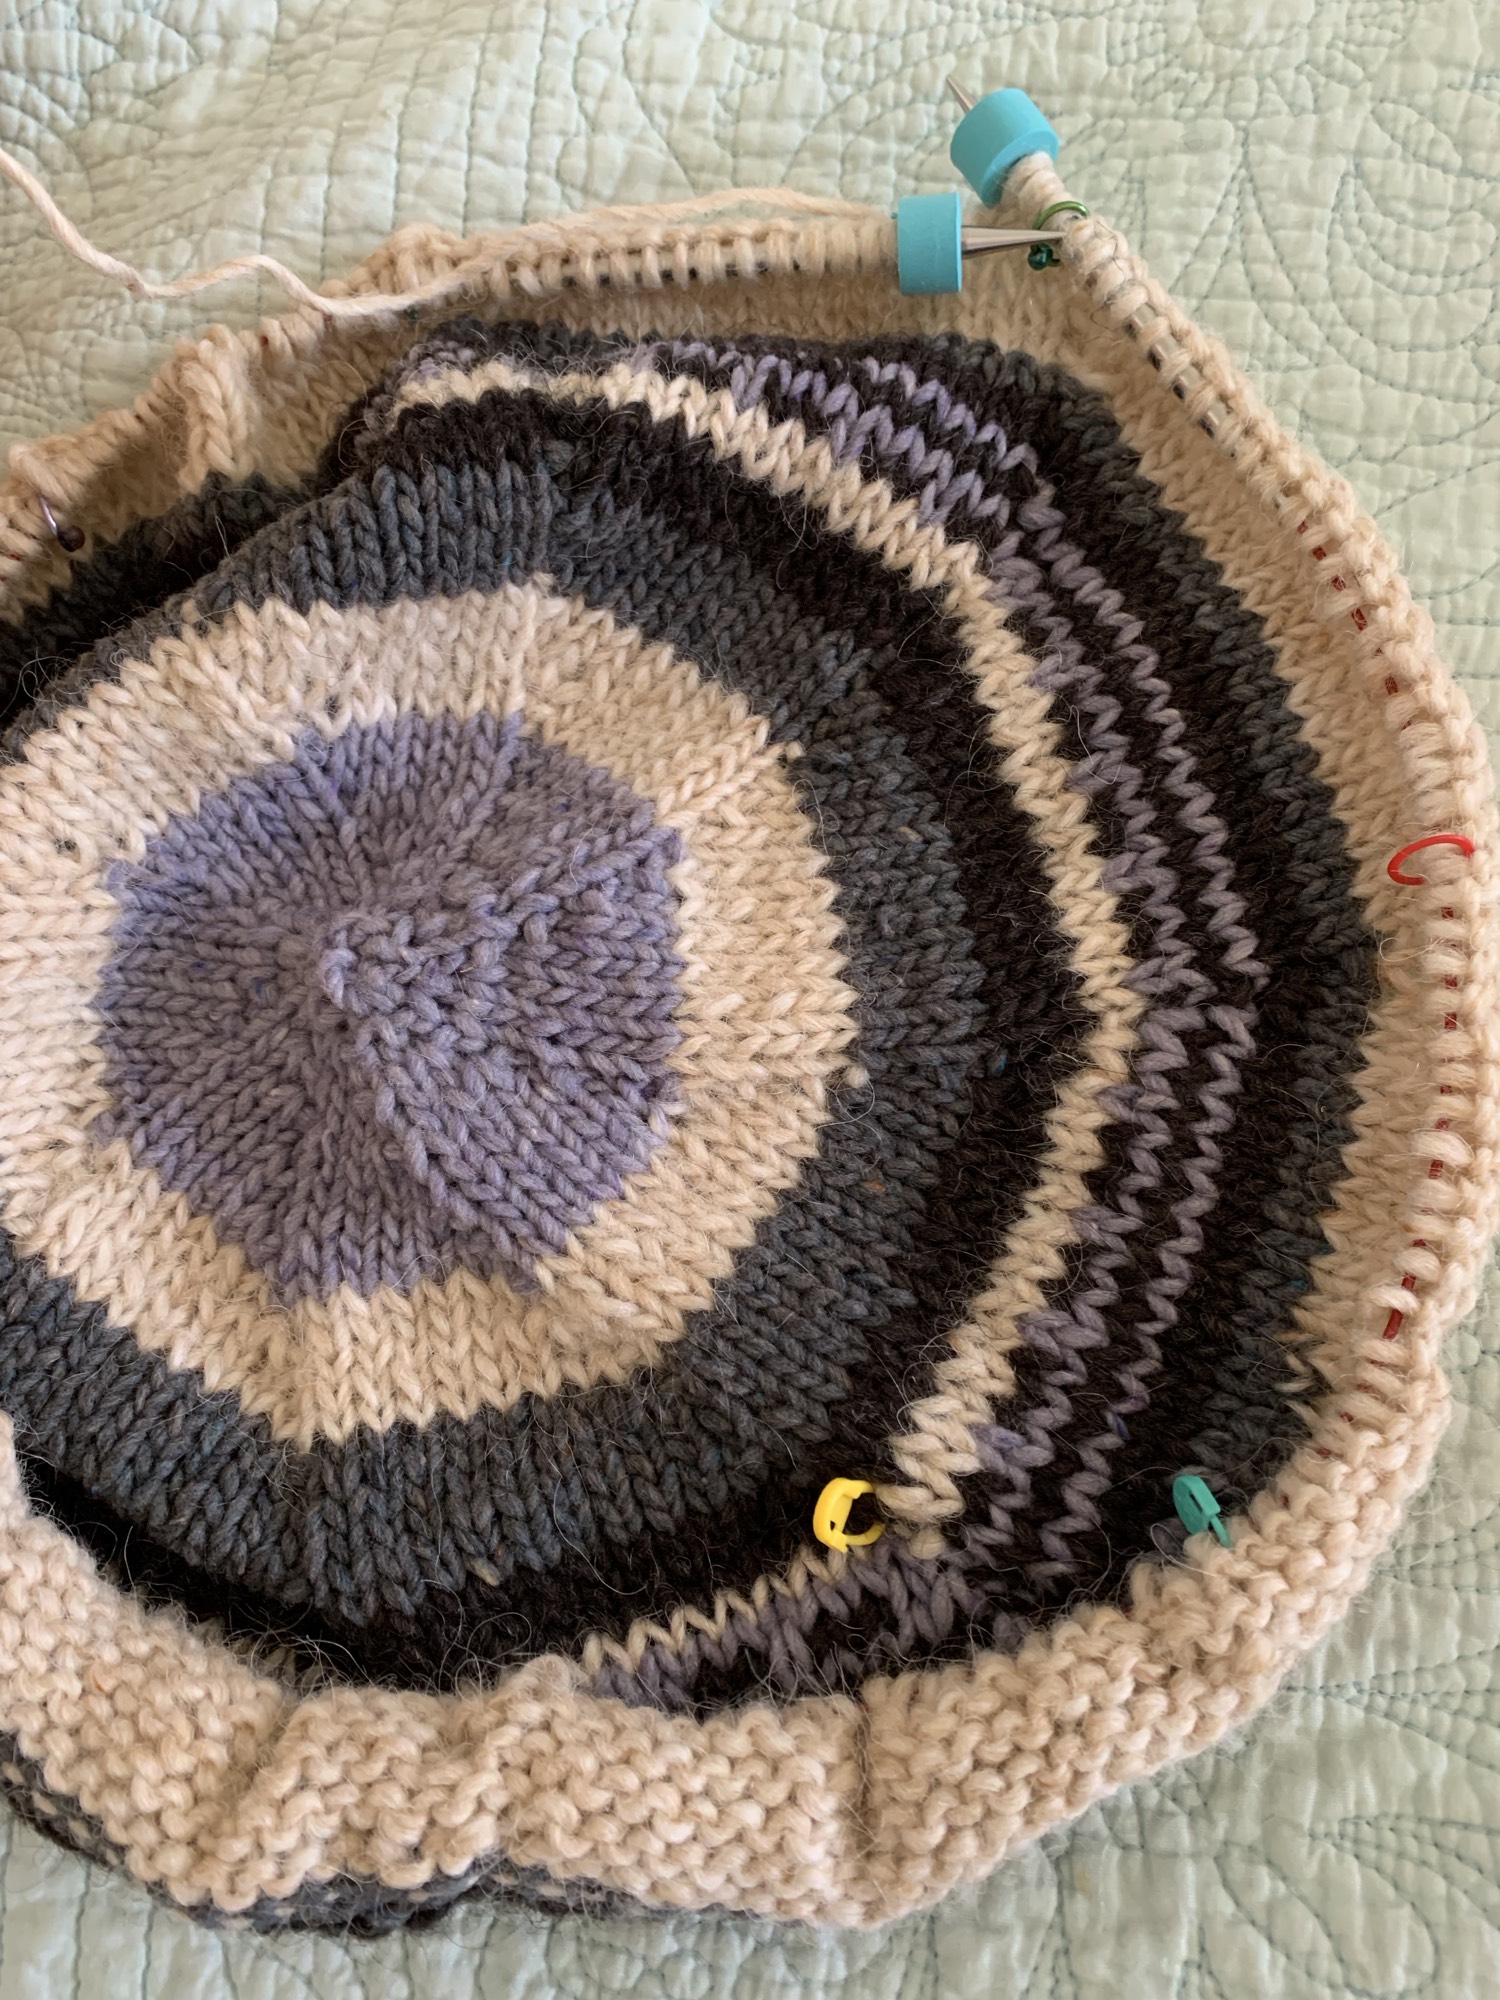
Currently I am using a size 10.5 US needle that is 40 inches long and that will have to finish up this blanket. I don’t have any longer needles in this 10 – 10.5 size.
I’ll probably do a few more rounds and then bind off. The blanket is for a cat so I intended it to be small. The project was fun, and I learned something new.
The yarn used is a combination of Brooklyn Tweed Quarry (the grays) and Alafosslopi (white and black).
Using up bulky wool to knit this round cat blanket.
Skittle’s blanket is washed and blocked to dry. I have the dehumidifier on in the bedroom so it won’t take four days to dry like the sweater did! The finished diameter is approximately 22 inches.
Wool Cat Blanket
Now all I need is to get a photo of Skittle enjoying her blanket. Photo coming soon.
This blog is full of knitting stories, please keep reading!
It is not a misprint – all mittens have thumbs, but not all mittens have thrums!
What is a Thrum?
Before fiber becomes yarn as we know it, it needs to be spun. The puffy fiber which is used to spin the yarn is called roving, or a carded top. (To get the roving to that point requires other processes as well.) To make thrums, that fluffy roving is knit, piece by piece, into a mitten. Knit a simple pattern, and add the roving – here and there – to create fluff inside the mitten. Each bit of fluff is called a thrum. Hence, when you do this you have thrummed mittens.
My rovingInside the mittenThis is 4 oz. of roving! It’s a lot.
Yarn spinners buy roving to spin (and sometimes dye, if it’s natural) to create their own unique hand-spun yarn. What I call roving, is also sometimes called a top. I’m unfamiliar with it really, but just wanted some fluffy stuff to add to my mittens!
Thrummed mittens are perfect for those who live in cold weather climates. The Well Sweep Sheep shop at Etsy has handmade thrummed mittens for sale. Take a look at the photos if you are not familiar with the look of thrummed mittens.
For a good result, most knitting projects take some planning. When I first saw mittens knit with thrums, I wanted to know more. I can’t believe I have never heard of this until recently. Now, I will plan and knit mittens with thrums – for the first time.
A Little About Mitten Thumbs – Two Ways to Knit
Be aware that mittens can have either “side gore” or “peasant / afterthought” thumbs. I’ve only knit mittens with the side gore directions, which makes them interchangeable – no right and left. The thumb area begins to expand shortly after the cuff is knit by making increases. Once part of the thumb is knit, those stitches are put on hold to finish after the hand.
All mitts and mittens I have knit have a side gore thumb. These are not Thrummed.
An afterthought thumb is added by leaving an opening in the hand where the thumb will be added later. The thumb is placed more toward the palm, which means each mitten knit will be for either the right or left hand and are NOT interchangeable. Read this article at Just Crafty Enough to see the difference.
Free Patterns for Mittens With Thrums
When searching for mitten patterns with thrums, free patterns and patterns to purchase are available. While most people love free things, we must take into consideration how well a free pattern works. Some free patterns are great, but others don’t work out.
Since I have knit quite a few mittens, I’m really only looking for cast on number, and thrumming information. I can’t see paying for that. YouTube and knitting websites all have information about how to thrum. Basically, I need a knitting pattern in worsted or chunky / bulky yarn where I can add thrums.
Here is a list of free patterns I would like to suggest. I have not knit any of these myself. The patterns are listed at Ravelry and get good reviews and ratings.
Chroma Thrummed Mitts – (Bulky) I printed this free pattern out and it has an “afterthought” or “peasant” thumb. This is something I am not thrilled about as I’ve never knit that type of thumb. But, the pattern has nice directions and advice on thrumming.
Worlds Simplest Mittens – not a thrumming pattern, but Tin Can Knits has offered this free pattern to knit mittens in 4 different weights of yarn, including worsted and chunky. Also a toddler size is included. I’m thinking I’ll watch a thrumming video, and add thrums to any of these mittens. Should work, right? Thumb type is side gore style.
Pay For Thrummed Mittens Patterns
Although free thrummed mitten patterns may be fine for anyone who can basically knit a mitten, some people will want more help. There is nothing wrong with supporting designers by buying their patterns.
Thrummed Mittens – by Staci Perry, from Very Pink Knits. When you buy this pattern you will have links to her videos to help with placing the thrums, or just watch her video here.
It’s a Snow Day! Mittens – (Fingering) by Bunnymuff – this pattern includes stranded colorwork with thrums. I’d love to knit these once I get the thrumming bit down on a simple pair.
One question I had was about the roving. I know nothing about it really, but I assume a nice wool of some sort would make those thrums nice.
I couldn’t find much info about this. At Three Waters Farm on Etsy, I see nice roving made from all sorts of fleece, including BFL, Merino, Merino and silk, Falkland wool, Romney, Corriedale, Targhee, Polwarth, and … yikes! Now I am more confused. I do know that you want wool, which will felt after washing. So do not use Superwash! This way the thrums will mesh together to create a nice soft layer inside the mittens…. right?
I am making mittens that I want to be very warm. Wool is my first choice so I don’t think I could go wrong with any of the wools listed, as long as they are not superwash. Bits of the roving will be pulled from the braid to match up with the yarn I use.
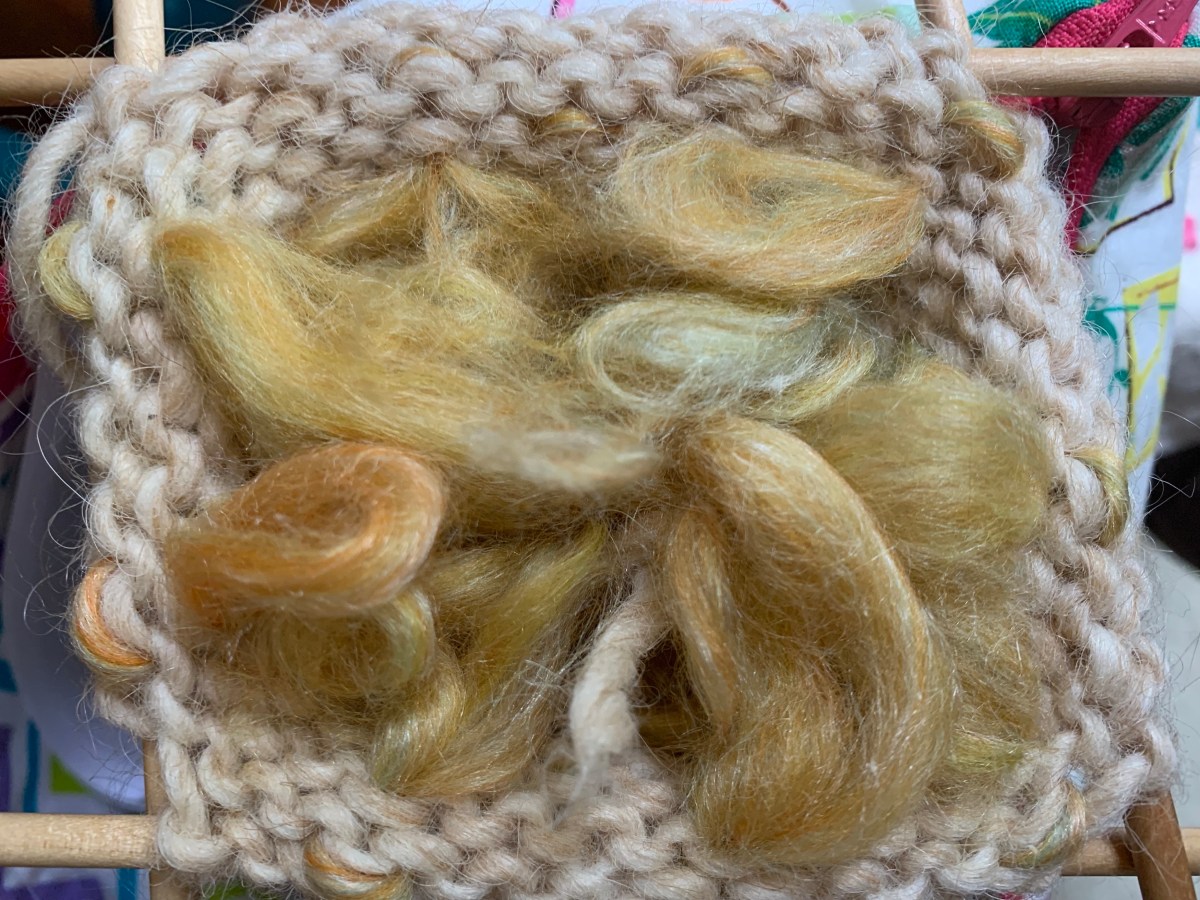
I ended up buying my roving from Paradise Fibers. I bought a merino and silk blend mainly for the color – I love the swirls of gold and pale green. Etsy shops also sell roving, and so do many yarn shops.
The roving I bought
Bulky Yarn Ideas for Quick Mitten Knitting
Roving is puffy, so a worsted, chunky or bulky weight yarn would be nice for a first thrummed mitten project. Apparently you simply make smaller thrums if the yarn is lighter weight.
Here are some bulky yarn suggestions for knitting thrummed mittens.
Prices listed here are current to the writing of this post (Jan. 2022) and obviously may change.
The Petite Wool, Bulky- We Are Knitters, $14.90 – $19.90 for 142 yds. (+/-) per skein
Alafosslopi – Bulky – Istex Icelandic wool – buy direct from Iceland for about $6.29 per skein, or find it available in many US locations, usually for $10 each skein (109 yds). (I’m using this type of yarn for my thrummed mittens.)
Read about knitting my first pair of thrummed mittens on a post soon to come.
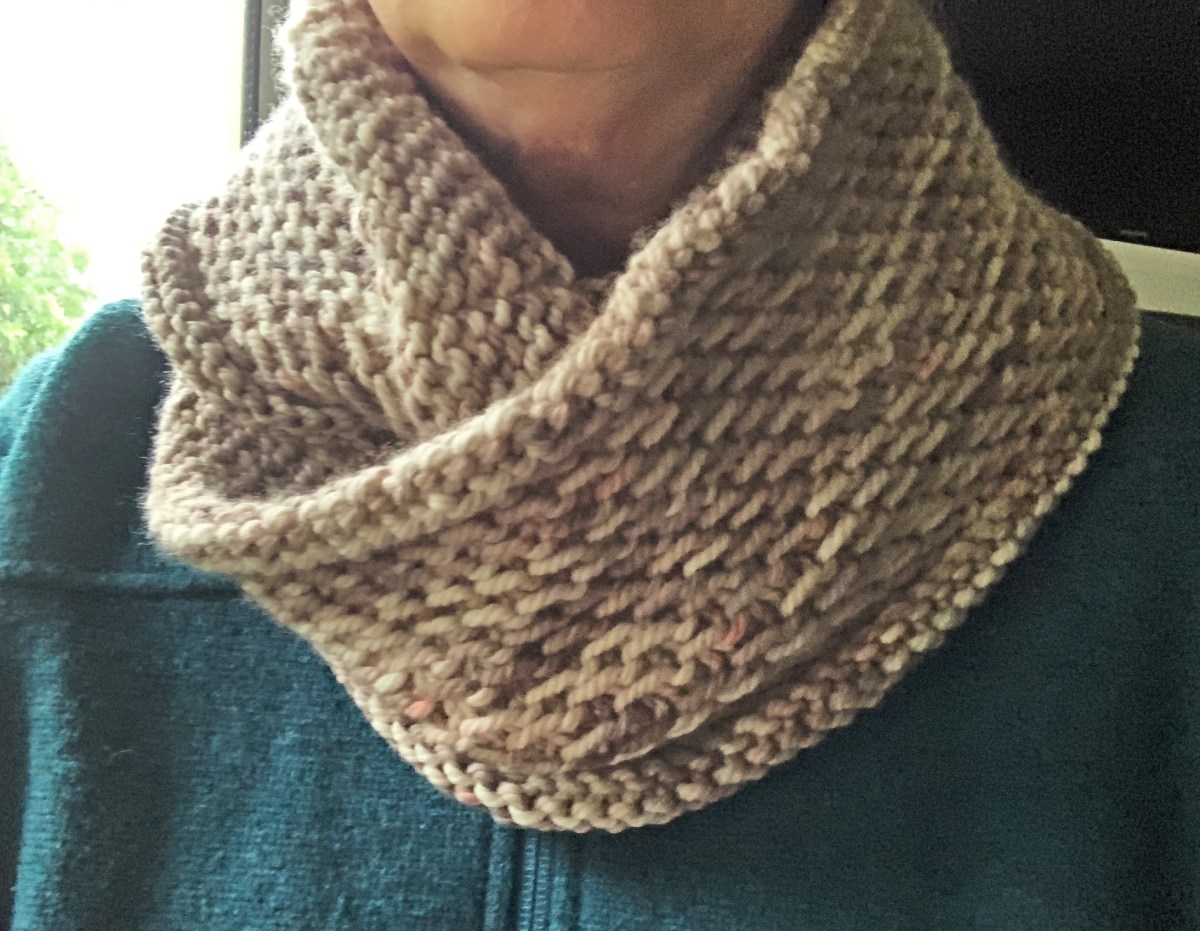
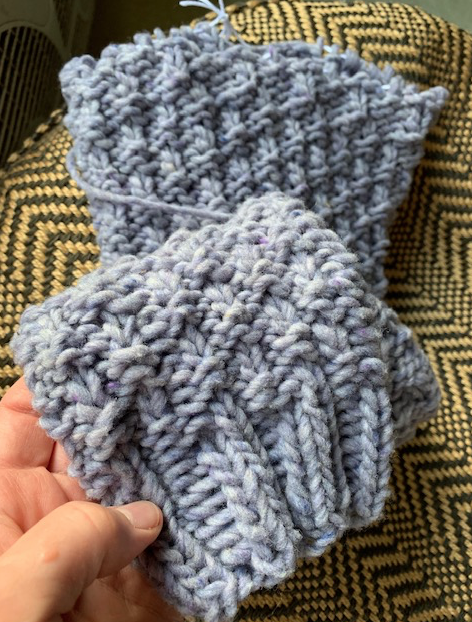
This is the second Honey Cowl I have knit and this time I used bulky yarn. The color,”Rock Sparrow”, yarn offered at Miss Babs a while ago. The other yarn weights were sold out, so I chose the K2 skein because it was all that was left. I had no idea what to use it for.
Pre-washing
This yarn has been staring me down every time I go into my craft storage room. While I was organizing my finished knitwear projects, the idea for a second Honey Cowl clicked. The slipped stitch, which is used to make the cowl, would show off the colors of Rock Sparrow nicely. I already knew it was a quick and easy knit.
Honey cowl stitch pattern
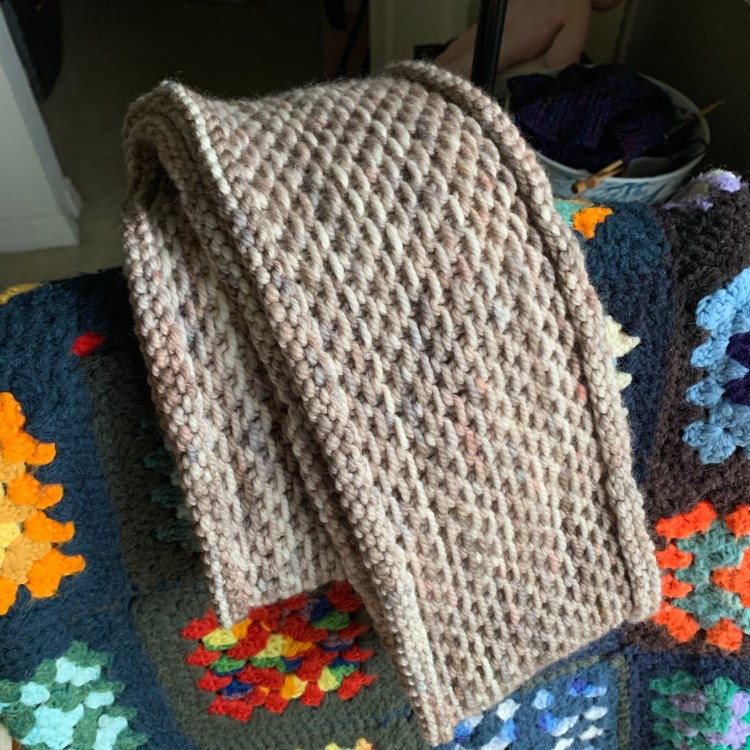
As you can see in my photo the texture is lovely, and the edges curl in to give the whole thing a border. These photos were taken before it was washed.
The curled edge makes a thick border
How I Made It
Using a size 10.5 US, long circular needle, cast-on 192 stitches and join. Place BOR (beginning of round) marker. Follow Honey Cowl pattern (FREE) directions until yarn is nearly gone. I used up most of this bulky yarn ball.
Color is Rock Sparrow, K2 Miss Babs yarn
This is a very easy knit, and just about any weight of yarn works if you adjust the cast on number accordingly. Make it short, or double-wrap as you like.
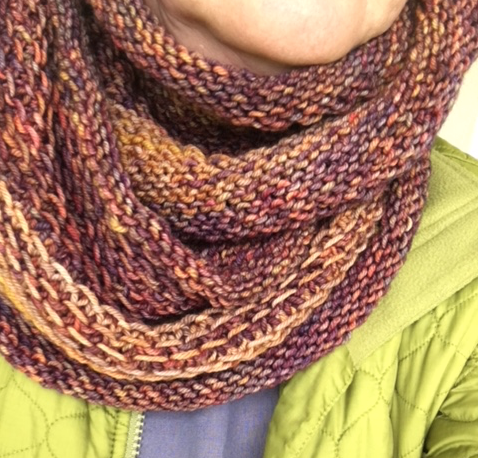
See my firstHoney Cowl here. I knit that one back when I first began knitting, and I used various yarns in rust orange and autumn colors.
I had informally decided to give sweater knitting a break, along with shawl knitting. Then I changed my mind when I saw the Oxbow Cardigan pattern.
The pattern is by Andrea Mowry of Drea Renee Knits and I have never knit any of her patterns although she is everywhere and is very popular with knitters. She seems to have patterns that are above my skill level (this one has only reinforced my belief), but it looked simple enough, with big yarn and big needles. Heck, she made them for the whole family!
Ha! Fooled again…..I have not found this project to be easy at all AND spoiler alert – I frogged it (ripped it out to save the yarn) on April 28th. I feel very good about that too.
How It All Began – My History With This Project
The yarn is bulky so I figured knitting the sweater would be quick. In fact I finished ONE Oxbow sleeve in two days, but man did I struggle, and it didn’t look all that great. But I learned from my efforts and the second sleeve went better.
The Yarn
Brooklyn Tweed yarn in color “Geode”
I am using Brooklyn Tweed Quarry in “Geode”, which is a gray-lavender color. My first impression with Quarry yarn was a year or so ago when I bought dark colors to knit warm hats for my kids. As I tried to cast-on, the yarn suddenly came apart! I was very unhappy. I’ve since used this same yarn to knit a hat and have had better luck. I think I just came across a weak section of yarn and didn’t know how to deal with it. It cannot be pulled tightly, so you do have to take care and twist the strand if necessary.
Quarry yarn is bulky, yet very light weight – surprisingly so. Because of this it dries quickly when hand washed (don’t put it in the washer or dryer) and will not weigh you down as a garment. I bought mine at Wool & Company, and they wound all 7 skeins for free! (US shipping is free too, for any order!)
I was interested in this yarn because it is spun in Harrisville, New Hampshire, near where I used to live! The wool comes from Wyoming ?, is spun in NH, and then dyed in another part of the US, so it is totally American made.
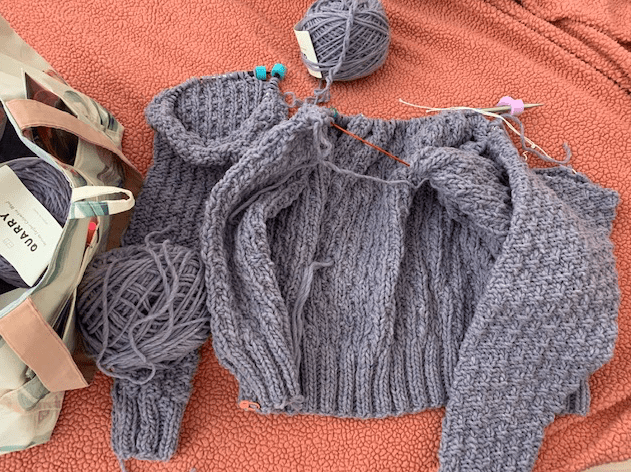
Oxbow sleeve knitting in progress
Knitting the Oxbow Sleeves
This is only my third sweater knitting project, (see Fine Sand and Umpqua) if you don’t count the little Popover for a child (I didn’t like that one either). So I am nowhere near being a sweater-knitting expert.
My first mistake was at the beginning, when I used the larger needles to cast on and knit the ribbing. I was supposed to use the smaller size.
Because my gauge swatch was telling me to go up a needle size, and I couldn’t find (and didn’t really want) larger needles, I decided to knit the sweater one size larger. Is that a good idea? I don’t know.
So I began my sleeve. Once the increases happened I got confused. Other knitters had questions too. I know because I saw them on Ravelry. As I knit along trying to figure out what to do with the pattern as the increases were made, I finally figured it out, but not before I made the underside of the sleeve look icky.
Making increases on the sleeves
Figuring Out The Sleeve Increases
This information may help you, if you decide to try this pattern. The problem arises when you come to the increase rows.
I added markers to show where the increase area was. The orange marker shows the BOR. Each time I would work a round I would count backwards – in pattern – from the original beginning (where I also placed a marker) to start the pattern from the BOR. Nothing in the directions advises this! You have to wing it.
I didn’t figure this out for a while, so my underarm of the sleeve is a bit messed up. This part will be towards my body and not easily seen. (The pattern simply says to make increases and knit in pattern. Ya, the directions are not impressive.) I did do better on sleeve #2.
Mistakes are apparent on the underside of my first sleeve
Sleeves Get Long!
My sleeve also began to get really long before I was done with making my increases! So I decided to go back and follow the next smaller size directions. If I had tried to get all the increases made my sleeves would have been way too long! (I saw comments on this same problem from other knitters). As it is, the sleeve is still a little longer, which is always better than too short!
One sleeve finished
The Oxbow repeat pattern is nice and makes a fluffy texture, but it’s not all that easy to follow. It’s an easy enough pattern with 2 row repeats, it’s just not easy to keep track of the rows. What I did was use the orange clip marker to give me reference for inches (length) and then I could pay attention to the pattern better.
On To the Body and Decreases
Now I have knit the body of the Oxbow sweater to the decrease section. Wow, all I can say is really read through all the info before you begin. Basically it comes down to knitting in the pattern, but adding decreases at each end of the row (every so many rows, depending on size).
I am knitting the size “Women 42” for a good bit of ease. Once I got to the body and neck and yoke decreases, I faltered. I set the sweater aside until I could concentrate and really figure out what to do. THIS IS NOT AN EASY KNIT! Also not something to set aside for long in fear I will forget what I was doing and have to re-read it all again!
The directions are not easy to understand and I can only hope I will finish this and have it be wearable. The designer talks like this is the simplest sweater ever to make ….. and gee, why not whip one up for every family member? NOT! If I get through this one, I doubt I will ever make another. I’m just being honest here, whereas I have my doubts about some reviews I’ve read.
Knitting progress on the Oxbow
For now, this sweater is on hold. I’m partway done with the body and have two sleeves completed. I do plan to finish it, but currently I’m on a mitten-knitting kick. So I’m publishing this post and will update it when I finally finish this hellish sweater knitting project.
Oxbow Frogging Complete!
Every time I would pass by the knitting bag holding the Oxbow sweater, I would feel pressure to get working on it. But I didn’t want to. When I did get it out, I had difficulty finding where the heck I was in the pattern. I was at a decrease every 5 rows, while doing the 4 row repeat with knits and purls done at such and such and P2tog or SSK done at here and here…. Just reading it was mind boggling. Sorry, but I think it was a very lazy way to write a pattern.
I contemplated all my work – 2 sleeves done and about halfway up the body. But tearing it out made me feel calmer than pressing onward. So I frogged it. Now I have tons of Quarry yarn and must find another sweater to knit. (Eventually I knit one by Espace Tricot). But today I feel good, and will no longer see this sweater sitting around driving me crazy!
This sweater knitting project was a fun one. Although there were a few things to figure out, I recommend the pattern to any fairly experienced knitters out there.
I’m knitting a beautiful cardigan pattern by Camilla Vad. The Magnolia Chunky Cardigan is knit top-down with lace and bobbles on the body and sleeves. On this page I cover some issues I had in the beginning.