Courage to Make Your Own Modifications to a Knitting Pattern

Knitting with confidence, and making modifications to a pattern, can take courage.

Knitting modifications (mods) are changes made to a pattern. The happy outcome of knitting regularly for a few years is that I now have some confidence to make my own mods.

Often a knitwear reviewer will tell others what types of modifications they have made and why. Sometimes this information is helpful, such as if a wider sleeve is preferred, or making a different cuff ribbing, or wider neck opening. They may have a suggestion to make a particular stitch in the pattern easier to do.

Now, it is nice to know the basics of how a sweater (for instance) is put together. I know that I can pick up extra stitches under the arm to close up the holes, and then compensate by decreasing as needed. It’s a very simple thing, but beginner knitters have enough on their plates without having to figure something out in a pattern!

Truth be told, I am not advanced enough to make changes other than simple ones, but the more I knit, the more confident I have become to change things up.

Re-knit Some Favorite Patterns Using Mods

I’ll bet that most knitters end up having a few favorite knitting projects. I certainly do. And, I have favorite parts of patterns I’d like to use for something else.

I mostly knit sweaters, but this applies to anything. A good length sleeve with a pretty rib can be applied as an alternative in a different pattern.

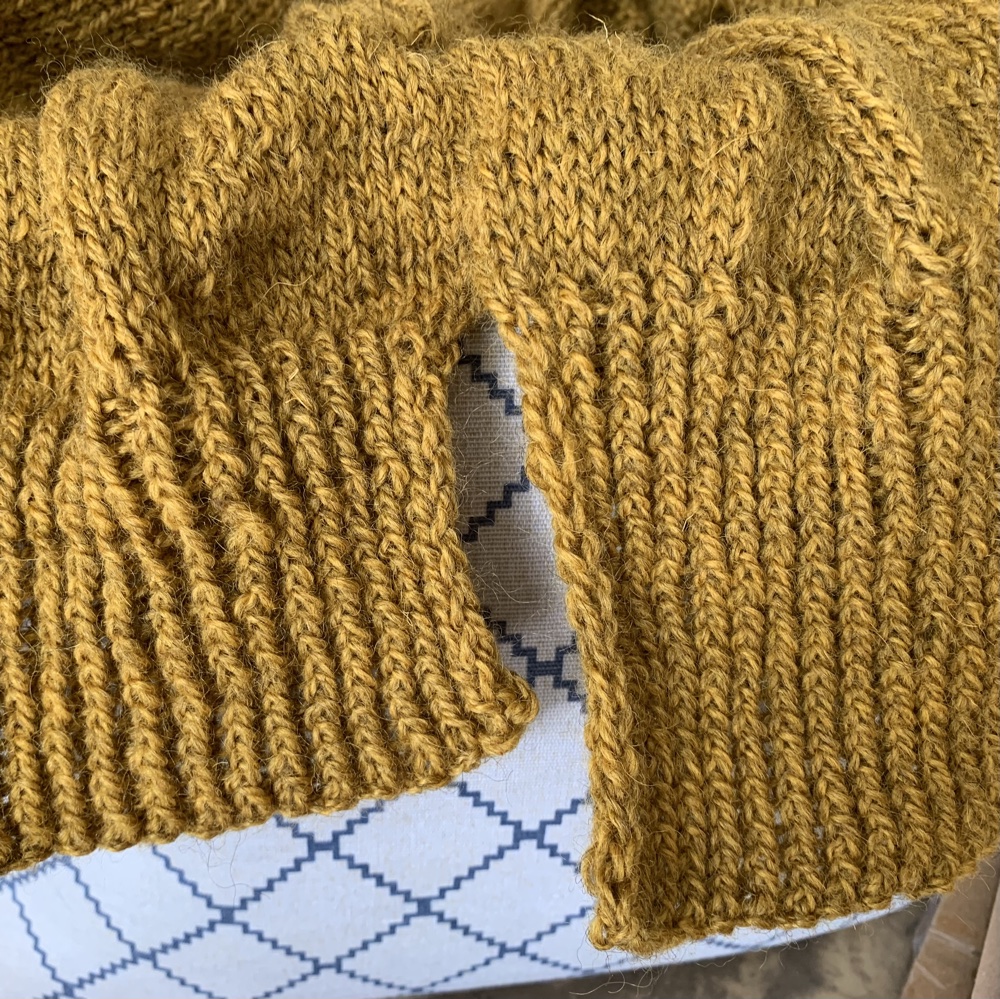
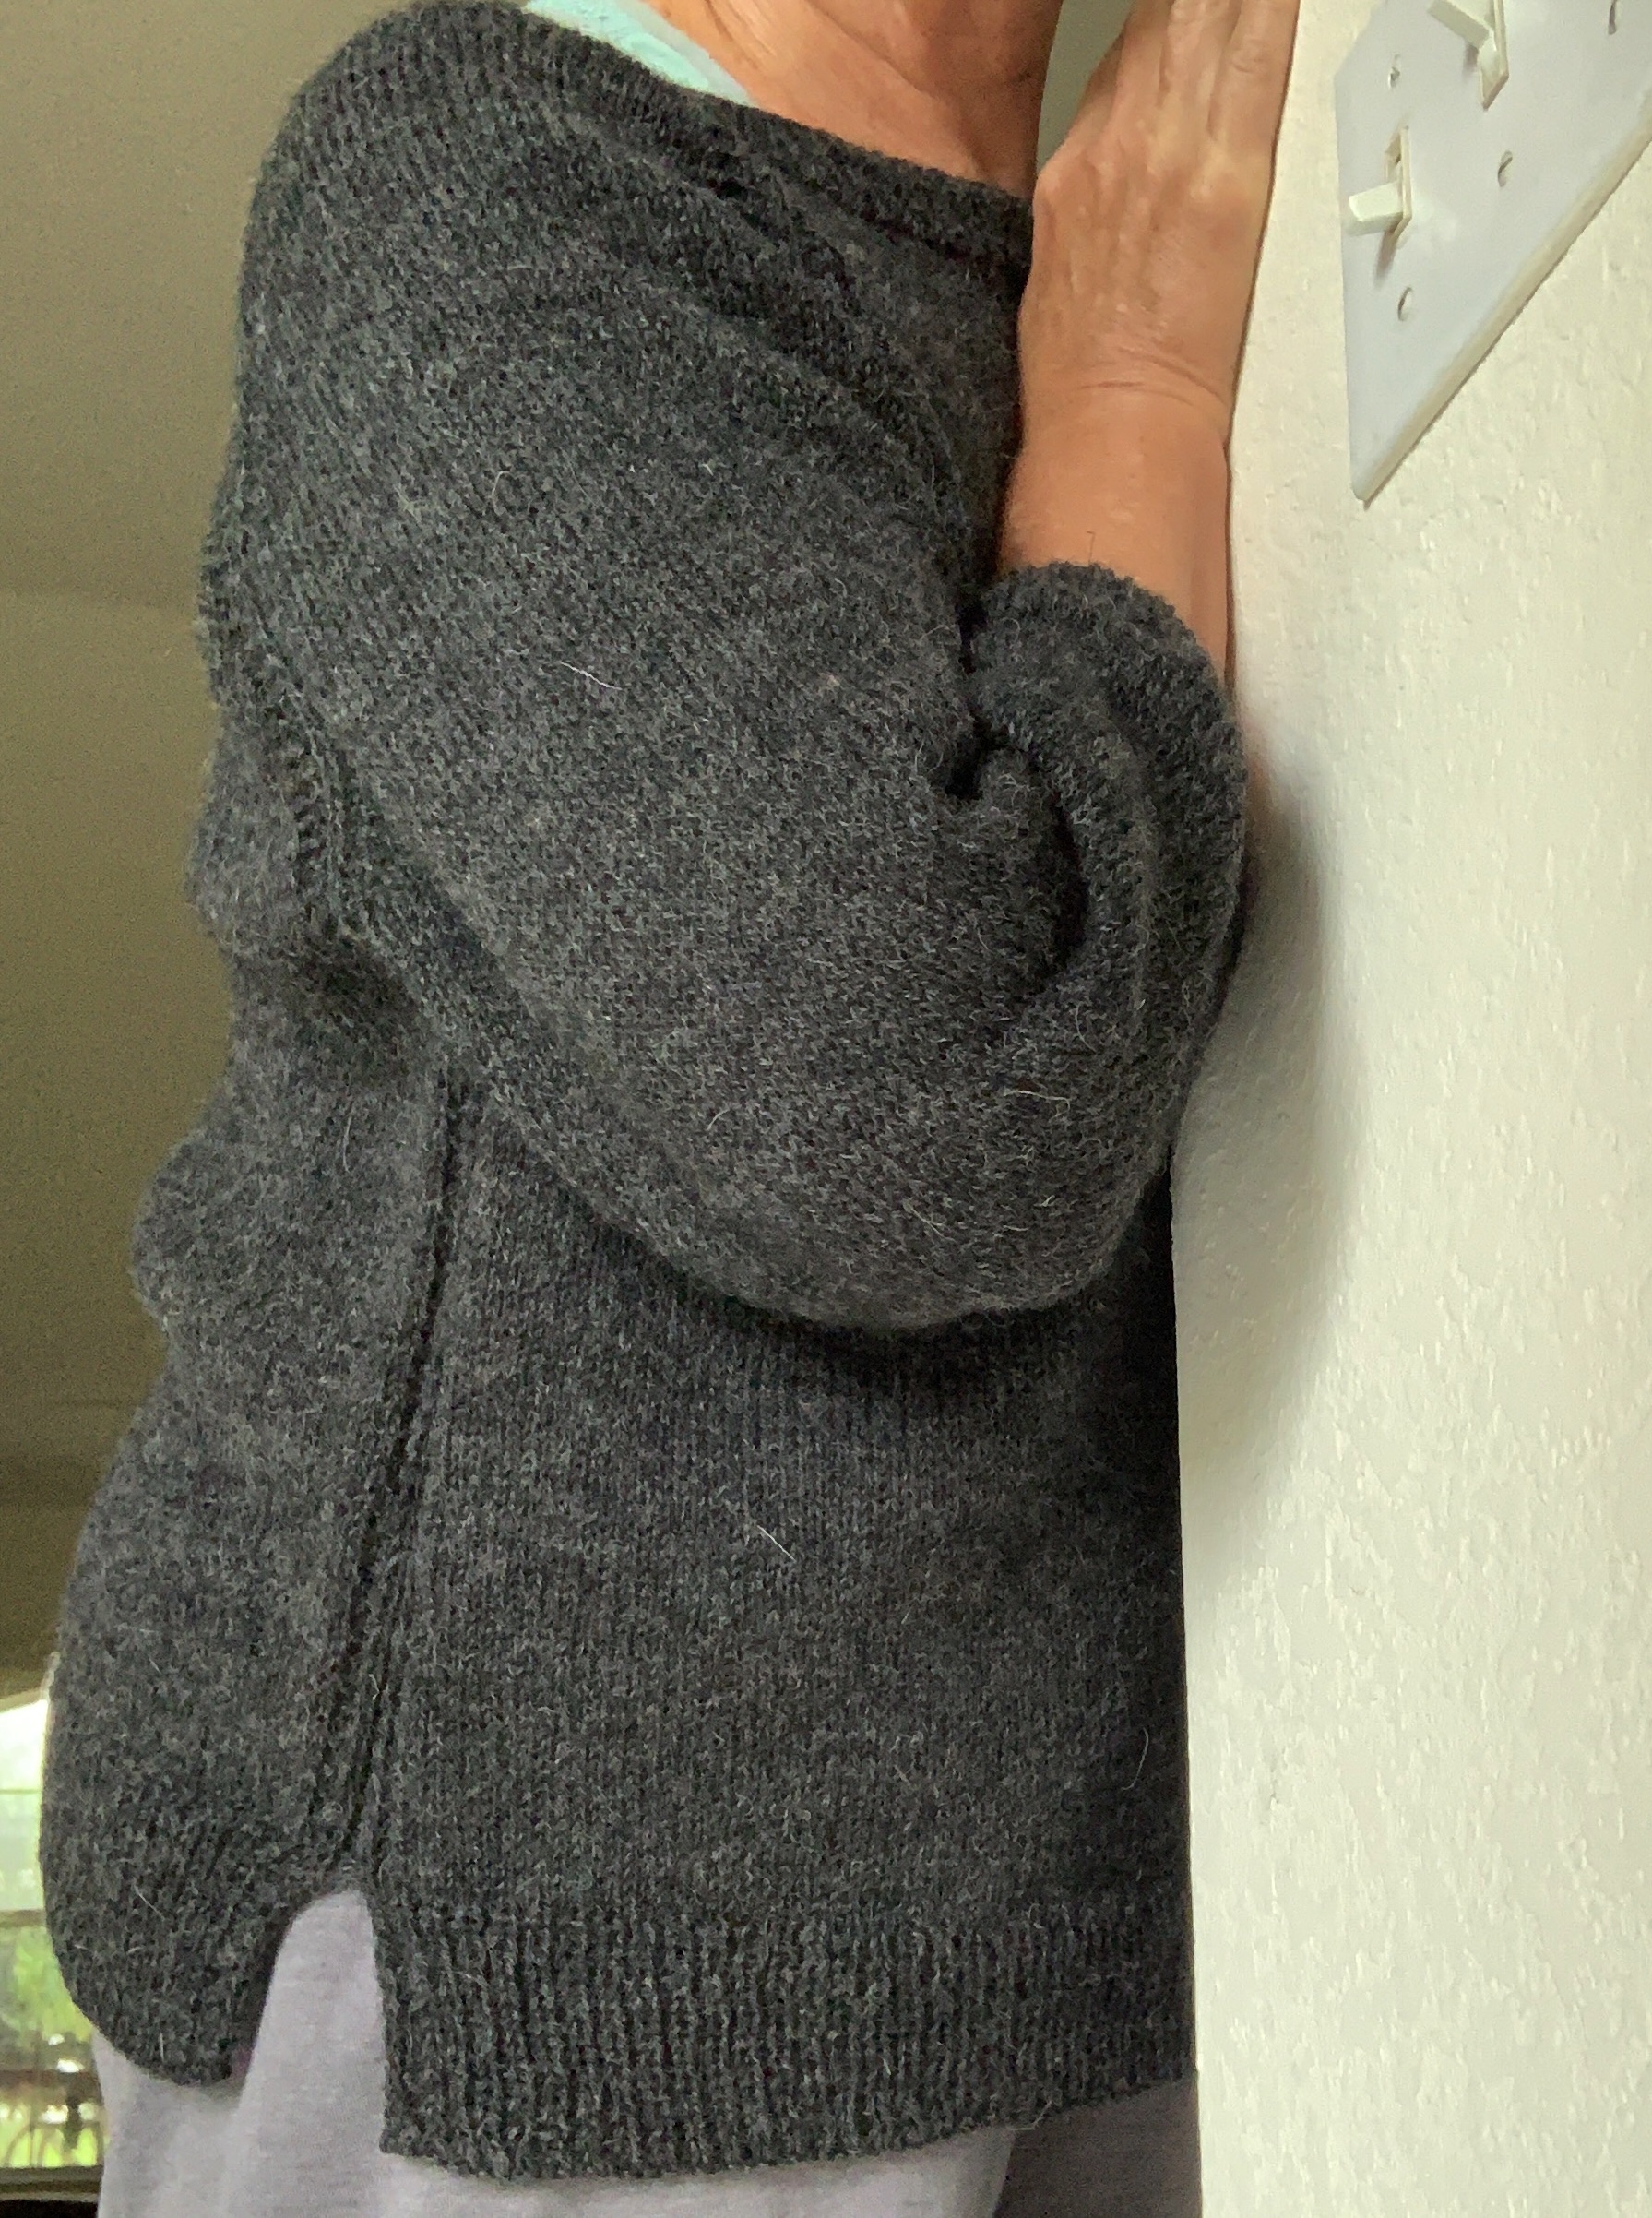
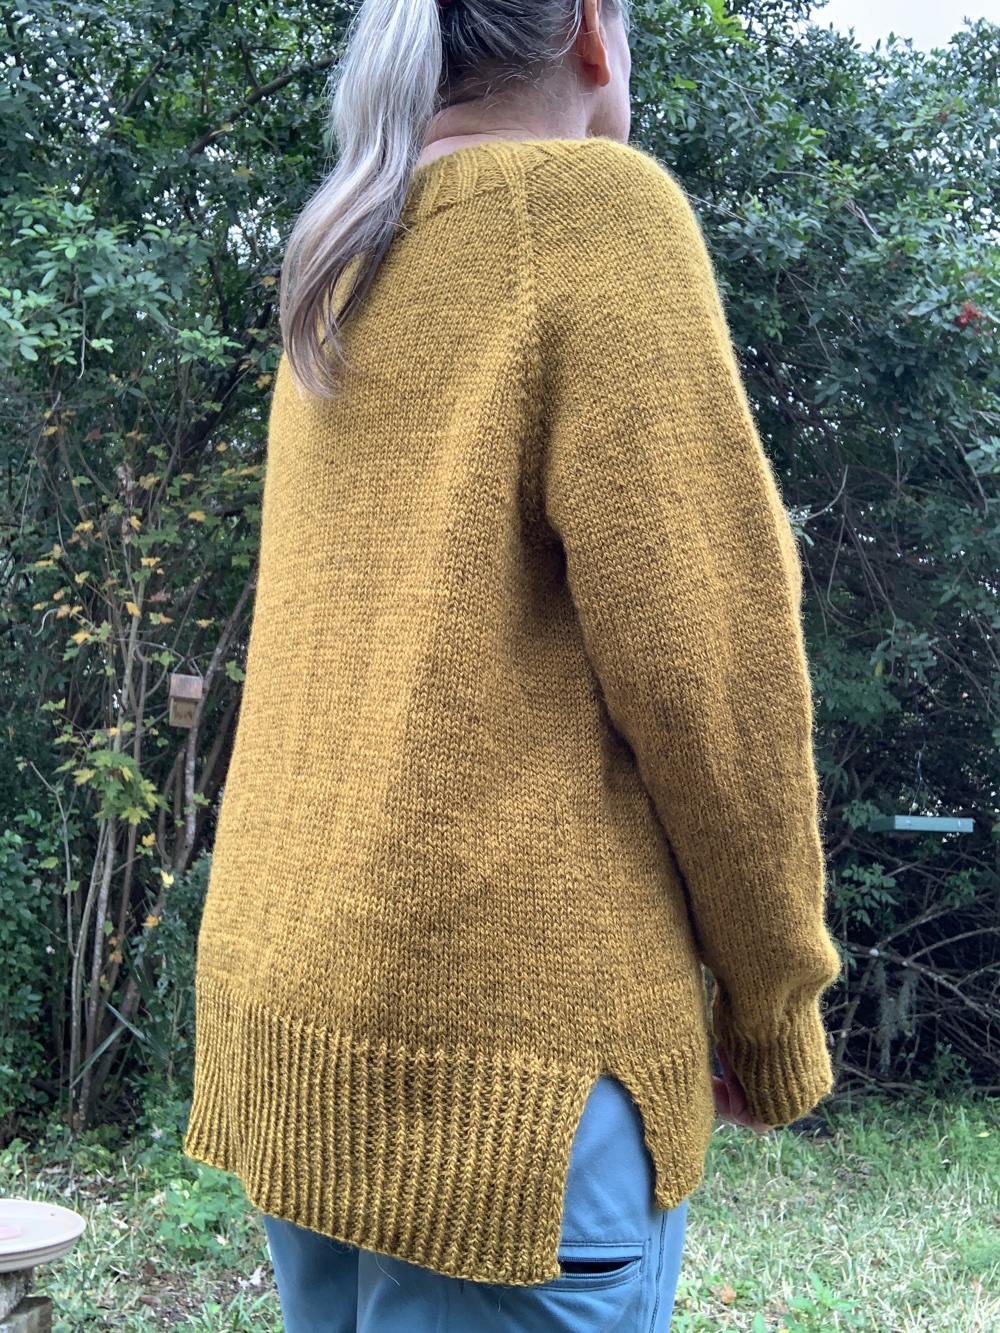
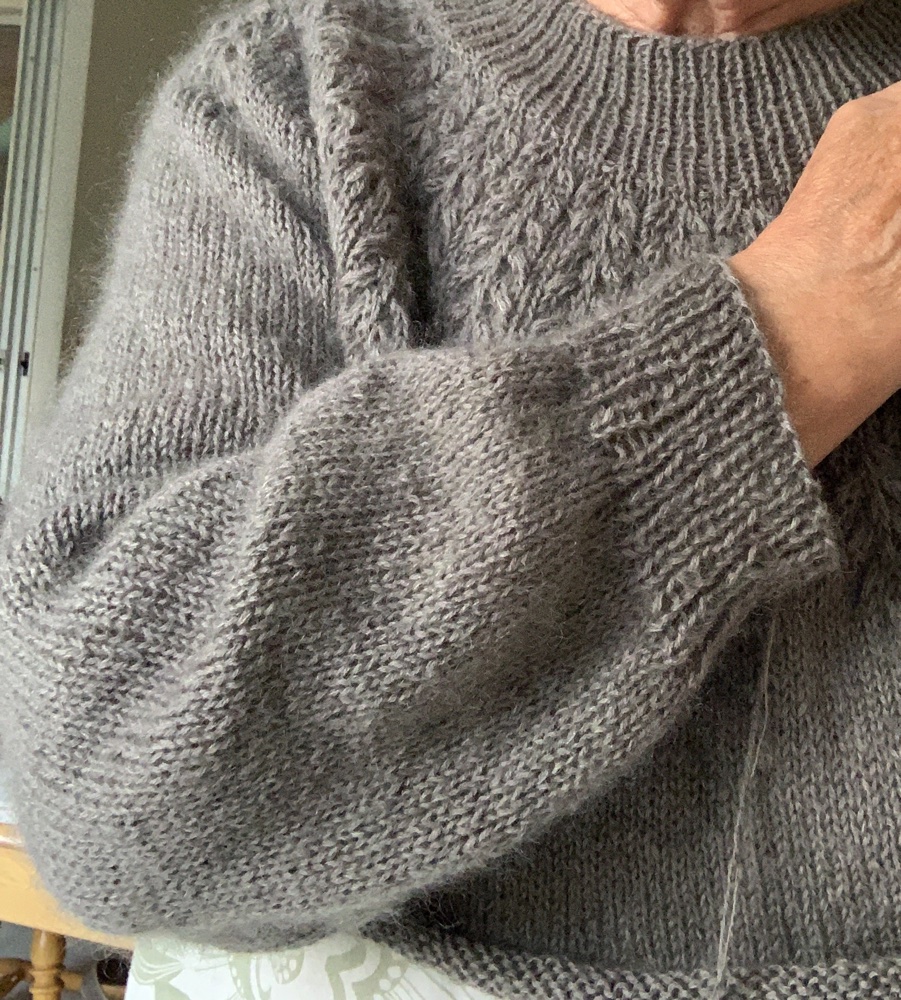
For example: I’ve re-knit the Calliope sweater in gold, and added different sleeves and body ribbing. I also added a split hem because I had just finished knitting a sweater that had a pretty split hem (Blueberry Vodka Lemonade Pullover – gray sweater below). I took some of the information from one pattern and incorporated it into another. The Calliope has a beautiful neckline. I may knit this one again one day.

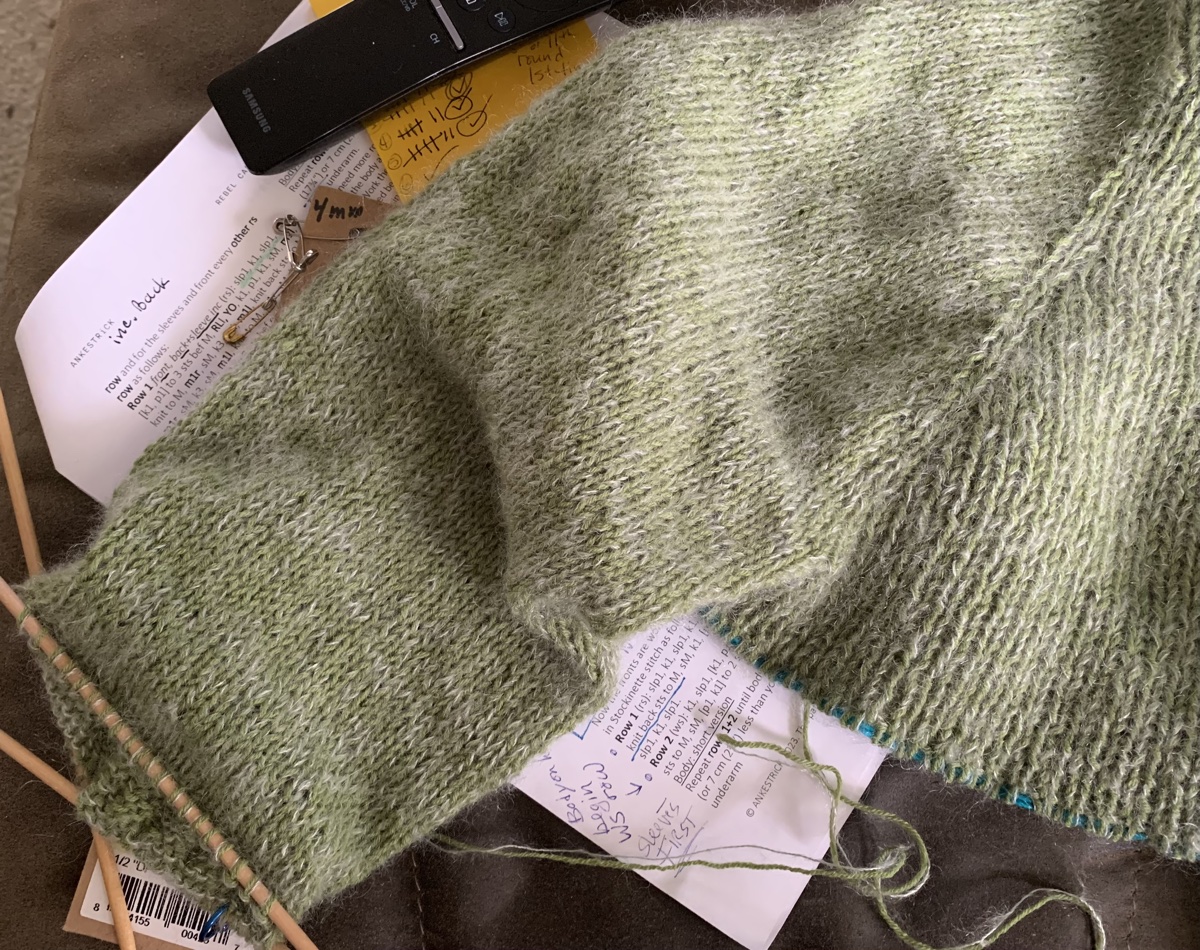
The more patterns I acquire, the more I learn. Usually, when looking for a new pattern to buy, I try something different to expand my knowledge. Every pattern gets printed out, and I make handwritten notes all over it. I try to keep track of favorite parts to possibly use elsewhere.

Making a Second Warm Up Sweater, With Mods

I already have plans (yarn on the way) to knit another Warm Up sweater (link goes to pattern page at Ravelry). This time I will do a different neck opening. I’ll also do a little colorwork among some stripes. My plans for this are still rolling around in my head.

The Warm Up Sweater is a pattern by Espace Tricot. I highly suggest it if you like a roomy “sweatshirt” type garment for cool days. It is a very basic pattern and includes short rows for a comfortable fit. See my review blog post here.

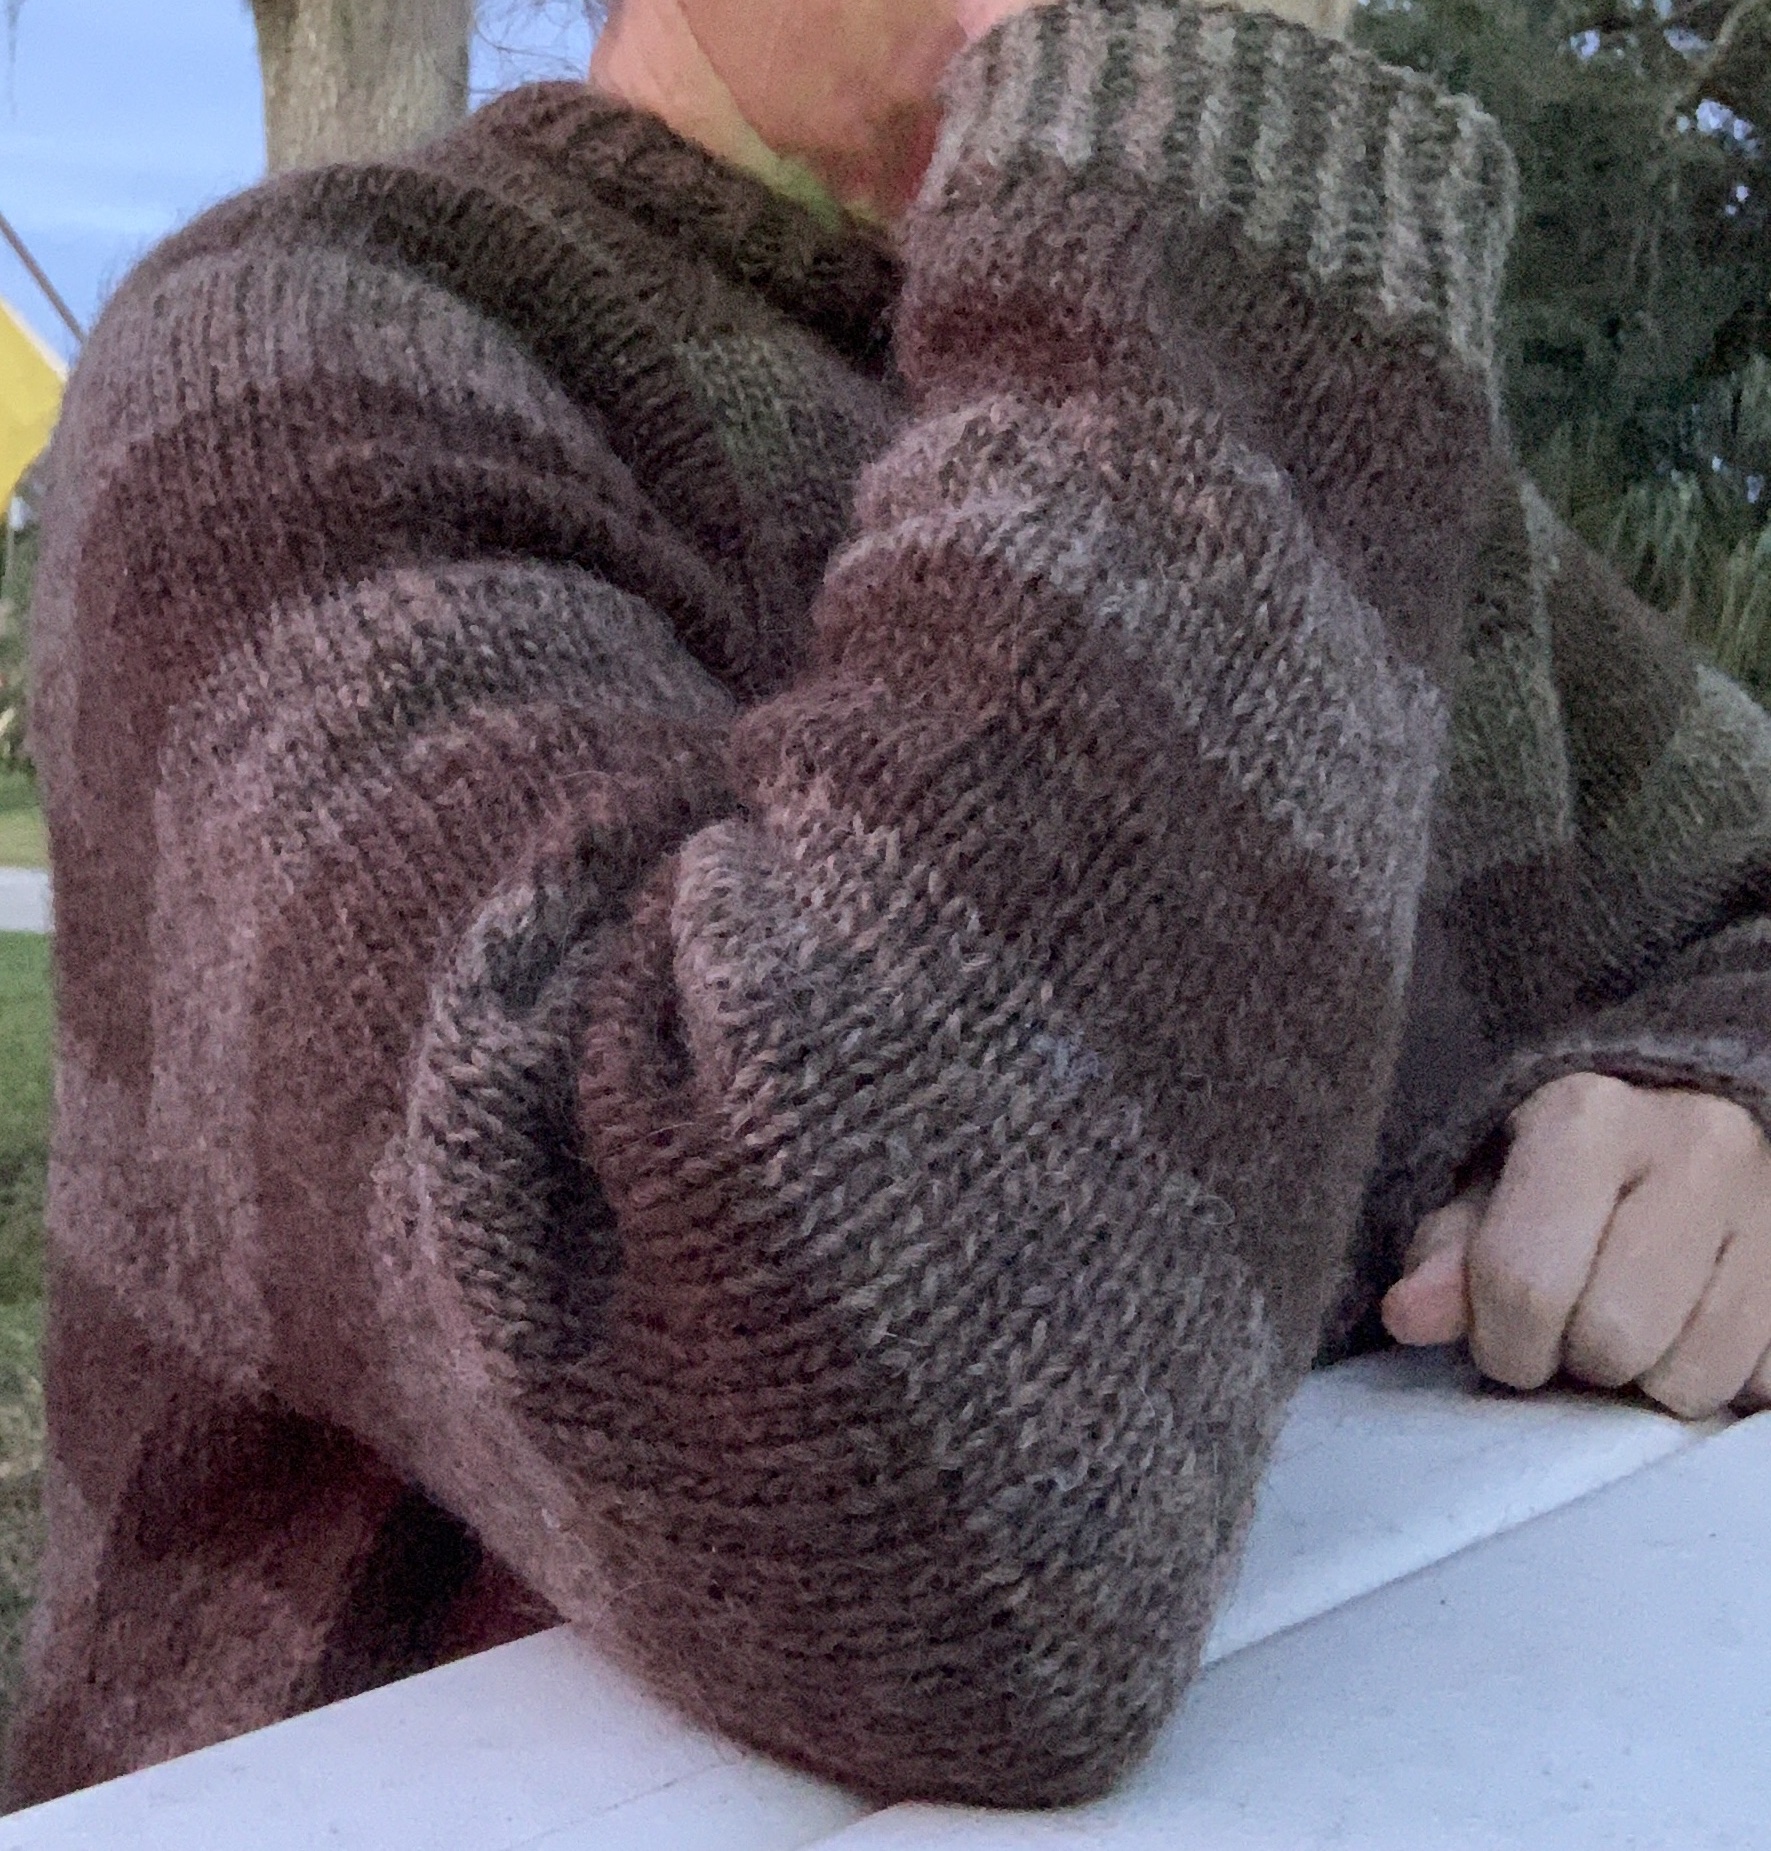
My brown and tan striped Warm Up is a fabulous and warm pullover. It came out nice and big, and the Lettlopi wool is one of my favorite yarns. I chose this pattern to use up some yarn I already had. (The pattern used to be free, but no longer is.)

Even though I live in Florida, I wore this sweater on cold evenings by the fire in our yard. We took a January camping trip, which turned out to be cold and rainy, and I wore it all the time. Wool is wonderful for repelling water, and it drizzled for most of our trip! I love the big, roomy style… and now, I want another, but with a new type of neck opening.

Do You Make Mods to Patterns Frequently? Which are Your Favorite?

One modification I have begun doing more frequently is on sweater sleeves. I don’t like a fitted sleeve. A little roominess is needed if the sweater is layered. I changed the sleeves on my Field sweater, and I’m glad I did.

I’m currently knitting the Rebel Cardigan and I’m also making the sleeves a bit wider. Wider sleeves simply means I am not doing all the recommended decreases. The sleeve won’t taper as much as called for.

Once you have some knitting experience, don’t be afraid to make little changes to patterns. It will build knitting confidence!

cat and yarn image

Please Keep Reading…

Something went wrong. Please refresh the page and/or try again.

Considering a Cable Knitting Project

Knitting a cable vest swatch for size reference and cable chart practice. The Rockhound Vest is a beautiful cabled knitting project.

Cable knitting is not something I have much experience with. I tend to buy cable patterns and then file them away thinking “maybe one day”.

The biggest cable projects I have done were hats (Skiff and Habitat). Now I am looking at knitting a vest with cables on the front and back.

The Rockhound Vest is a pattern by Wool and Pine designs. The company was offering a discount on their patterns and I thought I would see what they had to offer.

You would think that a vest would be a simple and quick knit. This one has a section of cables that comes down from the shoulders and goes down the front. Cabling takes time, but it can be so pretty.

The V-neck and armholes have to be picked up and knit after, and I’m not looking forward to that. Also, the charts look a bit intimidating.

Knitting a Cable Swatch

The Rockhound Vest pattern (link at the bottom of this page) comes with a Swatch Chart, which is a section of cable that needs to be knit, washed, blocked and measured as a swatch – both flat and in the round.

I decided to knit the swatch using Rauma Finull yarn because I had a skein, and I already know I love this fingering wool.

Helpful

First thing I do when knitting cables is color code them! I also write a short description of each cable next to each cable diagram. I have no idea how to read a cable stitch, so the color helps me find the description quicker.

colored pencils

Use stitch markers!!! This helped me a great deal, even though I had to keep moving some of them because the cable section would move. I made small sections on the row to prevent a lot of ripping back.

cable knitting with stitch markers
Use stitch markers to knit a flat cable swatch

Get a better cable needle!!! I was trying to knit using my old, metal cable needle and had my usual problems. The thing would slip out and leave my stitches hanging, or I had to clumsily hold it to be sure that didn’t happen.

Then, I searched for new types of cable needles. I just couldn’t understand why cable needles couldn’t work better! Low and behold… I discovered the Brittany short wooden cable needles (Amazon paid link). Amazing!

short wood cable needle
New Brittany wood cable needle – LOVE!

This set of cable needles comes in three sizes, and I used the middle size for this project, which is fingering yarn (picture above). The short, wooden needle is thinner in the center so the stitches stay put. The shortness also helps when knitting off the cable needle. This has made cabling a lot easier for me. I highly recommend them.

Swatch and Sizing

After looking over reviews, at Ravelry, written by previous knitters of this vest pattern, I see that many finished projects have turned out to be too tight. Even when a seemingly larger size was chosen, the vest seems to end up with a smaller circumference than planned. Maybe knitters did not do a swatch in the round???

I have added six extra stitches (3 on each side) to my swatch. Those stitches are not part of my gauge.

Knitting a swatch is very important and swatches should be knit flat and in the round, because that is how they are knit in the pattern. I’ve only done the flat swatch. The finished swatch size will be larger than normal 4×4 inches- according to the pattern. My swatch was nearly exact, but a tiny bit larger. Going down a needle size would most likely make this too small, and having things a little larger might be good with this pattern.

If I decide to knit this pattern, I need to buy the same kind of yarn, in a different color. I may knit a swatch in the round with my new yarn and see how that turns out. It is possible that the gauge is tighter in the round. That would explain why knitters were getting tighter vests. Maybe they never checked gauge in the round.

I definitely made some mistakes in this cable swatch, but it wasn’t that bad to knit. This swatch shows only part of the cable pattern which goes down the middle of the front and back. If nothing else, it was good practice at knitting from a cable chart.

More Knitting From Me

Knitting a New Little Crescent Shawl

I think I first saw the Interisland Shawl, and pattern information, on Instagram. The shawl caught my eye because it is small, and crescent shaped. (Link to pattern down the page.)

Usually I have more than one knitting project going at a time. Many knitters do. For me, it’s because I like one simple project and one that needs more attention. Mornings are good for knitting more complicated things. Evenings call for simple knits and purls while watching a TV show. Even though I am still working on the Rebel Cardigan, I wanted something else to do. Also, I’m attempting to use us some old yarn.

Crescent Shaped Shawls

Shawls can be knit in many ways. They can be large or small, knit in fine or heavy yarn. I prefer a crescent shape that is not very wide. The Interisland Shawl is shaped like that.

Often a shawl begins by casting on at the top center. Knitting then expands outward to create the long, curved shape. This one is knit differently. The pattern begins by knitting the border, which is a repeating lace pattern.

I have completed the lace pattern, for the border, twice – see my picture. And, I did make a goof, but I am not good at fixing lace. In fact, I rarely knit lace. It’s a bunch of yarn-overs and knit 2 togethers. I don’t find it especially fun, but it looks nice. Because it’s not a wide border, the pattern’s lace rows are manageable. I look at this knitting project as good practice. And I expect to have a wearable, lightweight scarf when done.

knitting lace
Lace edging

Knitters Need to Know

Here’s what knitters should know about this pattern.

The lacework is charted and written out line by line. I’m following the chart. After the entire lacework border is finished, all stitches will be picked up along the edge and the remainder of the shawl is knit. Short rows are involved to create the rounded shape.

The name for the shawl is explained on the designer’s pattern page. Or check out more of Donna Smith’s Shetland designs – Ravelry page.

Please keep reading…

Knitting a First Sweater, Warnings, Ideas and Suggestions

Want to know more about knitting a first sweater? I have some advice for beginner sweater knitters, as well as pattern suggestions.

After fiddling around with dishcloths, hats and scarves for a while, and getting basic stitches learned, I needed a bigger knitting project. I yearned to make a sweater just like all those pretty knitted sweaters I was seeing everywhere online.

I tried to find out as much information as I could before choosing the pattern. I read blogs, Ravelry pattern reviews, and visited the forums, but I still felt indecisive. What type should I choose? A top down, or bottom up? Cardigan or pullover? Plain or colorwork? I had done a bit of colorwork and liked it. A cardigan seemed like too much to handle with button bands, buttonholes and buttons! So, I chose a bottom-up pullover with some colorwork at the top by a designer I’d seen mentioned quite a bit, and bought the Umpqua sweater pattern by Caitlin Hunter.

Continue reading “Knitting a First Sweater, Warnings, Ideas and Suggestions”