Knitting projects I have completed or have in progress. My thoughts and review of the pattern, yarn, and outcome. Also knitting project ideas to consider or find for free.
I purchased the Moon Sisters shawl pattern in June 2019 (and finished June 2020! – see the end of this post for the update).
This triangle shawl is knit by holding two fingering weight yarns together except for the middle section where the yarns are separated to create a pattern. The cast-on for the shawl begins with a typical shawl cast-on, only much longer than any I’ve ever done. The center pattern is a chart only, which for me was not all that easy to figure out. Fortunately I was able to view what other knitters had done, and that helped. It is a small chart, and once you get the hang of it, it goes along fine.
So besides doing that long cast on and figuring out the chart for the center stitches, you will have to know how to knit / purl through the back loop, and how to “make one” left and right in order to knit this pattern. Most of the shawl will be knitting or purling with that break for the center design.
This pattern can be found on Ravelry – Moon Sisters, by Caitlin Hunter.
Moon Sisters Shawl
The center pattern is a series of triangle shapes which, to me, look like arrows. Because the orange color I am using is variegated and not solid bright orange, occasionally my center stitches are come out lighter. Then, my center pattern does not stand out as much as it should. Still, I love these colors together. My plan is to use up some dark colors in my stash, but the orange will be used throughout.
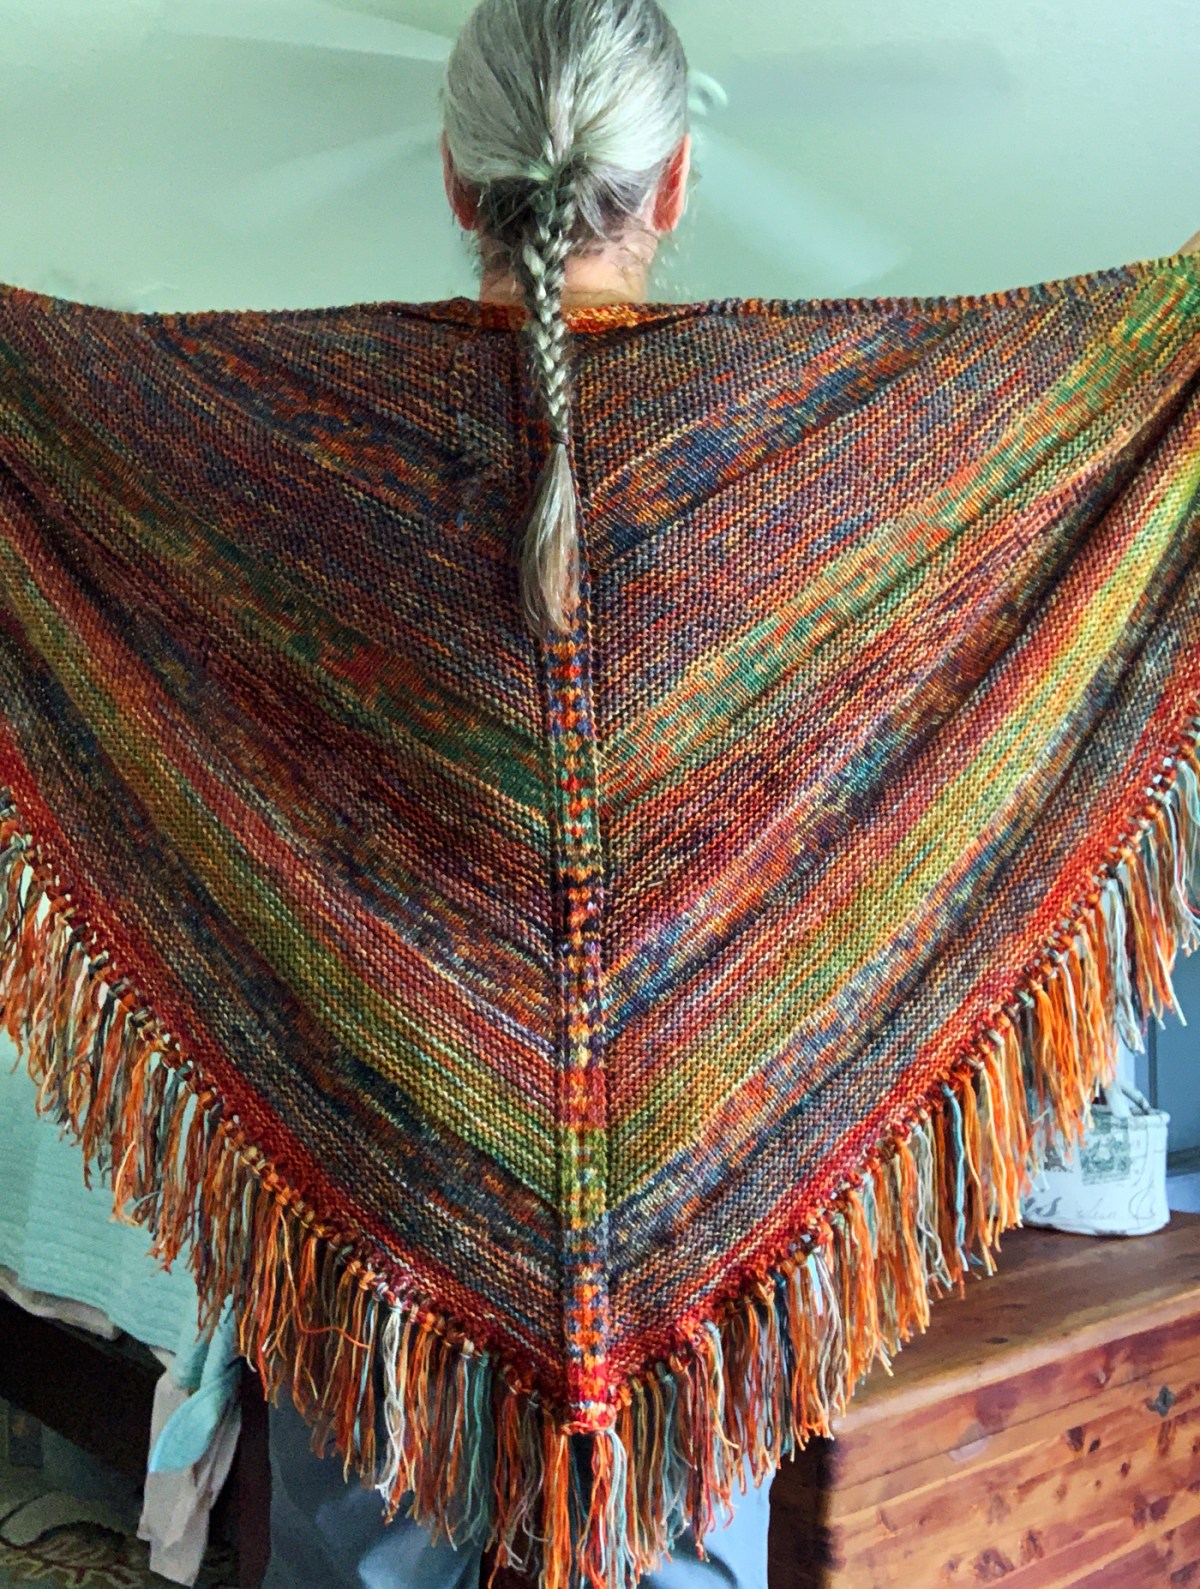
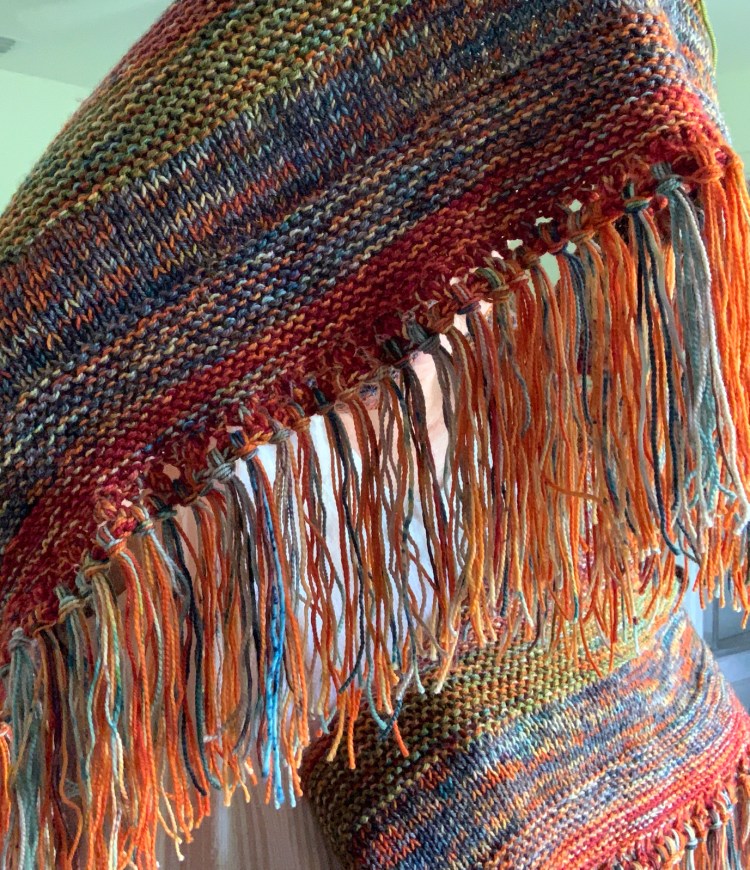
The Moon Sisters shawl is finished with fringe, and I think that is the charm of it. I’m a bit of an old hippie from the 70’s, so fringe appeals to me – sometimes. In this case, I think it makes the shawl even better.
Main color orange is “10 Questions” shown here with Denim blue
While I am knitting this shawl, I was also working on the Quince Wrap, the Fine Sand sweater, and a baby sweater called Playdate. Those are now finished, and so are my Pink Mitts and Winter Morning headband. So Moon Sisters has become my occaisonal go to knitting project. I’m in no hurry to finish it and it’s straight forward enough to do while I watch TV.
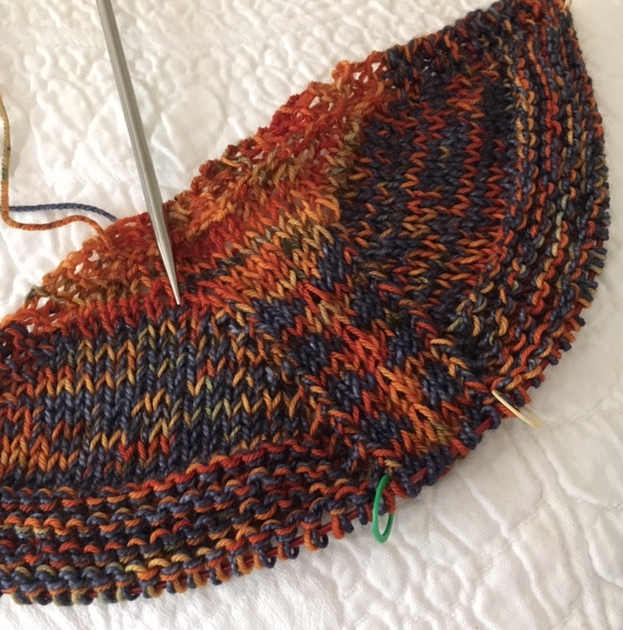
As of November, this is where I am with my progress on this shawl. I just added a dark purple (a Wild Iris colorway by Miss Babs) to knit with the orange because I wasn’t liking the green all that much.
I’m still on my first of three skeins of orange yarn so I should have plenty. I’ll keep some of all the colors I use to apply the fringe at the end.
Getting on with my knitting and added dark purple.
Moon Sisters Has Fringe!
I have yet to wash and block my shawl, but today I got all the fringe attached – no small feat!
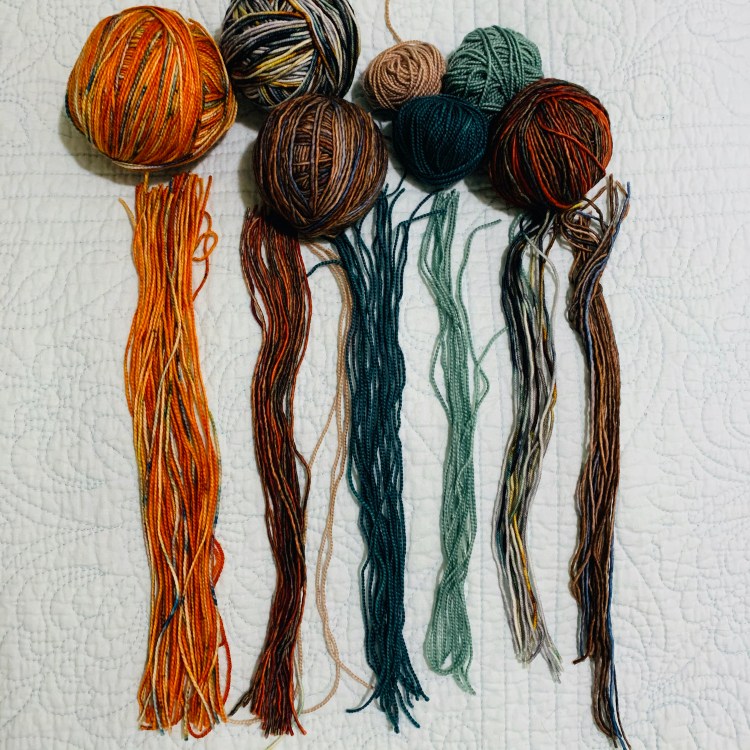
I saved a ball of my main color: Emma’s Yarn, in “10 Questions” orange to mix with other yarn for the fringe. I ended up using all the orange.
Scrap yarn for fringe
Adding all that fringe is a job!
Fontana loves all that string!
Moon sisters shawl finished
I do recommend this shawl, if you like knitting shawls. This one is a biggie. I used all three skeins of orange yarn, and it was held with lots of other colors. I needed to buy a 60 inch circular needle to finish it up, but you could always cut it shorter.
The somewhat boring knitting and purling is interrupted with that little center pattern, which is nice.
It took me a year to finish this, but I kept putting it aside to work on other things. Tomorrow I will wash it, and it will be ready to wrap up in – just in time for 100+ temps… LOL.
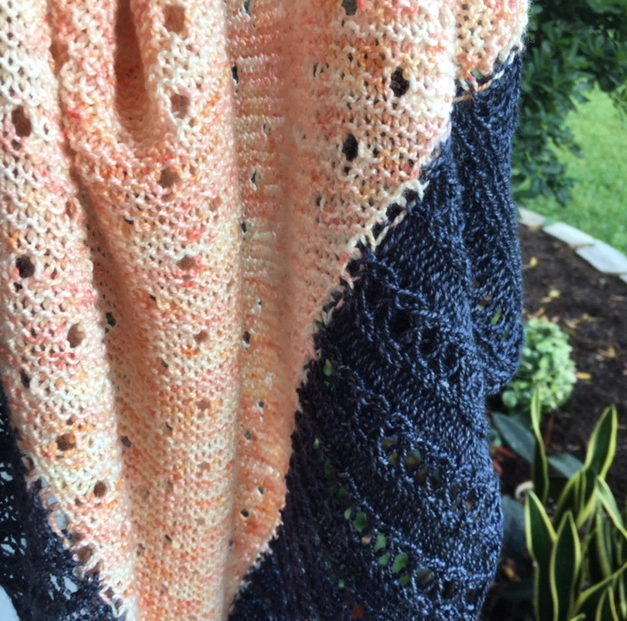
Just a quick post to show my finished photos of the Dewdrops shawl. I began knitting the peach -colored triangle section a few months ago. (See my cast on post here.) I loved the yarn (Emma’s Yarn) so much that I then had to wait for the Four Purls yarn truck to visit my area again in April to pick up a denim blue color for the border.
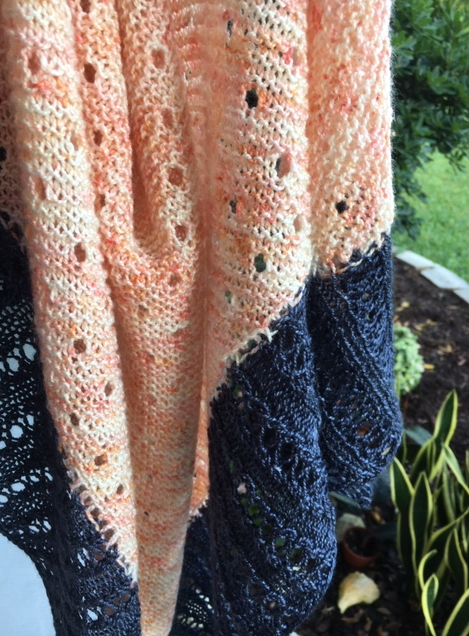
From the time I cast on I had pictured a dark blue color for the border. I love the outcome and am very happy with the way this shawl turned out. I’m not a super experienced knitter, but I had no trouble with that lace border.
I have more trouble trying to get good photos once my projects are complete! Outdoors is the best choice for bright, true color photos. But I don’t want to get my newly cleaned and blocked shawl dirty! So I simply held it with one hand and pointed my iPhone with the other.
Outside photo shows the true colors
Get the Pattern
Want to knit Dewdrops yourself? Here is the link to the designer’s Dewdrops pattern page at Ravelry. Or visit Woolenberry.com to see more of Janina Kallio’s massive selection of shawls.
More of What I’m Knitting
So what am I knitting now? Well, I always have a few things going at once but I’m focused on the Sun Kissed shawl, which is also being knit using Emma’s Yarn. When I want to relax and knit something simple, I work on my Ruffled Scarf. I’m working on a pair of socks – which are coming out okay. I’m not a sock-knitter, but I’m trying to be. A post on that is in the works.
This is a big deal for me! I am knitting a sweater…!
For my first hand-knit sweater project I chose the Umpqua Sweaterpattern by Caitlin Hunter of Boyland Knitworks. I know so little about knitting sweaters that I have no idea if top-down, or bottom up, are easiest, but here I go. I’m jumping in! This pattern is knit from the bottom up. The fun “arrow” design around the yoke caught my attention and I wanted to knit it.
Gauge is still a bit of a mystery to me. As far as I could tell, while figuring the gauge for this sweater, I needed to go up a needle size. I’m using a size 6 for the cuffs and bottom of body, and a size 8 for all the rest. I’d rather have the sweater fit loosely than tight. The pattern suggests going up a size for the color work (yoke area) if you generally do color work tighter. I have no idea if I should do that, but I don’t have a size 9 circular long needle, so I probably won’t. I’ll worry about that when I get to the color work part of the sweater.
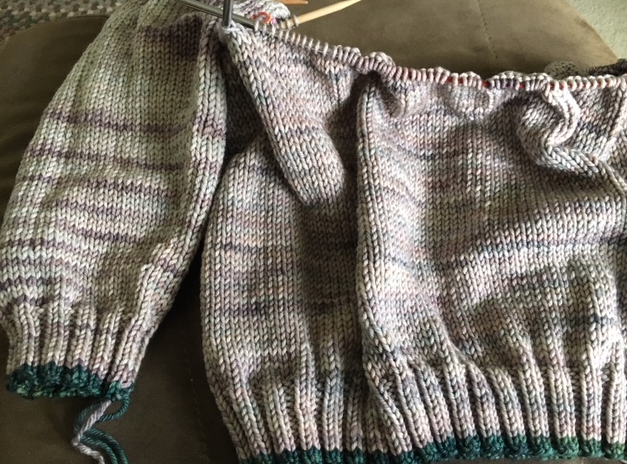
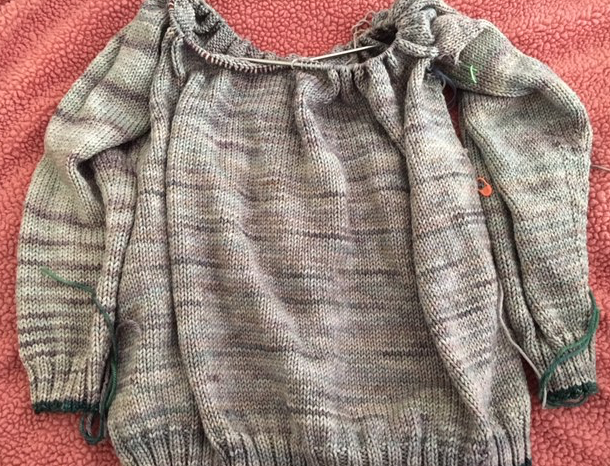
Body and One Sleeve – I’m On My Way!
Here’s a photo of my one sleeve and body. I still have a few inches to knit on both parts, and no, they are not connected. I set them side by side for the photo. I’m happy with the main color (Whole Grain) and I love the Rios yarn. Check out the Malabrigo website and I dare you not to buy their gorgeous yarn. Rios is washable too! I also chose Aguas (dark green) for the trim, and English Rose (dark pink) for the Yoke colors.
Knitters who are savvy sweater people make all sweater knitting sound EASY. I’m scared to death while I knit this. I’m following the pattern exactly and if I am unhappy with some part (like sleeve length), I may knit another one of these sweaters one day and make changes. This one is really a test for me!
Attaching Sleeves and Body of Sweater
Now both sleeves are done and I put the stitches of the sleeves onto “holders” like the pattern said. One little section of stitches is for the armpits – which will be stitched up at the very end – and the rest of the stitches will be knit with the body.
Purl Soho has an excellent tutorial which explains how to do this, so I added it here. It helped me visualize the parts of sweater knitting. Also, after watching the video, I realized that when I finished up my second sleeve, I should have kept the stitches on my 3 DPN’s and not placed them onto yarn. I had to put the stitches back onto the needles to knit – a waste of time.
My finished sleeves and body which are ready to be attached.
Doing German Short Rows at Yoke
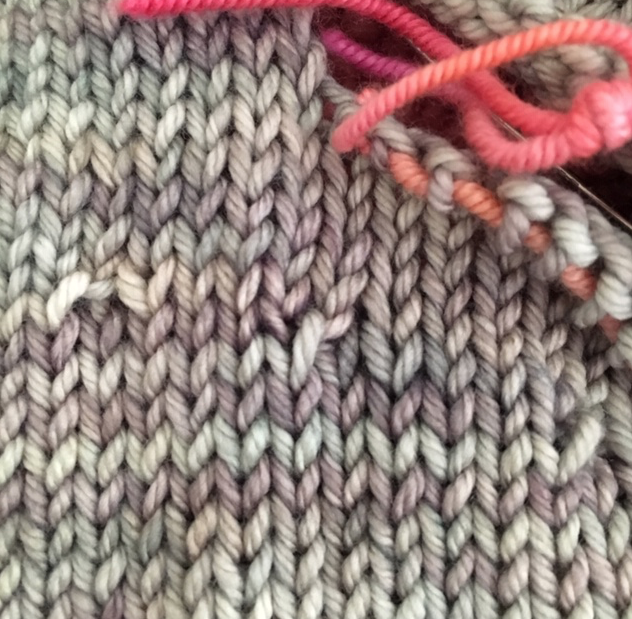
Because I was not happy with the look of the short rows I did earlier in the pattern (see photo below where you can see 3 “off” stitches where I did a wrap and turn to shape the back), I decided to try German Short Rows when it came to shaping the yoke.
NOT German short rows, but the 3 wrap and turns done for shaping the back.
I had read from some of the Umpqua knitters that they used this type of short row work. The YouTube video below is by Very Pink Knits and it is how I learned to do German Short Rows, which seem simple enough.
However, the sweater pattern itself was confusing when it came to doing short rows. Once I began doing wraps and turns (creating short rows) I had no idea where they were on my needles. Suddenly “Short Row 3” said to “knit to 5 stitches before last wrapped stitch, wrap and turn“. Does that mean the last stitch I wrapped, or the last wrapped stitch I would come to while knitting? I had no answer, so I turned at the first wrapped stitch I came to because the pattern said later on to “work wraps together”. I figured I should not hit a previously wrapped stitch until then. I have no idea if I did this part correctly.
Sleeves attached and almost ready for color work in yoke area.
Now I am nearing the color work area of the yoke, and that is shown in chart form only. Luckily I know how to read a chart for working in the round. I may order more Rios yarn in other colors because I still think I will be cutting it close with my main color (MC). If I substitute a new color in place of the main color for the rows of yoke color, I will conserve the MC yarn for finishing.
Adding Color to The Yoke Area
Below you can see my first rows of the color chart. I did decide to use another color of Rios yarn, which I just happened to have in my stash. I can’t find the tag for it, but it’s a peach color (Peachy?). I’m sticking with “whole grain” which is the MC for between the green rows as the pattern says. The same main color should also be where the yellow / peach color is, but I’m afraid I will run out by the time I need it to finish the neck area.
Done with the yoke colors and finishing the neck.
Three-Needle Bind Off For Armpits
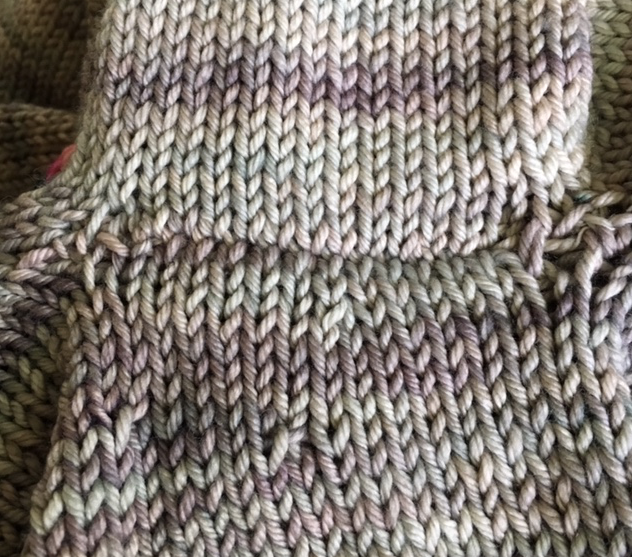
The yarn that has been held on stitch holders or extra yarn now needs to be put onto DPN’s once again – Do this on the WRONG SIDE. Holding them side by side a three-needle bind off is done. Watch the video below as it is easier to understand, but it’s very simple to do. Holes will probably remain at each end, but they can be closed up when weaving in the tails.
I’ve found this tutorial by Purl Soho which shows exactly how to accomplish the three-needle bind off. Don’t sweat it – it’s easy!
A neat seam after binding off the underarm area of the Umpqua Sweater. I also closed the holes when weaving in the tails.
Finished..!
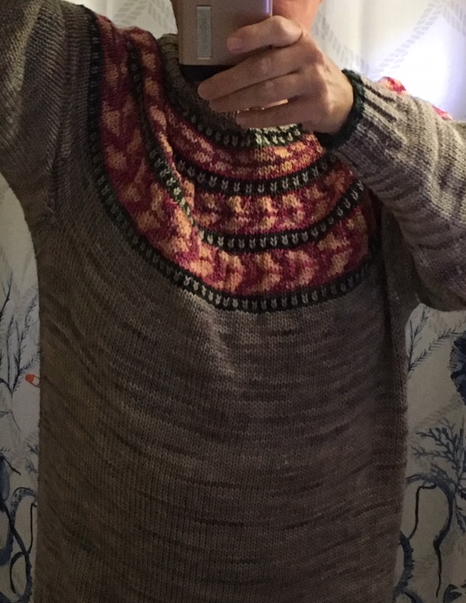
On April 7th I finished knitting my Umpqua sweater and I am pleased! It fits.. yay! There is lots of room to move and it would keep me very warm in cold weather, I’m sure. The day I finished, by weaving in the tails and closing up the underarms, it was in the 80’s here in Florida. Not exactly sweater-wearing weather. Because it was hot and muggy, I didn’t wash and block it yet. There is no hurry because I won’t ever be able to wear this garment unless I take a trip North to New England in cooler months! But I did get some photos.
Selfie time!
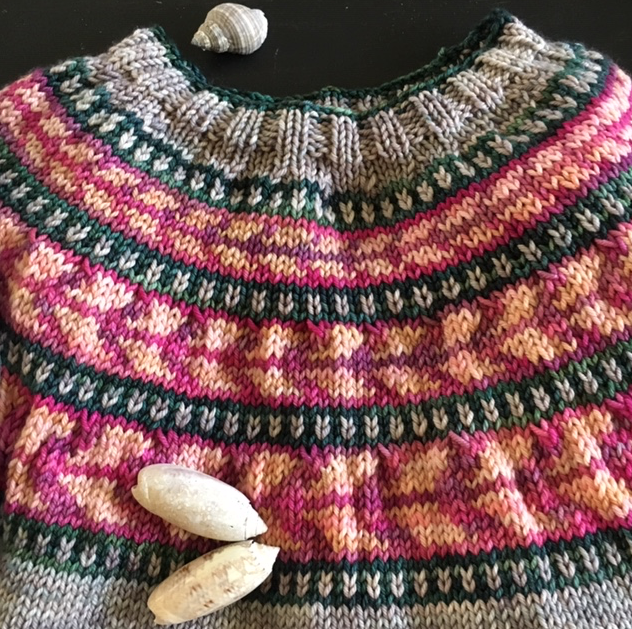
You can see the “whole grain” main color and the peachy colored arrows. Those were supposed to be the main color, but I was afraid I would run short so I used some Rios stash yarn. I do like the addition of color. I knitted size “D” but I probably could have gotten away with one size smaller. Or, I should have kept the suggested needle size and not gone up one.
Hanging with the drum set
I think I did my SSK’s incorrectly, but it’s not super noticeable. Live and learn is my motto.
Sweater and seashells – a rock snail and two olive shells.
Collecting and photographing seashells is another hobby of mine. I have a blog about it at Seashells by Millhill.
In my previous post I mentioned that I was searching for the next project to cast-on. I’ve decided on the Dewdrops shawl, which is triangle shaped, but is knit from the bottom up. Here’s a photo of what I’ve knit so far. It’s a simple pattern that looks nice on both sides. I’m about a third of the way through the rows, but they will get longer and become more time consuming. Once this section is done, a lace border is added. That will be interesting.
I am using Emma’s Yarn, merino and silk, which is hand-dyed here in Florida for the Four Purls yarn store. It was so nice to walk among yarn skeins and see them in person, which I did when the Four Purls Yarn Truck (what an ingenious idea!) came to my area. Usually I must buy my yarn online and hope for the best because I have no yarn shops nearby.
Janina Kallio is the designer of Dewdrops and the pattern is easy to understand, with written directions.
This beautiful merino and silk yarn is called “Main Squeeze” which resembles the color of orange and pink grapefruit juices. We are in Florida, after all! It is soft and silky.
Beginning the Dewdrops shawl pattern
The Cold and Wind Are Keeping Me Indoors
Windy days are upon us here in east, central Florida and that makes boating and fishing difficult. My son is a Florida native and can’t stand temperatures below 60. The heat goes on and he refuses to consider going boating. Floridians are wimps.
I know that no one will pity me having to deal with winter temperatures in the 50’s and 60’s… hahaha… !! Wait until summer. That is when I want your pity.
Being indoors more than usual has given me plenty of opportunity to knit. Recently I finished up two projects; the “Let’s Stripe” hat and “Scrappy Bias Shawl“. It seems I always have many projects going at once. I suppose most knitters do.
Update on “Dewdrops” Progress
Been knitting like crazy between a few projects I have going, but I’m almost done with the triangle section of the Dewdrops shawl. It is a very simple pattern, which would be great for a beginner. It’s almost too boring for me at this point. But it is a relaxing break from knitting my first sweater, which has turned out to be a challenge. See the Umpqua Sweater knitting post here.
This is the first time I’ve knit with Emma’s Yarn and it is very lovely. The color is gorgeous as well. My plan for the border is to use a denim blue color, or something dark. I’ll change my mind many times before I get there I’ll bet! I may wait to buy more of Emma’s Yarn when the Yarn Truck visits again in April.
Denim blue Emma’s Yarn is now purchased and wound into a ball ready to use. Dewdrops is off hibernation and ready to finish. I’ve been waiting for Four Purls to visit again so I could grab more of this Super Silky yarn. The yarn truck arrived April 16th and even though I had to pay taxes and not get a refund I managed to spend a bunch during my visit to New Smyrna Beach.
Denim blue color ball of yarn to finish my Dewdrops shawl.
Now I am knitting the lace border of the Dewdrops shawl with the denim yarn. Once I got the first row done I could see how the stitches lined up. Also I did count them and I appreciate designers including row counts in their patterns. The only place I am having trouble is at the “point” but so far it looks fine. I’ve had to fix a few missed stitches, but that is me. I’m still learning. This is one completed set of stitches and I have one more set to go. The border will be double this width.
Lace border
Check Out My New Shawl!
I finished knitting this shawl in May. See my photos of this finished project onthis post.