There is a lot more to knitting than picking up a pair of needles and choosing a pretty yarn. If you have done any amount of knitting yourself you will understand. I have learned a lot as I’ve knit various projects over the past year and a half.
One aspect of knitting you will undoubtedly come across if you knit mittens, socks or even sweaters, is the Kitchener stitch. It is usually done with a tapestry needle to either close up a mitten top (see below), sock toe, or stitch something together seamlessly. (See my Playdate Cardigan page also where I used this stitch on shoulder seams.)
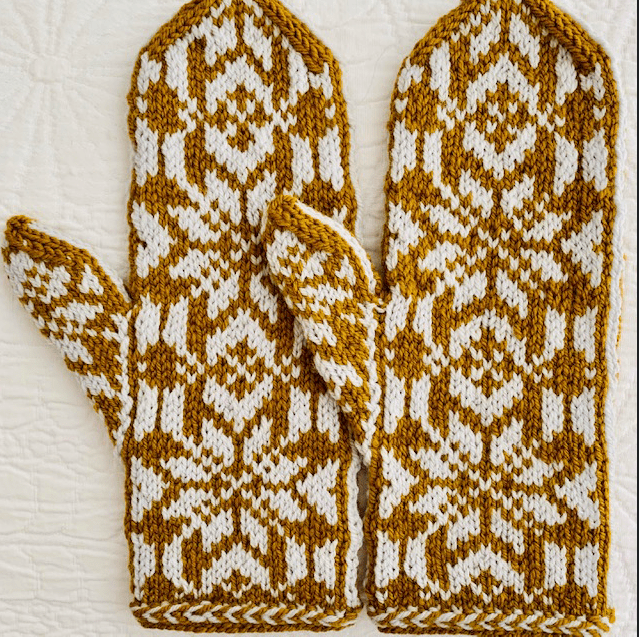
Glissade mittens
Basics of the Kitchener: End your knitting with even number of stitches on each of 2 needles. Do a set up stitch, and then begin the Kitchener. It weaves both sides of the project together without making a seam. If you look at my mitten tops, it appears that my stitches flow over the very top of the mitten like magic!
I have not done the Kitchener stitch often, but there is a good YouTube video by Very Pink Knits which has helped me to understand it better. She has a little mantra she says while stitching. She shows it on a sock toe, in slow motion, which is very helpful!
My Glissade mitten tops look pretty good, if I do say so myself. When I first tried this stitch, I practiced on something that didn’t matter.
At first, this stitch drove me nuts. I really hated it, but after practicing, it’s really not that bad. I just have to go slow and pay attention. A lot of videos don’t tell you what to do with the last two stitches, but this video does.
Now, whenever I have a pattern that calls for this stitch, I write that little saying on the pattern itself so I don’t have to go look up the video when it’s time to do the Kitchener.
After beginning The Woolly Thistle mitten knitalong with one mitten pattern, I came across a new pattern for sale that I liked a lot better.
I finished on mitten in my first choice (Milet) and then started this one which is called “Glissade” and you can buy the pattern and download it at Ravelry – I have a link further down the page. I have finished one mitten, and I do love this pattern! Read on…
Brooklyn Tweed Arbor yarn is pretty nice
I wanted to use the same DK yarn the designer used, but it was out of stock, so I began looking for other DK yarn to use.
One thing I want to do this year with my knitting projects is to use new types of yarn. I’ve already fallen in love with the Rauma yarn, and I vow to use more pure wool this year. The Woolly Thistle imports beautiful wool from overseas, so that’s a good place to start when shopping for “yarn with a story”. I love knowing where my yarn came from!
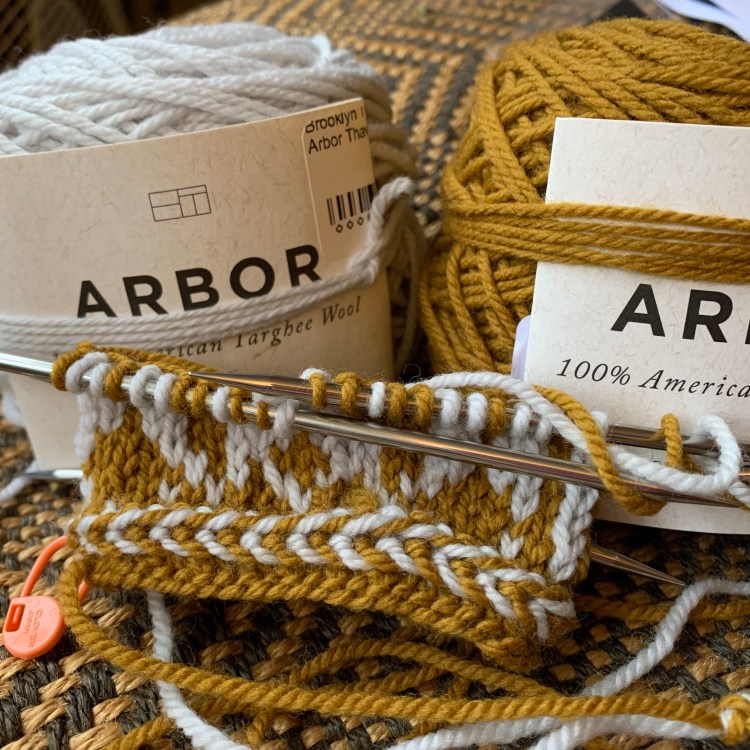
But this time I chose Brooklyn Tweed’s Arbor yarn for a couple of reasons. After researching this yarn, reviews are outstanding. Everyone loves it, and I can now join that group – it is so nice. Secondly, the color selection was fabulous. I bought mine at Wool and Company, and they wound the skeins for free (as always).
My Arbor colors are “Kilmt” (gold) and “Thaw” (silver gray) and I think I made good color choices. It’s not super expensive yarn for the nice quality. It will need to be hand-washed, but how often do you need to wash mittens?
Getting beyond the cuff
The Glissade Mitten Pattern is for sale on Ravelry by Virginia Sattler-Reimer and I believe it is one of her newer patterns. She also has a very popular mitten called Tettegouche mitten which has many colors. She has a hat with the same name which is featured in the Milarrochy Heids book which I bought a while ago.
This mitten pattern is fun. It starts with a Latvian Braid, which I think looks really nice. (The designer includes directions for making the braid.) I think one reason a braid is used at the beginning of the cuff is to keep it from rolling.
Knitting the Thumb
The pattern is in chart form, and the thumb is shown separate, which took me a bit to figure out. The thumb stitches have to be added at a certain point in the pattern, which takes some getting used to for a newbie like me.
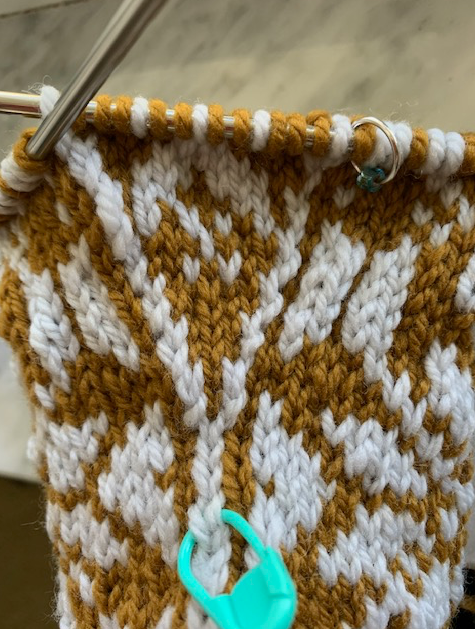
You can see my thumb placement knitting in the photo below. It was easier for me to add a marker so I would know exactly when the thumb stitches begin.
I placed a marker at the beginning stitches of the thumb area
It’s tough to know gauge with mittens until you get far enough along to slip your hand through the DPNs. I began using size 3 DPNs, as the designer used – I switched to size 4 after the thumb – because the hand seemed to be a bit tight.
Getting started on the colorwork thumb
I did okay for my first colorwork thumb. It did get a bit hairy at times, but all in all it was completely worth it because I love the outcome! I used a marker for the BOR, and added one in the center of the pattern, just to help keep me on track.
Love the color, love the yarn, love the fit, and love this pattern!
Here you can see how the side line of the mitten carries onto the thumb.
Pattern on inside of thumb continue along the side of the mitten as well
I Love This Mitten!
Although I still have one more Glissade mitten to knit, I look forward to having a pair of these. The fit is perfect, but I did end up going up to size 4 DPNs once I put the thumb stitches on hold. I tend to be a tight knitter.
When I do the next mitten I will do the cuff in a size 3 and then change to a size 4 for the hand and thumb. It’s the only change I’ll need to make. (That worked well on #2)
I have not washed and blocked it yet – I am waiting for the second mitten to be knit.
Love this!
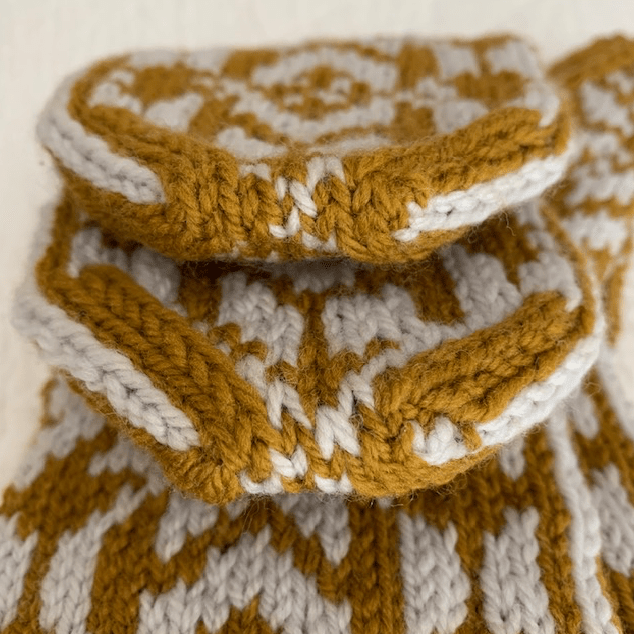
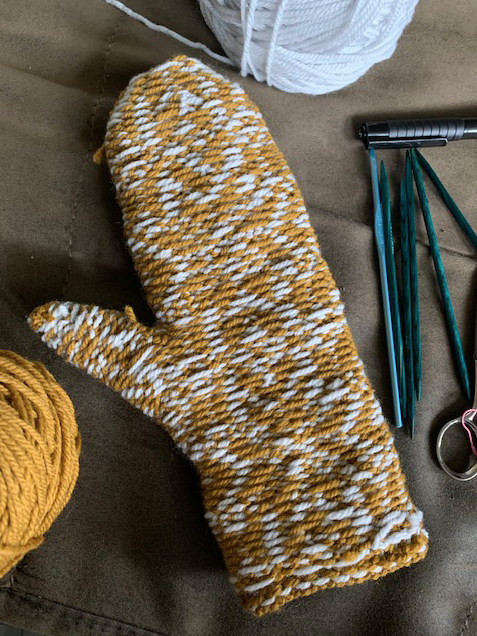
When doing stranded colorwork knitting, the inside of the mitten looks like the image below. It makes for a bit thicker fabric than plain knitting.
Wrong side
I am trying to be a better “pairs project” knitter, where I finish two mittens, two socks, etc., but I have to love what I am knitting for that to happen. I can’t see wasting time knitting something I dislike.
Finished today! My first pair of hand-knit, full colorwork mittens. They still need to be washed and blocked, but they fit well and look decent. In fact, I really enjoyed this knitting project. It was quick, even for me.
I did not knit every day. I have to work also, but the pair only took 13 days. Haha… some knitters can knit 3 pair in that length of time! Still, I am happy that I have a new pair of mittens AND I finished before the knit-along ends (March 26th).
Washed and blocked and ready to wear
Inspired to Knit More Mittens
Once I knit a project that I enjoyed, and turned out wearable, I want to do more. The Brooklyn Tweed Arbor yarn is so fabulous that I have my eye on a new mitten pattern in DK yarn. It’s called Fiddlehead, and is very popular. The DK weight works up quicker than fingering, and that is a good thing for a beginner.
In fact I might write a page full of DK and Worsted weight patterns.
The Milet mitten pattern is my first real colorwork, small-needle knitting project. I’ve learned how to hold the yarn for the Main Color (MC) and Contrast Color (CC), and I’ve learned how to carry floats from both hands. So, I figured I was ready to attempt something new.
I did a trial knit of this pattern to try and figure out what size needles to use. The first attempt at this mitten came out very large (also my needle sizes were off – see Flexi Flip size discrepancies). I had gone up a needle size because usually I have to do that. But this time the mitten was way too big.
When I began my knit-along mitten project, although I had another mitten pattern in mind (Helianthus), I stuck with the Milet pattern because I could understand it (especially the thumb). I did go down to needle sizes 1.5 and 2 (pattern calls for 1.5 and 2.5). It meant I had to order some new DPN’s to finish off the top and thumb.
Honestly, I think this mitten should be knit in size 1 and 1.5, with added length for cuff and hand.
Accomplished the floral cuff the first day of knitting
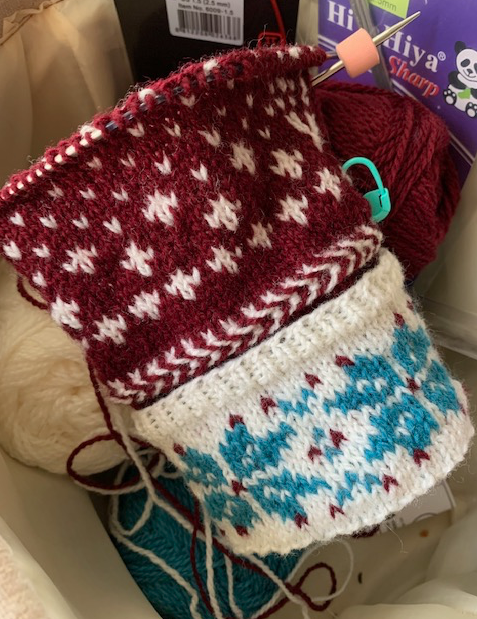
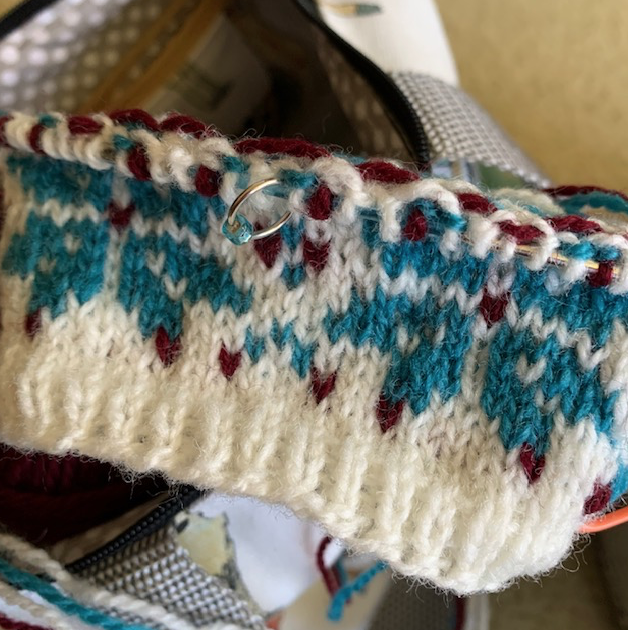
The colorwork cuff is knit first then a ribbed lining is worked. Once the ribbing is finished the work is turned inside out to begin the hand. (See mug photo below.) I like this idea of making a double layer cuff.
Because I like a longer cuff on my mittens, I added extra rows of maroon to the bottom of the hand / wrist area, then did a Latvian Braid (just for fun) with a couple more rows of maroon. I wouldn’t do it this way again because that wrist area is too loose. I like the braid, but overall the mitten is simply too wide and loose.
I added a Latvian braid and extra rows to lengthen the cuff
The pattern is easy to follow, but it did take me some time to figure out the thumb knitting. I’m not experienced with picking up stitches and very small circumference knitting, so the thumb was annoying. Because of this, I decided to knit it solid maroon until I got near the top.
knitting colorwork Milet mitten pattern
It took me twelve days to finish this one mitten, but I did not work on it every day. I had to wait for my Hiya Sharp #2 DPN’s to arrive.
Learned this: Very sharp, metal, DPNs are super helpful when knitting tiny stitches.
Made some changes to lengthen the mitten
Review of Milet Mitten Pattern
Overall I like the looks of this mitten. Loads of people have also knit it, so it is popular. Many knitters have mentioned having to add length to the hand, which I also had to do. The nice thing about mittens is that they can be tried on. It’s easy to adjust length of hand and thumb by adding / subtracting rows.
The thumb chart has been fitted in with the hand, so it’s very easy to follow – but you must know how to read a chart to knit mittens. It’s not difficult, but when designers put the thumb chart separate from the rest of the work, I don’t know how to incorporate that into my knitting. It’s something I will have to figure out because I have other mitten patterns I would love to knit.
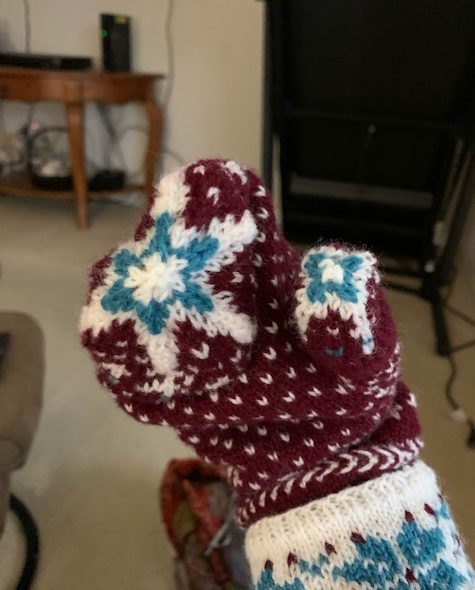
I added three extra rows of the white dot pattern, but once I got to the top “star” pattern I realized I needed more length. So I added a couple more rows there.
The mitten is also very wide. I believe a thin pair of gloves could be worn inside for extra warmth.
The left-hand mitten will not be knit exactly the same way as I will make better adjustments. I’ll use the same needle sizes so the pair will match, but next time (if I ever knit this pattern again) I will use smaller needles overall.
Changes, Mods, to Pattern For Next Time
Needle size 1 and 1.5 for a tighter cuff and smaller mitten circumference overall
Lengthen the cuff by adding more colorwork or plain color knitting, then more rows of ribbing to match length.
Add as many rows as needed of dotted colorwork to the hand length.
For the mitten knit-along I am doing, colorwork knitting is a requirement. The pattern must include more than one color for this KAL, and the mittens I am knitting have three. Once you know the basics of doing colorwork, also called stranded knitting, the project will end up looking good instead of a mess (like mine used to be).
Colorwork Basics
I have a little experience in knitting colorwork. Basically you are knitting with two or more colors and using them to create an image or pattern. Yarn is held in both hands, with left hand using the prominent yarn, and right hand holding the “background” yarn color.
However, if there is a long bunch of stitches in one color only, it means the other yarn must be carried along until ready to use. Because you can’t just let it droop and create a long “float”, or unattached length of yarn, you have to know how to “carry a float” for both the left and right hand yarns. This is knitting talk for catching the unused yarn with the used yarn to bring it along correctly. And it is done differently for each hand (color).
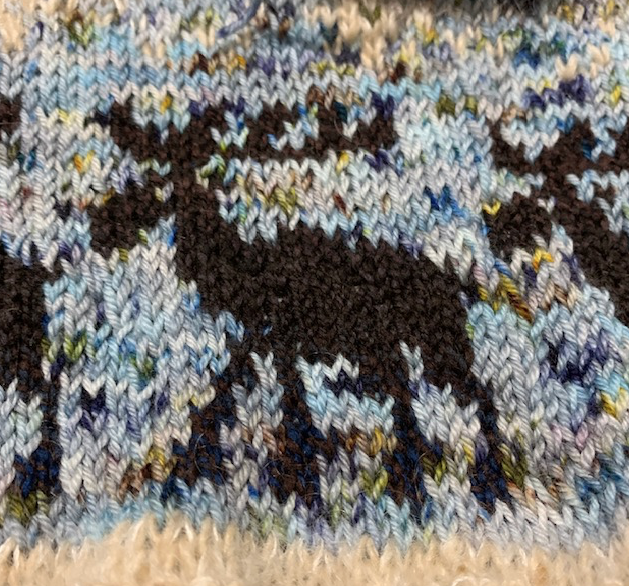
Moose motif
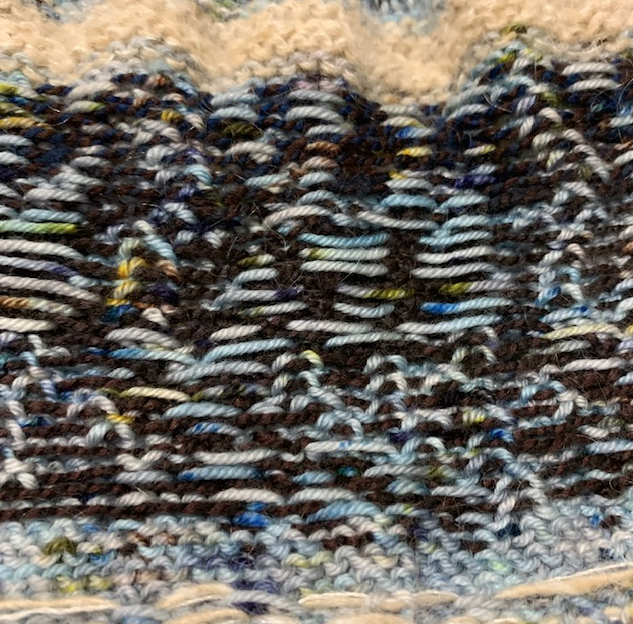
For instance, when I knit this moose motif I had to carry yarn colors over numerous stitches. When knitting the rows of brown for his body, I had to carry the blue yarn and catch it up while I knit the brown so as not to leave a long strand drooping along the back of the hat.
Catching the floats for the moose motif
Catching floats is not difficult and once you know how to do it, it becomes simple. I suggest you knit something where you can practice this over and over until it becomes second nature. I’m getting more practice now while I knit the Milet mittens.












 New England's Narrow Road