Just about a year ago I purchased two hanks of hand-spun yarn at Clarion Call Fiber Arts at Etsy. One of those hanks contained some bunny fur (angora), which made it feel so wonderful, and I finally decided what to use it for. A variegated yarn such as this is great for knitting a hat. Since I only had one skein, it came down to a cowl, hat or mittens and hats are favorite projects.
Beanie
How I Made This Hat
I did not follow a pattern and simply decided to knit a 2×2 rib. I wanted a wide cuff to roll up so I knit until the hat was about 10 inches tall before I began to decrease.
I knit this hat to be quite long for a wide brim
I cast on 112 stitches using the Old Norwegian cast on and a size 6 US circular needle (16 in.). Then I began K2, P2 around. (I tend to be a tight knitter.)
I really had no idea how to correctly decrease a 2×2 rib. I decided on a SSK and K2tog side by side four times around – four decrease seams. So, 112 divided by 4 becomes 28. I placed a marker after 28 stitches around, with different marker for BOR. As I knit around, at each marker, including the BOR, I did a ssk, then a k2tog. With only a few stitches left on the needle, cut the yarn and draw through stitches to finish.
The crown ended up looking like this: I’m happy with it.
Crown showing decreases
Crown was knit with decreases in four places around.
I’m very happy with the finished hat. A ribbed hat is easy to knit anywhere, at any time. When I lived in New Hampshire this is the type of hat I would grab whenever the wind was blowing and I needed good ear coverage. (I had to snow-blow my own driveway.)
This yarn was hand spun, which means it is truly unique. For me, that is the exciting part of knitting! I love to know where my yarn came from – whether is was sheep grazing in Norway, or a little bunny living in New York.
My other current project is a stranded colorwork pattern from the Hat’s On book. I am also using hand-spun yarn, but from another source. I’ll be blogging about this one later.
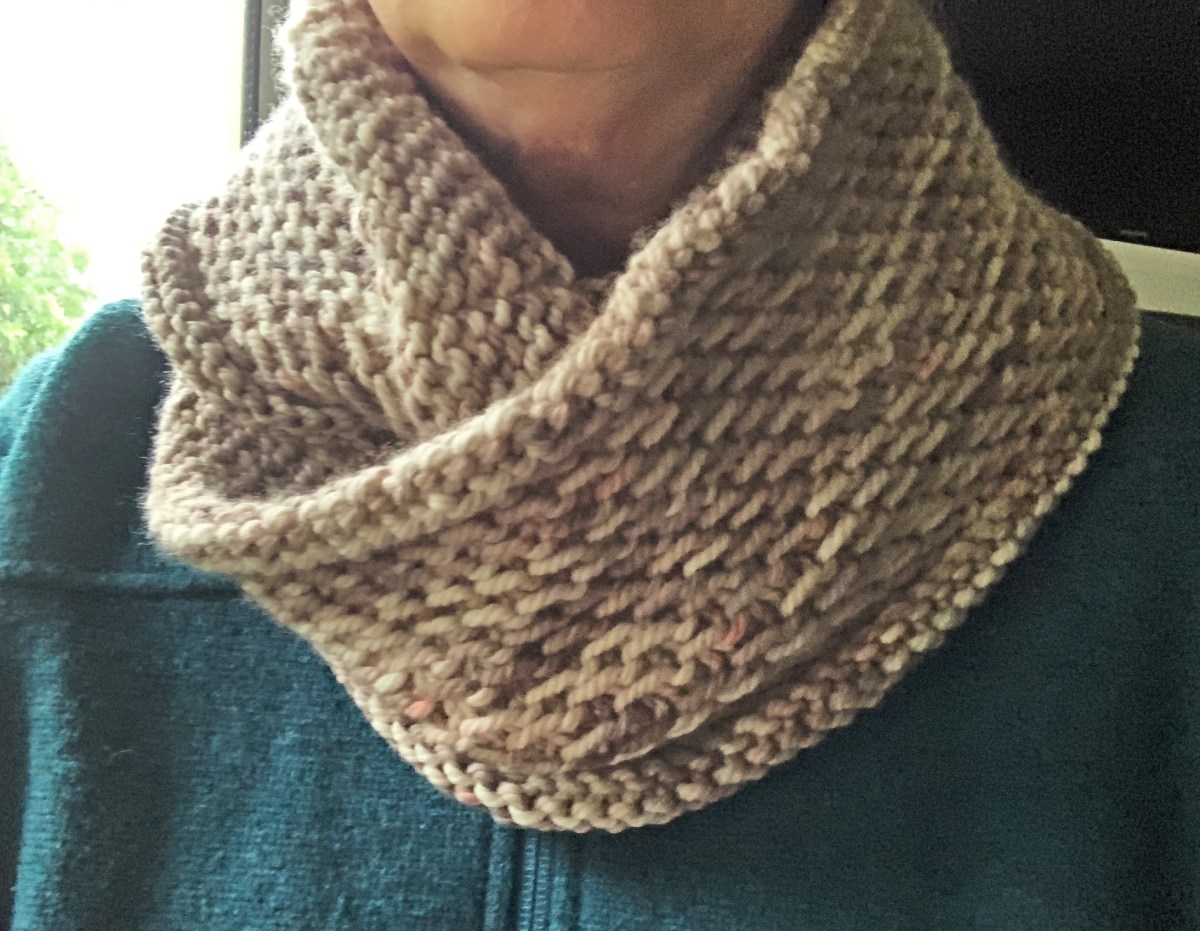
This is the second Honey Cowl I have knit and this time I used bulky yarn. The color,”Rock Sparrow”, yarn offered at Miss Babs a while ago. The other yarn weights were sold out, so I chose the K2 skein because it was all that was left. I had no idea what to use it for.
Pre-washing
This yarn has been staring me down every time I go into my craft storage room. While I was organizing my finished knitwear projects, the idea for a second Honey Cowl clicked. The slipped stitch, which is used to make the cowl, would show off the colors of Rock Sparrow nicely. I already knew it was a quick and easy knit.
Honey cowl stitch pattern
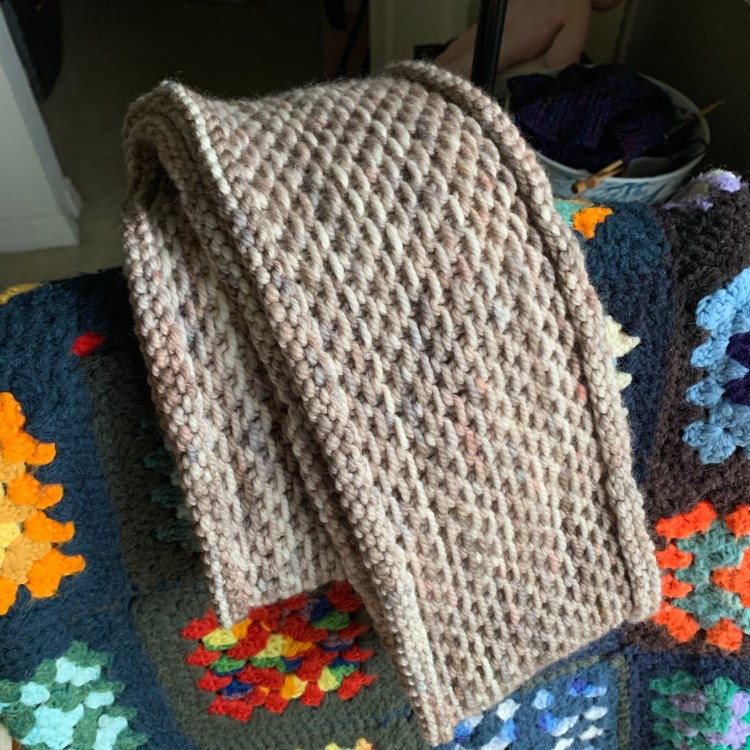
As you can see in my photo the texture is lovely, and the edges curl in to give the whole thing a border. These photos were taken before it was washed.
The curled edge makes a thick border
How I Made It
Using a size 10.5 US, long circular needle, cast-on 192 stitches and join. Place BOR (beginning of round) marker. Follow Honey Cowl pattern (FREE) directions until yarn is nearly gone. I used up most of this bulky yarn ball.
Color is Rock Sparrow, K2 Miss Babs yarn
This is a very easy knit, and just about any weight of yarn works if you adjust the cast on number accordingly. Make it short, or double-wrap as you like.
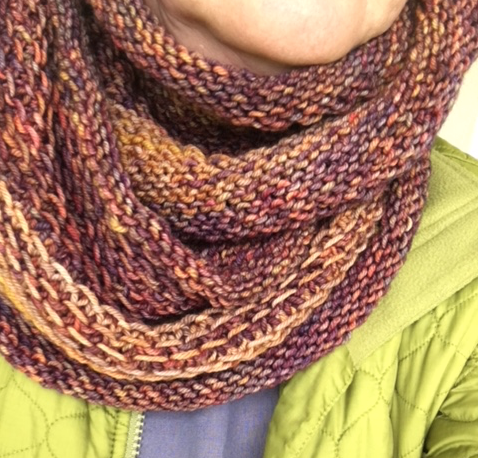
See my firstHoney Cowl here. I knit that one back when I first began knitting, and I used various yarns in rust orange and autumn colors.
Because my first Katie’s Kep (hat) came out a bit large, I decided to cast on four fewer stitches for my second knit. (Find the link to the Kep pattern at the bottom of this page.) I still used a size 3 circular needle and did the Old Norwegian cast on – or something like it! I’m not sure I did it exactly right, but it looks okay.
The brim of this hat is knit in 2×2 corrugated rib
Once the corrugated ribbing was done, I increased around by four to get back to the original pattern count. Here’s how:
*Knit 33, make 1* – 4x’s around = 4 additional stitches. Total stitches are 136 now (as pattern calls for). Continue with pattern increase row.
Now I was back to the correct number of stitches needed for the colorwork. I would love to make this hat using a 2 or 2.5 US needle size, which would work out better I think, but I don’t have those sizes in a circular needle. I might have to buy them.
My main yarn used for the tan Kep is Rauma Finullgarn color 406, Wheat Heather. Other yarn used is Jamieson & Smith in colors: 4: brown, FC7: Peach / orange, FC62: green, and 133: medium purple. The colors are more subdued than what I used for my first Kep.
The fun of knitting this colorwork hat is choosing the colors. It’s probably the reason people can’t stop at knitting only one! As you can see in my photo above, very little yarn is used to make one hat. But if you choose to use J&S yarn as the main color, you will need 2 skeins.
Where to Buy Jamieson & Smith Yarn
This was the first time I knit with J & S yarn. I found it for sale, at a very good price, at Fairlight Fibers. I saved over $1.50 PER SKEIN compared to the current price of the exact same yarn at another online shop. And shipping is FREE when you spend over $50.
At this time, many yarn sellers are low on yarn, thanks to the Covid pandemic keeping people from making the yarn.
Other yarns the designer mentions in her materials section of the pattern are: Uradale (UK based), Shetland Handspun, and Jamieson’s of Shetland.
Wool
Some people don’t like wool because they think it is scratchy, although I don’t mind it. When wool is used for a hat, it doesn’t really matter (unless you are bald). I find the Rauma and J&S to be similar in feel, and once it’s washed, it feels softer. I use Eucalan no rinse wash, and it conditions the wool.
Anything made of wool dries quickly and will of course keep the wearer warm.
Katie’s Kep is a Free Download at Ravelry, by designer Wilma Malcolmson
The provisional cast-on is needed when you will have to go back at some point and use, or pick up, the stitches that were cast onto the needles to begin with.
Waste yarn – some yarn other than your main yarn – holds those stitches until they are used. This cast-on method combines both the working yarn and waste yarn to begin the project.
The gray yarn is my waste yarn, the pink is working yarn.
There are a couple of ways to get these two yarns onto the needles correctly. I use the crochet hook method because it is easiest for me.
#1. Cast-on Using a Crochet Hook
For the crochet provisional cast-on, I watch Purl Soho’s YouTube video. It is straight forward and easy to understand. However, it ends there, at the end of the cast on stitches. The first time I watched it, I was disappointed because I didn’t know what to do next!
HINT: After the crocheted cast on, you need to knit one row with the main / working yarn and then begin your pattern.
Provisional cast on with crochet hook
Below is a photo of the crocheted provisional cast-on I used for the Winter Morning headband. The gray yarn will later be removed as I pick up those pink stitches and graft them with the finished end of the headband to connect the loop.
Knitting onto the provisional cast on
The Lion Brand page explains, and shows with photos, how to do this same cast-on. They also show how to pick up the live stitches / remove the waste yarn when the time comes to use those stitches.
#2. The Invisible Provisional Cast-on
As I was searching for help with the provisional cast-on, Lucy Hague’s blog tutorial popped up. I was specifically looking for advice on the type of yarn to use as waste yarn, and she mentions this in her article: Invisible Provisional Cast-on. Her information is all-inclusive, with photos to show what to do once all the stitches are cast on to the needle. In this case, you purl.
This type of provisional cast-on is made using two strands of yarn – waste and working – no crochet hook needed. Lucy shows us what to do; after the cast-on is made, how to begin the first couple of rows, what to do with the slip knot, and how to remove the waste yarn when the time comes. I have yet to find a video as comprehensive as her page.
But trying to knit while scrolling through photos is slow going. I did try to get the hang of this cast-on, but went back to the crochet hook! So I have not done this type of provisional cast-on. I mention it as an option.
What Type of Waste Yarn to Use?
Use a waste yarn with a color that contrasts with your working yarn. Lucy says to use a slightly thicker yarn. This makes it easier to remove the waste yarn when stitches are picked back up.
Do not use anything that is fuzzy. I learned that it’s more difficult to pick up those stitches when fuzz from the waste yarn gets in the way and is picked up into your project….! A smooth silky, or cotton, yarn may work best. If you have trouble gettin the gauge needle into the stitches, you can use a smaller needle to pick up the stitches. Then continue with the correct size.
Reasons to Do a Provisional Cast-on
Sometimes a scarf, cowl or shawl, will be knit from the center point to the end, like the little headband I mentioned above. If a pattern needs to look the same from both edges, or uses a cable that is knit one way, a Provisional cast-on might be used.
The headband / ear warmer I knit in bulky pink was knit from end to end and had to be grafted together to make the band. After I knit the length of the headband, I had to Kitchener stitch it together so it appeared to be one piece.
In the middle of the kitchener stitch
Be Brave… Jump In… Try New Techniques
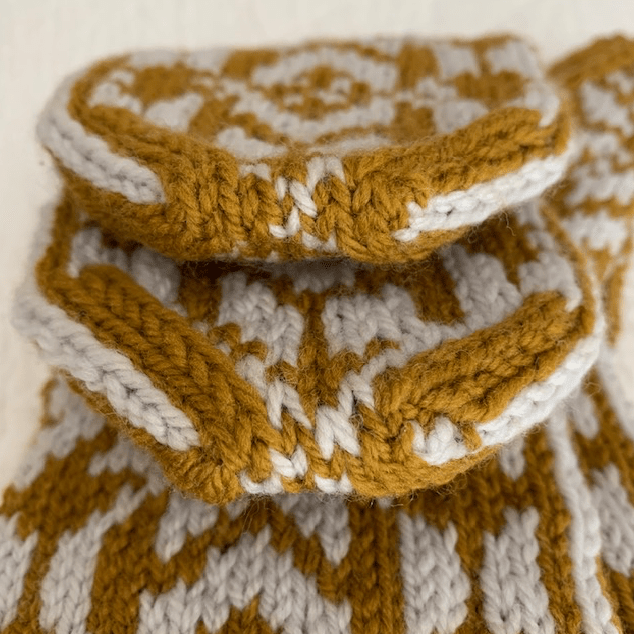
For a long time I avoided any knitting project that mentioned the provisional cast-on. Yikes… too scary..! My headband didn’t end up looking so great – because I needed practice on the Kitchener stitch. So I practiced. Then I knit some mittens that called for it at the top. I think they ended up looking pretty awesome!
Kitchener stitch at top of mittens
I’ve used a lifeline before when knitting and had a heck of a time going back to pick up those stitches. So more frightening than casting on, was having to go back and picking up those stitches when the time came.
If you use a thick, smooth, yarn for the waste, and maybe use a smaller needle to pick up the stitches, you shouldn’t have a problem. Take your time, it’s not a race.
Every time we expand upon our knitting knowledge, a new world of projects opens up! Experience is key with all things, and that goes for the knitter’s world. You will never expand your knitting abilities unless you take a chance.
Try new things on a swatch before you mess up a project, if that makes you feel better.