A Lesson in Holding Two Strands For Yarn Dominance

Colorwork sock knitting the “Wild Angelica” pattern. A fun pattern for those who enjoy knitting socks.

This lesson is mainly for me. When I began knitting the Wild Angelica Socks pattern by Runningyarn, for some reason I got confused after the cuff.

This is not really shocking since I have not knit many socks. But I have knit colorwork hats and mittens. I began to do the color work with the dominant color being dark blue – held in my left hand. This was wrong! The dark color should be the background of this design.

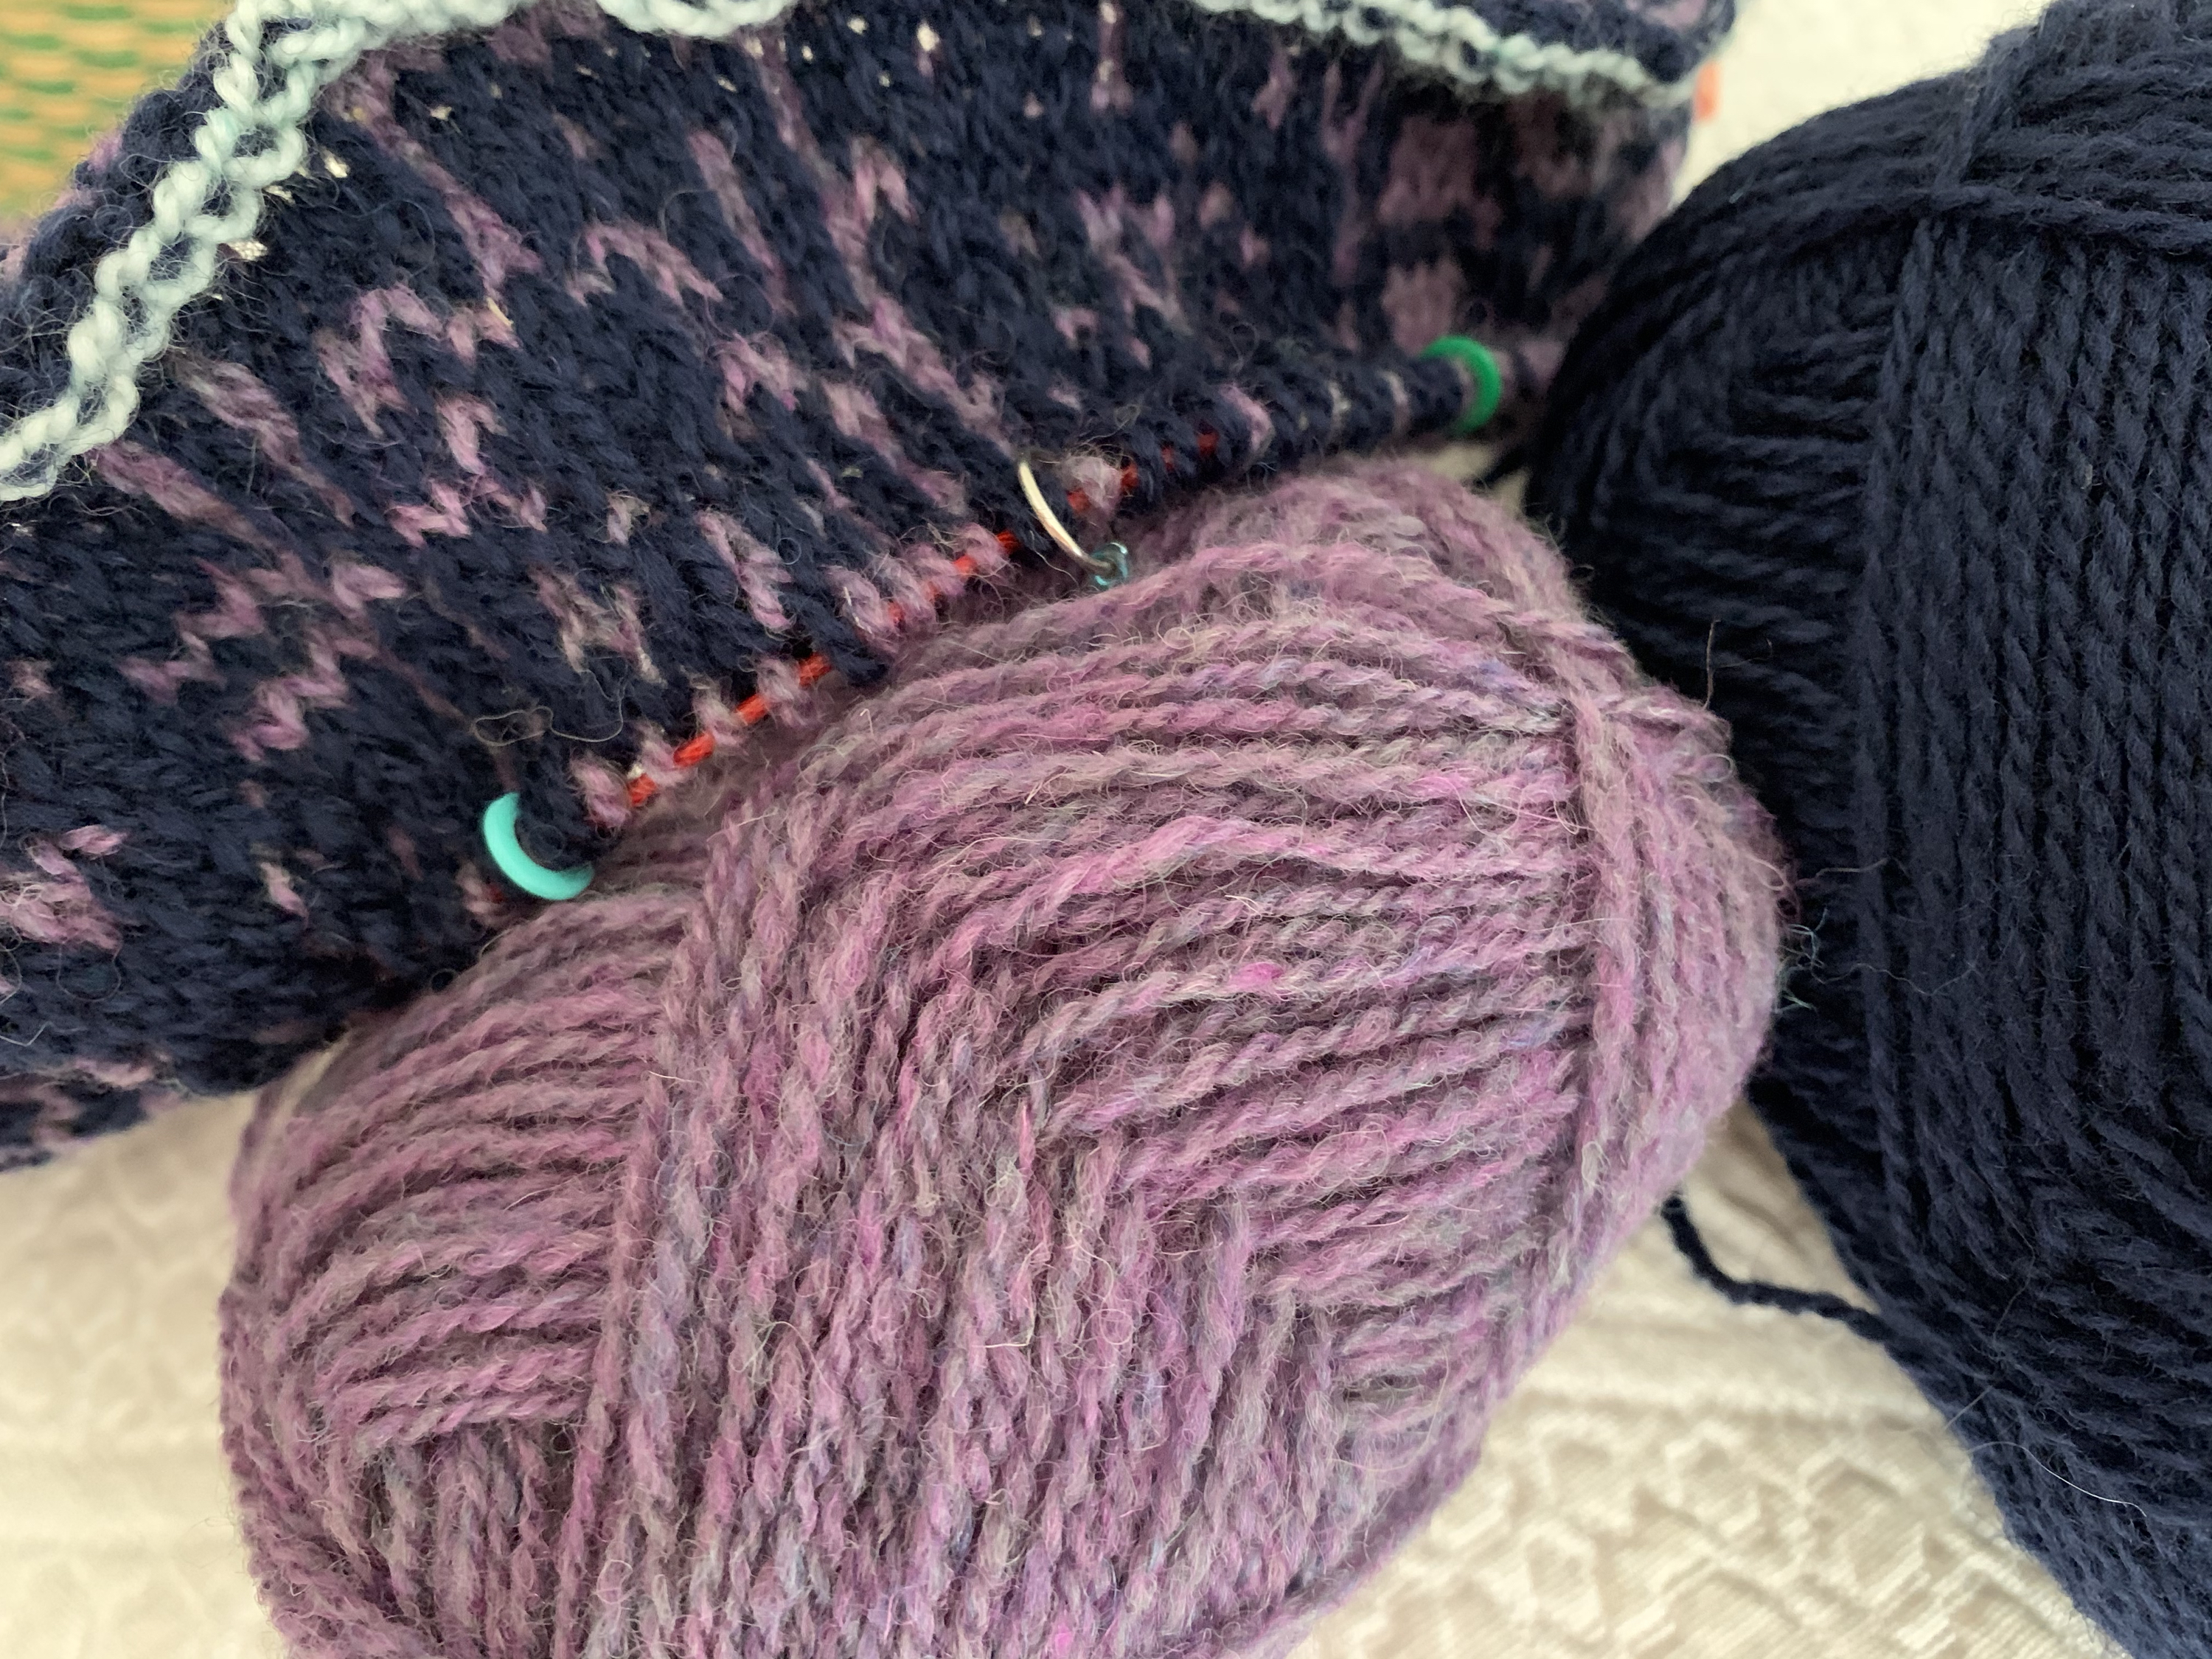
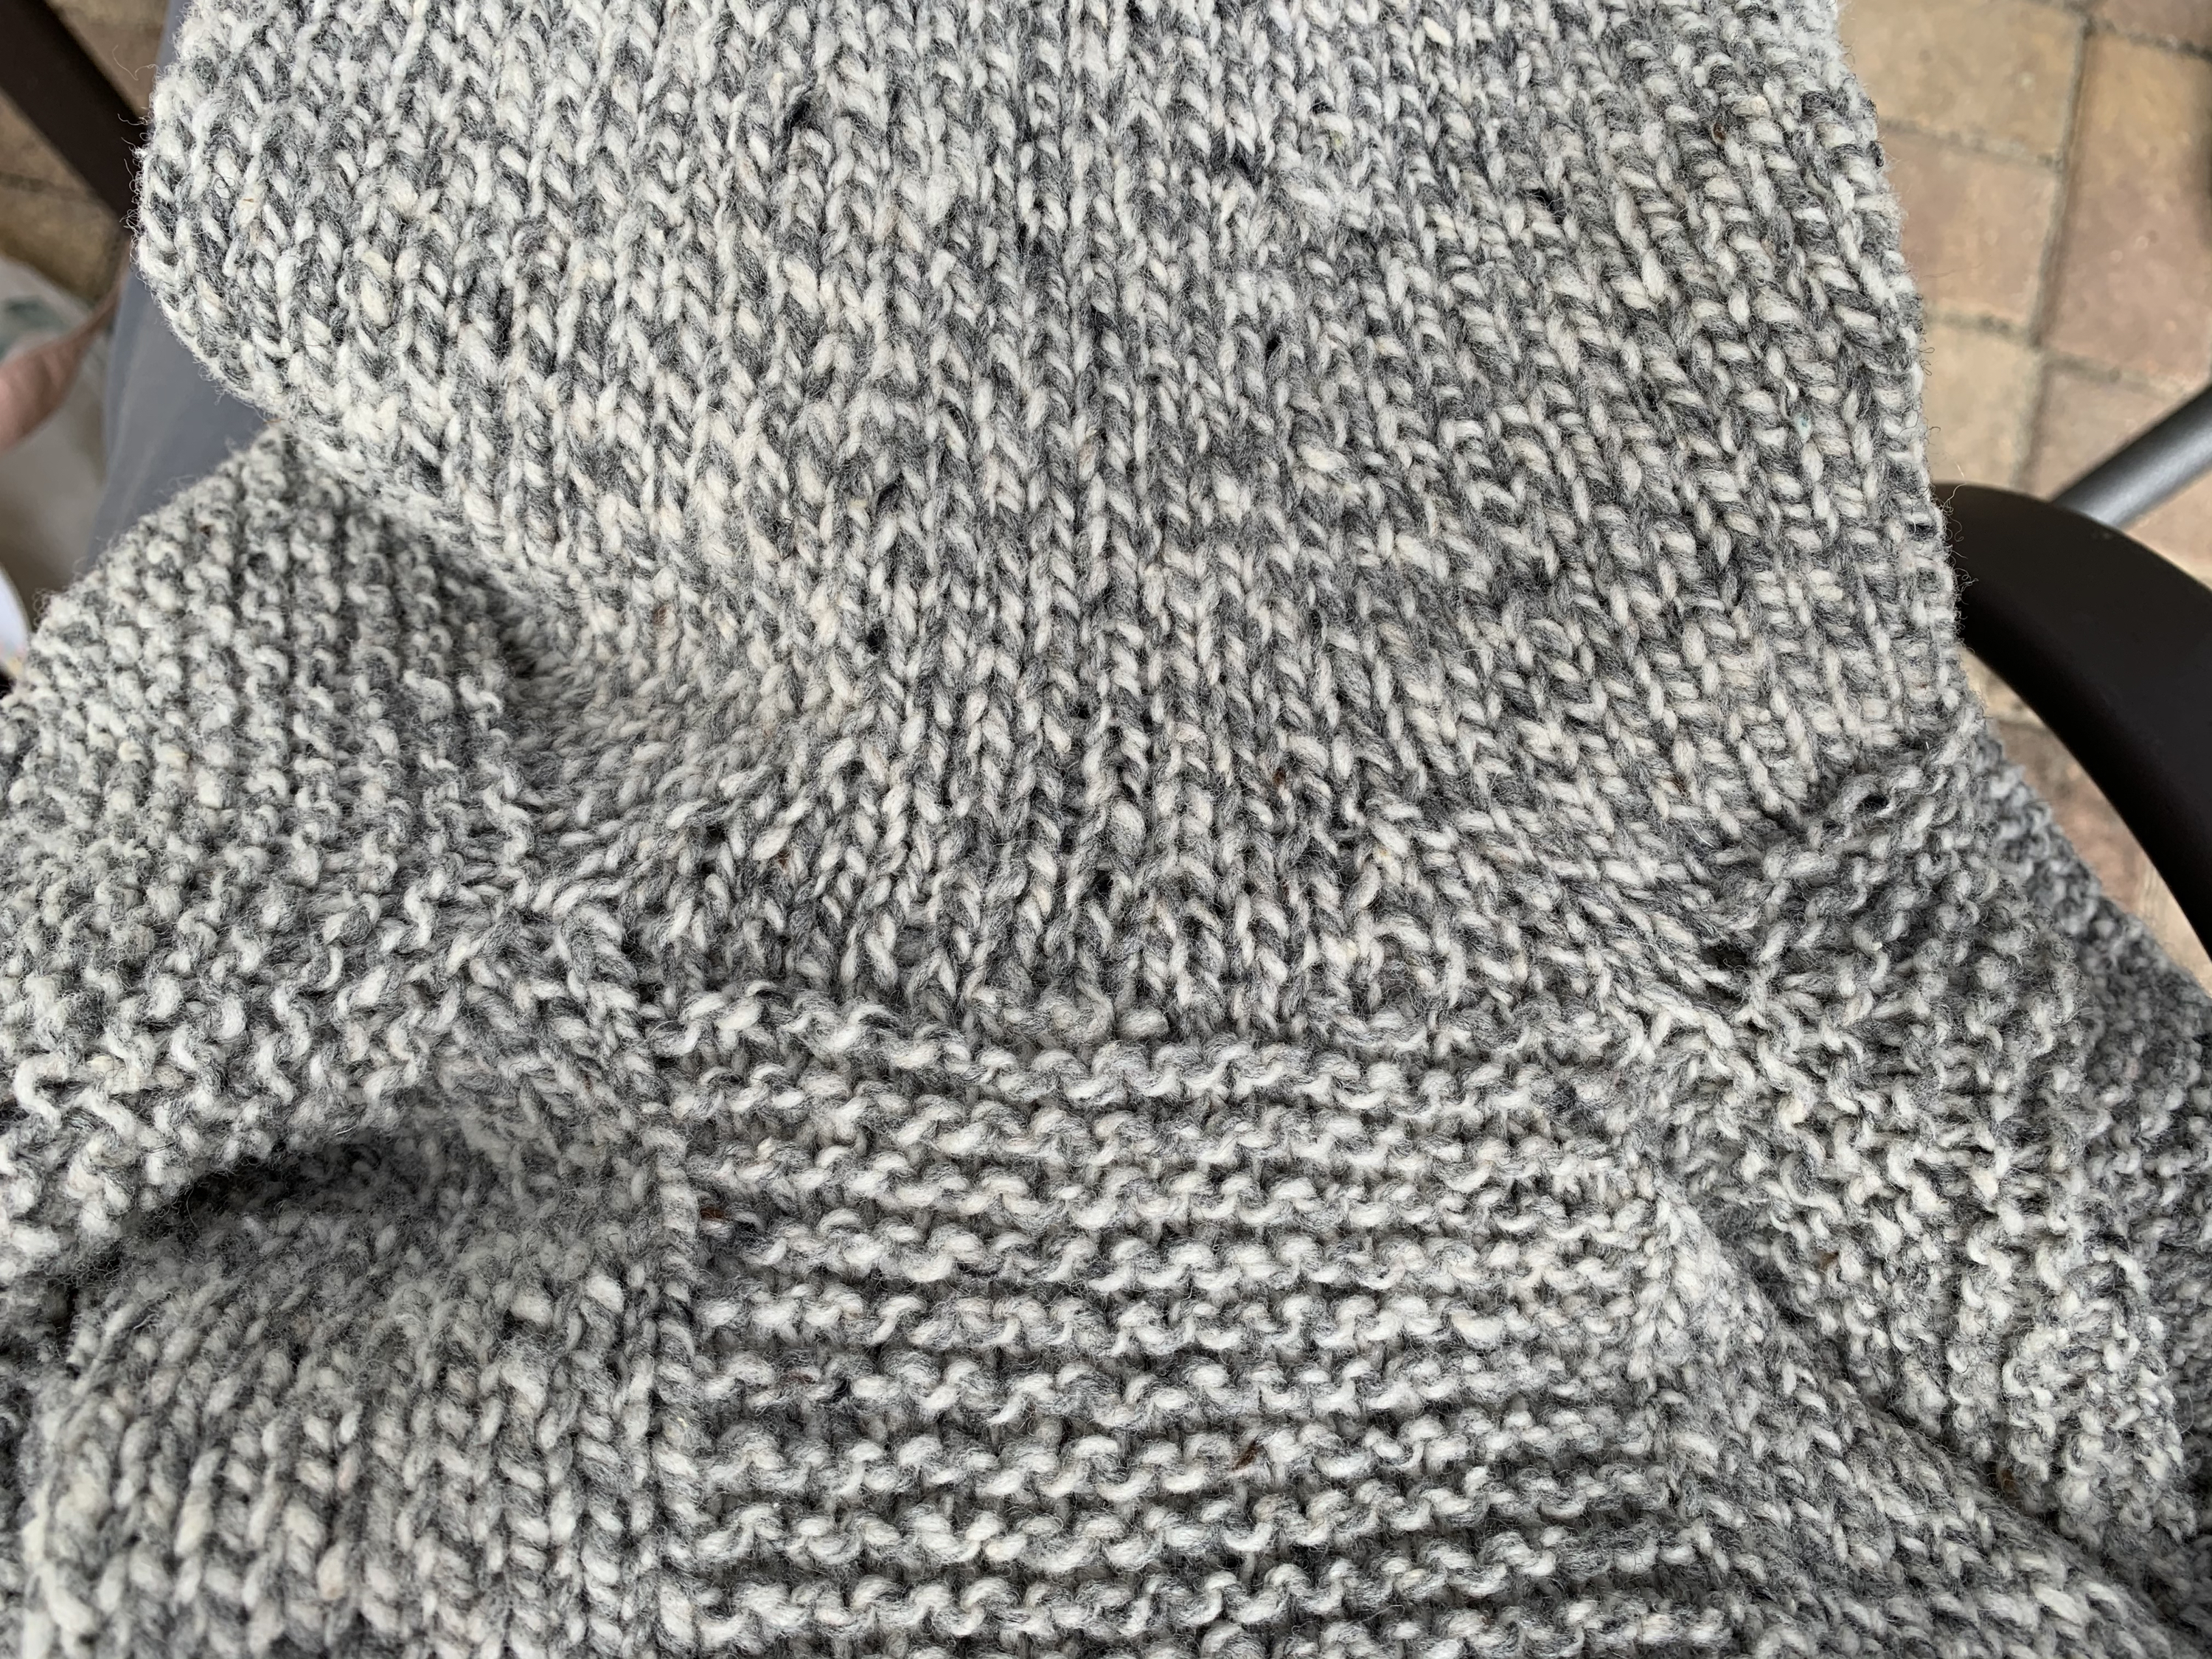
As you should be able to see quite clearly in my photo here, once I changed to holding the tan color as dominant, the pattern begins to pop. This mistake is entirely my own, as the pattern is very clear. I have no explanation for my dimwittedness.

It’s all the same pattern, but just after I finished knitting the cuff, I knit with the dark blue yarn in my left hand – as the dominant color. As the floral pattern began to show, I didn’t like the looks of it. That is when I switched the blue yarn to my right hand. Wow, those tan flowers really began to show nicely. DUH! The difference is striking, so I wanted to share this info. It does matter how you hold your yarn to knit colorwork patterns. Not that I doubted it, because experienced knitters always preach it.

Colorwork knitting and yarn dominance depending on which hand holds the yarn.
Tan yarn near cuff is not prominent, but becomes so when I changed hands.

I also messed up while knitting the cuff of this sock, but I’m not going back to start over. They are socks. No one will be closely inspecting my knitting abilities at my ankles. I want to get on with it and see if I can manage the rest of the project (yes, I did!). The lessons I learn from this pair will help when I go on to knit more socks. Runningyarn has more pretty patterns like this one, as her specialty seems to be colorwork knitting.

If you haven’t yet learned to knit using two hands, the basic way to hold the yarn is with the Main Color (dark blue here) coming OVER the Contrast Color behind the work. As you pick up the strand to knit, keep this in mind. If you use two hands, CC in left and MC in right, it will happen naturally. I wrote a previous post on colorwork knitting.

The Wild Angelica Socks pattern designer explains this clearly in her pattern.

Wild Angelica Socks Pattern Review

Knitting this pattern was fun. I love all kinds of 2-stranded colorwork knitting and I needed practice knitting socks. For the colorwork chart, I used the Knit Companion app on my iPad where I could see it much more clearly.

All directions were very well written, and for the most part, easy to follow. I am not an experienced sock knitter and the heel / heel flap area gave me pause. I had not saved out any extra blue yarn for the heel. I was knitting from a ball and not a cake, so I couldn’t knit from the inside. Fortunately, I did have two balls of the tan yarn. I made up for it by using blue at the toe.

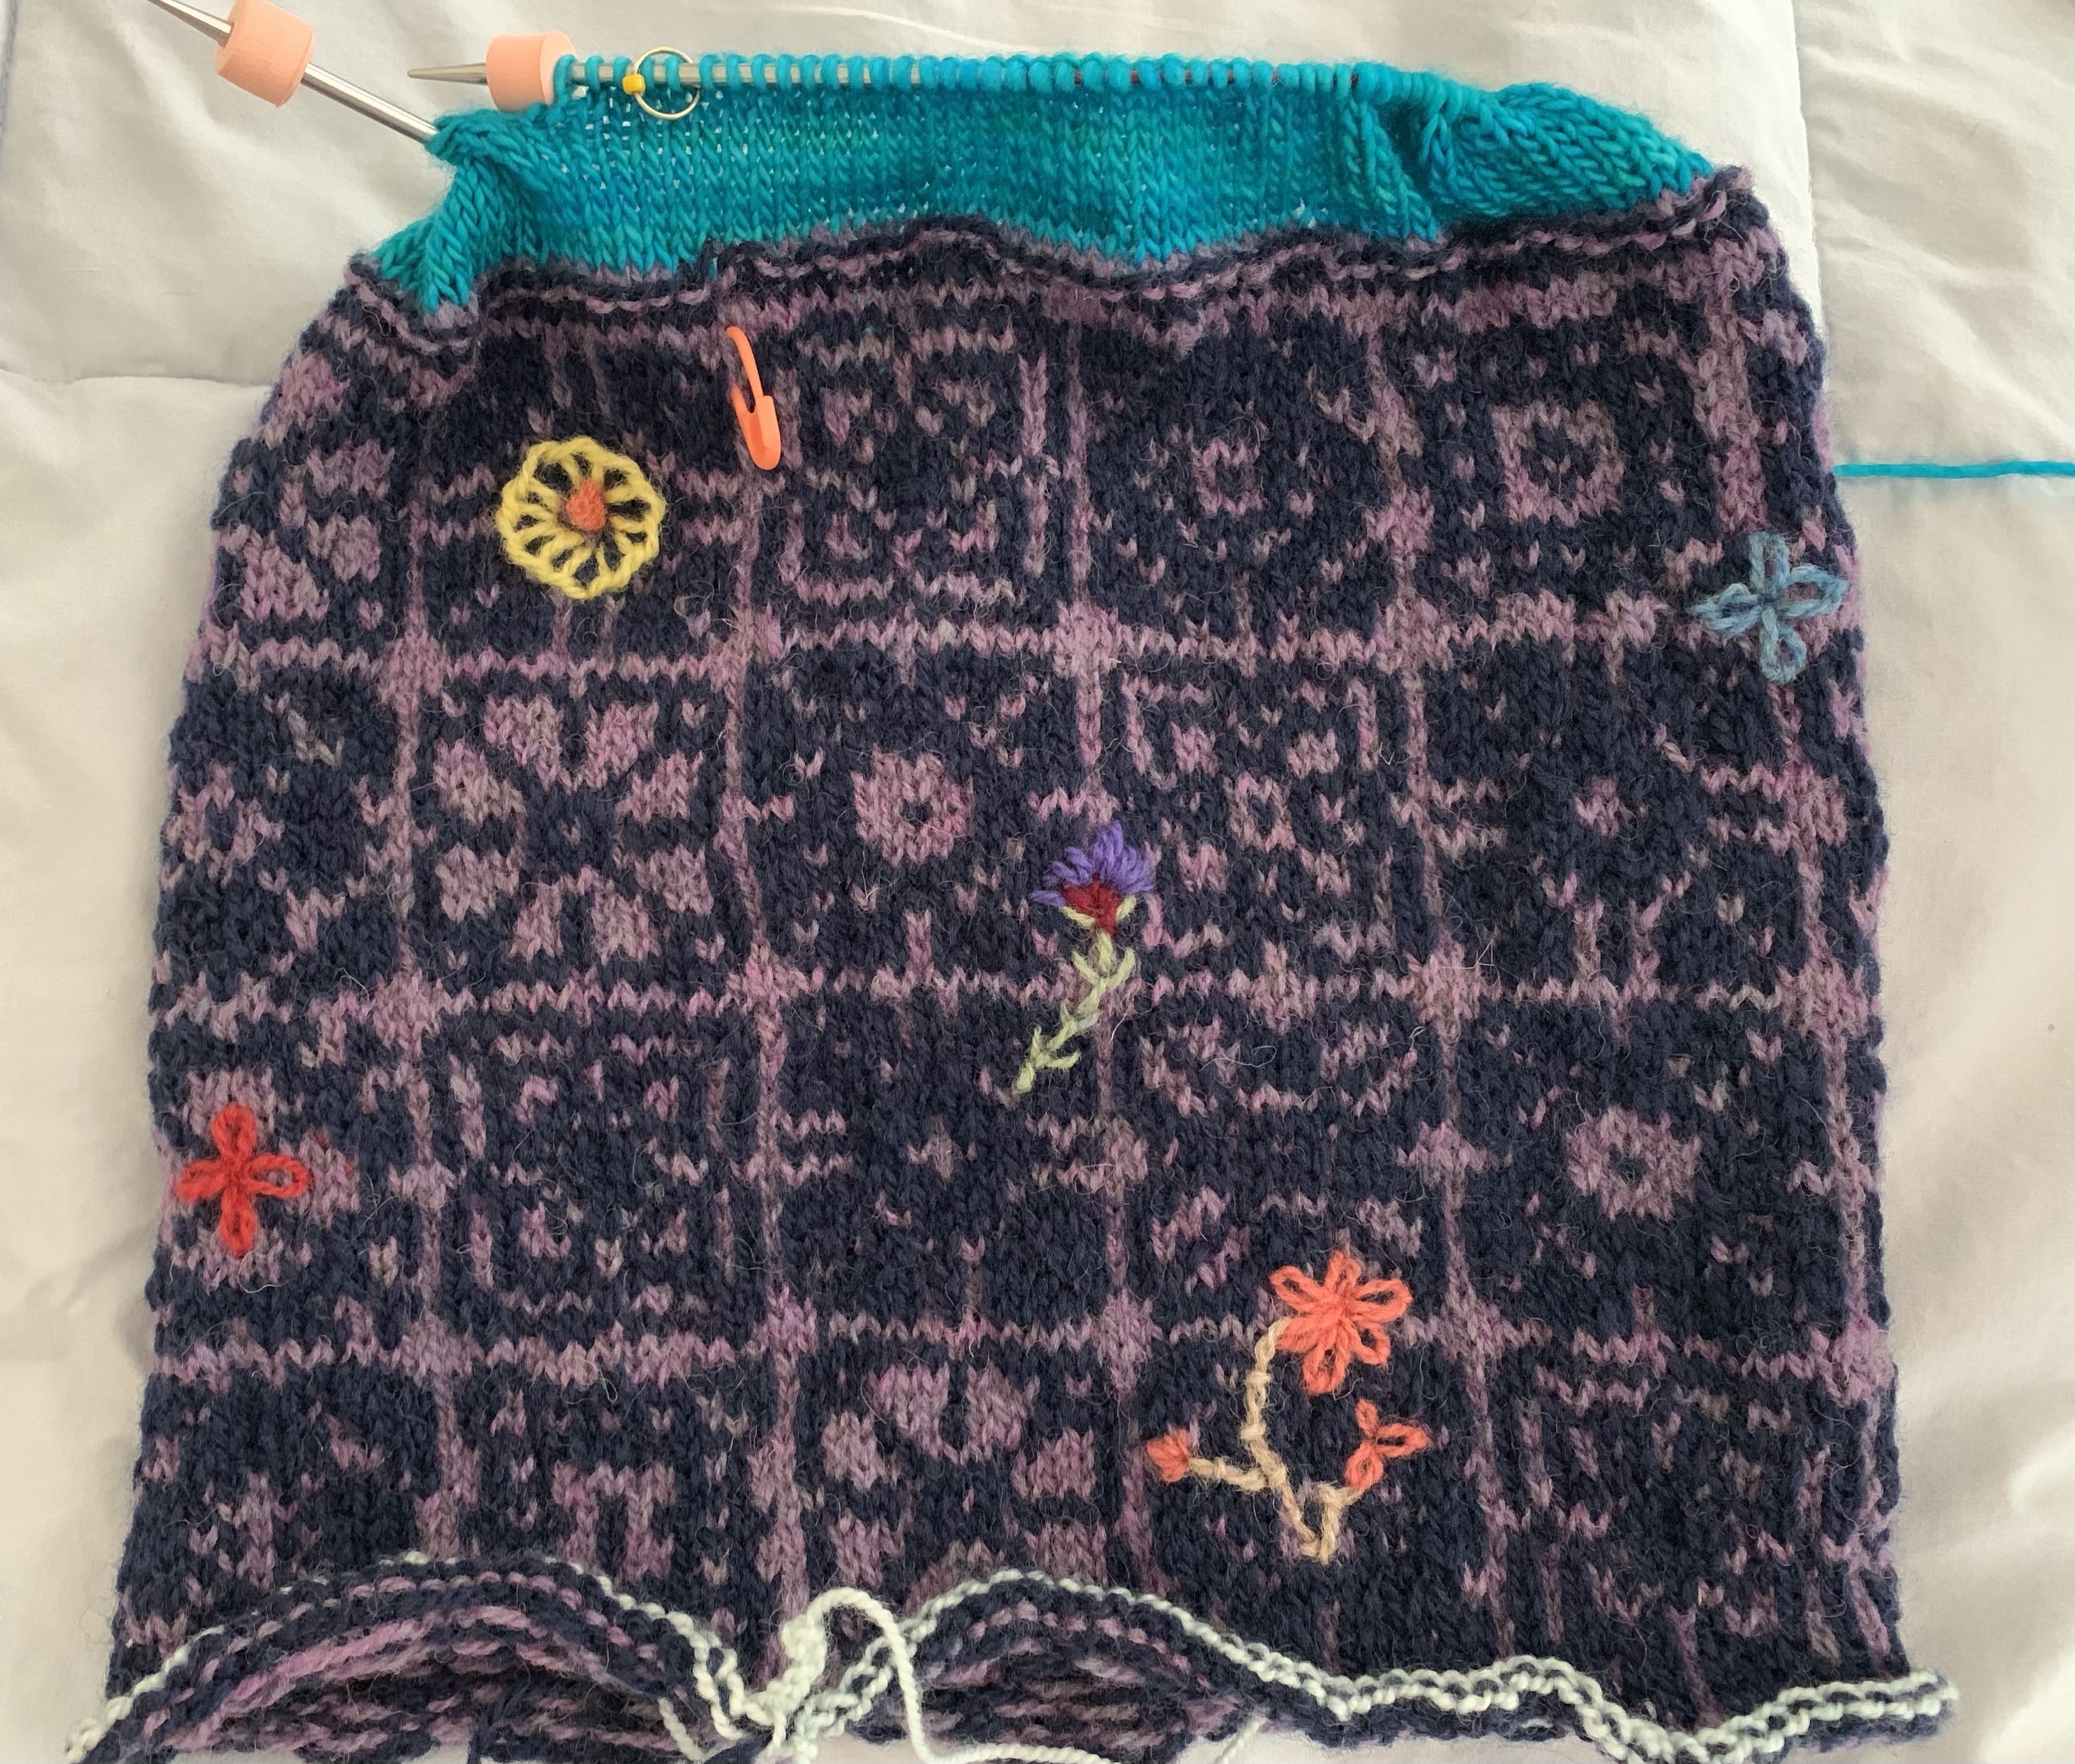
Colorwork Socks Photos

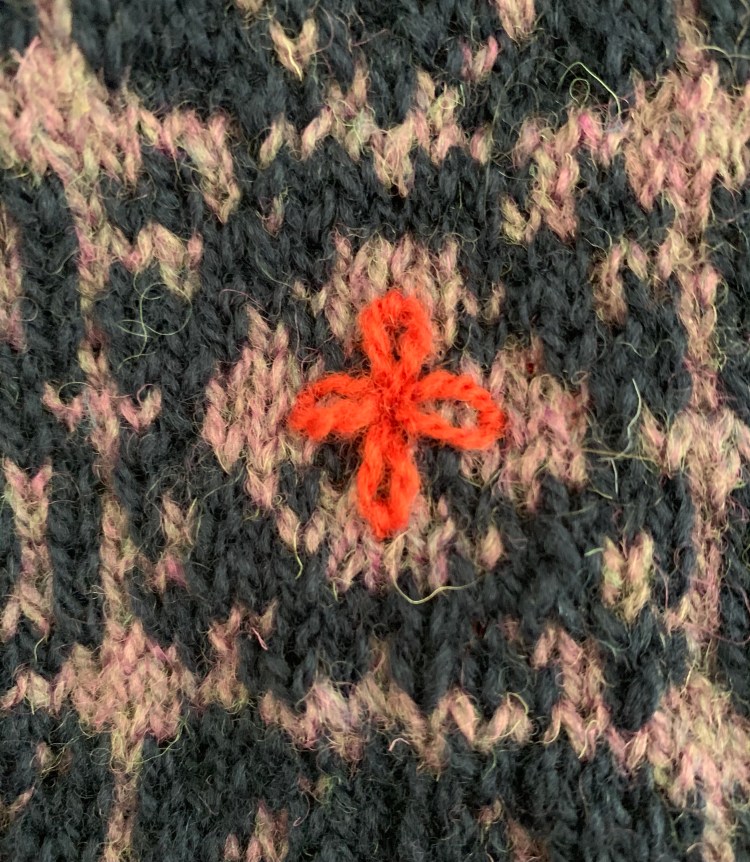
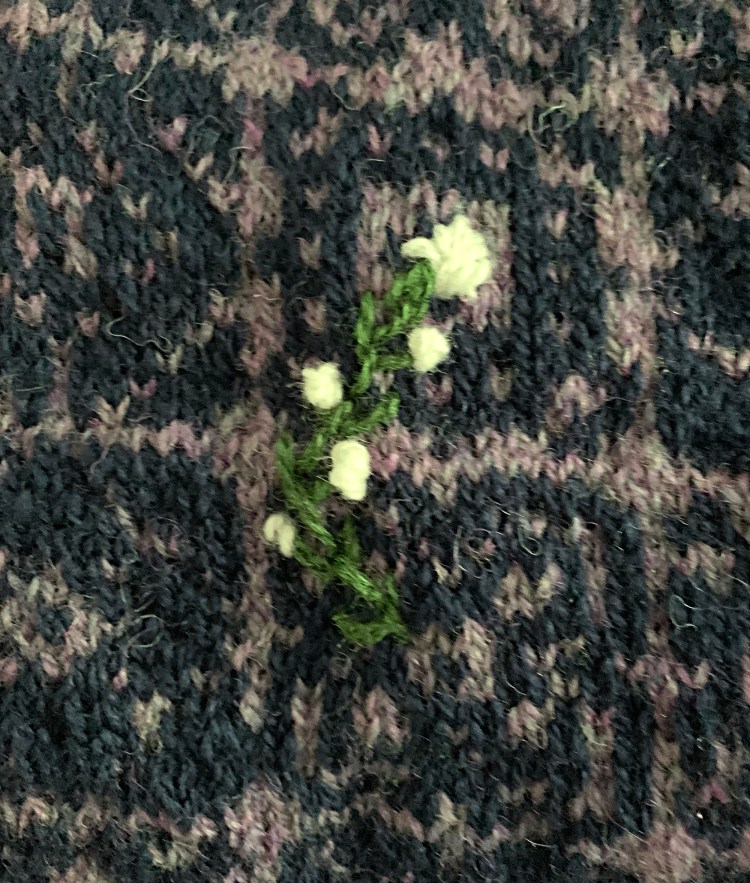
The floral design is pretty and I love the little design on the bottom. I would not attempt this as a beginner sock knitter, but I have enough experience to understand the pattern and do the colorwork. I’m inspired to knit more stranded colorwork socks.

As far as this sock pair goes, I will always know which sock was knit first because of the color dominance mistake.

More Knitting Stories…

Knitters and Our Many Projects

How many projects do you have on your needles? It is not uncommon to find that fellow knitters have many things going at once.

Year-Round Camping in Florida; Enjoying Nature While I Knit

The peaceful days of camping in the wilderness go perfectly with knitting. What could be better than having coffee outside, with knitting on my lap? We camped twice in the last month and here is a look at the knitting projects I took along.
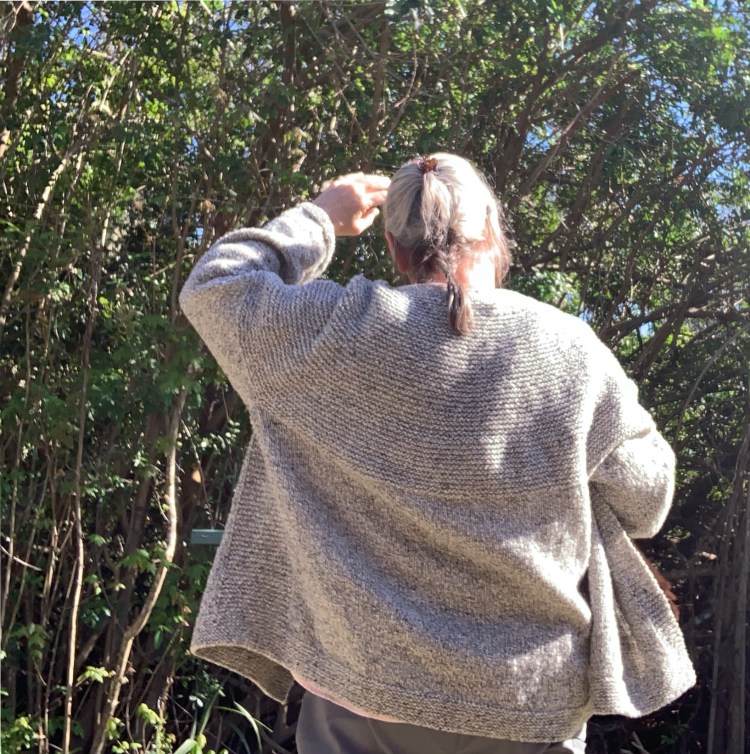
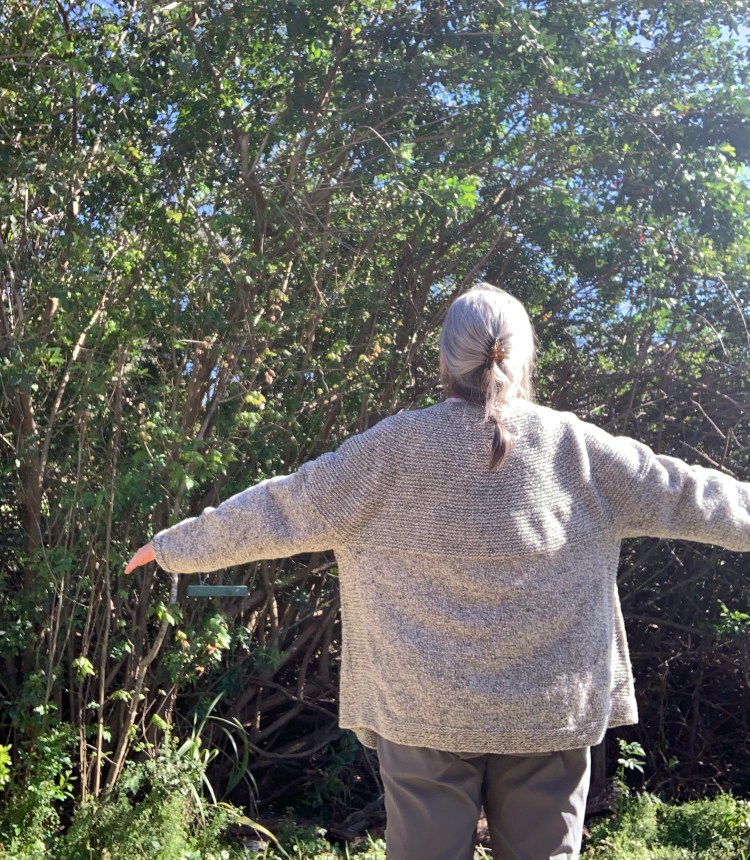
Keep it Comfy, Knit the Keramos Lined Wool Cowl

Knitting with wool, using two colors, is such fun. This is called Fair Isle, or stranded colorwork knitting. I was hooked after knitting two of the Katie’s Kep hats, and some mittens for a KAL (knit-along) last winter. Now I am knitting the Keramos lined wool cowl using two colors. What I really like about this pattern is that the wool is lined with a softer yarn.

Designers offer sales during the first weeks of TWTCOLORKAL2021 (a knit-along hosted by The Woolly Thistle), so it’s a great time to find patterns with discount codes! It’s how I found a new favorite designer named “Bunnymuff” and used the discount code to buy two of her patterns.

lined wool cowl Keramos knitting
Lined wool cowl

The one I will be knitting first is the Keramos Cowl, which is a Fair Isle pattern with a lining and optional embroidery. I’m entering this one as a project for the KAL, which began February 19th. The other pattern I purchased is a colorwork hat with chickens! My daughter plans to raise chickens soon, and I will knit the hat for her at a later date.

Jamieson & Smith purple yarn and Rauma navy blue
Pretty wool yarn by J&S and Rauma

My stash of wool includes Rauma Finull and Jamieson & Smith Shetland, which are both fingering yarns and are perfect for any stranded colorwork project. I’m not sure yet which stash yarn I will choose for the lining of this cowl.

Colors I am using: Jamieson & Smith shade FC9MIX (lavender) and it is so pretty. I’m using it for the background color. Rauma is the dark navy blue yarn, #0449. The embroidery will be done on the foreground color and it needed to be dark.

Cast on for the Keramos Cowl Fair Isle pattern
Keramos cowl, cast on to 16 inch needles.

Needle Length and Size

The pattern says to cast onto a 24 inch circular needle but all I had was a 16 inch. It worked okay, but the stitches were a bit bunched. I ended up buying a 24 inch needle so I could see the stitches more clearly. I also went up in size, and cast-on using a size 3 then changed to a size 4. This is quite a bit larger than what the pattern calls for, but I was afraid the cowl might be too tight if I didn’t.

The cowl begins with a provisional cast-on. Once the front pattern is knit, a lining is created and attached to the bottom, or beginning of the cowl using a 3-needle bind-off. I’ve never done that, *but it was fairly easy. Before the lining is attached by casting off, a little embroidery can be added. Another new thing for me.

Keramos cowl Fair Isle pattern
Pattern beginning to show on the Keramos Cowl

Notes on Knitting The Pattern Using Knit Companion

The Knit Companion app was a big help when it came to reading and knitting this pattern. If your eyesight is not good this app is invaluable when doing colorwork knitting. At first I had some difficulty getting it all organized as the colorwork pattern spans five pages which must be knit in sequence. As I am still learning all the ins and outs of this knitting app.

Eventually what I did was place silver stitch markers to separate my stitches to show each page of colorwork. To make things easier, and to catch mistakes quicker, I also divided each page chart in half. I used plastic stitch markers for that. This way I could easily see if I was on a new page, or in the middle of one.

I used the numbers section on Knit Companion to mark pages and rows. I used the “notes” section at the bottom to remind myself how I was tracking this pattern. Every time I finished an entire 5-page row, I went back to the first page number and changed my highlighter to the next row on every page before I began knitting. That way, once I went to the next page, the row was ready for me to knit.

Using the knit companion app on my iPad to keep track of rows of colorwork while knitting the Keramos Cowl

The image above is of my Knit Companion app on the iPad. The inverted highlighter shows my row as 19, and I have also kept track using the blue number on the right. The red number 4 is the page I will begin knitting on (Rows 4-8 hold the pattern). As I move through the next pages, I will change that number until after page 8 when I will go back to page 4 and change the row to 20.

For help using your KC see the Knit Companion Reference Guide PDF

What is The Best Way to Find Cowl Gauge?

Finding gauge for a colorwork cowl is not easy. Basically you need to knit the whole thing and then see how it turns out! Or, if you have colorwork swatches, or more likely whole projects knit up, find your gauge on those. It is not easy to count such small stitches.

Because cowls aren’t as important for fit, I didn’t count anything. I simply chose a larger needle size, because I tend to knit tightly. The cowl could not end up too tight for my neck, and it turned out I was right to do this. Once I had knit a couple of colorwork sections, I measured width and estimate the height.

It turns out that my width around is spot on and matches the sizing in the pattern (21 inches around). My two finished rows of colorwork sections measure about 5.5 inches and the pattern calls for 5 “rows”. But the finished cowl should measure 10 inches high! This means my horizontal gauge is good, but my height gauge is off. All I can do to fix this is shorten the project. This is easy to do on the Keramos because I will knit two more row sections and leave off the 5th row entirely.

Knitting a colorwork cowl and finding the right size
Finding the size on a colorwork cowl

In the photo above, I am comparing my Namu cowl size, which I knit a while ago for size. The Keramos is wider, but will not have the “give” of the cabled Namu, so that should be fine. Colorwork is not very stretchy.

Choosing a Lining Color, and Learning Embroidery

The turquoise blue yarn is a ball I’ve had sitting around. It’s some kind of single ply sock yarn, but that is all I know. The yarn is brightly colored and soft and silky which is perfect for the inside of this wool cowl. Now it’s just knitting along until the liner length is right.

Turquoise yarn for knitting lining of Keramos Cowl
I chose turquoise blue sock yarn, from my stash, for the lining

I stopped knitting after four colorwork “rows”, or sections. My cowl measures 9.5 inches tall. Now the lining will be knit and folded inside to be attached at that provisional cast-on along the bottom. I’m dreading that. It’s a 3-needle bind-off which I’ve never done. (Turned out to be pretty easy!)

Knitting a blue lining and doing embroidery on Keramos Cowl
Began my blue lining for the Keramos Cowl

The Keramos Cowl designer, “Bunnymuff” aka Mona Zillah (link goes to her Ravelry Store page), includes cute embroidery on her knitting projects. My first try at embroidery is not exactly cute, but it was fun learning. I did a lot of flower removal over and over just to get these little sewing designs finished! Then, I did a little bee, which I love. I got the idea for this bumblebee from a YouTube image.

My Embroidery Skills Are Lacking, But it Was Fun Trying

  • Embroidery bumblebee
  • Thistle embroidery on Keramos Cowl
  • Simple Lazy Daisy embroidery flower on knitting
  • embroidery flower
  • Blanket stitch yellow flower
  • Wool yarn embroidery flower

YouTube Videos on Embroidery Stitches

After searching through a bunch of embroidery stitch videos on YouTube, I found a couple that were pretty nice so I’ll list them here. Using wool yarn, on a knit surface, is a bit more challenging than embroidery thread on drawn patterns, but you will get the general idea.

Finished cowl photos to come.

Finishing Up Knitting the Keramos Cowl

Finally I finished up knitting this cowl. It seemed to take a while, but it was on hold for two months when I took my trip to New Hampshire. I brought the Wild Angelica socks to knit and left this cowl behind.

The worst part of this pattern, for me, was picking up those stitches on hold. It was a tedious chore. The three needle bind-off went well, and ended up looking nice. I used the lighter purple color to do it and watched a YouTube video to figure it out.

3-needle bind off on Keramos Cowl
Fair isle wool knitting mitts and cowl drying on boards
Drying my knitting projects – Keramos and Fair Isle Mitt

I did try the cowl on before washing, and it is big and thick. Once it’s dry I’ll get photos wearing it (below). This one will definitely keep a neck toasty warm! It feels so good to finish up a knitting project.

Notes on Knitting The Cobblestone Cardigan

On January 24th I began knitting the Cobblestone Cardigan pattern by Jarod Flood. It is rated at two stars out of five for difficulty, so should be an easy knitting project.

The yarn I used was Brooklyn Tweed Shelter in “Narwhal” color which is a marl of two colors twisted together. I bought 10 skeins and my size calls for 11 skeins, but I did squeak by with 10 – just barely. I prefer knitting with a lighter color yarn because my eyesight is not that great. Knitting in the evening is especially difficult. My knitting wish is that designers would print up their patterns in bolder, larger print.

A highlighter comes in handy to remind me of the pattern’s important information.

Brooklyn Tweed Shelter in Narwhal for a sweater
10 Skeins of Narwhal yarn

I read through the pattern and will have to learn the new increase mentioned when the time comes. I love to try new things and I think this pattern will be just challenging enough in places to keep me happy. Also, lots of the knitting is simply round and round (sleeves) and back and forth, which I can do at night. I need this sweater for my trip to New Hampshire in March and I should have it done well ahead of that (*Nope- 3/1 I finished knitting – still needs buttons). Note: This is an easy pattern and would make a good first sweater. End project is large, will go down a sweater size next time.

End Results, Or Continue Down the Page

Please read on to see the notes I recorded while knitting this project. But, before the page got long, I wanted to comment on my finished garment. The Cobblestone Cardigan knitting is finished and the cardigan is very big. The neck had to be tightened up as it was very droopy. Doing that was a big improvement. Note: ***Don’t do a loose cast on! Also the sleeves are big around and droopy in the armpits. My gauge was right on, and I did go up a size, but it was a mistake. Now I am wondering if I should attempt to shrink it, or simply wear it around the house to be cozy. EXCEPT I live in Florida where I put a sweater on about five times a year. I’ve ordered some buttons from Etsy and will get more photos once I add them.

Cobblestone cardigan

Beginning the Project: Cast On and Markers

I’m knitting the fourth size in the pattern although I expect it to be a little large (*Yes, this was a mistake!). I’d rather that than too tight. I cast on using the German Twisted / Old Norwegian cast-on (*Also a mistake – Do a regular cast-on, or the pattern recommendation, or the neck will be too loose!).

I placed a marker to remind me of the right side of the project. Whenever that blue marker is on my right when beginning a row, I am on the right side. I also placed a marker to show the first buttonhole.

Note: Count the stitches whenever the stitch count for the row is given!

Cast on and placing markers for the beginning of the Cobblestone Cardigan
Beginning the sweater

Placing The Buttonholes

I wanted the buttonholes on the right side front (when wearing) and making that pattern change was easy – there is a note in the pattern for making the change. Without a yarn shop / button seller nearby, I’m forced to search online for my buttons and it’s hard to find them online in the right size but I did find some to order from Etsy.

marking buttonholes for Cobblestone Cardigan
Marking my buttonholes

Every time I knit a the hole for a button, I place a marker so it can be seen easily. Then I am knitting 12 ridges between buttonholes.

Moods Fabric has a chart that shows button sizes in inches / mm and ligne.

Learning a New (and Easy) Increase

The Raised Right Increase (RRI) in the Cobblestone pattern was something I had not done before. I found it to be a very easy increase to knit. I’ve done the yarn over increase, knit front and back increase, and the right / left lifted increases.

The RRI reminds me of knitting in the round with colors or stripes and creating the jogless knit stitch at the beginning of the round, except the stitches are not knit together. This is an increase stitch so it is creating an extra stitch by lifting a stitch from the previous row. The pattern provides detailed directions for doing this stitch. Note: Remember that the RRI includes a knit stitch so when the pattern says, “RRI and knit 2” you will be knitting 3 stitches total.…!

In case you want to know some variations on making a knit stitch increase, the Interweave site has a list of Six Essential Increases Every Knitter Should Know. I admit that I do not know them all!

Knitting the Body of the Sweater

It is February 6th and there is not much to say here except to watch for buttonhole placement as I knit. (*I ended up not really liking the long garter stitch area of this sweater. I think I would shorten that up if I ever knit this again. It makes the shoulders / top of arms look bulky.)

Somehow cats know just when to show up and get into the photo, don’t they?

knitting the Cobblestone Cardigan
Knitting the body

End of February and On To Knitting The Sleeves

Because I am one skein short of the recommended amount of yarn, I will begin the first sleeve with a new skein of yarn. Once I see how far I get, I will use up the remaining 1/2 of the ball leftover from the body of the sweater.

Stitches on hold were put onto a 16 inch circular needle. Using a wooden DPN, I began picking up stitches from the underarm and divided all stitches for the sleeve to fit four DPNs (19-20 stitches on each needle). After the stitches were picked up, I used the 16 inch circular needle to knit down the sleeve until close to the end when I changed to DPNs at the cuff – the sleeves are WIDE. *I reduced the number of rows before each decrease row. For my size I was to decrease on every 8th row, and I did it on row 7. After the decreases, the sleeves were about long enough, so I stopped knitting and did the cuff – change to the smaller needle.

  • picking up stitches to begin knitting the sweater sleeve
  • picked up stitches for sleeve knitting
  • knitting Cobblestone sleeve

Don’t forget to change to size B (6) needles to do the garter stitch cuff! I forgot on this first sleeve so I ripped the first cuff out and re-knit using the smaller, size 6 needles. I had enough gray yarn to finish up both sleeves correctly.

The underarm seam on my first sleeve looks really good! Because the stitches are picked up in the center of the underarm, leave a longer than usual tail to close up any holes at the edges. I did pick up a few extra stitches and then decreased back to the normal count.

Underarm sweater seam looking good
I’m very happy with the look of the first sleeve underarm

The knitting is finished. I squeaked by with my ten skeins of yarn, but I would suggest buying the eleven skeins suggested. I shortened up the body a little and also the sleeves. If you need extra sleeve and body length, you will definitely need 11 skeins! The sweater, before washing, seems very large – and stayed large. The neck is loose, so I hope that blocking will help tighten it all up. *I had to pick up stitches around the neck to tighten it up and did a regular, rather tight bind-off with the smaller size needle.

Cobblestone Cardigan knitting project on the mats and drying
Washed and drying my Cobblestone
  • Wearing my Cobblestone Cardigan hand knit in gray wool
  • modeling the Cobblestone Cardigan
  • Cobblestone Cardigan knit in Brooklyn Tweed yarn

Knitting the Cobblestone Cardigan was fun, except that I put a time limit on myself due to my travel plans. The pattern is perfect for any beginner sweater knitter. Overall, I love the body and trim, with garter down the sides. I’m not as thrilled with the puffy shoulder area and big, wide sleeves. The neck was too wide and droopy, but mainly because of my cast-on choice – I think. A tighter neckline pulls the sweater up more and looks better.

Buttons came from TrimGem at Etsy. I ordered some black and gray and chose the gray which I think work nicely.

My Cobblestone Cardigan hand knit sweater is done with buttons added.

Recent Blog Posts

Knitting With Beloved Worsted Weight

When I began knitting many years ago, I used worsted weight yarn only. I practiced making winter hats and the little old lady who gave me lessons had a shop that sold lots of wool. I was in New Hampshire at the time, and it only made sense to knit for winter with heavy wool. “Peace Fleece” was one that I remember she sold.

Back then, I knew very little about yarn weights, knitting gauge, and the difference between superwash and non-superwash. Now that I have been knitting with all types of yarn for a few years, I’m beginning to find some favorites, and they are not machine washable. I have come to love wool.

Often people will think “scratchy” when wool is mentioned, but times have changed! Wool that is minimally processed can be quite soft, and many yarn sellers will tell you all about their yarn and how it’s processed. Many wool yarns get softer after hand-washing and even wearing can soften them up.

Sweaters Should Be Wooly and Warm

When I plan a knitting project I am thinking about warmth. Sweaters, hats and mittens should all be knit in a warm fabric, which looks good and will last. I like the idea of wearing something that came right off a sheep. Natural fibers will be warm and that just makes sense. Wool is excellent for colorwork knitting as well.

Brooklyn Tweed Shelter in Narwhal for a sweater
10 Skeins of Shelter in Narwhal gray to knit a sweater

I don’t want pretty mittens that won’t keep my hands warm, or a sweater that won’t do the job. I fell in love with Rauma Finnulgarn (fingering) and Jamieson & Smith (fingering) when knitting colorwork projects like Katie’s Kep. Then, I wanted to find some good wool like this in worsted weight.

When I began knitting the Cobblestone Cardigan in beautiful #1: Brooklyn Tweed Shelter I realized how nice a wool sweater can be. It’s been a pleasure knitting with this yarn. The end product is light to wear, yet warm – this comes from being woolen spun, where air is trapped in the fibers.

Projects go along quickly when the yarn is thicker (worsted weight) and I’ve used Shelter for fingerless mitts as well.

Hand washing a sweater made of wool is not a chore. This type of sweater will lay flat to dry and it will dry quickly! If you use a leave-in wool wash, such as Eucalan, there is no rinsing needed.

#2: Woolstok wool yarn by Blue Sky Fibers gets excellent reviews at Ravelry. The link goes to Wool and Company, where I buy a lot of my yarn. The skeins seem to come in either 50g / 123 yds, or 150g / 370 yds, but not both. I am dying to try this yarn for a project! It is 100% Highland wool.

Lots of people give good reviews of #3: Cascade 220 wool. I have knit with it and was not super impressed with softness, but it comes in loads of colors. Many people love this yarn (see Ravelry reviews here), and it is not super expensive. I think it would be nice for a sweater worn over clothing – like a cardigan. The plied yarn is made of Peruvian Highland Wool.

More Worsted Wool Ideas, Not Superwash

  • Malabrigo Worsted, single ply – Personally, I don’t like single ply yarn. This must be hand-washed
  • The Croft Aran Colors – no link here because many colors are out of stock.
  • Scholar Worsted (The Plucky Knitter) – Quite expensive yarn of Merino wool and Cashmere.

Reasons to Avoid Superwash Yarns For Sweaters

Umpqua sweater yoke pattern colors
Umpqua pullover knit in washable yarn

Some knitters don’t like using superwash yarn. Anything labeled “superwash” may be easier to care for, because it can go into the washing machine, but the yarn tends to stretch after washing. Some garments, like sweaters and hats, can end up much bigger than anticipated because of this. This happened to me after knitting my first pullover sweater (Umpqua) in Malabrigo Rios yarn. It ended up quite large.

Sometimes pilling can be a problem with superwash yarns. If you are a member at Ravelry, look up a yarn and then read the comments. This is where I got my information – from actual knitters who have worked with the yarn.

Washable yarn (meaning in the machine), IMO, would work better for kid’s clothing, things that can stretch a bit (scarves and shawls) or anything that will not be hand-washed by the recipient. The Malabrigo colors are really gorgeous, but I would not choose to knit another sweater using it.

Superwash Worsted for Those Who DO Want It

  • $$$ Anzula, For Better or Worsted (about)- I love this yarn, but would use it for other than sweaters. It is not cheap but the feel…. amazing…. and the colors…. so wonderful. Personally, I look for sales, but it can be purchased at many online sites such as Purl Soho. I made the Namu Cowl in “root beer” and it’s very soft and beautiful. ($35)
  • $ Rowan Pure Wool Worsted – affordable and washable (I have never used it). ($13.95)
  • $$ Emma’s Yarn Washable Worsted Wool – from right here in Florida, at the Four Purls yarn shop. ($28)

What are your favorite worsted weight yarns made of wool?