Winter Knitting Bay’s Edge Shawl Pattern

Today I finally decided on the seven colors I would use to knit the Bay’s Edge Shawl pattern. I had been searching for a rectangular shaped shawl to knit.

It took me days to decide which blue-green shades of yarn to use. Then there were the two contrast colors. The main color was an easy choice as I wanted something with a bit of a gradient and not the plain white shown in the pattern. I wanted colors to represent ocean and beaches I see near my home.

The Bay’s Edge pattern suggests a gradient yarn collection (find it at Miss Babs) to make buying easier, but I wanted to choose my own colors! The ripple effect evokes waves of water so I chose blue-greens and blues with one tan (sand color) and a peachy-pink to add a bit of color to offset the blues.

At Miss Babs I added many colors to the “compare” section, then deleted them, and added more. I think I went through every single 2-ply toes yarn shown!  The only color which is the same as one in the collection of yarn used in the sample pattern is Sea Oat.  I chose to exchange their blues, green and purple with shades of blue-green.

My main color yarn will be “Life Begins” which is a Yummy 2-Ply wild iris (non-repeatable color way) in light blue-green with some speckles – See the big skein below.  I needed one skein in 400 yds.  My yarn arrived November 1st – how exciting!  I love those little gifts they always include, and the yarn is super wonderful!  Look at those colors…!

shades of green yarn
Yarn colors for my shawl project

Miss Babs offers smaller skeins of Yummy 2-Ply Toes with 133 yards each, and I needed 6 of those to complete the “waves” in the pattern.

Here is what colors I ended up choosing: (a “wild iris” color is non-repeatable, one of a kind dye lot).

“Sea Curtain” (Wild Iris)
“Mount Kootaloo”
“Black Watch”
“Sea Oat” – tan / beige
“Picuri” (Wild Iris) – pink
“Aquarius”

I would have liked the two darkest greens to be more of a contrast, but buying yarn online makes it difficult to see everything together. The “Blackwatch” color way is really beautiful and I’d love to knit something using that color again. It looks a lot more green than blue in reality. The photos at Miss Babs look very blue, which mine was not.

Beginning the Shawl Pattern

It took me three tries to get this shawl’s “cast on”.  If you have ever knit a triangle shawl, you probably know how that weird beginning goes.  You must know how to “pick up and knit” stitches. I suspected it would give me trouble and I expected to have to re-do. I finally had it looking okay and got on a roll.   I can see the pretty little triangle shape emerging!  

Miss Babs yarn is so pretty with slight variations in color throughout.

knitting the Bays Edge shawl
Beginning the shawl

Now it is January and I am finishing up this shawl. Once I did the bind-off on the first edge, I fell in love! The I-cord bind off looks so nice. Once I completed the second half and needed to do the bind-off again, I had to look it up to refresh my memory.

Today I wove in the ends and washed the finished shawl. It is blocked on Knit IQ mats, and in the process of drying in the spare bedroom. The pattern was easy to follow and fun to knit. I really love the way it turned out. The yarn colors I chose were meant to represent the colors of the sea. Shades of blue-green from light to dark are mixed with a row of beige for “sand” and “pink” for seashells.
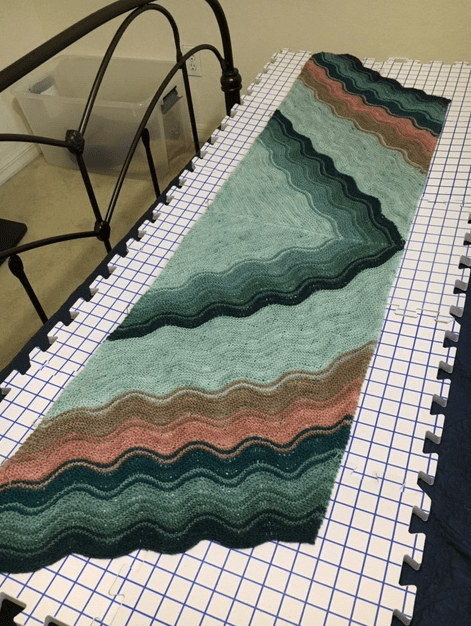
Bays edge shawl in ocean colors
Blocked and drying – the Bay’s Edge shawl

My Notes on Knitting the Bay’s Edge Shawl

Notes: Beginning this shawl is a bit tricky. Watch a video about how to pick up stitches and knit them, if you have never done this. You must know how to SSK and M1R and M1L. I placed markers for each 19 stitch set on the making waves rows just in case I ended up off with my count at the end of the row. I could easily go back and count 19 stitches in each section to see where I was off. Many of the rows were simple knit across, which could easily be done while watching TV. The I-cord bind off takes time, but is worth it.

More Rectangular Shawl Patterns

Buy the Bay’s Edge Shawl pattern (link at the top of this page) or view some of the other patterns I found in my search for rectangular shaped wraps.

Opaline Wrap by Ambah O’Brien

Torquata by Ambah O’Brien

Fading Point by Joji Locatelli

Nakarra Wrap by Ambah

Time Trades by Caitlin Hunter

Honestly some of the patterns seemed too involved for me, but maybe one day I will be brave and make the attempt because they are all beautiful.

Winter Hats I’ve Been Knitting

All hats shown here were knit from patterns found in the Hats On! pattern book which is available at Amazon.

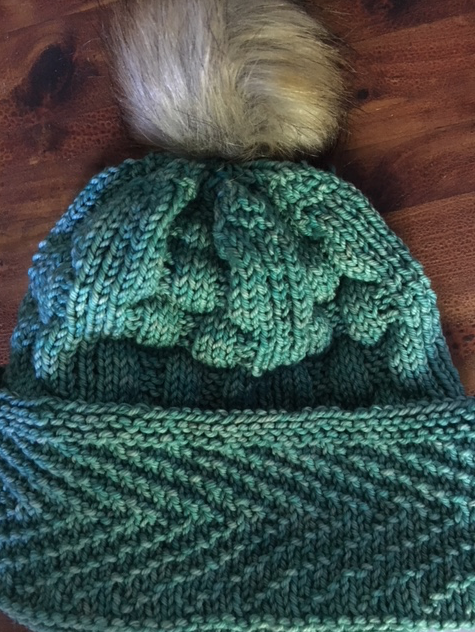
Gansey Watch Cap

Screen Shot 2018-08-07 at 7.05.05 PM
Fur Pom Pom Added to Gansey Watch Cap

The pattern is in chart form only, and I was not sure how to do it.  I think the top is not quite right, but it’s good enough.  I would make this hat again with smaller needles in the smaller size. Mine is a size Medium, but came out a bit loose.

Fana Cap

I finished knitting the Fana Cap just before I left for New Hampshire, and gave it to my daughter. We volunteered at the Monadnock Animal Shelter fundraiser and it was a cold, rainy day, so she wore her new hat.

Fana Cap hat pattern
Fana Cap

Yarn Used: Manos del Uruguay “Gloria” in superwash merino worsted wool in color “Pescador” blue. White yarn is Rowan Alpaca soft DK combined with Rowan Kidsilk Haze mohair, held together.

Notes / Changes: I made the Medium size, which was perfect for my daughter’s small head, but next time I would make the larger size.

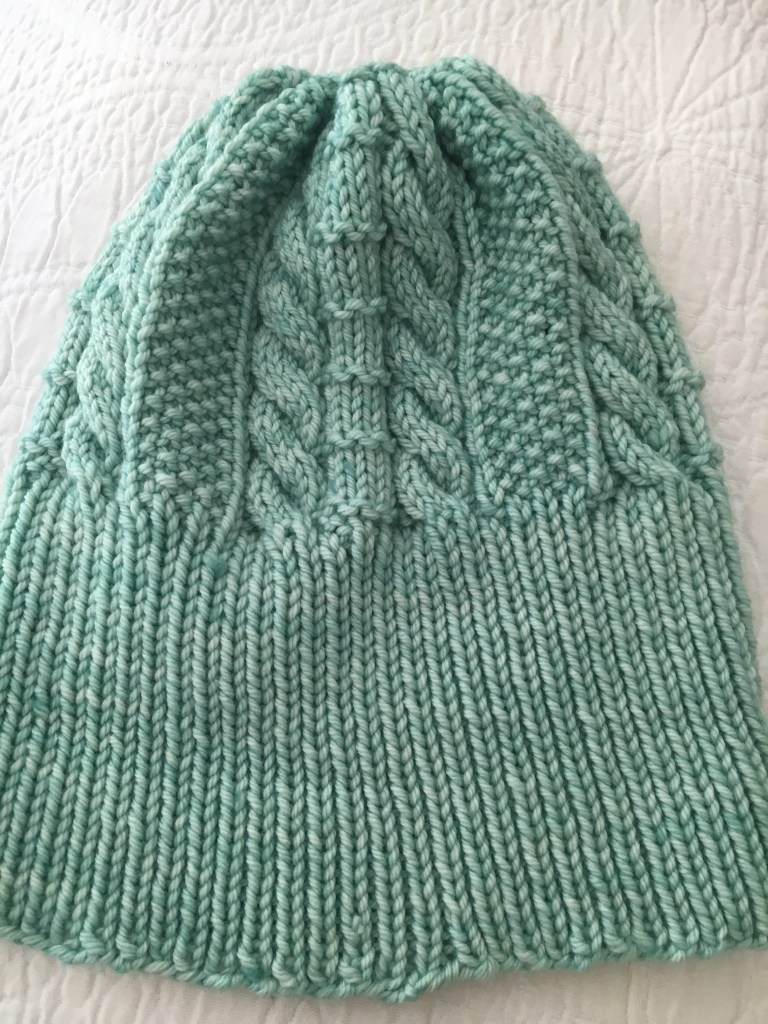
Aran Watch Cap

I knit this one in size Medium which was large enough around, but I needed more height.   Changes:  Next time I will add another inch to the top part and maybe make a longer cuff. I like a nice wide cuff to flip up and give my ears double coverage in the cold.

This is an interesting pattern with cable and seed stitch between simple knits and purls. For that reason a solid color is recommended. I used Malabrigo worsted yarn in “Water Green” color which made this finished hat nice and soft.

I plan to make this one again with the changes I mentioned.  The decrease section is quick so dealing with DPN’s is fast.

Depending on your knitting skill level, the hats in this book will keep most knitters happy.  I began by knitting the simple patterns like the Classic Watch Cap and Tam, and progressed to two color patterns and cable patterns.   Still on my list of “want to knit” are the Triple Pattern Watch Cap, All-over Two-Color Pattern Watch Cap, and Norwegian Star.

Some of the colors chosen to knit the sample hats in this book are not the best, but change the colors yourself and come up with something unique.

Aran watch cap hat pattern
Aran Watch Cap

For more hat’s to knit (FREE patterns) for baby / children, see my post at Little Pink Baby Hat Knit in a Day.

Just Finished Knitting My First Pair of Socks!

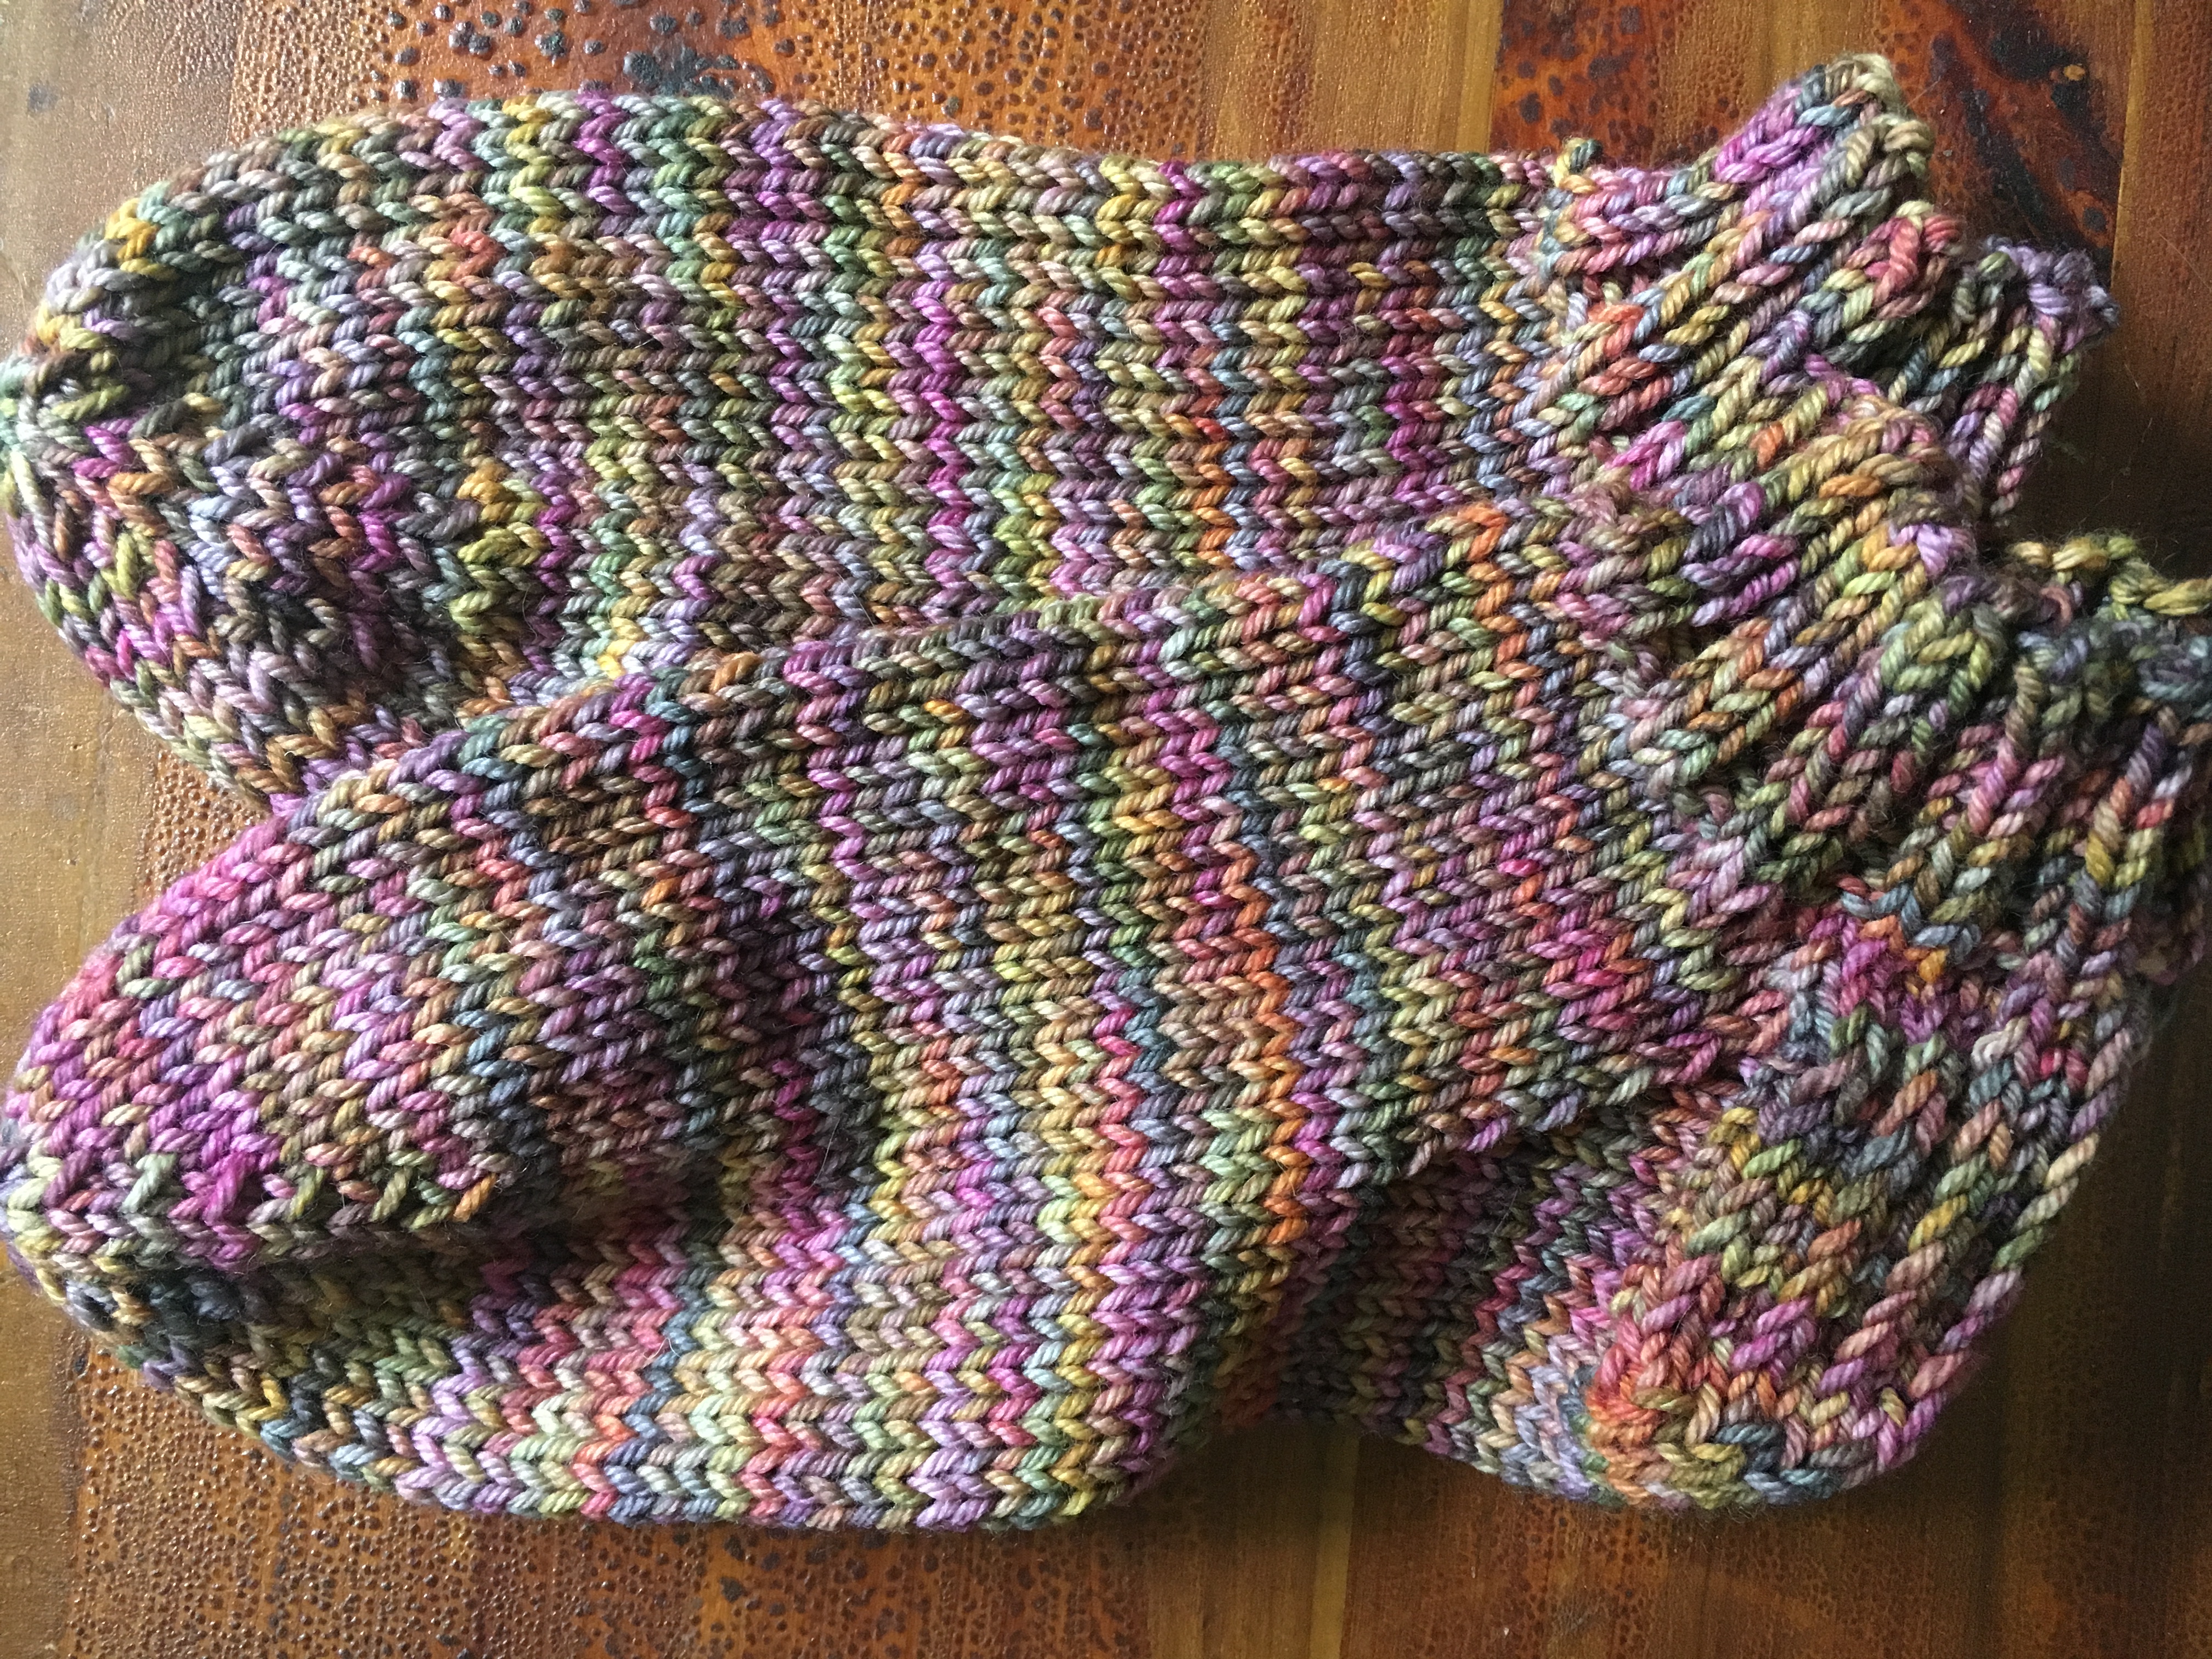
They are not perfect, but they fit, and today I finished sock number two. That gives me my first finished pair of hand-knit socks.

Many years ago, when I lived in New Hampshire, I took knitting lessons from a lady named Anne, of The Wool Room. I can’t find any recent info about the shop, and Anne was up in years way back then. Tiny, local shops in New England work more by word-of-mouth than website. But my time living in that area gave me great insight into hand-crafting and becoming self-sufficient.

My lessons were about making hats. My first attempts at knitting hats were sloppy and a bit crazy, but it was fun. My neighbor took lessons with me, and she decided to knit socks for her husband. I often wonder how many pair she has made since then.

Personally, I never had the desire to knit socks. Until recently. They seemed too difficult to make, and then to wear them on your feet where no one really notices… why? I couldn’t figure out what all the sock-knitting fuss was about.

My mind is changed. I want to branch out and make clothing which is useful rather than the typical cowls and scarves I’ve been making for years. Plus, how many scarves does a person need?

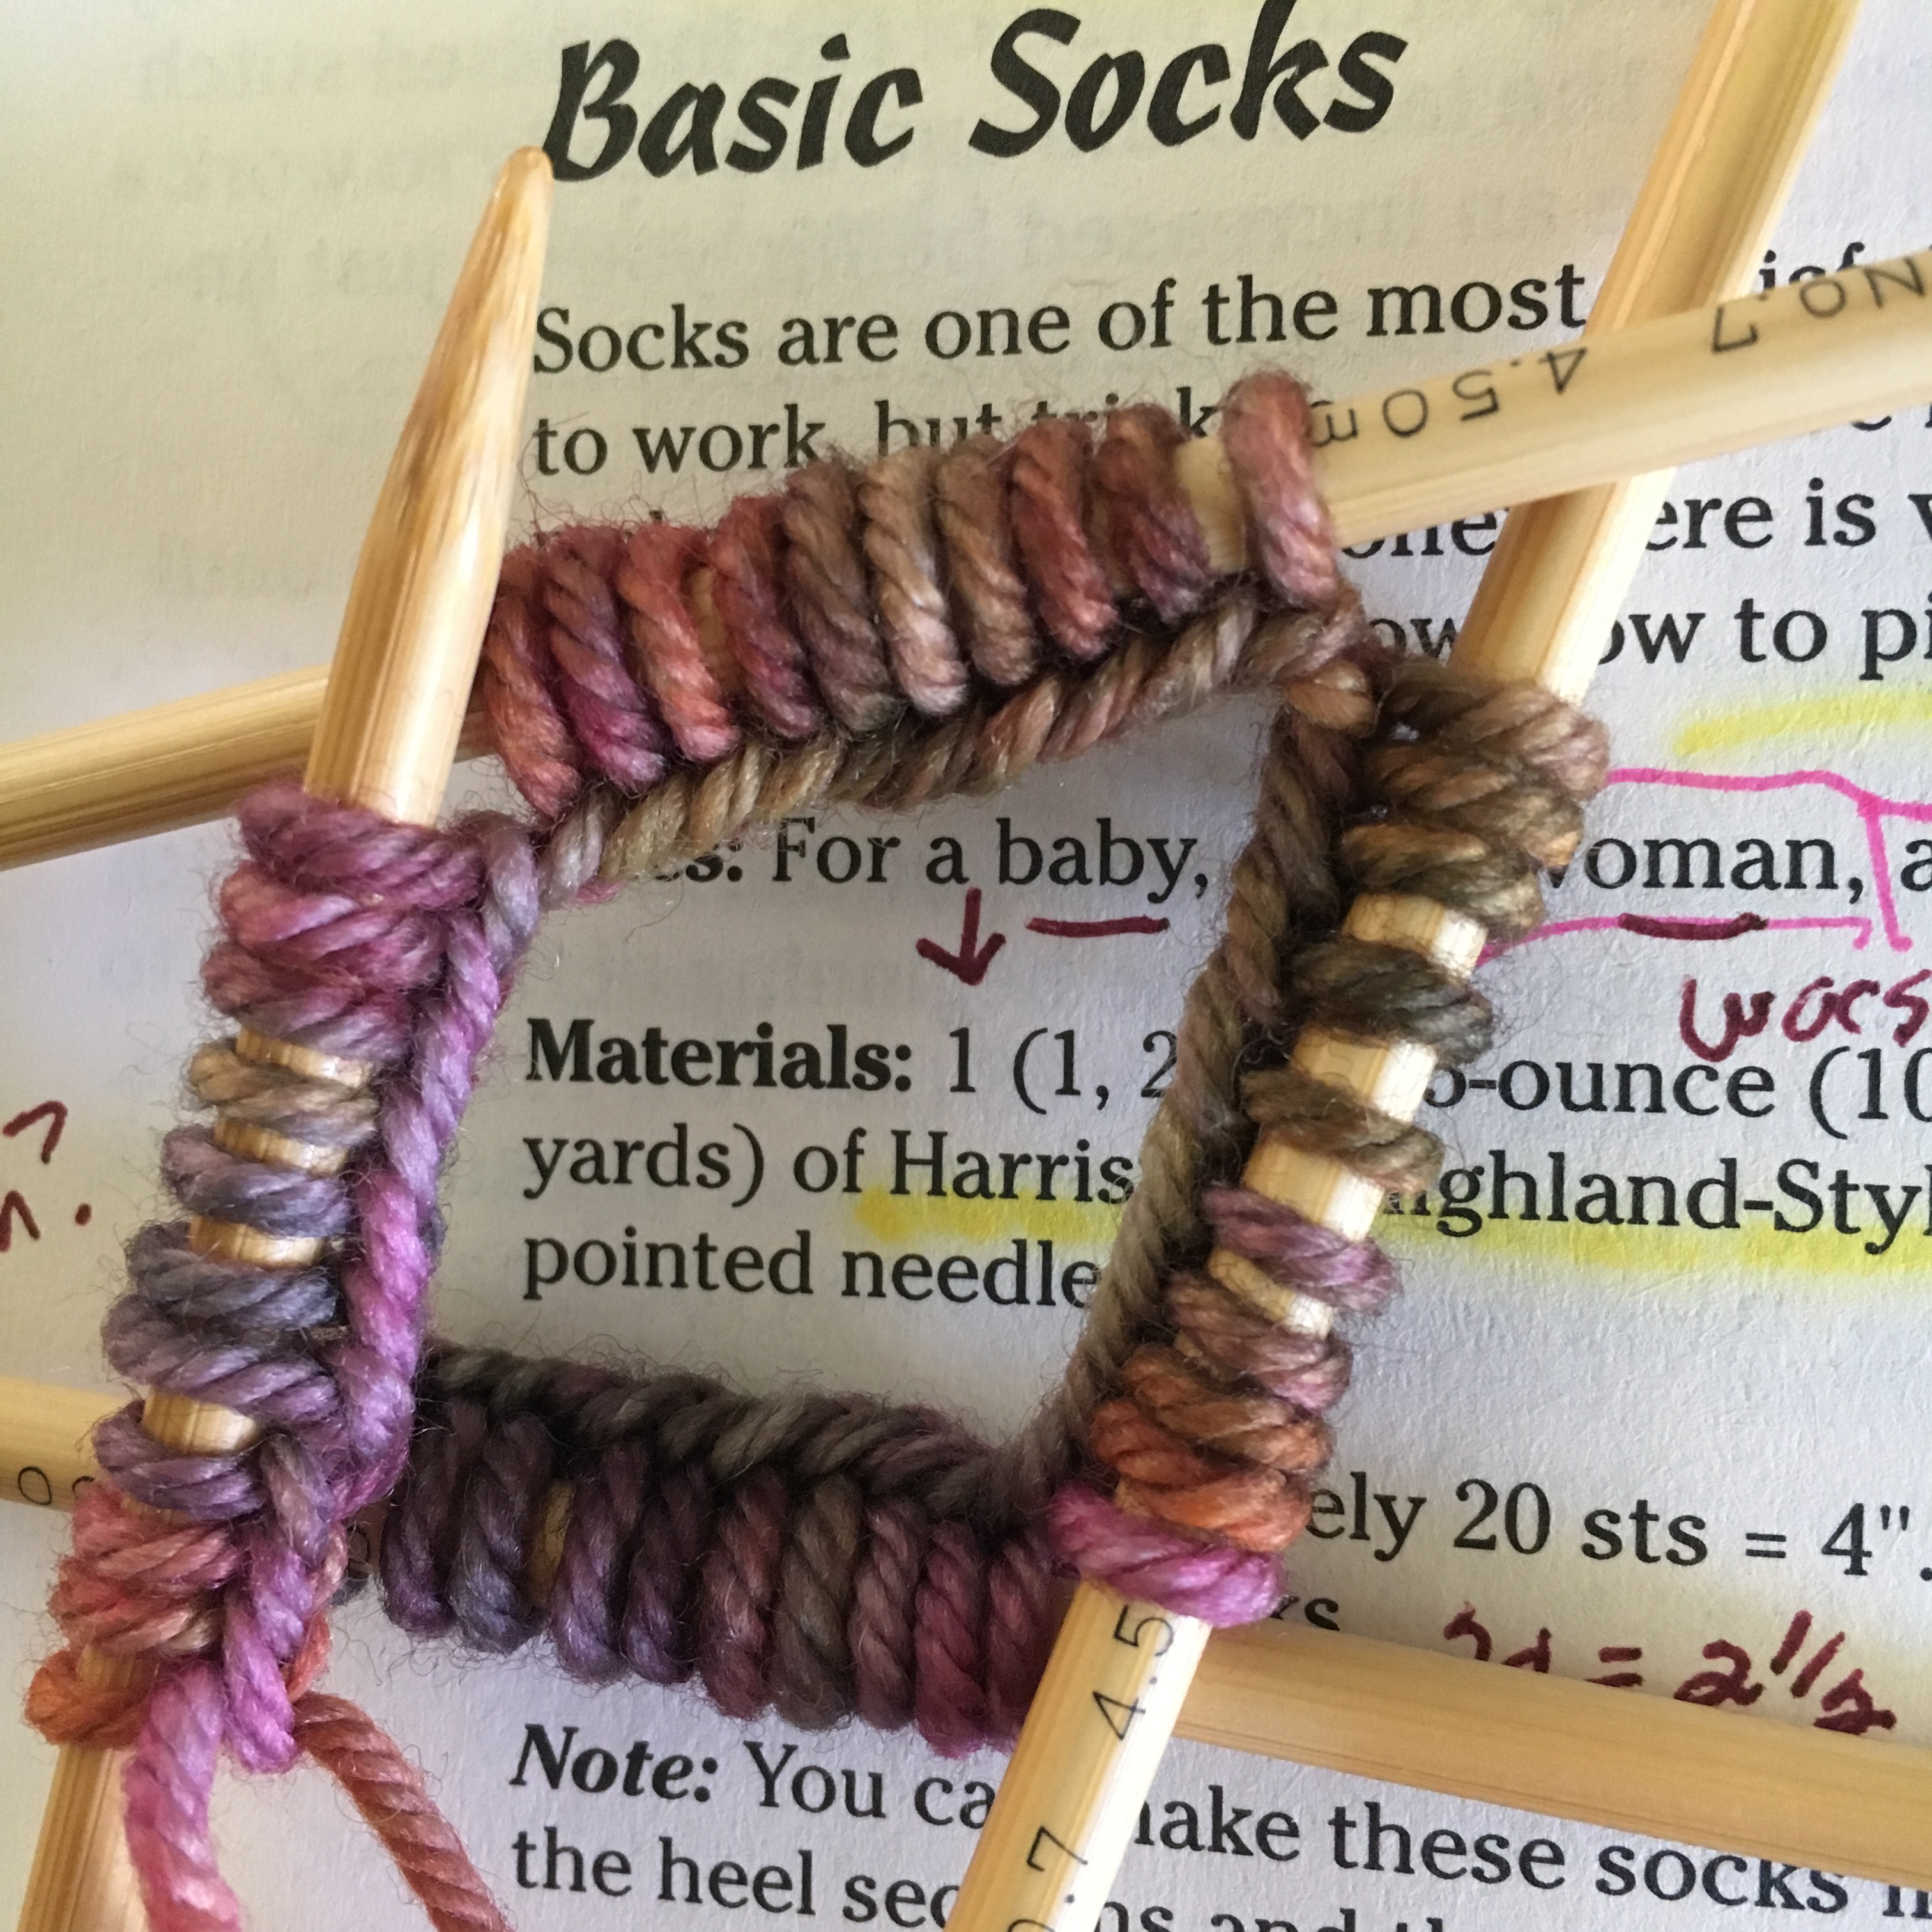
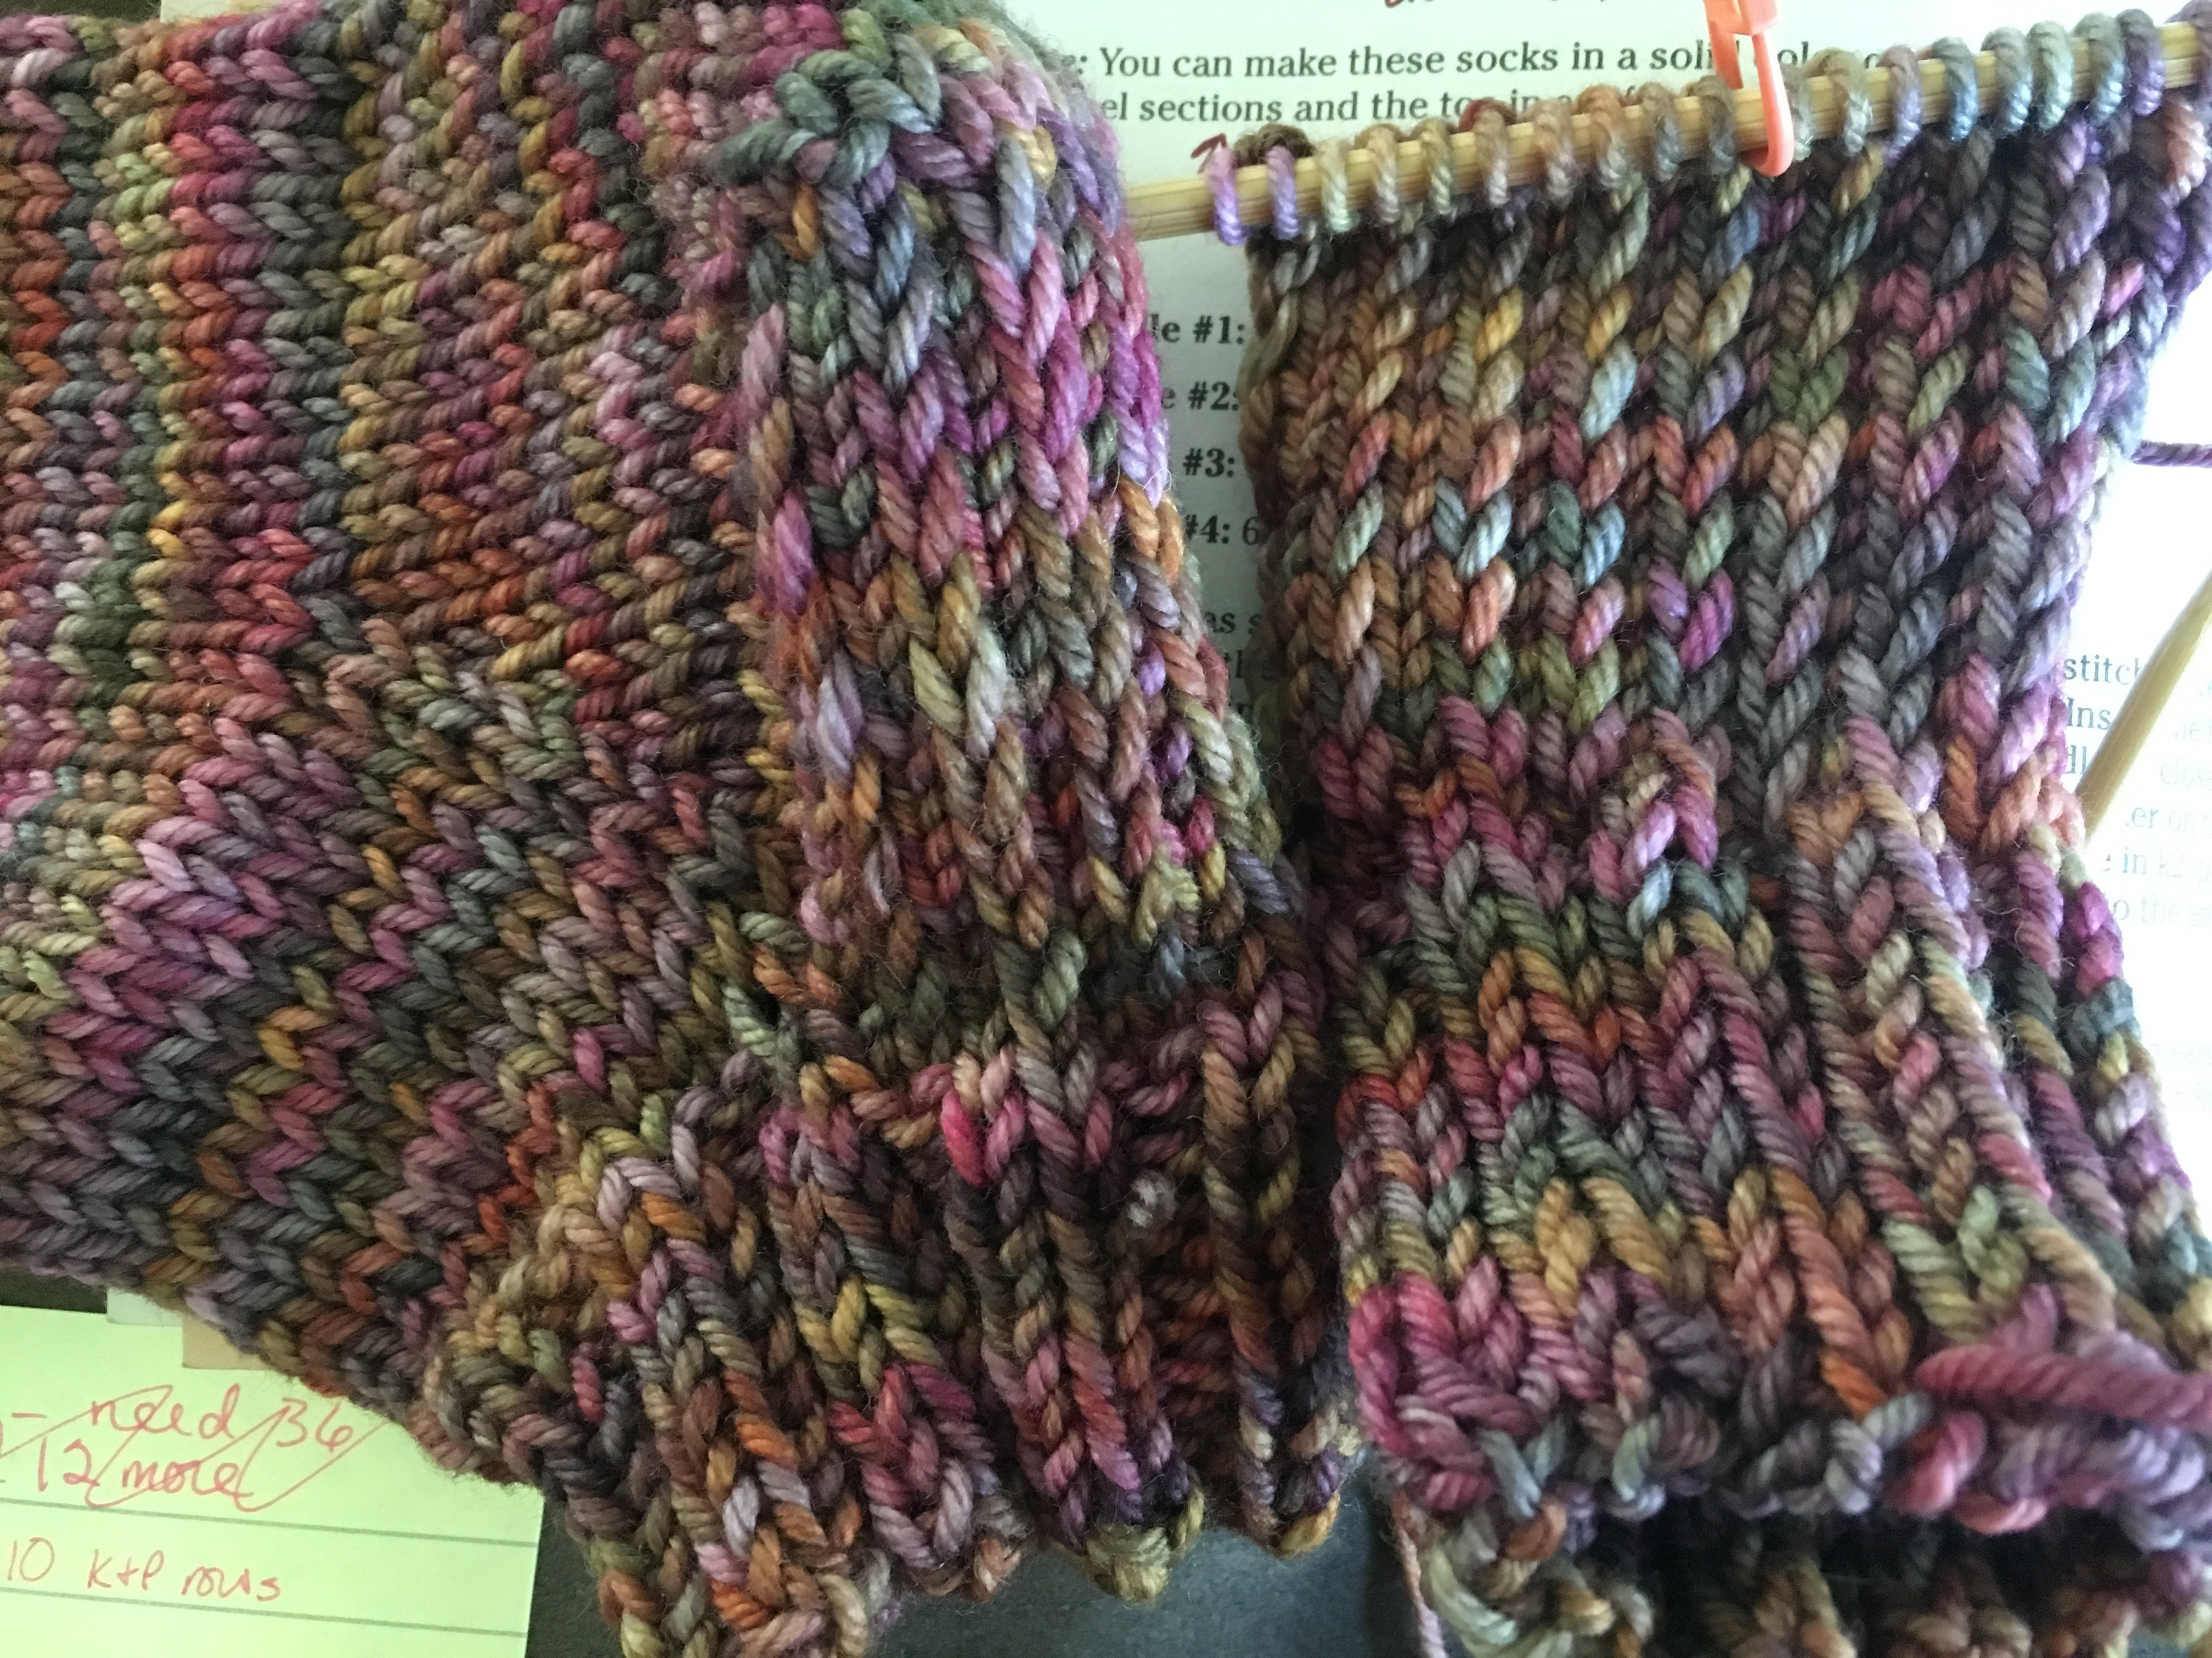
Suddenly I was ready to try making socks. But I needed an easy pattern to follow. After searching online, and eventually trying one free pattern that didn’t work out, I picked up my Knitting for Dummies book. I hadn’t flipped through it’s pages in years. I wondered if it had any sock knitting information.  Oh yes, it did.  I chose some Madeline Tosh Vintage yarn (Rocky Mountain High is the color) from my stash and cast onto my DPNs.

basic socks pattern
The “Knitting for Dummies” book has a “Basic Socks” pattern! Yay…

Although the socks are called “basic”, I still had some trouble. Eventually, thanks to YouTube, I got through my first sock. Wow…I was thrilled.

Because I’d had trouble with another pattern once I got to the gusset area, I chose to make my Basic Socks with a short rib section just in case I ended up having to rip it all out. Since I seldom wear socks at all here in Florida, these will be more like slippers for me.

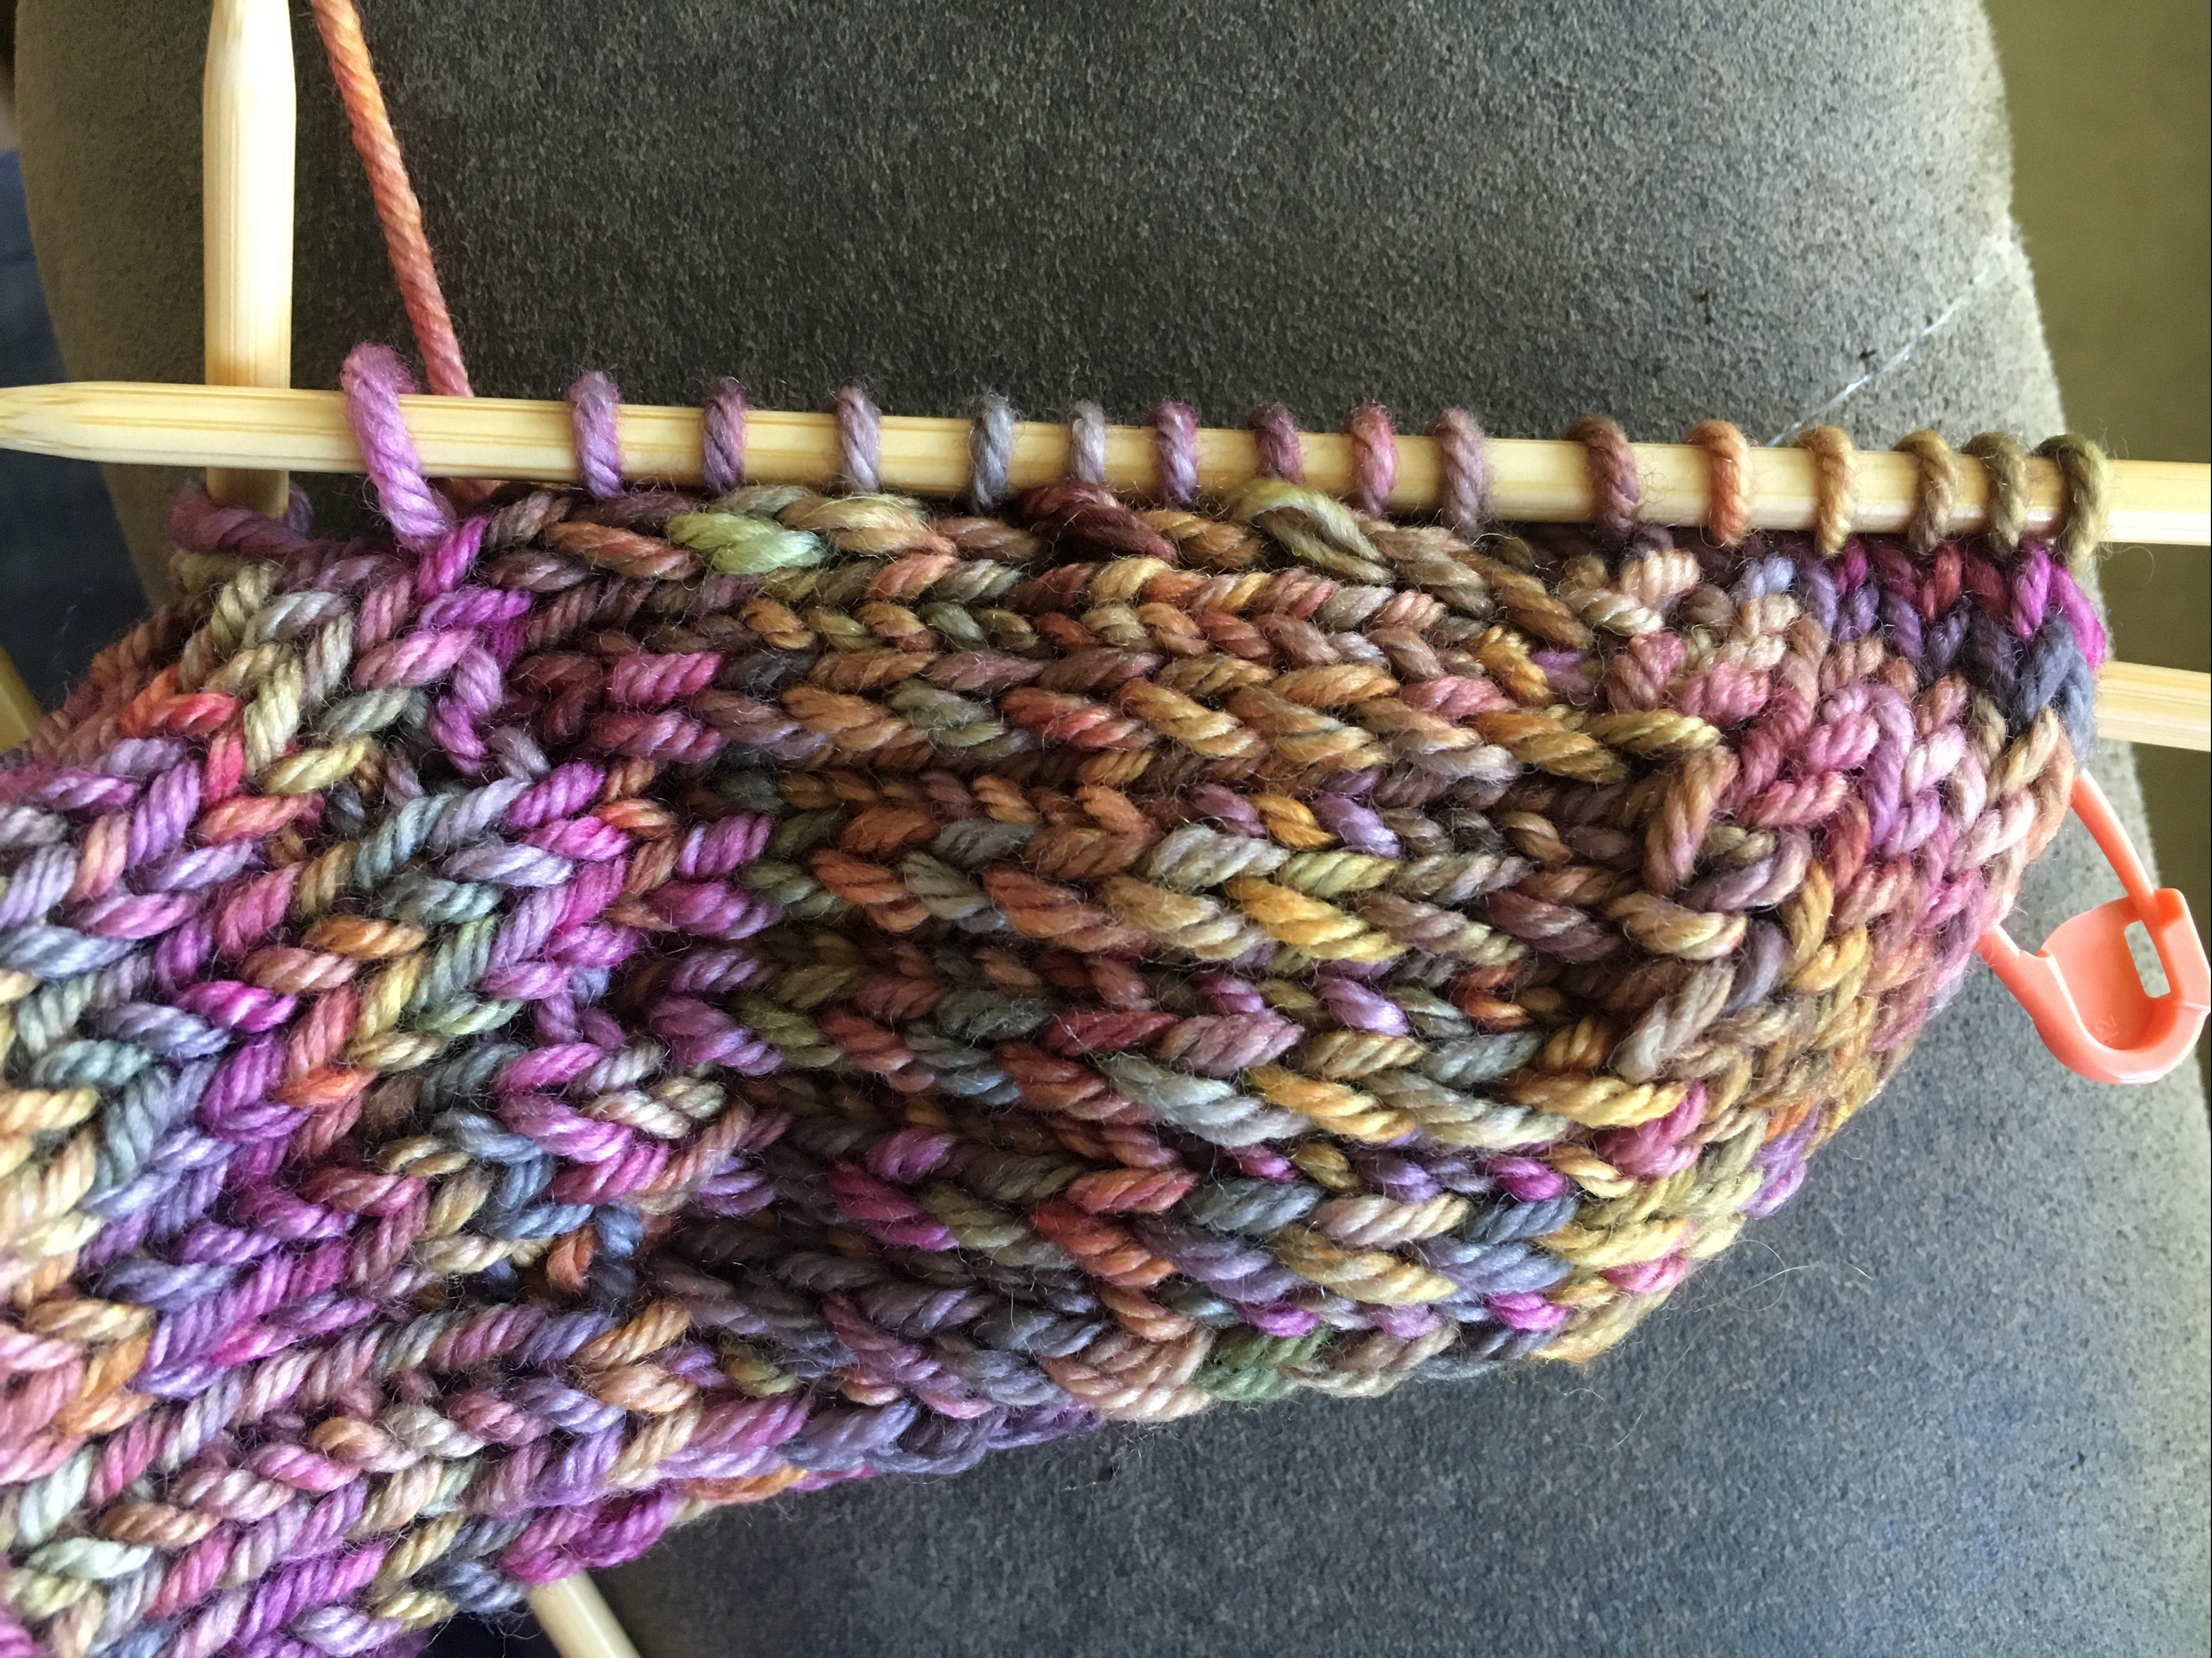
picking up stitches
Picking up stitches along the heel flap

The gusset part of the pattern that called for me to “pick up stitches” got confusing. Suddenly I had no empty needles to use! Something was wrong. I went to YouTube and watched an experienced knitter explain this part of basic sock-knitting.  Her “pattern” is not exactly like the one I followed, but I got the general idea of what I was supposed to do.

Once all the stitches were on my 4 needles, I shaped the gusset, which decreases stitches to the correct size for the foot section. For this you need to know how to SSK (slip, slip, knit) and K2tog (knit two stitches together).

sock number two
Beginning sock number two.

pair of hand-knit socks
They are not perfect, but they fit!

I will never wear these socks with shoes as they are a bit thick. I did wash them in the machine, to see how they held up. They came out fine, but a bit fuzzy, so I will hand wash from now on. It’s a good idea to hand-wash fine knits no matter what.

hand knit socks
My finished socks!

Knitting the Typha Cowl in Shades of Pink

Finished knitting the Typha cowl. I had trouble figuring the gauge for this because I was not very experienced, but I should have gone up at least one size in needles.

Two tone cowl in lace pattern
Finished Cowl

I am knitting a cowl in shades of pink – the finished photo above most closely matches the actual colors.   This pattern comes from designer Kirsten Kapur and is named “Typha”.  The link takes you to the Ravelry page where the pattern is sold as a download.

The cowl is a simple one to create, with the first part being a simple garter stitch.  One row of knitting and the next of purling.  After that, a simple repeating lace pattern is followed to finish off the cowl.  The pictures below came out very “Pink”.

pink cowl knitting
Done a few rows of the lace part of the cowl.

The second part of the cowl is a lace pattern. After knitting a shawl in the Through the Loops Knit Along, this pattern is very simple to follow. And I believe that most knitters with some experience can easily follow the pattern. It is fun to do.

pink cowl knitting
Cowl knit in the round in lace and garter stitch

I will admit that getting started with this pattern was not easy. For some reason my cowl is coming out much smaller than the pattern implies (Go up 1 pr 2 needles size next time!). I did do a swatch to check gauge, but I am not familiar with figuring out gauge and finding it with a lace pattern threw me off. (Now I know to knit the pattern in a 4×4 square to measure for gauge.)

Consequently when I tried to cast on (for first the smaller cowl, and then the larger) the yarn did not reach, so I had to begin over.

My yarn is obviously thinner than what Kirsten used to create her cowl. The yarn she used is Fibre Company “Meadow”, which is listed as “heavier lace”, so I bought “heavy lace yarn” from Miss Babs, thinking it would be the same.   I guess not.  Live and learn… that is my motto, and once again, I have learned from making a mistake.

So my “long” version will actually be short, and probably not long enough to wrap twice. My plan was to make the shorter version of the cowl to give to my daughter, but now I will keep this one and try again to make a correct size for her.

I do plan to make this cowl again using a heavier yarn and trying to figure out my gauge. It’s a beautiful and unique cowl in the two colors, which gives us many color choices.