Knitting the Goldenfern Sweater Pattern

Knitting the Goldenfern pullover, a Jenn Steingass pattern, in Rauma yarn with pink yarn colorwork at the bottom and on sleeves.

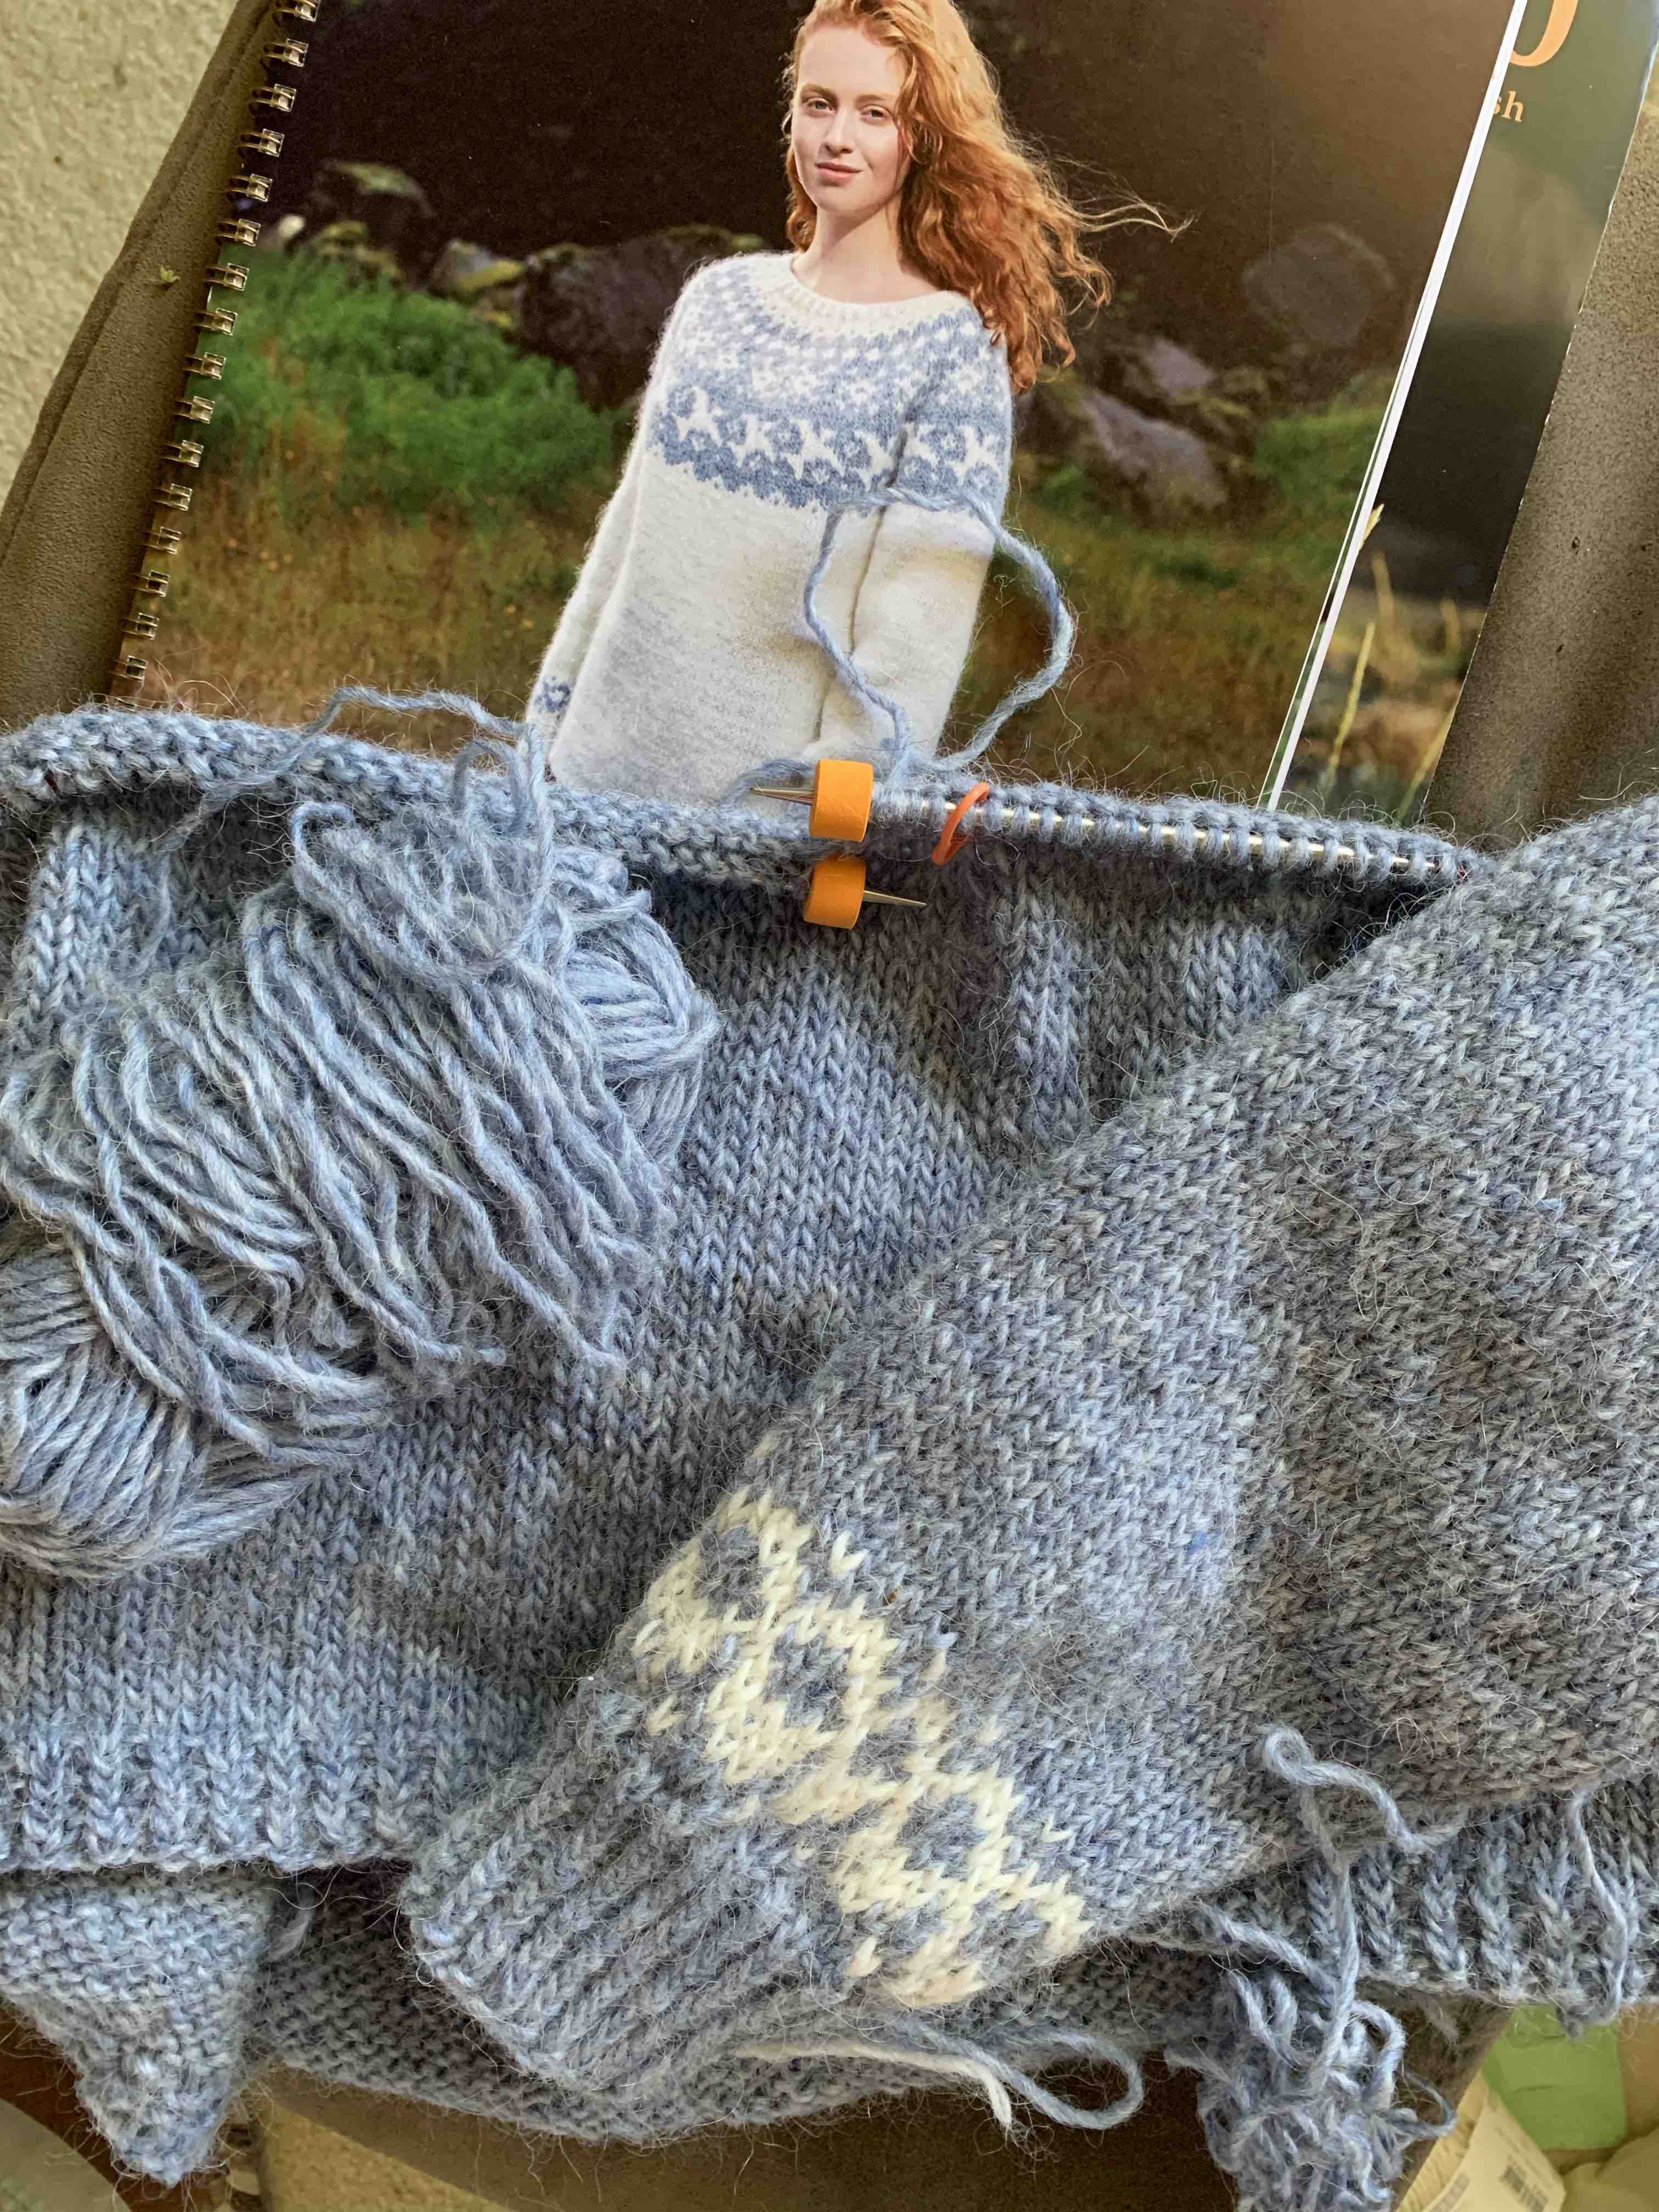
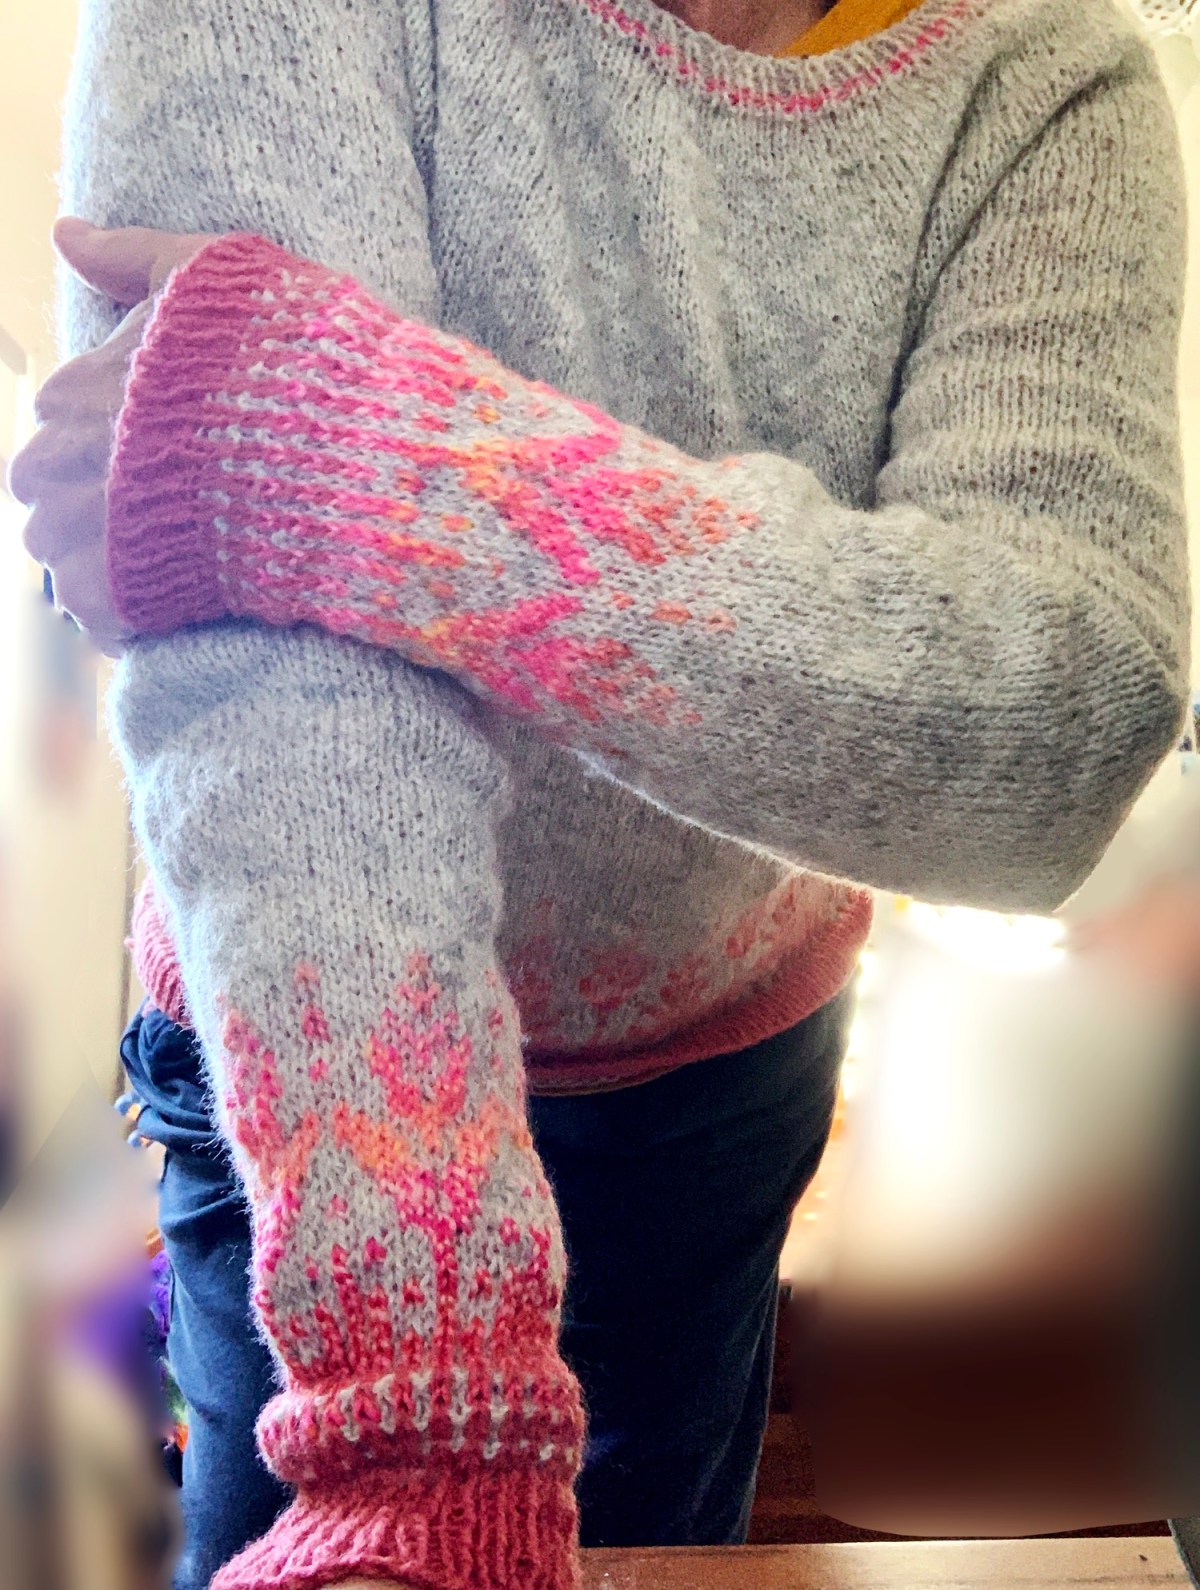
The Goldenfern pullover is a Jenn Steingass knitting pattern design. It is knit using fingering weight yarn and has colorwork at the bottom of the body and end of sleeves.

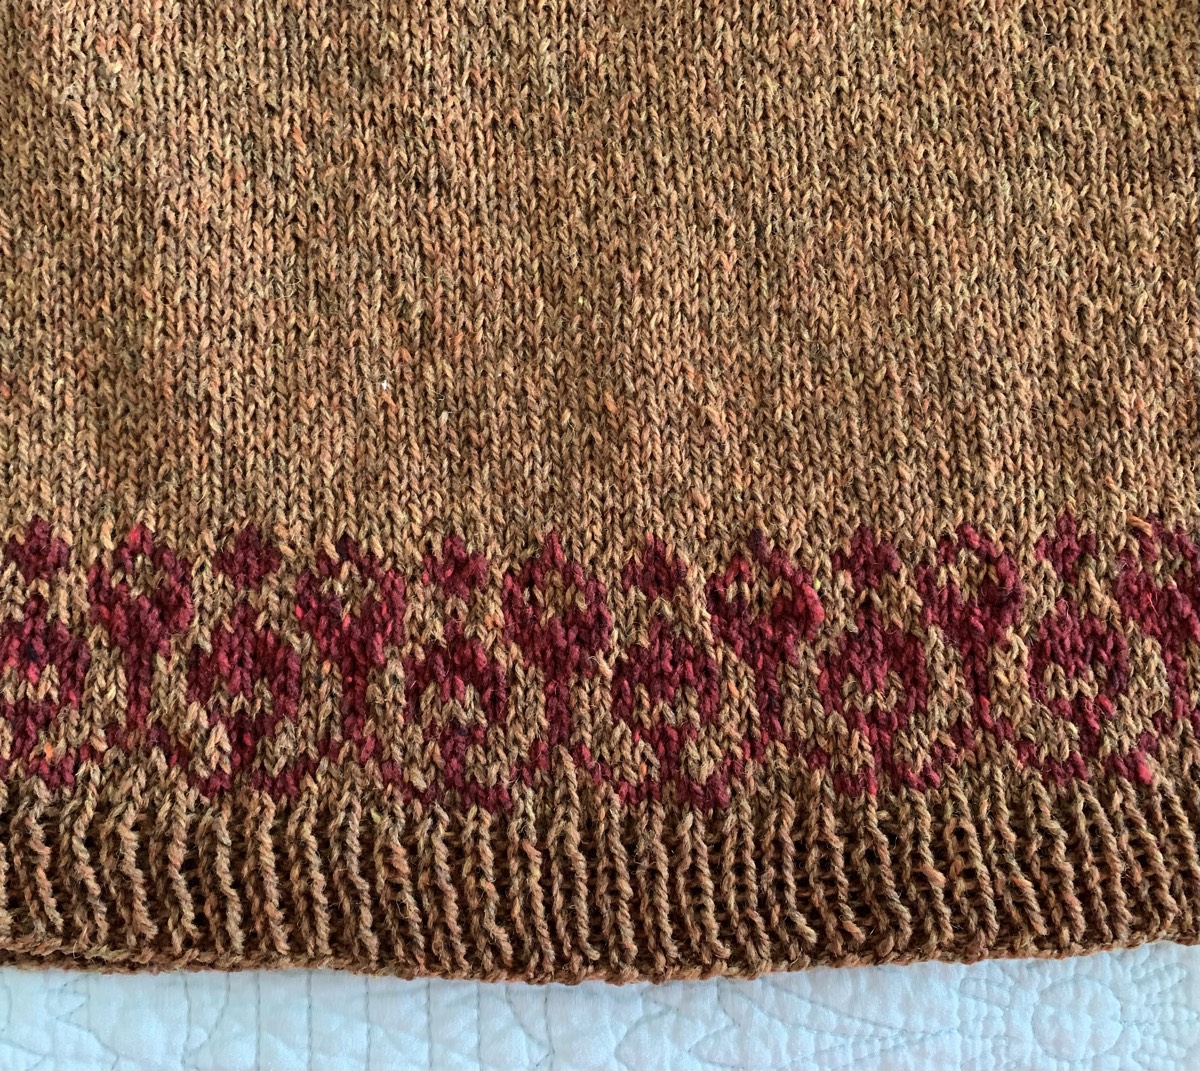
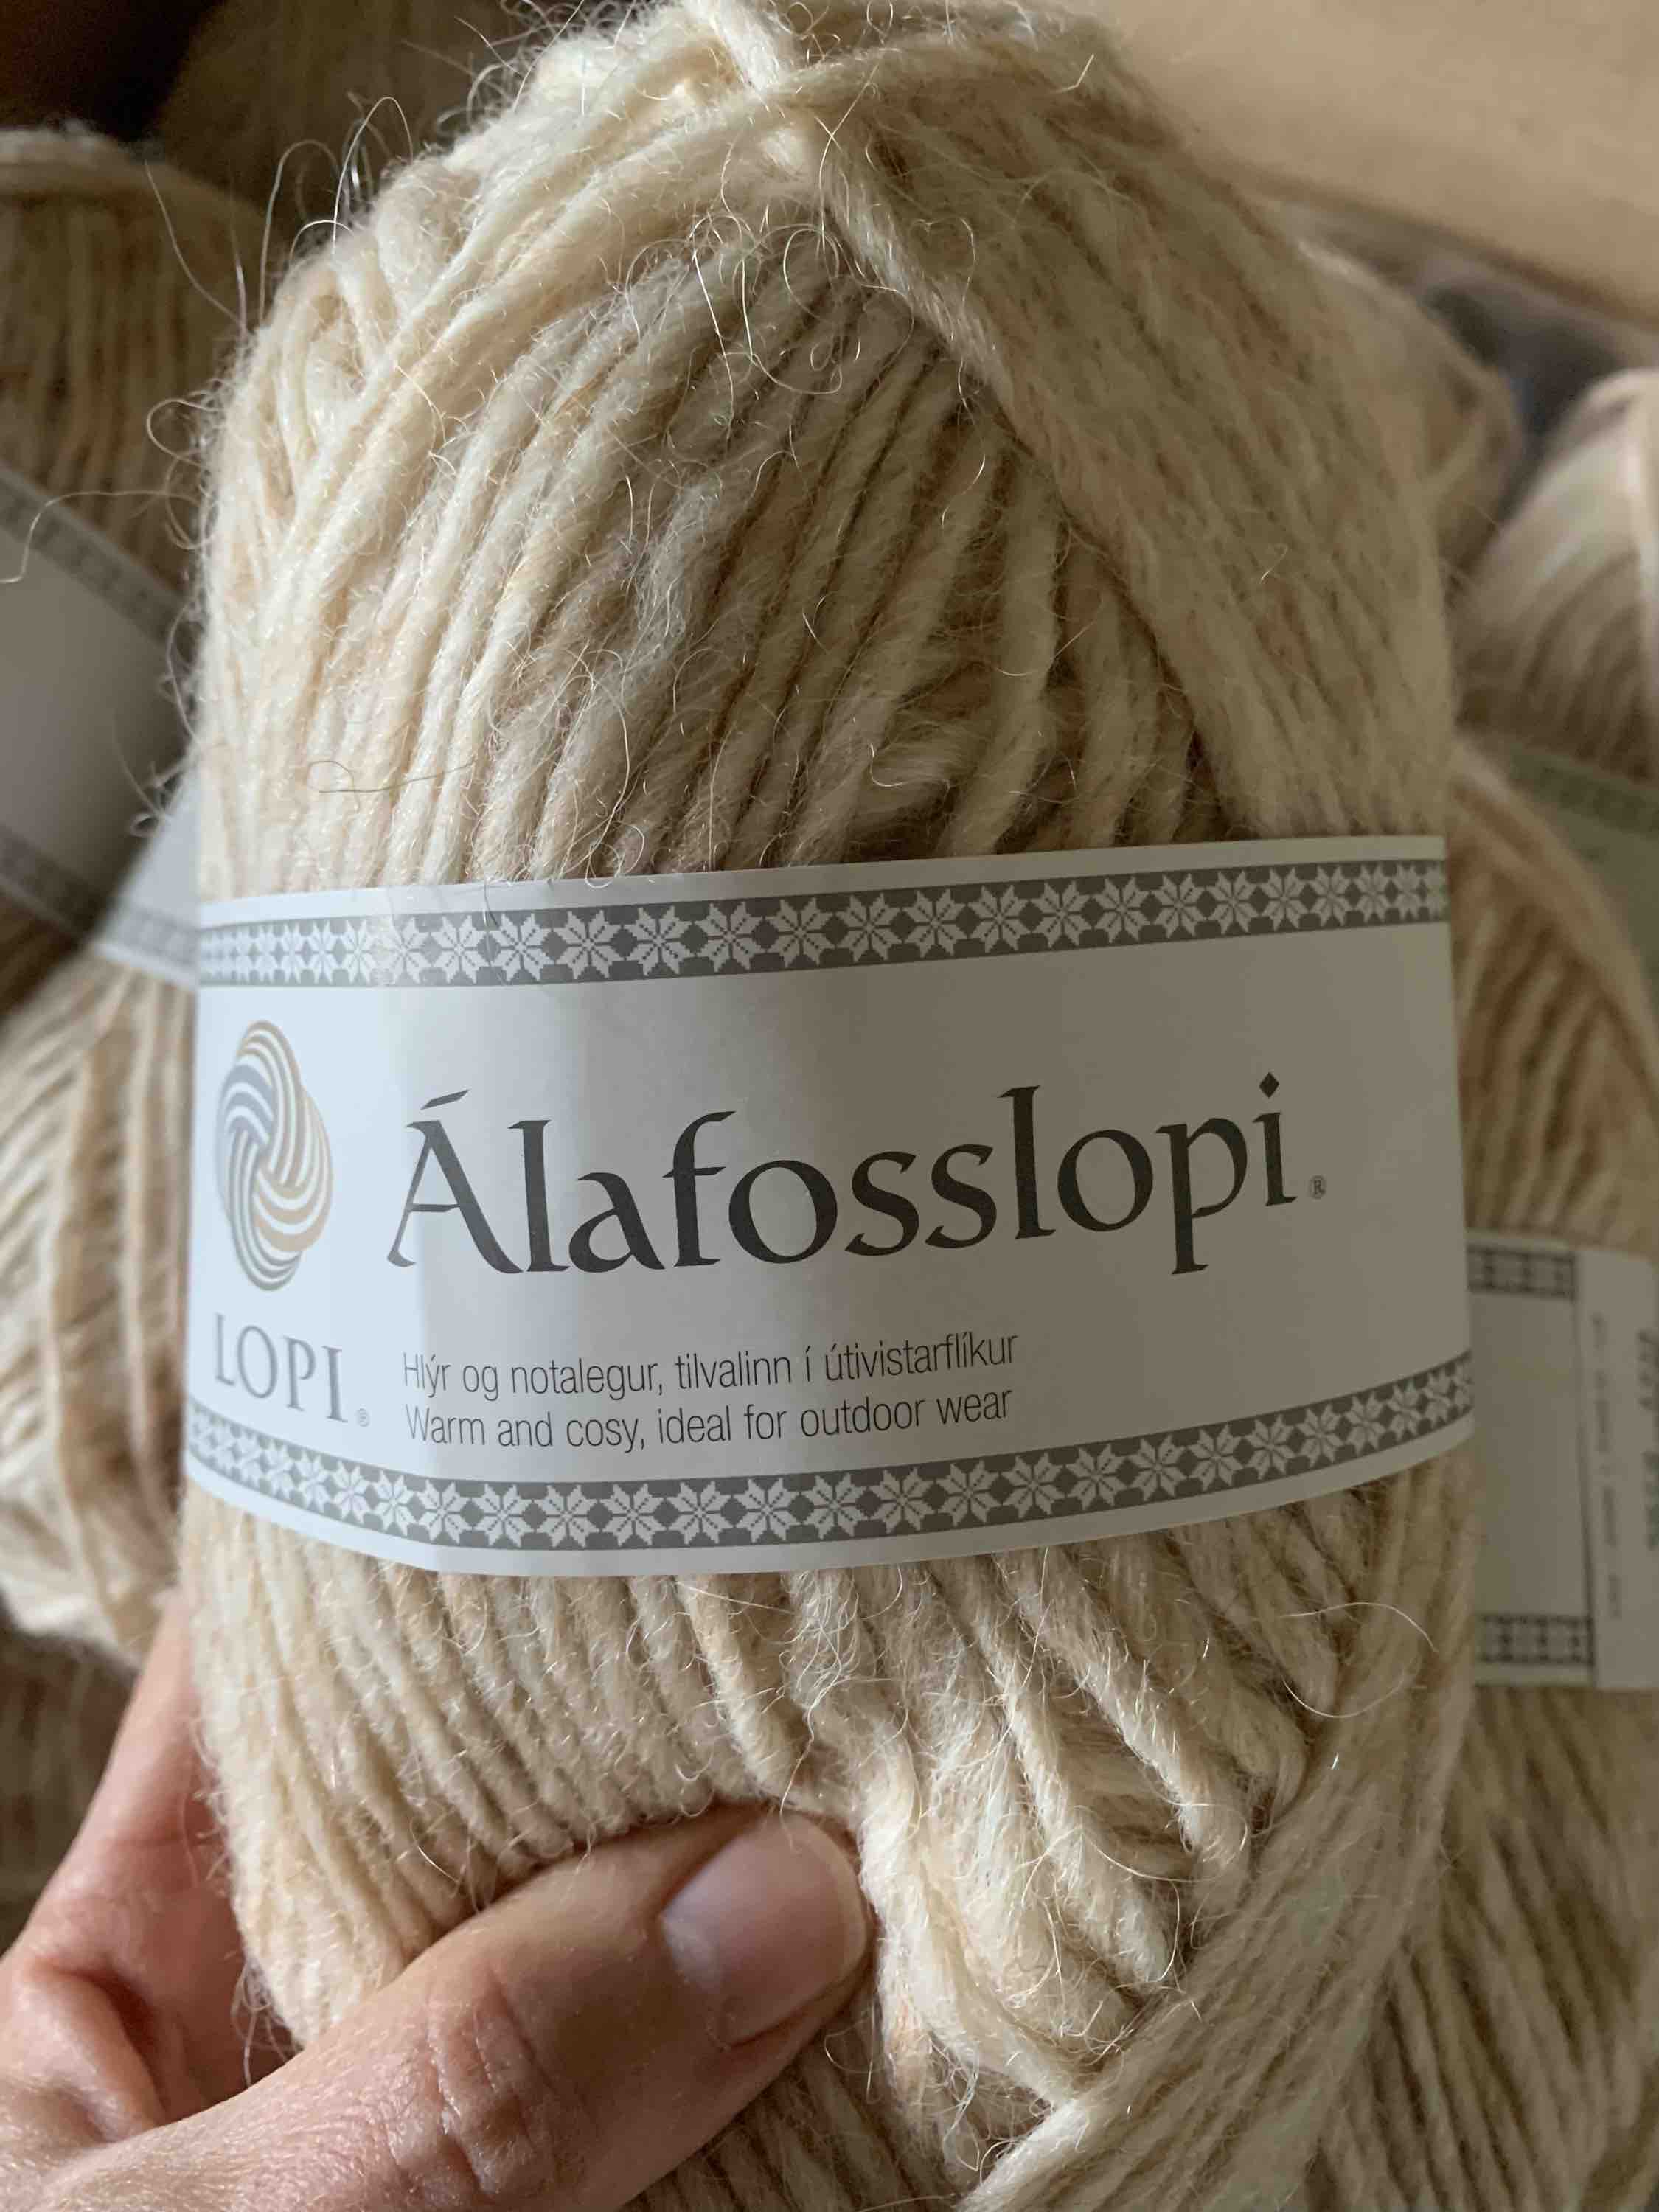
The yarns I chose were Rauma Garn, in light gray, combined with a gradient pink handspun. The darker, coral pink color is Jamieson & Smith, which I used for the very bottom of sleeves and all bottom ribbing. I chose to add one row of pink at the neck.

Casting On and Needle Sizes

My gauge was off, but in the end the sweater turned out fine. For me: The cast-on at the neck (this is a top-down sweater) was done on a size 3, 16 inch circular. The main body and sleeve knitting was done on a size 4 needle. All colorwork was done using a size 5, although a size 6 is recommended for the body colorwork, and I’m thinking maybe I should have done that. Size 3 needles were used again for the ribbing at the bottom of the body and sleeves.

Knitting The Sleeves

I picked up the stitches to begin knitting sleeves downward, using a 16 inch circular needle. As the circumference became smaller with decreases, I switched to a 9-inch size needle.

Then I used a size 5 circular and did the pink colorwork down to Row 37. Using the J&S coral pink when the chart said to use a new CC color.

This is when I changed to size 3 DPN needles and did a plain color 1×1 rib for about 7 rows. The bind-off is a normal bind off and not the i-cord suggested in the pattern.

Total sleeve length is 18.5 inches. Pattern suggestion is 18, so I’m close.

The Fall of 2022 was not a good one, with two disastrous hurricanes hitting the area. The knitting on the Goldenfern pullover began in September, and alternated with some other knitting I wanted to do. It has been a relaxing escape for me with other stresses, like the hurricane mess, that piled up. The pattern is easy to follow with lots of helpful notes by the designer.

Buy the Goldenfern Pattern

The link above goes to Ravelry, where you will find so many beautiful finished knits that use some truly gorgeous yarn color combinations. Go there to get inspired and knit your own Goldenfern. The designer has an offer to buy 2, get one free. Her patterns are so well written, and she has many beautiful patterns.

Finished Knitting

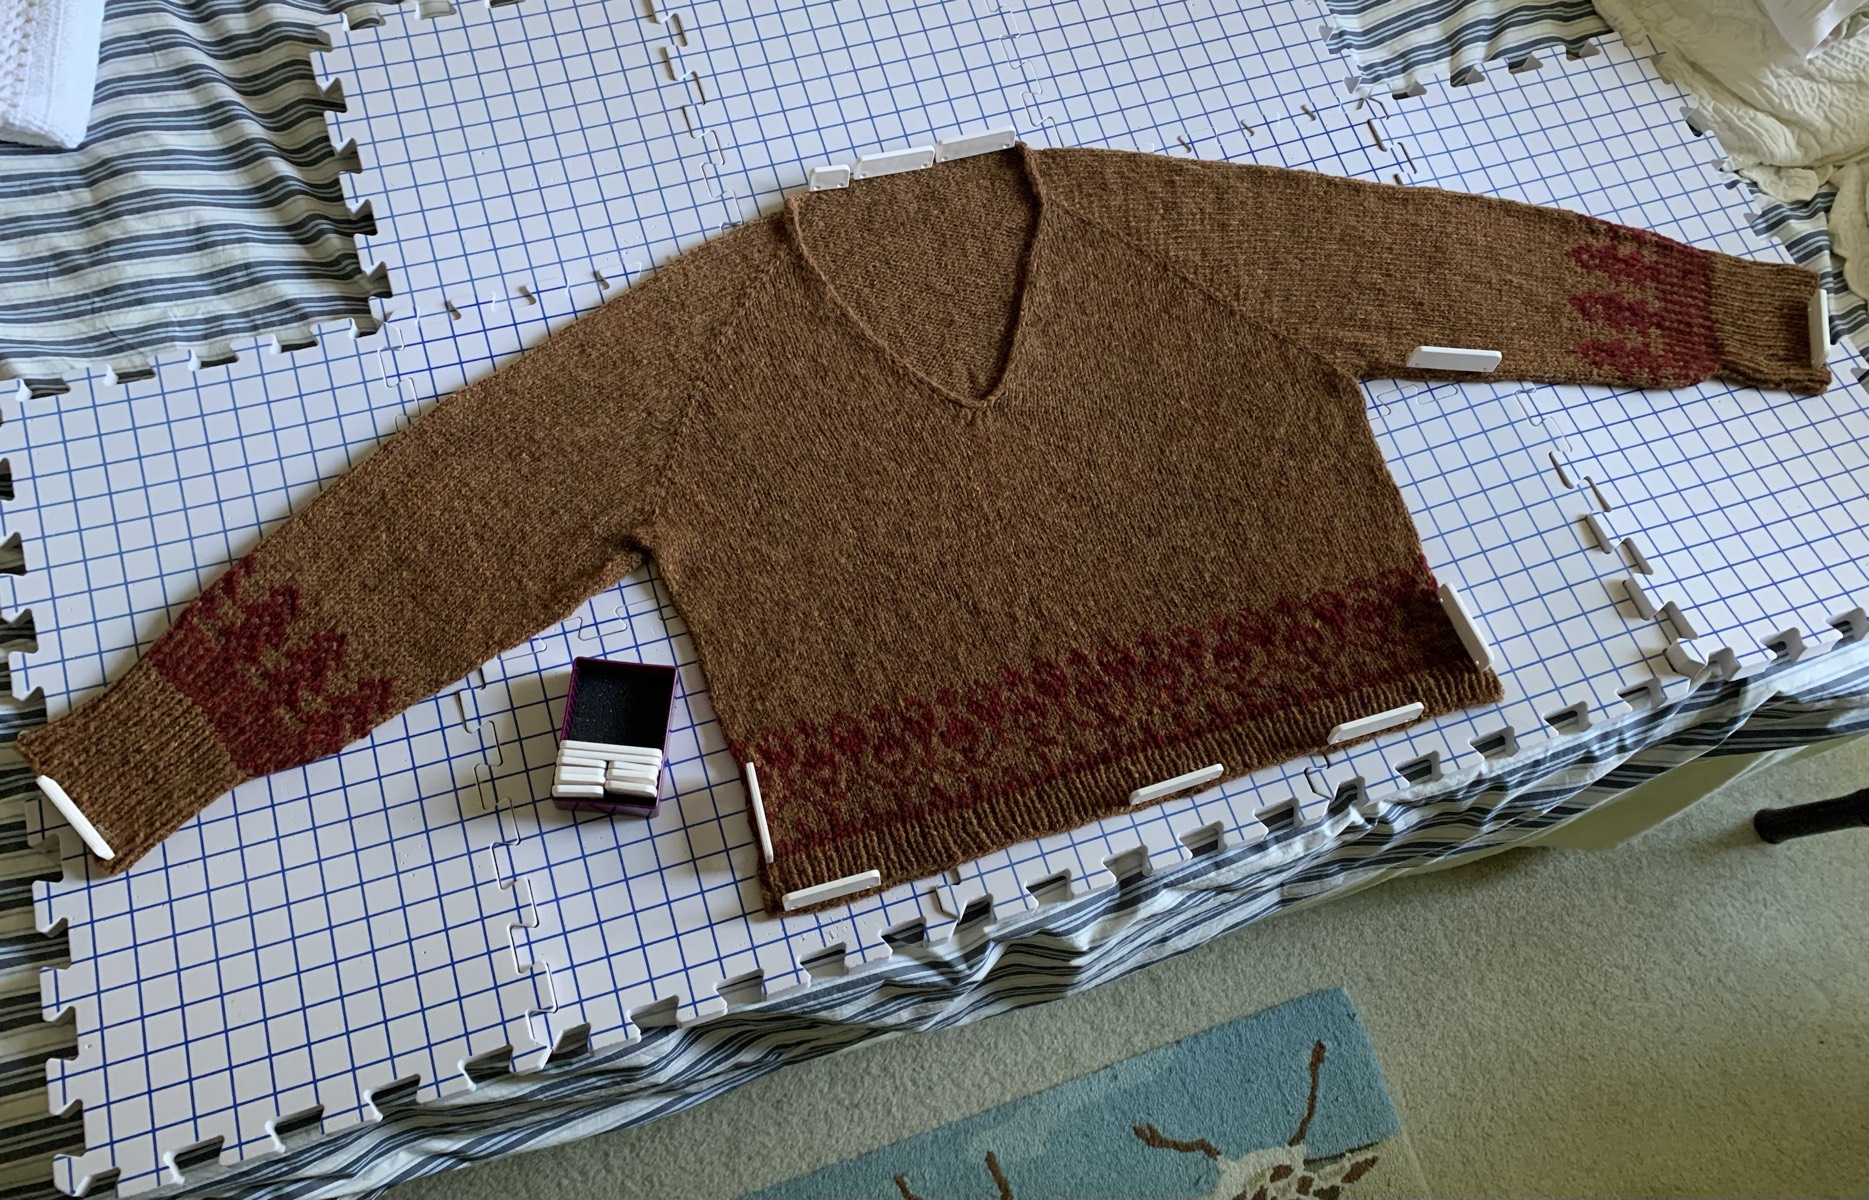
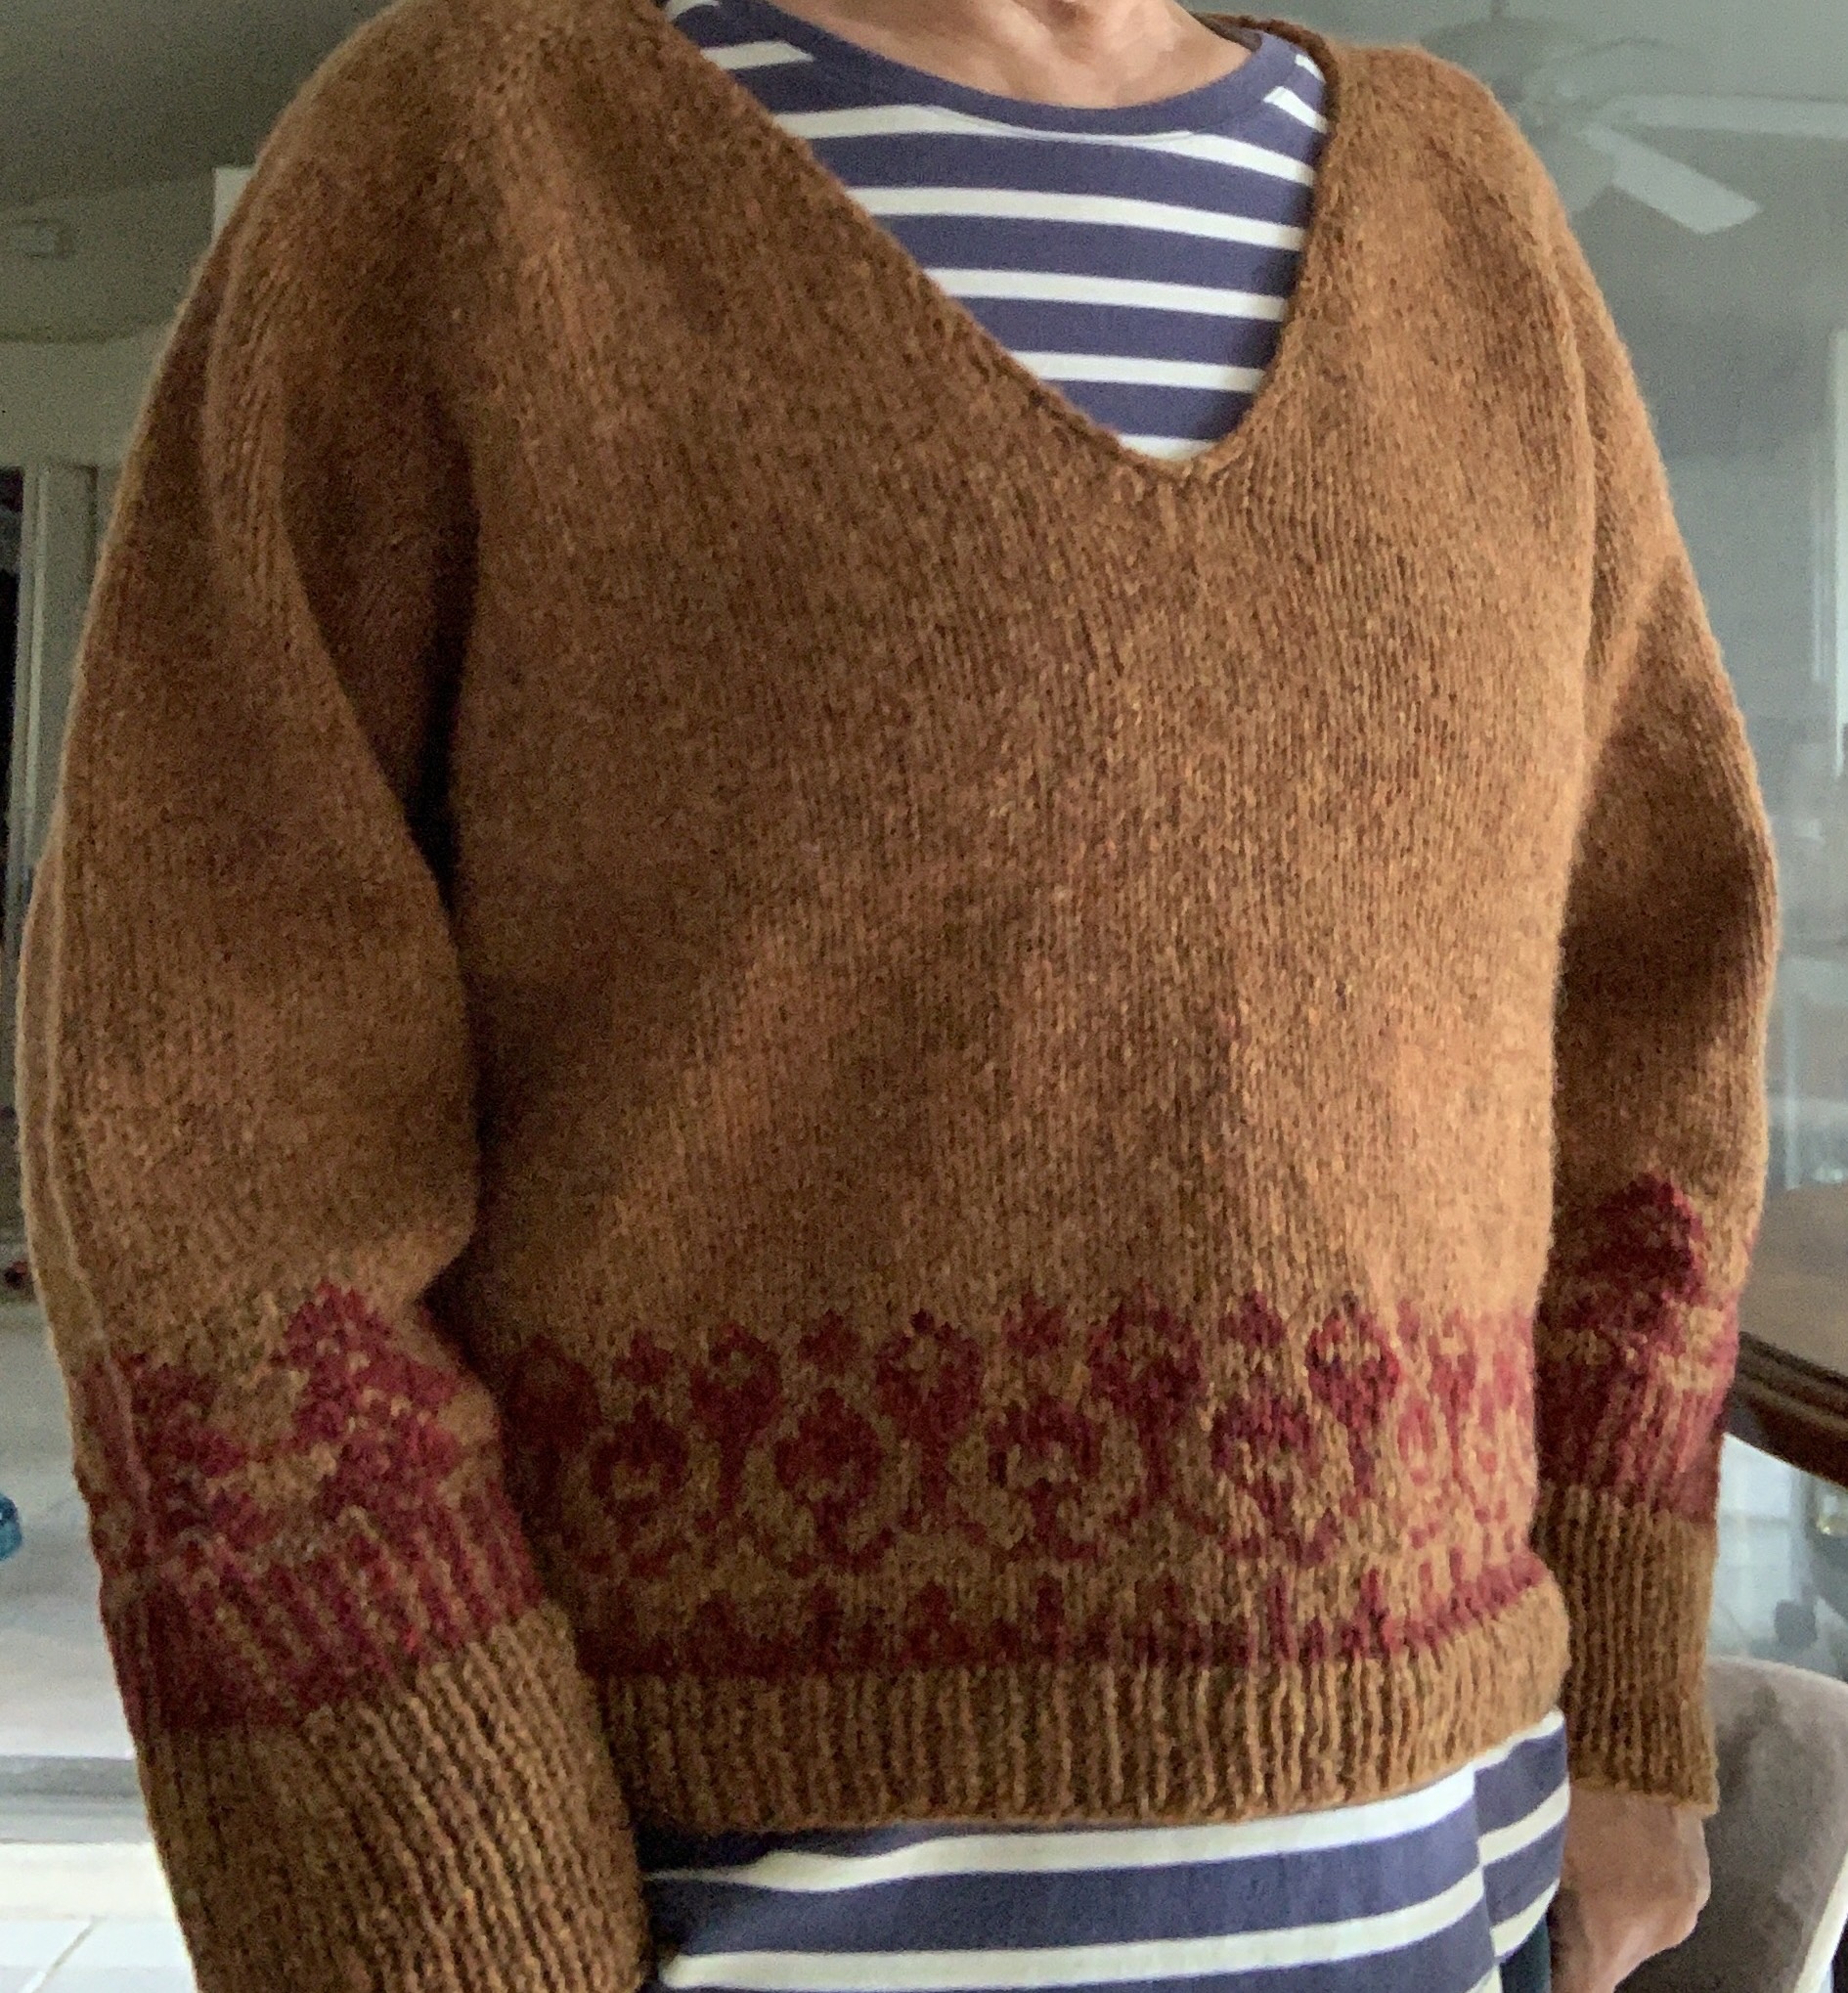
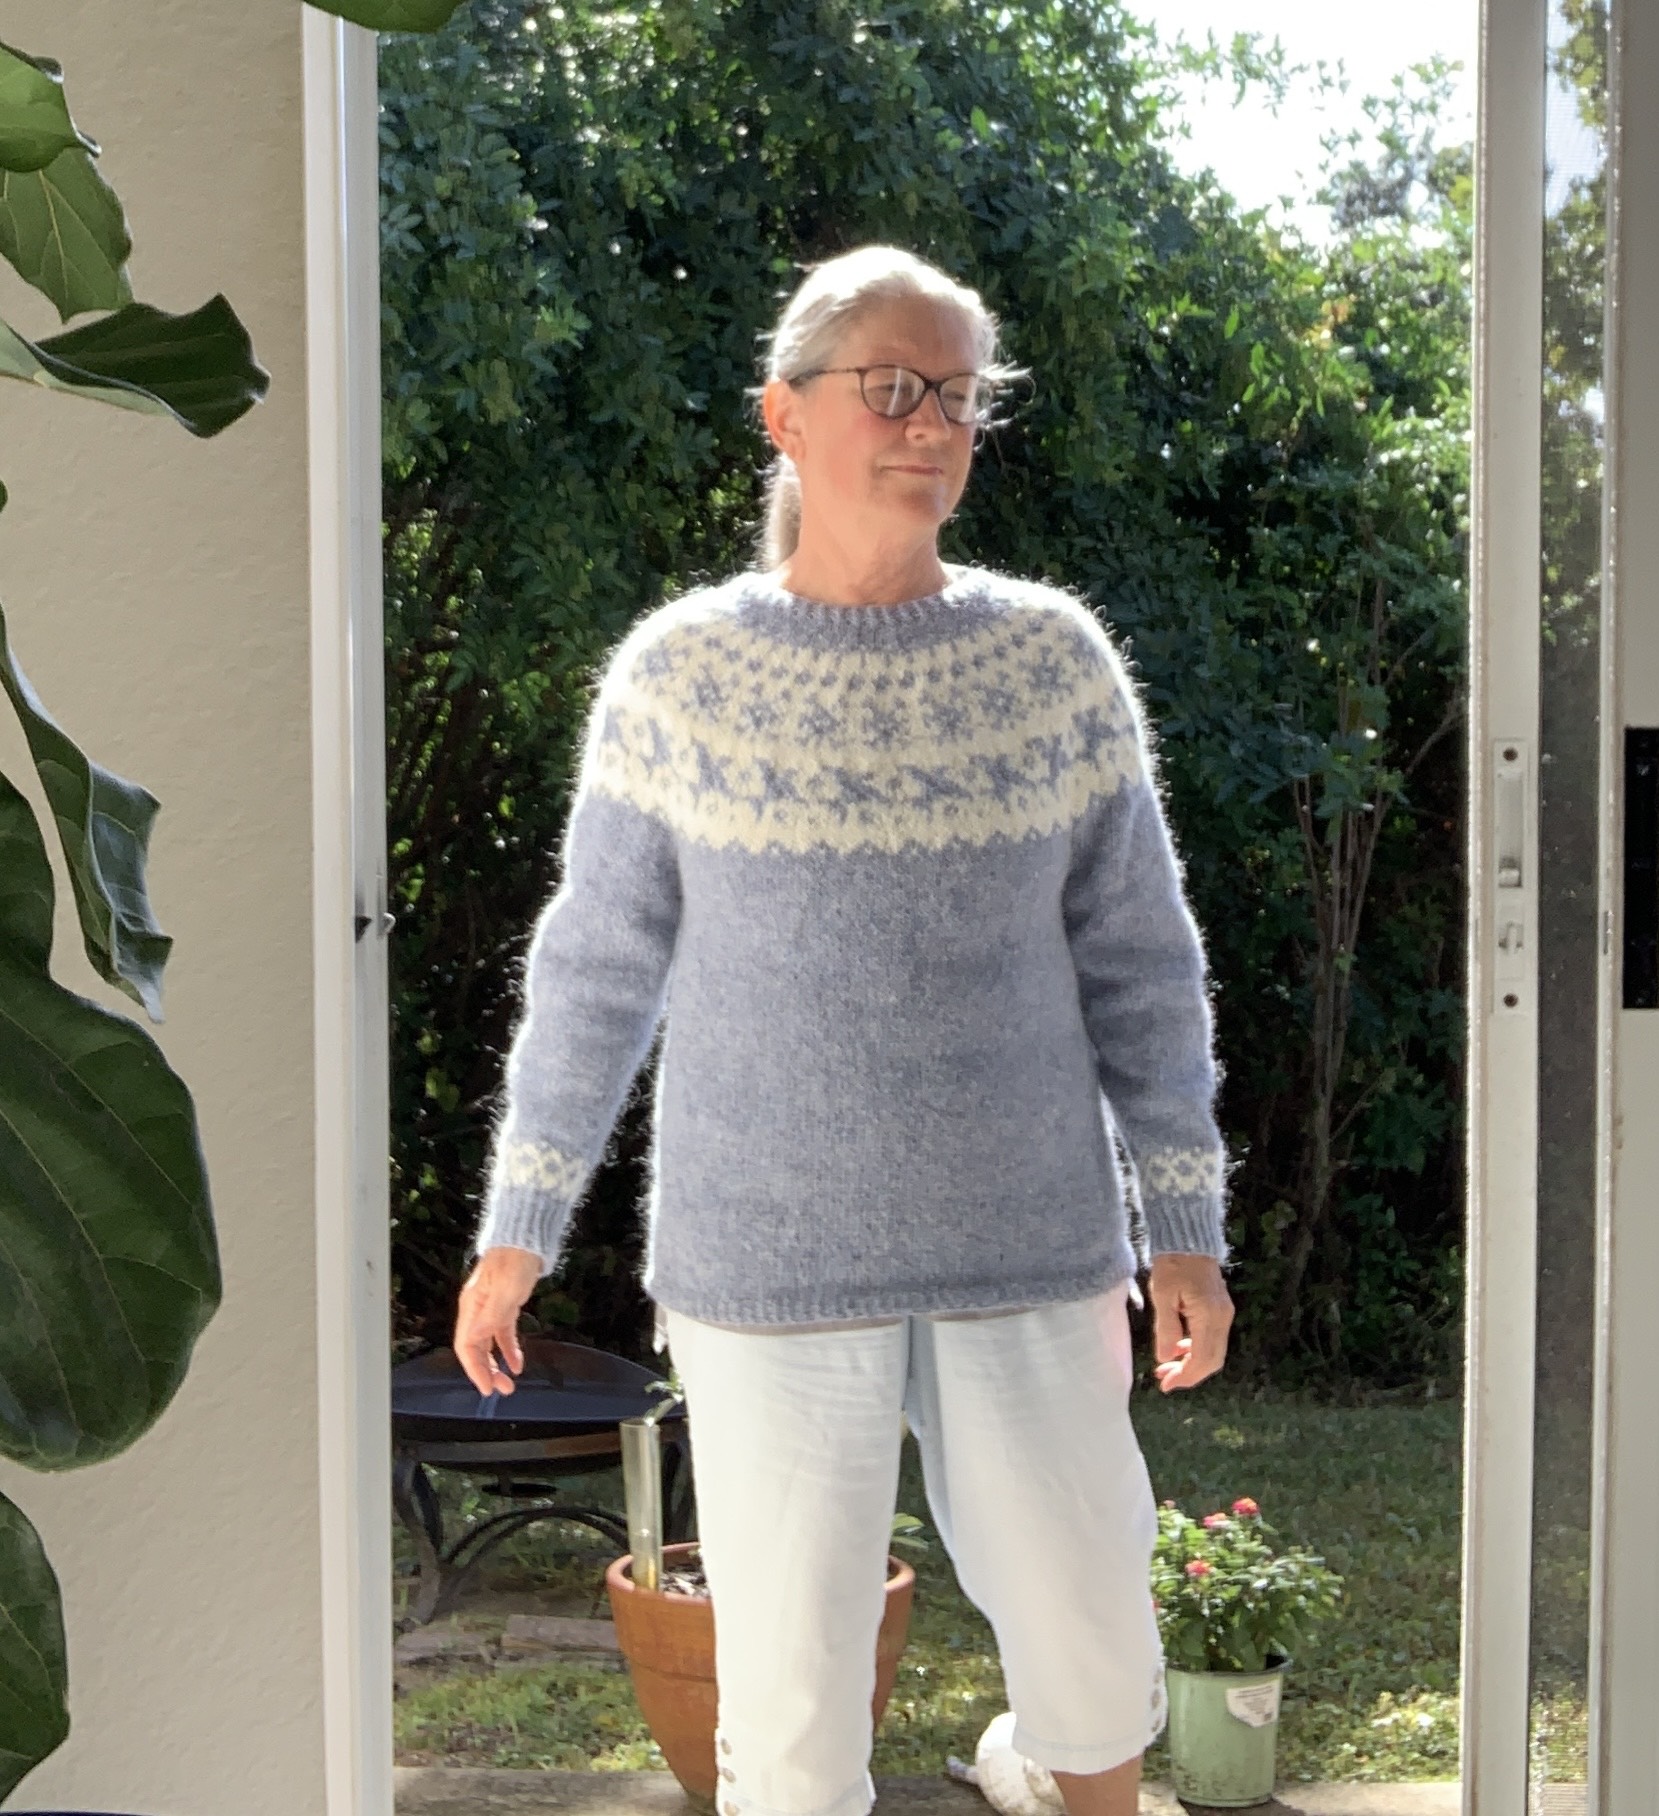
January 7th and the sweater is finished! I took some photos before all ends were woven in. Now, for the wash and blocking. But before all that I would say the pullover is a great success.

I’m very bad at keeping track of the amount of yarn I used, so I can’t list it here. I had one ball of the hand-spun and it was plenty for all the colorwork with some left over. I have a small bit of the Rauma left as well, so my calculations worked. I probably used around 1,100 yards of Rauma.

This pattern shows the sweater as being more cropped, which does not work for me. I added a few more inches. Thevlength is perfect at 14 inches from underarm to bottom.

See my other Jenn Steingass sweater “Meadow Moon” here.


Please Continue Reading

Lots of Changes This Year

Writing a blog, sharing photos, and doing research and making links takes time. Lately I don’t think the time spent doing all that is worth enough to continue. I have stopped writing my gardening blog, and downgraded my…

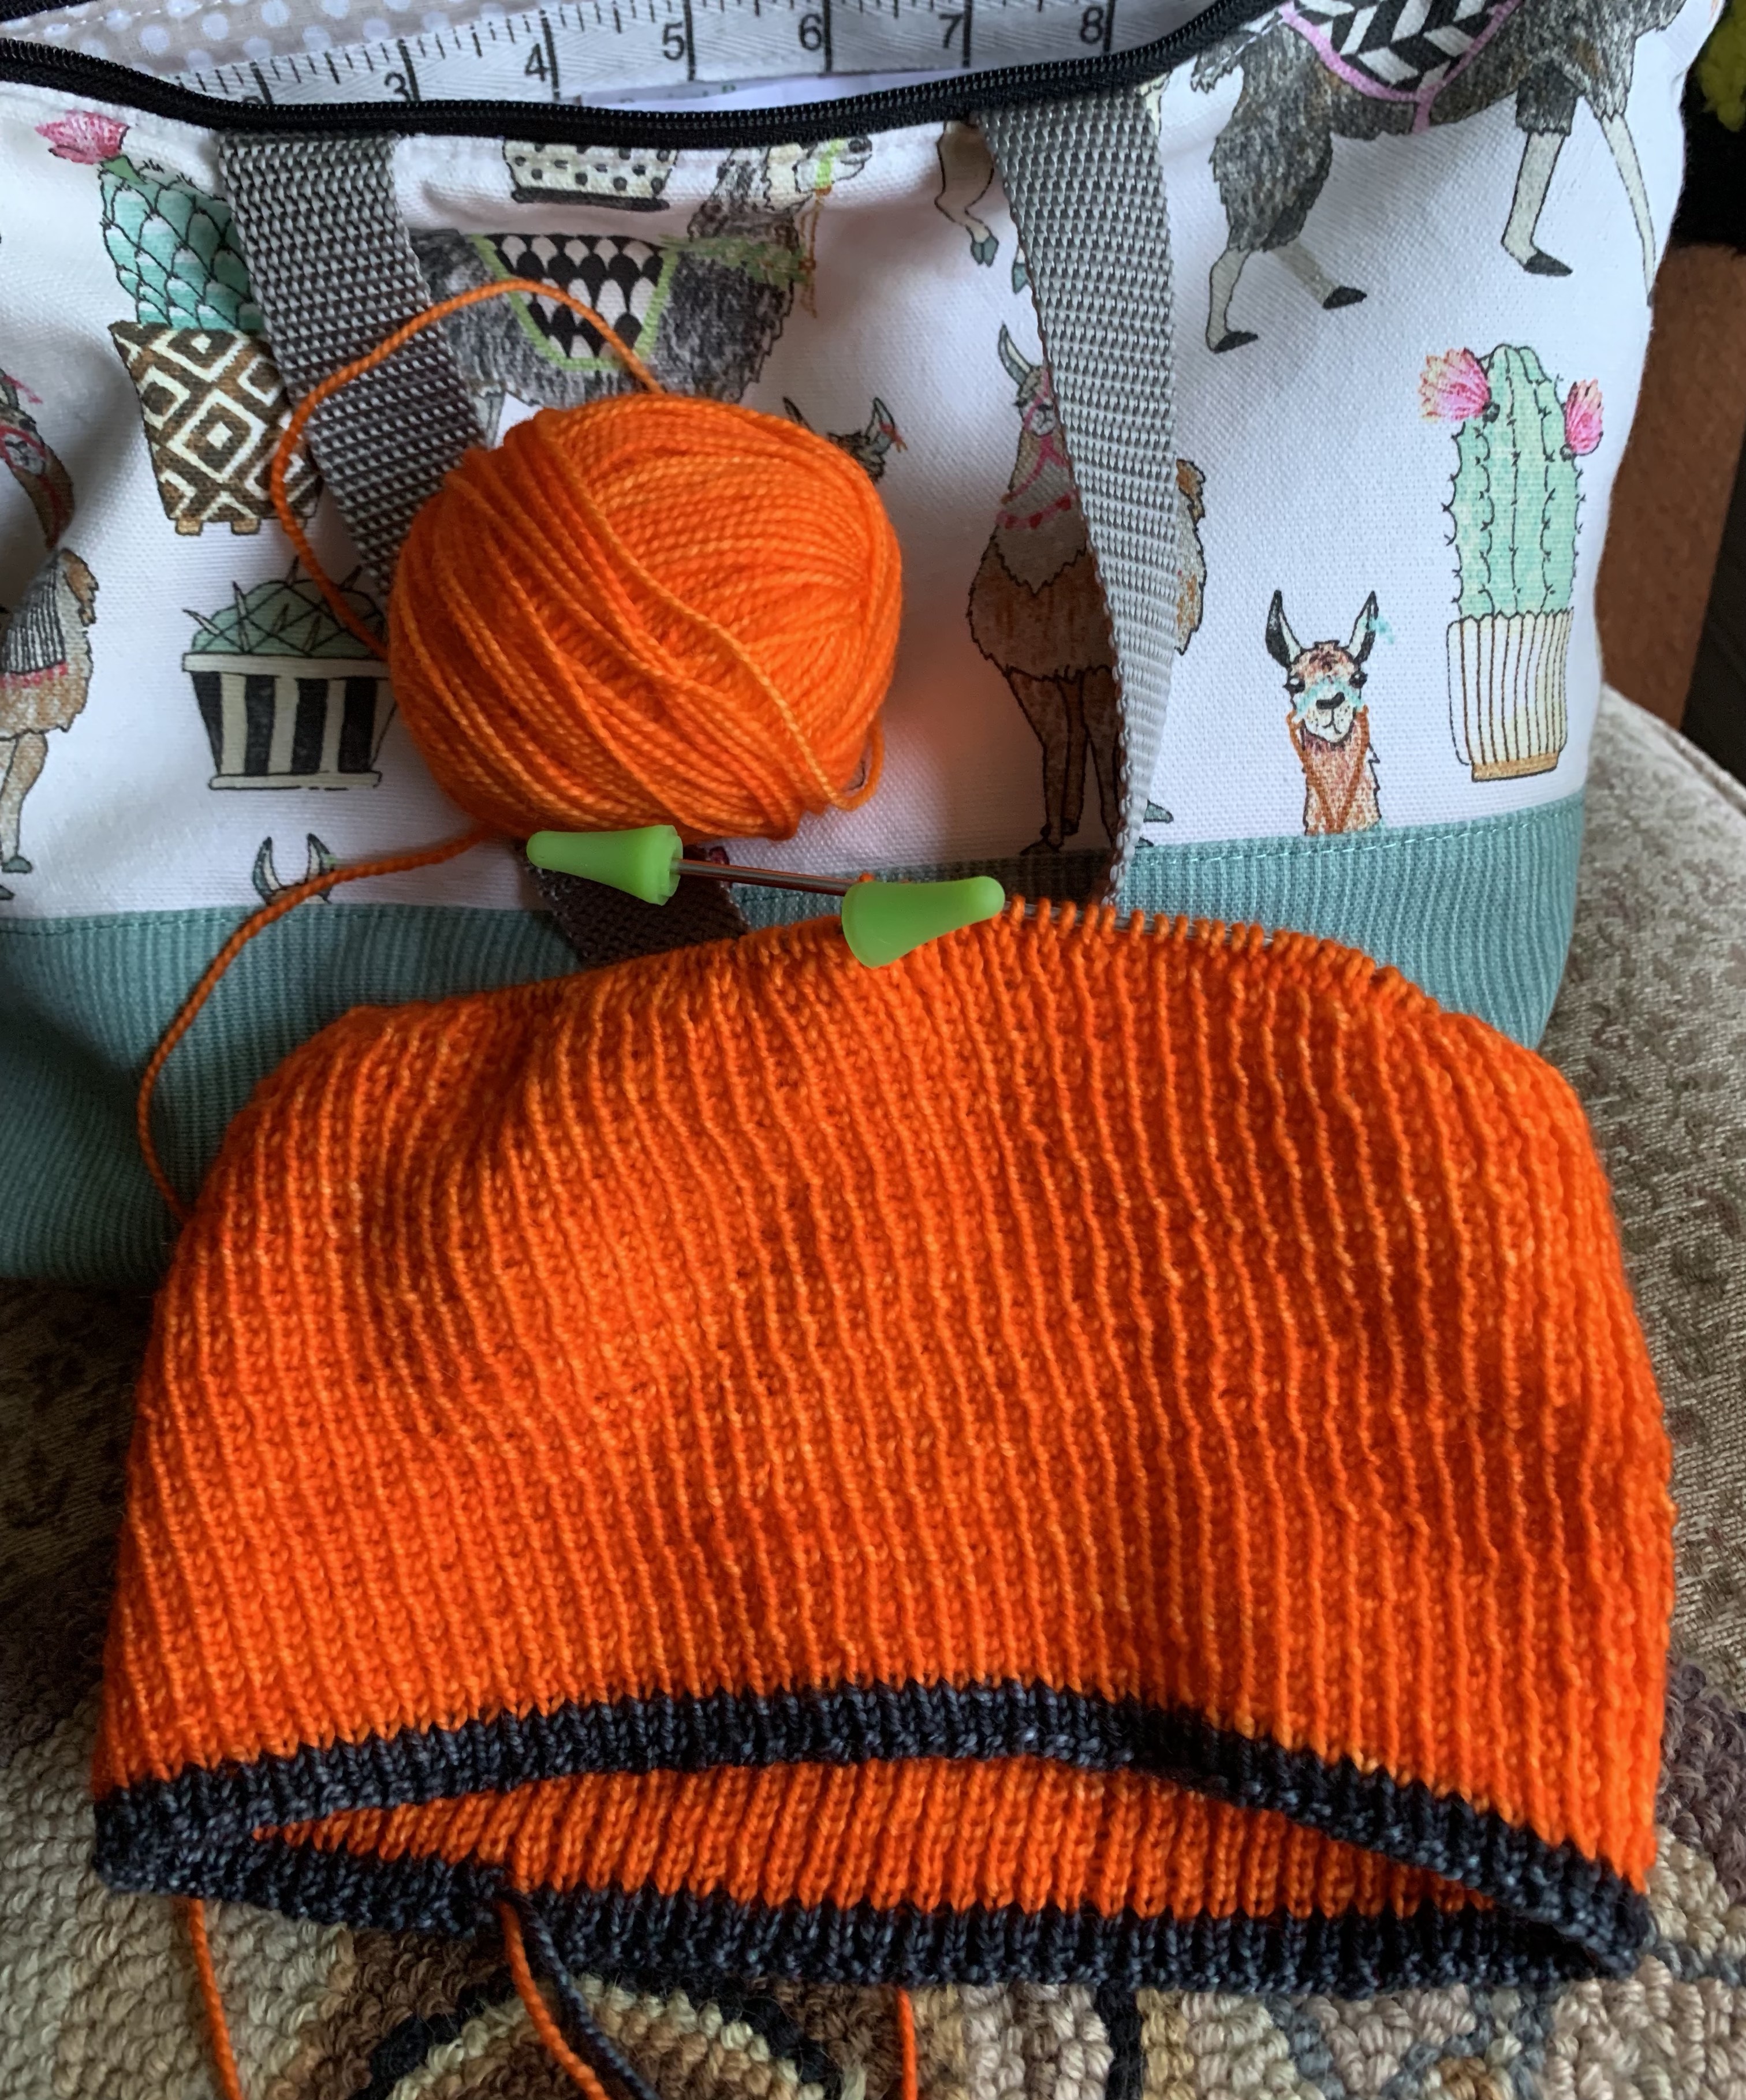
Knitters and Our Many Projects

How many projects do you have on your needles? It is not uncommon to find that fellow knitters have many things going at once.

Cumulus Blouse, My First V-Neck Sweater Knit

The reason I chose the Cumulus Blouse was the v-neck construction. I thought I would use a heavy yarn instead of the designer’s choice, but the pattern really wasn’t written for wool. I ended up with something a little different.

I’ve been dealing with being sick from Covid for about a month now (July 2022). Simple knitting is about all I’ve done while sitting in front of the television. Most days I couldn’t get off the couch and took a few naps off and on. I’ve been pretty miserable. I finished the Honey Cowl #3 and did a lot of round and round knitting on my orange watchcap. I even sat outside one morning and did a little knitting on the striped sweater which I eventually finished.

stranded knitting with red yarn
Knitting Cumulus

Now I am ready to begin a new sweater and I want a v-neck. My choice, in the end, was the Cumulus Blouse by PetiteKnit. I’ve been eyeing her sweaters on Instagram for a while now. They are very cute but she likes to knit holding two yarns together, and the Cumulus is no exception. It calls for two strands of Mohair type yarn held together and knit with a size 7 needle. I don’t plan to do that, so I have named my version the Cumulus Sweater.

Any time you must use two strands of yarn together in a sweater the cost of knitting that sweater doubles. Also, I am not a huge fan of Mohair fuzzies. I plan to use some Harrisville Highland wool I’ve had for a bit. Her little sweater is not something that would look good on my body either!

Cast-On Day

Today (July 6th) I did my cast-on and set up the raglan increases. The cast-on row ends up being the back of the neck area and then the increases are made to expand the shoulders and make the v-neck front. I’m not crazy about “make ones” and there are a lot of them in this pattern. Also, every other row is a purl row – so there’s that. That will change once the body is joined in the round.

Cumulus sweater in wool

I am also knitting from a cone for the first time. Cones generally save money because you get a lot of yarn for much less than a normal few skeins of yarn. I honestly can’t remember where I bought these cones, but I have two in this color as well as an extra normal skein. (I ended up using nearly all of both cones. Without using that red contrast color, I would have needed more than the cones to finish this sweater.)

I made a mistake right off the bat when the pattern said to set up the markers. I knit across the row to add ring markers when really I should have simply added attachable markers along the needles. So I had to purl back across and THEN begin the four row increases. Because of this, I have two extra rows of knitting.

Cumulus sweater beginning the knit

I’ve looked through the entire Cumulus Blouse pattern and the designer calls for an i-cord bind-off with decreases. And then the neckline is done in an i-cord, but without the decreases. This was confusing. She directs knitters to her website with a Petite Knit videos page and after searching, found the i-cord bind off under the section “Tips and Tricks”. Once I watched the video (which is not in English) I realized that the decrease part of the bind-off is the k3 together part, so that will be left out when doing the bind-off around the neck. Great, I’m all set! (Actually, I did this differently with fewer stitches because my yarn was heavy.)

I do not plan on doing an i-cord bind-off for my body and sleeve cuffs as my yarn is not mohair. A normal ribbing will work fine – going down a needle size to a 6.

I am ready to continue on with my new sweater knitting project.

Now that I have done most of the V part, I am re-checking my gauge. My gauge is good. Onward!

Cumulus v-neck sweater knitting
Knitting the body after separating the sleeves

I finished off the neckline before I finished knitting the sweater. Because my yarn is stiffer, I only did a cast-on of 2 for the i-cord bind off, and knit from there with a k1, k2togtbl. Now I could try the sweater on to see the v-neck, and it is low. For this type of sweater, it doesn’t matter as I would have a shirt on underneath.

I’m not real happy about my neckline. It is puckering a bit and there is a tiny hole that I had to close up in the end. That is all on me and my lack of skills.

Colorwork in red yarn (Brooklyn Tweed Shelter – color “Long Johns”) was added along the bottom of the body. I went up to a size 8 needle for that. Then, I did the ribbing in size 7, but I wish I had used a 6. I may go back and redo that ribbing. (I did.)

One sleeve is done. I only did a total of 7 decreases down the sleeve. Used a size 8 to work the trees, then decreased for five rows doing k1, k2tog (BOR) and SSK, k1 at end of round, while knitting one brown and one red around.

Both the flowers and trees patterns came from Fair Isle books I have.

With 60 stitches I began the ribbing using size 6 DPNs and made the cuff long enough to roll up.

Re-doing the body ribbing

I have finished knitting the Cumulus sweater but have decided to rip out the body ribbing. It will be done over using a size 6 needle (originally it was knit in a size 7). I ended up adding a bit more red before the ribbing.

So the Cumulus sweater was officially done on September 8th. It took me almost exactly 2 months to knit – between knitting on other projects along the way. It has been washed and is drying in the spare bedroom. Then I will get a photo of me wearing it.

The pattern was very easy to follow and straight forward to knit, but I did not do the bind-offs the same as the pattern directions. I also did not hold two light weight yarns together.

My sweater is quite roomy and comfy. If I ever did knit this pattern using the type of yarn suggested, I would knit the Medium size – one size smaller. My gauge was correct, and I checked it twice.

You can buy the Cumulus Blouse pattern from PetiteKnit on her Ravelry page. It is very pretty when knit in light weight yarn, and if you have the body for it – go for it!

V-neck sweater with colorwork in worsted wool
Done knitting, before the wash

January Photos


More Pattern Reviews and Stories From the Blog

Heading Into Summer – Four Projects On the Needles

Here’s what I am currently knitting. A couple of easy, free patterns, as well as a hat and sweater.

Because I live in a climate that is seldom considered to be “cool”, I knit with wool year round. I’m not sure what other knitters do, but this is the time of year when all the big yarn sellers come out with cotton, linen and silk yarns and showcase knitting projects for lightweight tops. I really don’t pay much attention to that because most “summer” projects are still too hot to wear here in central Florida.

Currently I am finishing up four knitting projects I have been working on regularly. I like to have a variety of knitting going at once.

The Hidden Gems Shawl

For a while now I have avoided knitting “shawls” because I never wear them. I would love to, but in this hot and humid climate the last thing I want is something around my neck. But, when I saw “Hidden Gems” knit up in hands-spun yarn, I thought it was a beauty and it might be nice to have one.

Hidden Gems free shawl pattern
Hand-spun shawl / scarf

The shawl is more of a scarf in the shape of an elongated set of triangles – larger in the middle coming to points on each end. It is a free pattern, and could be knit using any type of yarn. This pattern would be great for a beginner knitter. It is mostly garter stitch with a few other stitches that would be good practice. You should know how to knit front and back, slip, slip knit, and knit 2 together.


The Orange Slouchy Hat

I have knit this slouchy hat in light blue already. It is a tedious knit that seems to take forever and that makes it great as a take-along project AND becomes a very lovely everyday hat. I have mostly been knitting on this hat while traveling. I no longer have a car of my own, so I ride as a passenger everywhere. It is perfect for knitting this simple 1×1 ribbing.

orange hat knitting

The Honey Cowl

The Honey Cowl is another simple (and FREE) pattern that is perfect for take-along car rides, or TV knitting. This is my third Honey Cowl and it is another good pattern for a beginner knitter to try. Because stitches are slipped, this is a faster knit.

Honey cowl knitting Mrs. Crosby yarn

The Lopi Sweater

This sweater started as a vest. The vest directions were hard to understand, mainly because I have never knit a vest. After I knit the body part of the “vest” I had to switch to making it a sweater. The whole thing was pretty much made up as I went along.

As I write this the pullover is nearly finished. I mainly have weaving in of ends, washing and blocking left. There is no pattern for this, but I followed stitch counts (mostly) from Farfuglar.

Yoke section of Lopi wool sweater
Yoke patterning of the Lopi Sweater

The sweater is nearly finished, and once that is done with I will look for another sweater to knit. I already have yarn set aside for two patterns, so I will probably begin one of those. The simplicity of the hat, cowl and shawl patterns make them perfect for occasional knitting and there is no hurry in completing any of them.

Knitting Farfuglar “Migrating Birds” Icelandic Wool Sweater Pattern

This new sweater pattern is from the Lopi 40 book which I bought along with some Lettlopi yarn recently. I want a light blue sweater with white accents and Farfuglar is the pattern I chose. It means “migrating birds”. The sweater shown in the book uses my same choice of colors (air blue and white) as I chose, but in the opposite way. The yoke can also have more colors in another version.

Lopi 40 is full of Icelandic designs knit with Lopi wool and apparently it is one of the newer books.

This Farfuglar pattern, and other patterns in the book, can also be purchased separately. (This link goes to Ravelry.)

The Farfuglar Learning Curve

I purchased bunches of the Lettlopi yarn variety which is aran weight. The first pattern I chose was one by Jennifer Steingass. After beginning the sleeve twice, and not being happy, I gave up and moved on. That is when I chose this pattern from the Lopi book: Farfuglar, or “Migrating Birds”.

I knit a flat gauge swatch which matches the required gauge for the sweater. I know that garments knit in the round should have swatches knit in the round, but oh well, I didn’t do that.

The pullover is knit bottom up. I have begun knitting one of the sleeves and really like the way this yarn looks and feels. The pattern uses the same two colors I chose, white and “Air blue”, but the sample sweater is mainly white with blue accents whereas mine will be the opposite. The colorwork chart is in five colors because there are two ways to knit this sweater. As I knit the chart I will convert it to two colors in my head.

The patterns in Lopi 40 are Icelandic and measurements are given as centimeters. Needle sizes are also mentioned in mm except at the beginning of the pattern where they give the US size also.

Increases and Decreases

After the sleeve ribbing is finished, we are told to increase around evenly to end up with correct stitches for the colorwork. I had to go from 42 stitches to 50. I don’t know why, but this was hard to figure out. I will have to do something similar at the neckband except it will be decreases! Oh Boy….

Had to decrease at the neckline from 100 to 84 stitches evenly around. This strained my brain, but I did it.

Learning New Things

Two new (to me) types of decreases are also mentioned: KRPR (right leaning) and SKP (left leaning) – both links go to pages at the New Stitch a Day site where videos show the process.

I’m not a super experienced sweater knitter, but I have finished a few. Most have been top-down knits, but this is a bottom up. The underarm stitches need to be grafted together when finishing, which I’ve never done, that I recall. The pattern doesn’t say how to accomplish this, but I found this page at Laura Chau that explains Grafting Underarm Stitches. It uses the Kitchener Stitch, which I have done.

Joining Sleeves to Body – Notes for the Inexperienced (Me)

I’ve only knit one other sweater bottom up which means the sleeves and body must be joined. It’s not difficult, but for me, drawing out a diagram while reading the directions was helpful. I got a better picture for how this would happen. I also placed a pink marker on the front section so I would know front from back.

I’ll keep this for future reference and noted needle sizes and other hints to the paper.

Notes I made: After finishing the second sleeve, leave stitches on the needle (I used a 9-inch circular). When beginning to join, I used the longer (body needle) to knit off the sleeve needle. When I got around to the second sleeve, I put those stitches from the holder yarn onto a smaller (size 4) needle and then knit off of it. Once that happens, the whole sweater is now combined into one piece.

Needle lengths: Begin knitting the whole yoke with a 40 inch (The pattern says 32, but I found the longer needle to be easier). Changed to 32 inch farther up, and ended up with 16 inch for the neck.

Four places are on holder yarn and stitch holders for the underarms. Those will be grafted together using the Kitchener Stitch when I’m done knitting.

Now I have begun the colorwork yoke. Some of the yarn carries are quite long, so knowing how to catch floats is definitely necessary for this design. I was very excited to see the birds emerge!

Yarn Used For Size L

  • Blue Yarn total used: 8 skeins – nearly every bit of 8, so 9 is better just in case
  • White Yarn total used: less than 2 skeins

October 29th and the Sweater is Finished! See My Photo Shoot Below

At this point I was still trying to decide if that high front neckline would be okay. Without any type of short rows, the front and back of this one are exactly the same. This makes the front neckband ride on my neck. I would probably have a shirt on underneath, so I decided I could live with the neck as it is. Also, I didn’t want to risk ruining things since I am not experienced at changing knitwear designs!

The hat photos were taken in “winter” when the temps dropped to the low 40’s here in Florida. I went out to feed the birds bundled up in my woolies! (Triple-patterned watchcap, mittens, Woolfolk cowl) All other photos were taken before I washed the sweater.

I will be writing a separate blog post about how I finished off this sweater.


Learning About Lopi Wool

The sheep who provide this wool live in the harsh Iceland landscape. If their wool can keep them safe and warm during winters spent outdoors, certainly the wool in your Icelandic sweater will do the same. The yarn comes in lots of pretty colors (if you can find them in stock!) as well as natural colors such as white, gray, tan, brown and black. It comes as heathered, solids, and tweeds in various weights, including unspun yarn. The yarn is a combination of insulating and water repellant, not to mention very warm indeed! If you are not a knitter, the sweaters can be purchased already knit up.

After knitting with the Lettlopi, I found there were quite a few knots to deal with. More than most yarn I knit with, but maybe that is just the nature of the yarn.

I don’t yet have a sweater or other garment to try on so I can’t comment on the scratchiness of this yarn. Some people think it is exceptionally scratchy, but many people say the wool softens over time and gets better and better.

Finding Lettlopi and Alafosslopi Wool to Buy

As is unfortunately true these days, finding yarn can be challenging, and especially in the popular color ways.

The Lettlopi (aran) and Alafosslopi (bulky) yarn in my stash has come directly to me from Iceland and is from the Istex company. It was ordered from The Icelandic Store where they still have quite a few colors in stock. The low price of the skeins, compared to prices in the US for the same yarn, made it worth paying the high shipping rates.

My order of Alafosslopi arrived in four days..!!… and came with a little candy surprise. I have already knit up a swatch and plan to knit the Carbeth Cardigan by Kate Davies, but that plan could change.

For instance, many places in the US have Alafosslopi for around $10 a skein, or close to that price. When ordering from Iceland, each skein is $5.99, which is a big difference, and especially if you need many skeins to knit a sweater. The Lettlopi costs about $5.75 in the US compared to $2.99 each in Iceland.

Webs yarn offers big discounts if large amounts are bought, and the cost can be less in the end, but many of the colors are out of stock at the time of this writing.

More From the Blog

A Simple Sweater With Stripes

My newest knitting project is a simple sweater with stripes. A link to the pattern page on Ravelry is further down the page. This one is advertised as a good project to…

Keep reading