There is a lot more to knitting than picking up a pair of needles and choosing a pretty yarn. If you have done any amount of knitting yourself you will understand. I have learned a lot as I’ve knit various projects over the past year and a half.
One aspect of knitting you will undoubtedly come across if you knit mittens, socks or even sweaters, is the Kitchener stitch. It is usually done with a tapestry needle to either close up a mitten top (see below), sock toe, or stitch something together seamlessly. (See my Playdate Cardigan page also where I used this stitch on shoulder seams.)
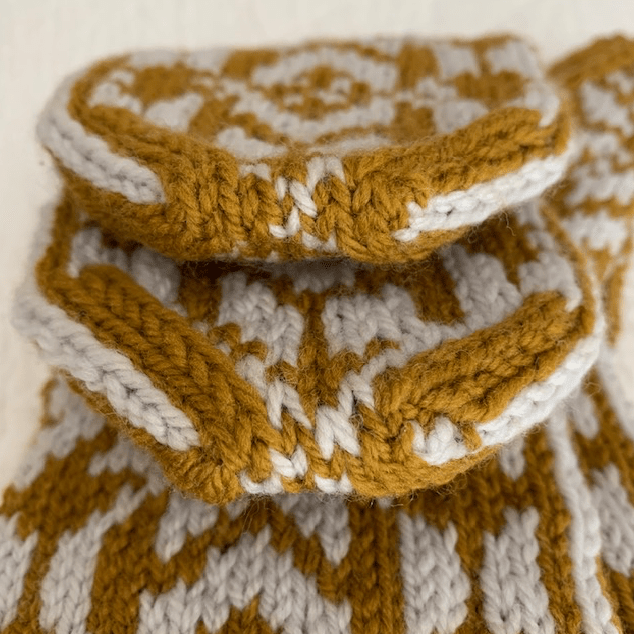
Glissade mittens
Basics of the Kitchener: End your knitting with even number of stitches on each of 2 needles. Do a set up stitch, and then begin the Kitchener. It weaves both sides of the project together without making a seam. If you look at my mitten tops, it appears that my stitches flow over the very top of the mitten like magic!
I have not done the Kitchener stitch often, but there is a good YouTube video by Very Pink Knits which has helped me to understand it better. She has a little mantra she says while stitching. She shows it on a sock toe, in slow motion, which is very helpful!
My Glissade mitten tops look pretty good, if I do say so myself. When I first tried this stitch, I practiced on something that didn’t matter.
At first, this stitch drove me nuts. I really hated it, but after practicing, it’s really not that bad. I just have to go slow and pay attention. A lot of videos don’t tell you what to do with the last two stitches, but this video does.
Now, whenever I have a pattern that calls for this stitch, I write that little saying on the pattern itself so I don’t have to go look up the video when it’s time to do the Kitchener.
I found this free pattern called Winter Morning (Link goes to Ravelry) to knit a chunky / bulky yarn headband with a cable. So here are the results and tips I want to share. First of all, my grown daughter has shown interest in this type of accessory in the past, so I believe she will wear it. I’ll make one for myself too because my ears may get cold on early morning winter walks here in Florida.
This is an easy pattern which I knit in 2 hours, and I do like the way it came out. BUT… the cast on, and kitchener stitch took time because I had to look them both up. (See more about the Provisional cast-on and Kitchener stitch down the page.)
Washing: The Madeline Tosh yarn is machine washable so I put it into a zippered mesh bag and washed with my clothes. I took it out to air dry – and the yarn smelled awful… which sometimes happens with treated yarn – but once it was dry there was no smell. It’s ready to give away.
Finished!
Finding the Right Bulky Yarn
I needed to find some good, yet machine washable, yarn because it will be a gift for my daughter. She is a busy woman so I wanted an easy-to-care-for gift. The yarns below are not cheap and come from Peru, South Africa, and Italy. I should get 2 ear-warmers out of each skein of the Mad Tosh. You can find other super bulky yarns for a bargain, but I wanted nice yarn. After I bought my yarn, I found Mirasol Yaya for $5.54 on sale at Wool Warehouse. It ships from England. This yarn is only around 50 yards, and would make one headband, but it’s affordable.
Bulky Yarn That is Machine Washable
After doing much searching online I ordered the yarn shown below and chose the Mad Tosh ASAP in “Cosompolitan” (far right below) to knit the first headband. (I’ve begun a second using the Wool Addicts “Fire” super bulky yarn, in dark gray, and I love it and think it works better for this project.)
Bulky yarn by Mad Tosh, Spud & Chloe, and Wool Addicts
Because I want an idea of which yarn is best for this easy project, I will try all four of the yarns above and do a comparison, which I will share at some point!
“Franca” super bulky, washable yarn
Wool Addicts “Fire” super bulky yarn is very soft
Provisional Cast On to Needle Using Crochet Hook
A provisional cast on means using yarn that will be removed from the project – in this case, at the end of knitting the band. The stitches will be picked up onto the needle and the gray yarn here will be removed. That way both the end and beginning stitches can be knit together to create a nice-looking seam (hopefully).
I’ve included a video by Very Pink Knits to show how to do this because the pattern calls for it.
Casting right onto the needle using a crochet hook.
Once the provisional yarn is on the needle, knit one row. Then, begin the pattern.
Knitting onto the provisional cast on
Finish With the Kitchener Stitch
The worst part of knitting this headband / ear-warmer was putting the held stitches back onto the needle from the cast-on. It has to be done in order to finish with the Kitchener stitch. Once you figure that out, both needles should have the same number of stitches. They will be sewn together.
The Kitchener stitch is something I can only do when watching a video. I still don’t know if the working yarn has to come from the back needle or not. In Purl Soho’s video (below) they use an unattached piece of yarn, so I assume it doesn’t matter. Hold right sides facing out and have the same number of stitches on both needles. Once I get to the end with only one stitch on each needle I wing it because I have yet to see what to do!
For the kitchener stitch you will need a darning needle and long bit of yarn left from the end of knitting the headband. All I can say is watch the video and pause it as you go. I could not tighten up my stitches because I couldn’t tell where my stitches were! Purl Soho is using red on white, but I am not. Just a note: In case you are wondering, it’s helpful to know this stitch if you knit socks and mittens because sometimes you end the toe / fingers section doing this stitch.
In the middle of the kitchener stitch
My kitchener stitch
Changes to Make Next Time
Honestly, I wasn’t too impressed with my stitching (kitchener stitch) and I decided I would knit my next headband with a regular long-tail cast-on and regular bind-off and stitch the ends together. It will be much easier. We’ll see how it looks.
Also, if you know how to do other types of cables, it would be easy to change that part of the pattern. This cable is very simple and I knit with size 13 wooden needles and used a DPN as a cable needle.
Just so you can see that it fits!
Once the band measured around 18.5-19 inches (my daughter has a small head and for myself I would go another inch). I stopped and finished it off. As you can see in my photo above it fits on my gray-haired head. It will look much prettier on my daughter’s head. As I mentioned above, this yarn is not really bulky enough even though it is called “super bulky”. The skein is 90 yards long, so one skein should make 2 headbands.
Types and Cost of Yarn
Here is a list of the yarn I bought and the approximate price per skein (at the time of this writing). Remember that some skeins have enough yardage to make two headbands from this pattern.
Spud & Chloe Outer- $18 (wool and organic cotton – 60 yds, will make one headband)
Manos del Uruguay “Franca” – $36 (114 yards) is super bulky (reminds me of Mad Tosh “Rasta”, except it’s washable) I found some at Richland Street Yarns on Etsy for $26.75 per skein – in limited colors.