New England native, Florida resident. Blogging about boating, beach-combing, gardening, camping, and knitting. Work for Zazzle as a designer since 2008.
One of the first things I knit was a shawl. A shawl can be a very easy project and might be perfect for a beginner knitter to make.
Shawls can be knit in various ways to make a variety of shapes. Most are triangular, rectangular, or crescent shaped. They can be knit from the top down, end to end, or a combination.
Crescent, or Half Moon Shawl Patterns
Because I live in the sub-tropics, I never wear any type of shawl. They can be fun to knit though. My favorite shape is the crescent. A crescent shawl can also be called a “half moon” or “half pi” or “pi shawl”.
Occasionally I come across a nice crescent shawl that I might want to knit one day. A smaller size shawl can often be knit using one (decent size) skein of yarn. That makes them cheap to knit, as opposed to a sweater project. It also gives a beginner knitter some practice on easier stitches, as well as practice reading a pattern.
I have not yet knit any of these patterns, but they are in my list of faves. Choose a wool yarn of some type and use the shawl like a scarf. All links go to the designers Ravelry page where the pattern is sold.
Interisland Shawl, by Donna Smith. Knit in fingering weight yarn, this one has a lace edge that is knit first. Very pretty. Yardage: 437-470 yds / 400 – 430 m
Dutch Tulips, by Alina Appasova is listed as “crescent” but it is kinda triangular too. I like it, so I am including it here. This one is done in various stitches including slipped stitches. Sounds interesting. 2 colors, 800 yards?
The Lone Skein Shawl, by Joji Locatelli, needs 440 yards (402m) so takes one large skein. It is crescent, but asymmetrical (one side is longer).
Slumber Shawl, by West Knits, has been a long time favorite. It is listed as a triangle, but is basically rounded with a wavy edge. It is listed in Stephen West’s Beginner Friendly Patterns.
Shawls I Have Knit – Mostly NOT Crescents
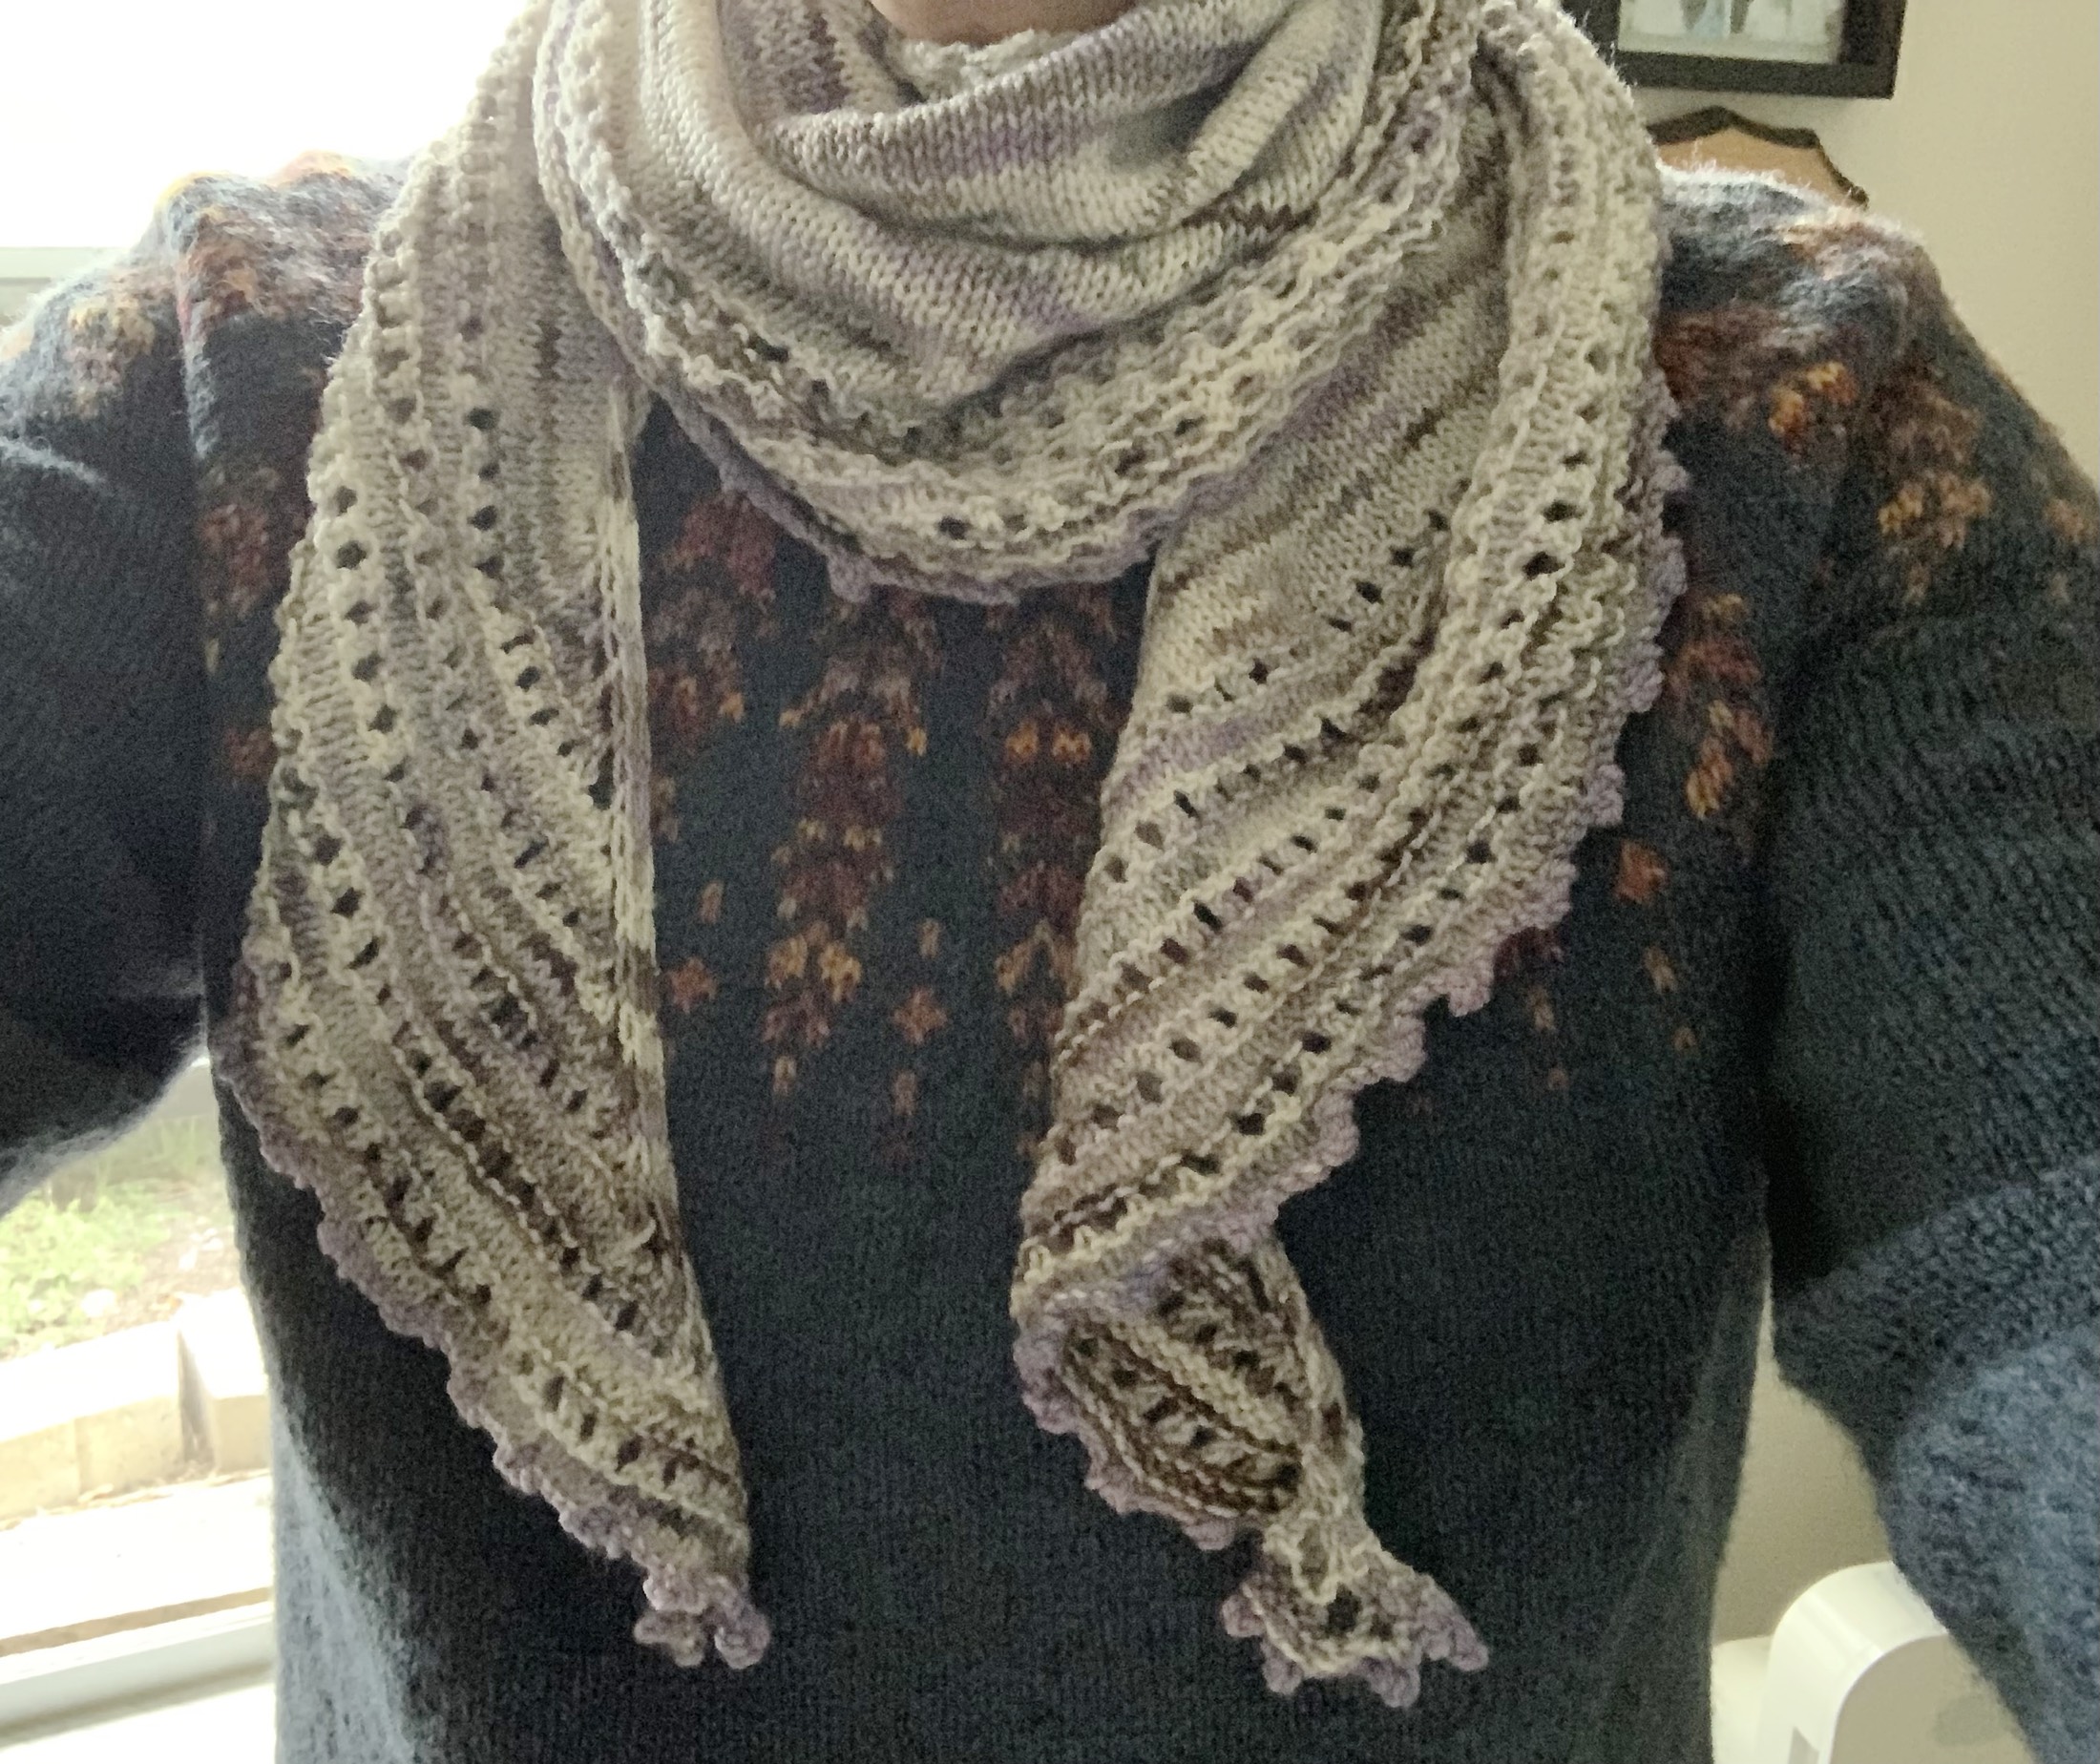
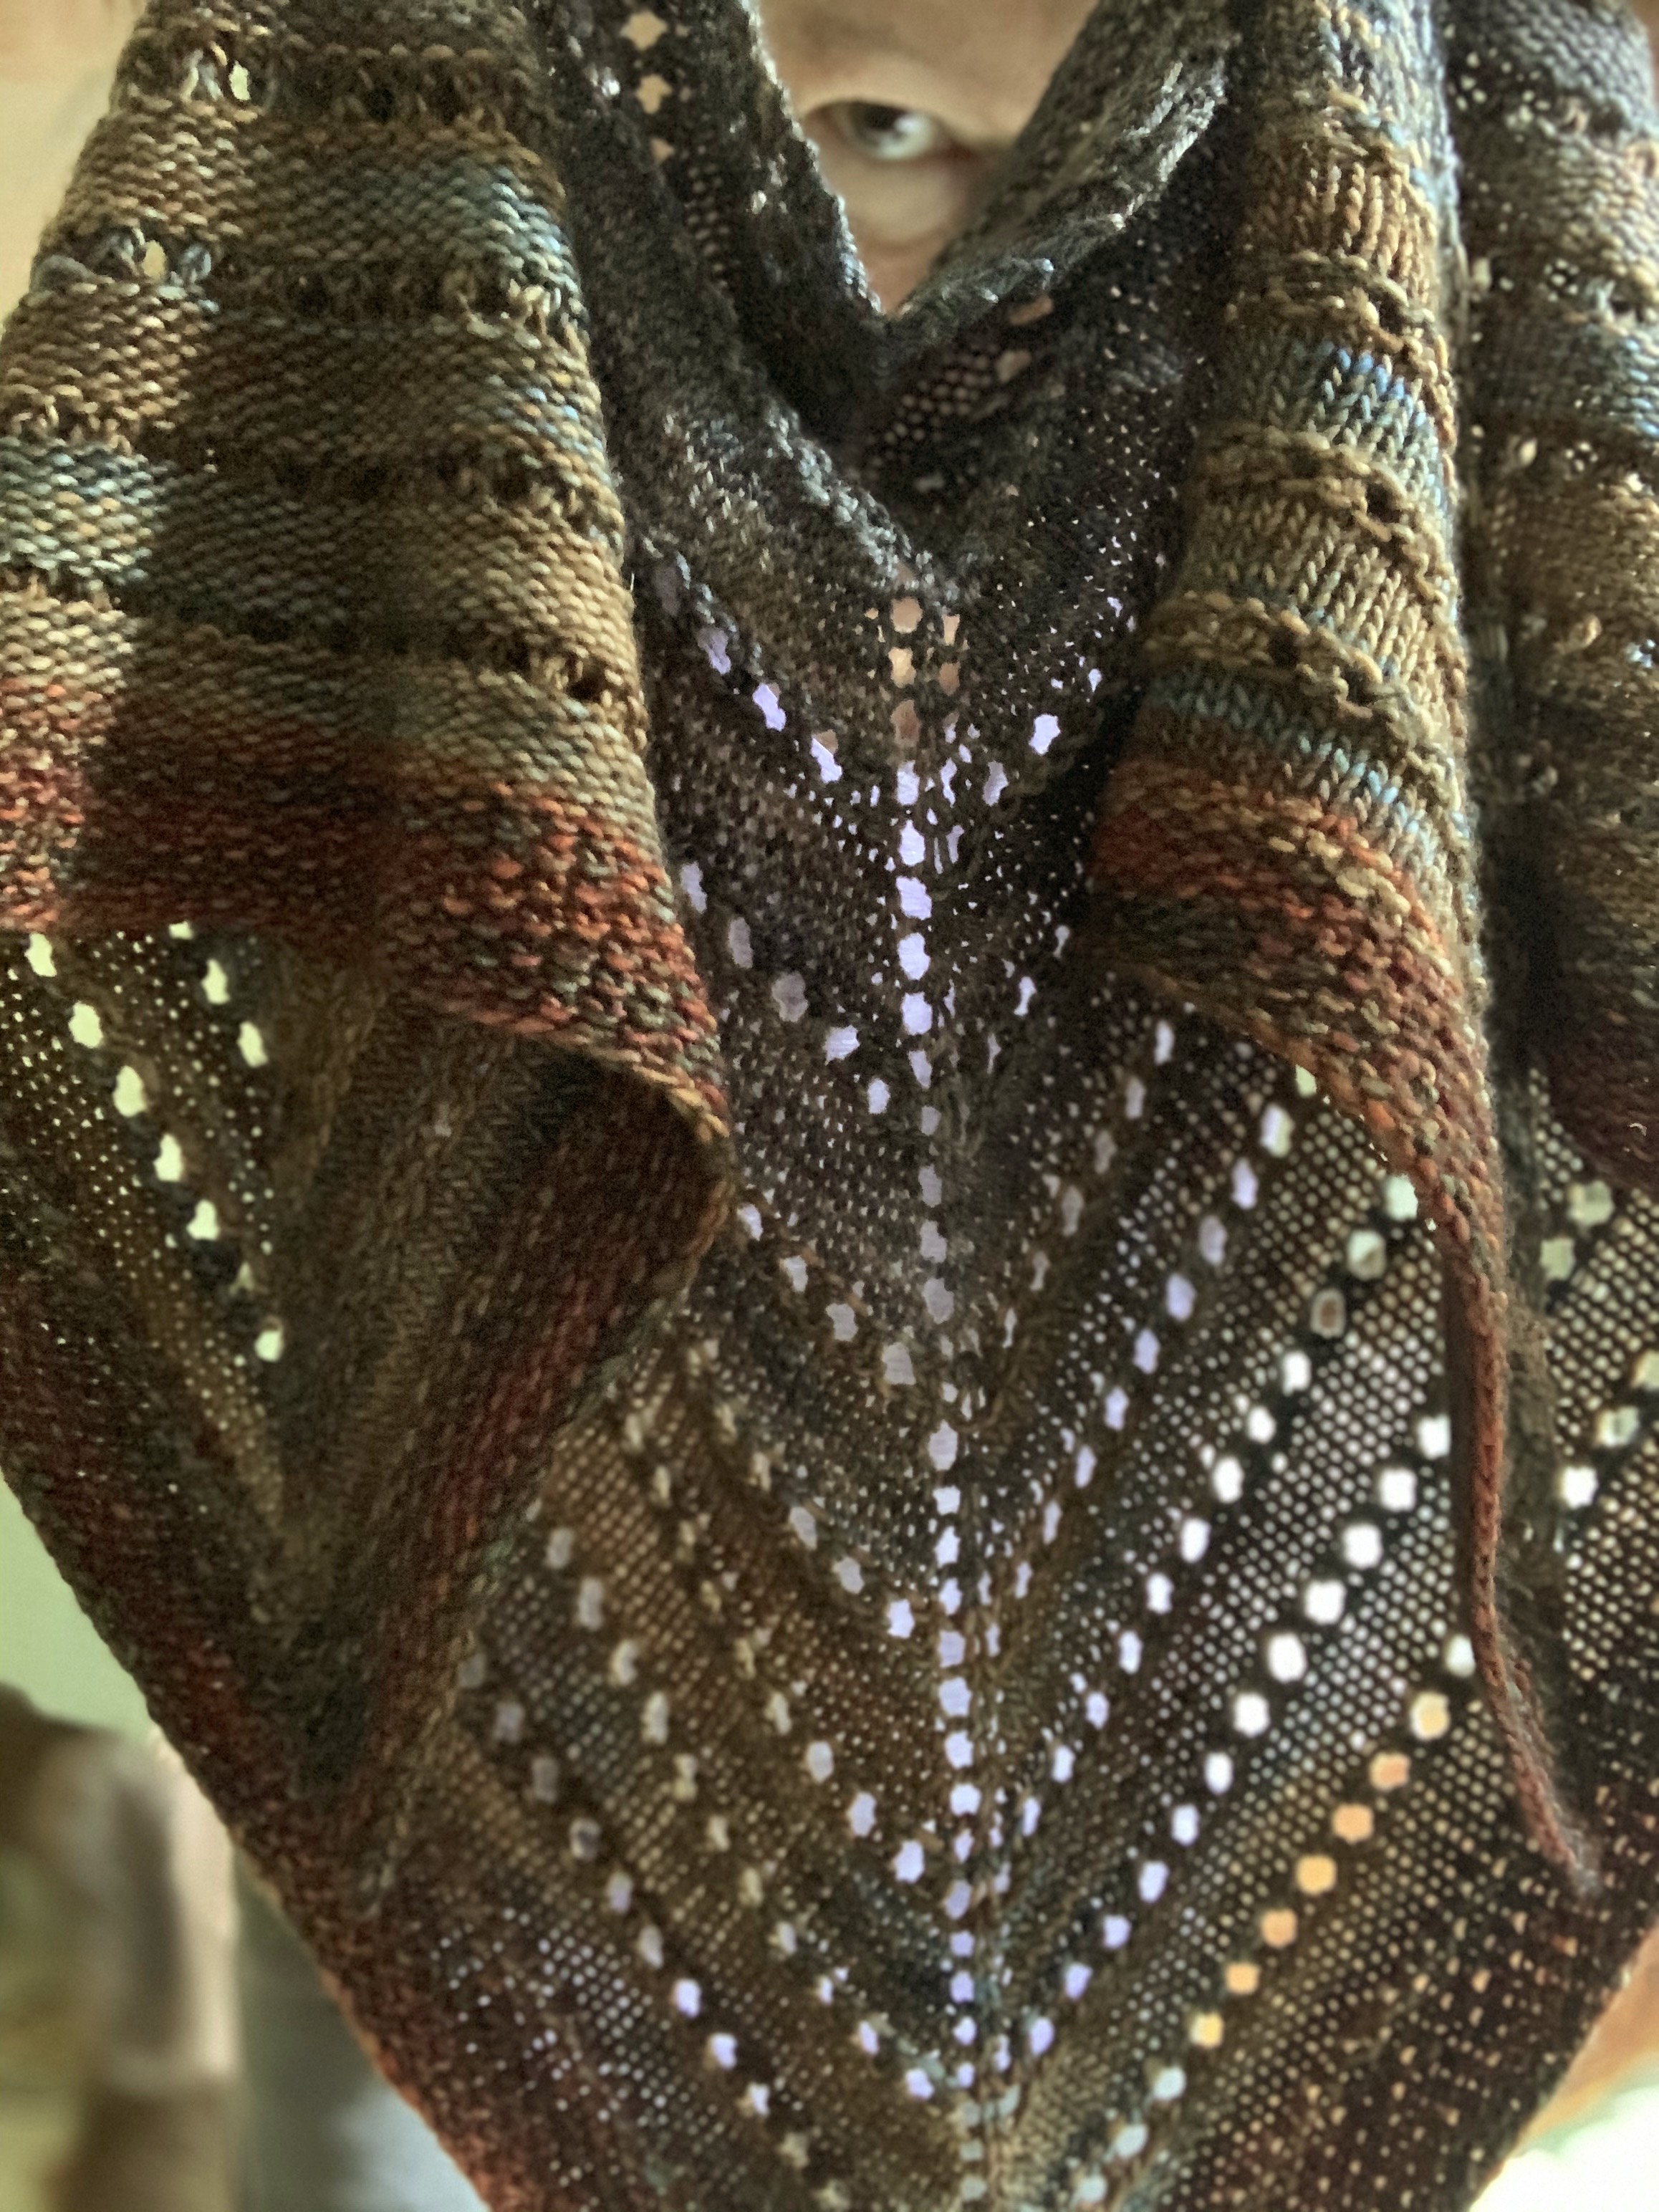
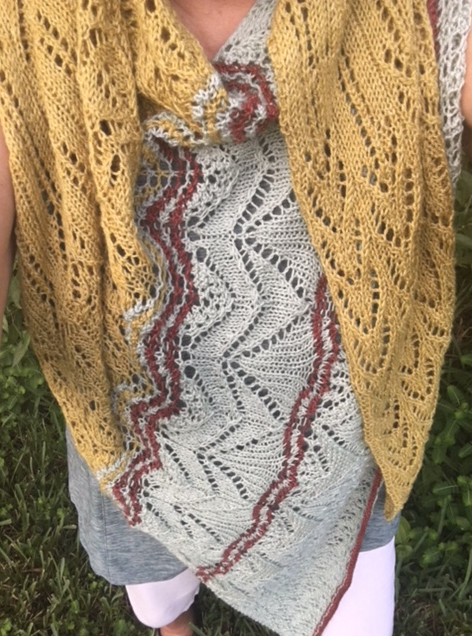
The Spindrift Shawl, by Helen Stewart – link is to her pattern page at Ravelry – was a free pattern (and still is if you sign up for the workshop) and the first shawl I made. It happened to be crescent shaped.
When I began knitting I went for yarn colors that seemed fun to use. Now I am more discerning about yarn type, and colors that I would actually wear! The shape is more important too.
All of the shawls pictured here (except for Vine Pops) were very simple to knit. Vine Pops was a MKAL (mystery knit-along) and I can’t even believe I stuck it out and finished. I was new to knitting, and the shawl had lots of lace. I’ve since decided that I do not like KALs.
The block of photos above shows all my finished shawls. I have worn exactly NONE of them!
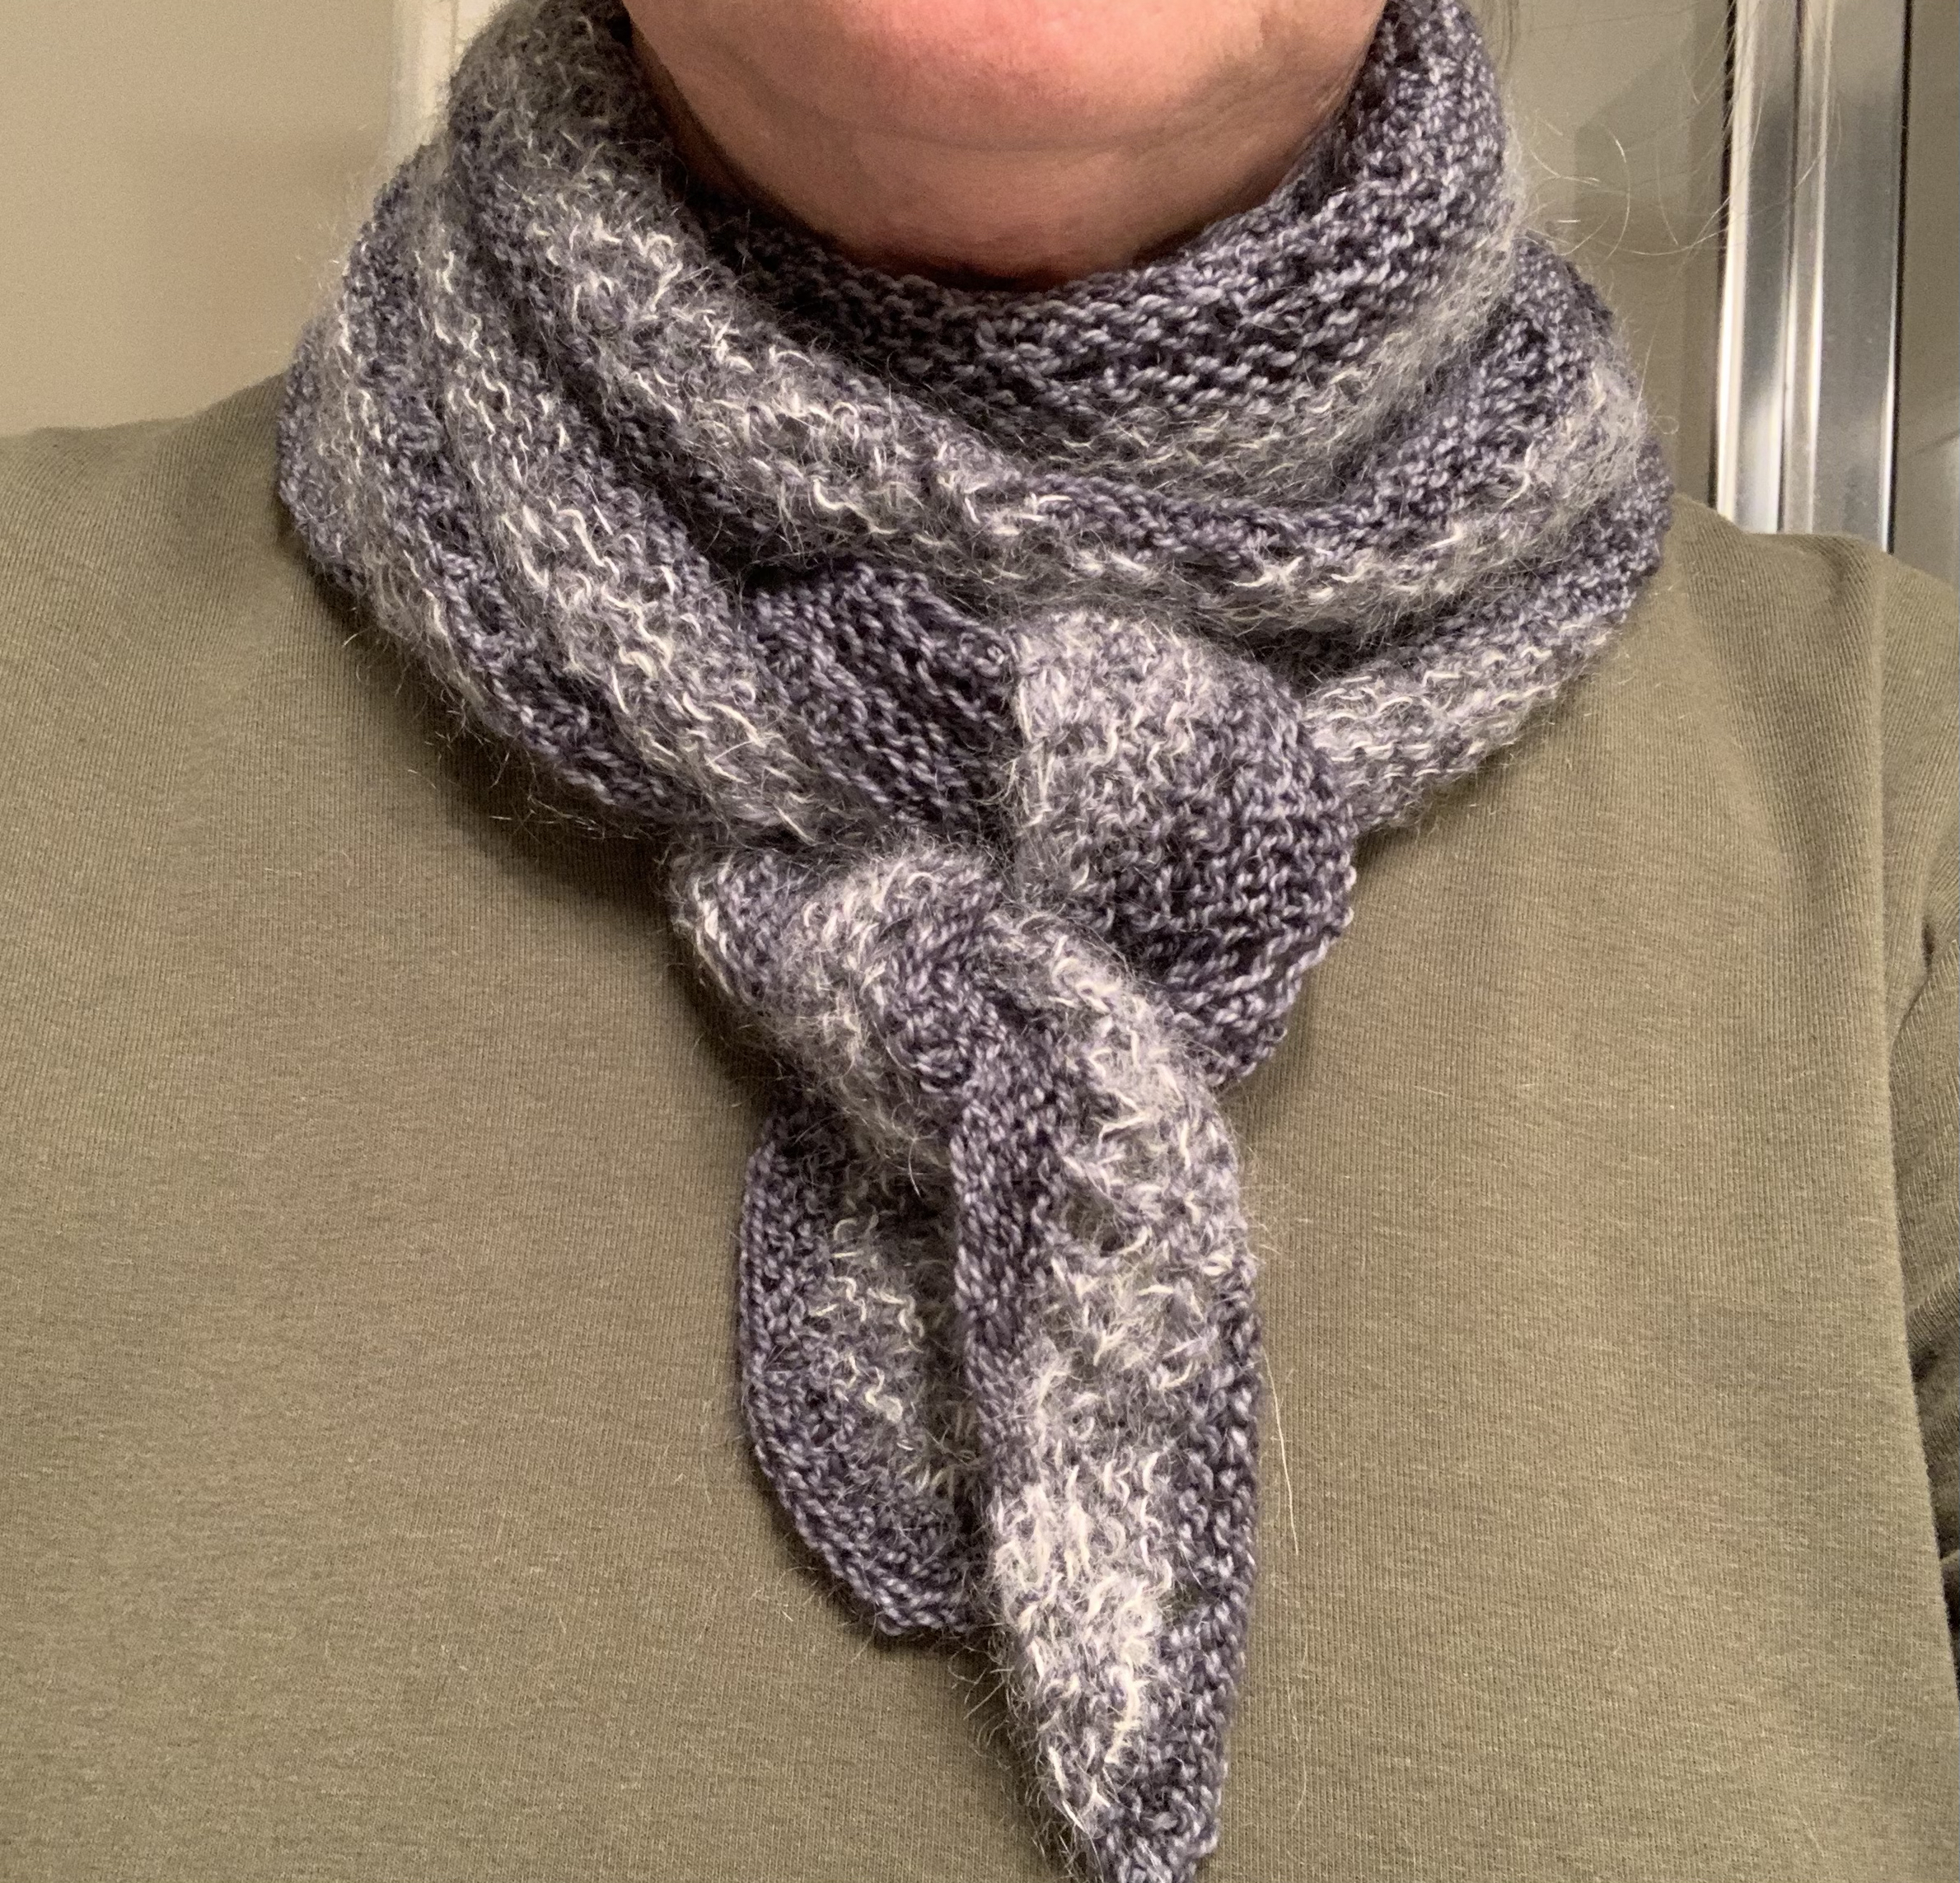
All, except for Spindrift, are angular. When I was ready to take a trip to New Hampshire, I wanted a little wrap for my neck, and knitted the Railings pattern by Janina Kallio. It was a little crescent-shaped shawl and I added some mohair. Using mohair was a mistake, because the fuzz near my face was not good. But, I did wear it during my trip and it provided nice warmth, as intended. It’s a sweet little shawl pattern.
Maybe I need to write a page about knitting little travel scarves.
On this page I try to help beginner knitters understand short rows, and the important shaping they do when knitting sweaters.
Short rows are just that, shorter than normal knitting rows. Most often I come across directions to use short rows while knitting sweaters. In order for a sweater to fit properly, the back needs to be raised up a little higher than the front. It makes the neckline lower in front and therefore more comfortable. This is done by knitting back and forth over one section (the back) and ignoring the front stitches, for a few rows.
Short rows also can be used to shape things, like sock heels, or shawl edges. I’m no expert on short rows, but I feel they are necessary as part of sweater knitting.
Sweaters Knit Without Short Rows
I’ve knit a couple of sweaters that did not include short row shaping. They are not the most comfortable to wear. The Carbeth Cardigan really needed short rows. The pattern was unique and pretty nice except that the back pulls downward, and shouldn’t. I tried to add some short rows myself, which I think helped, but I didn’t really know for sure if I had done them correctly.
Farfuflar, or Migrating BirdsCarbeth back
Farfuglar was another pattern that omitted short rows. I wish that pullover pattern had included a few short rows as well.
Without short rows, there will be a noticeable difference when wearing a sweater.
Picturing Short Rows
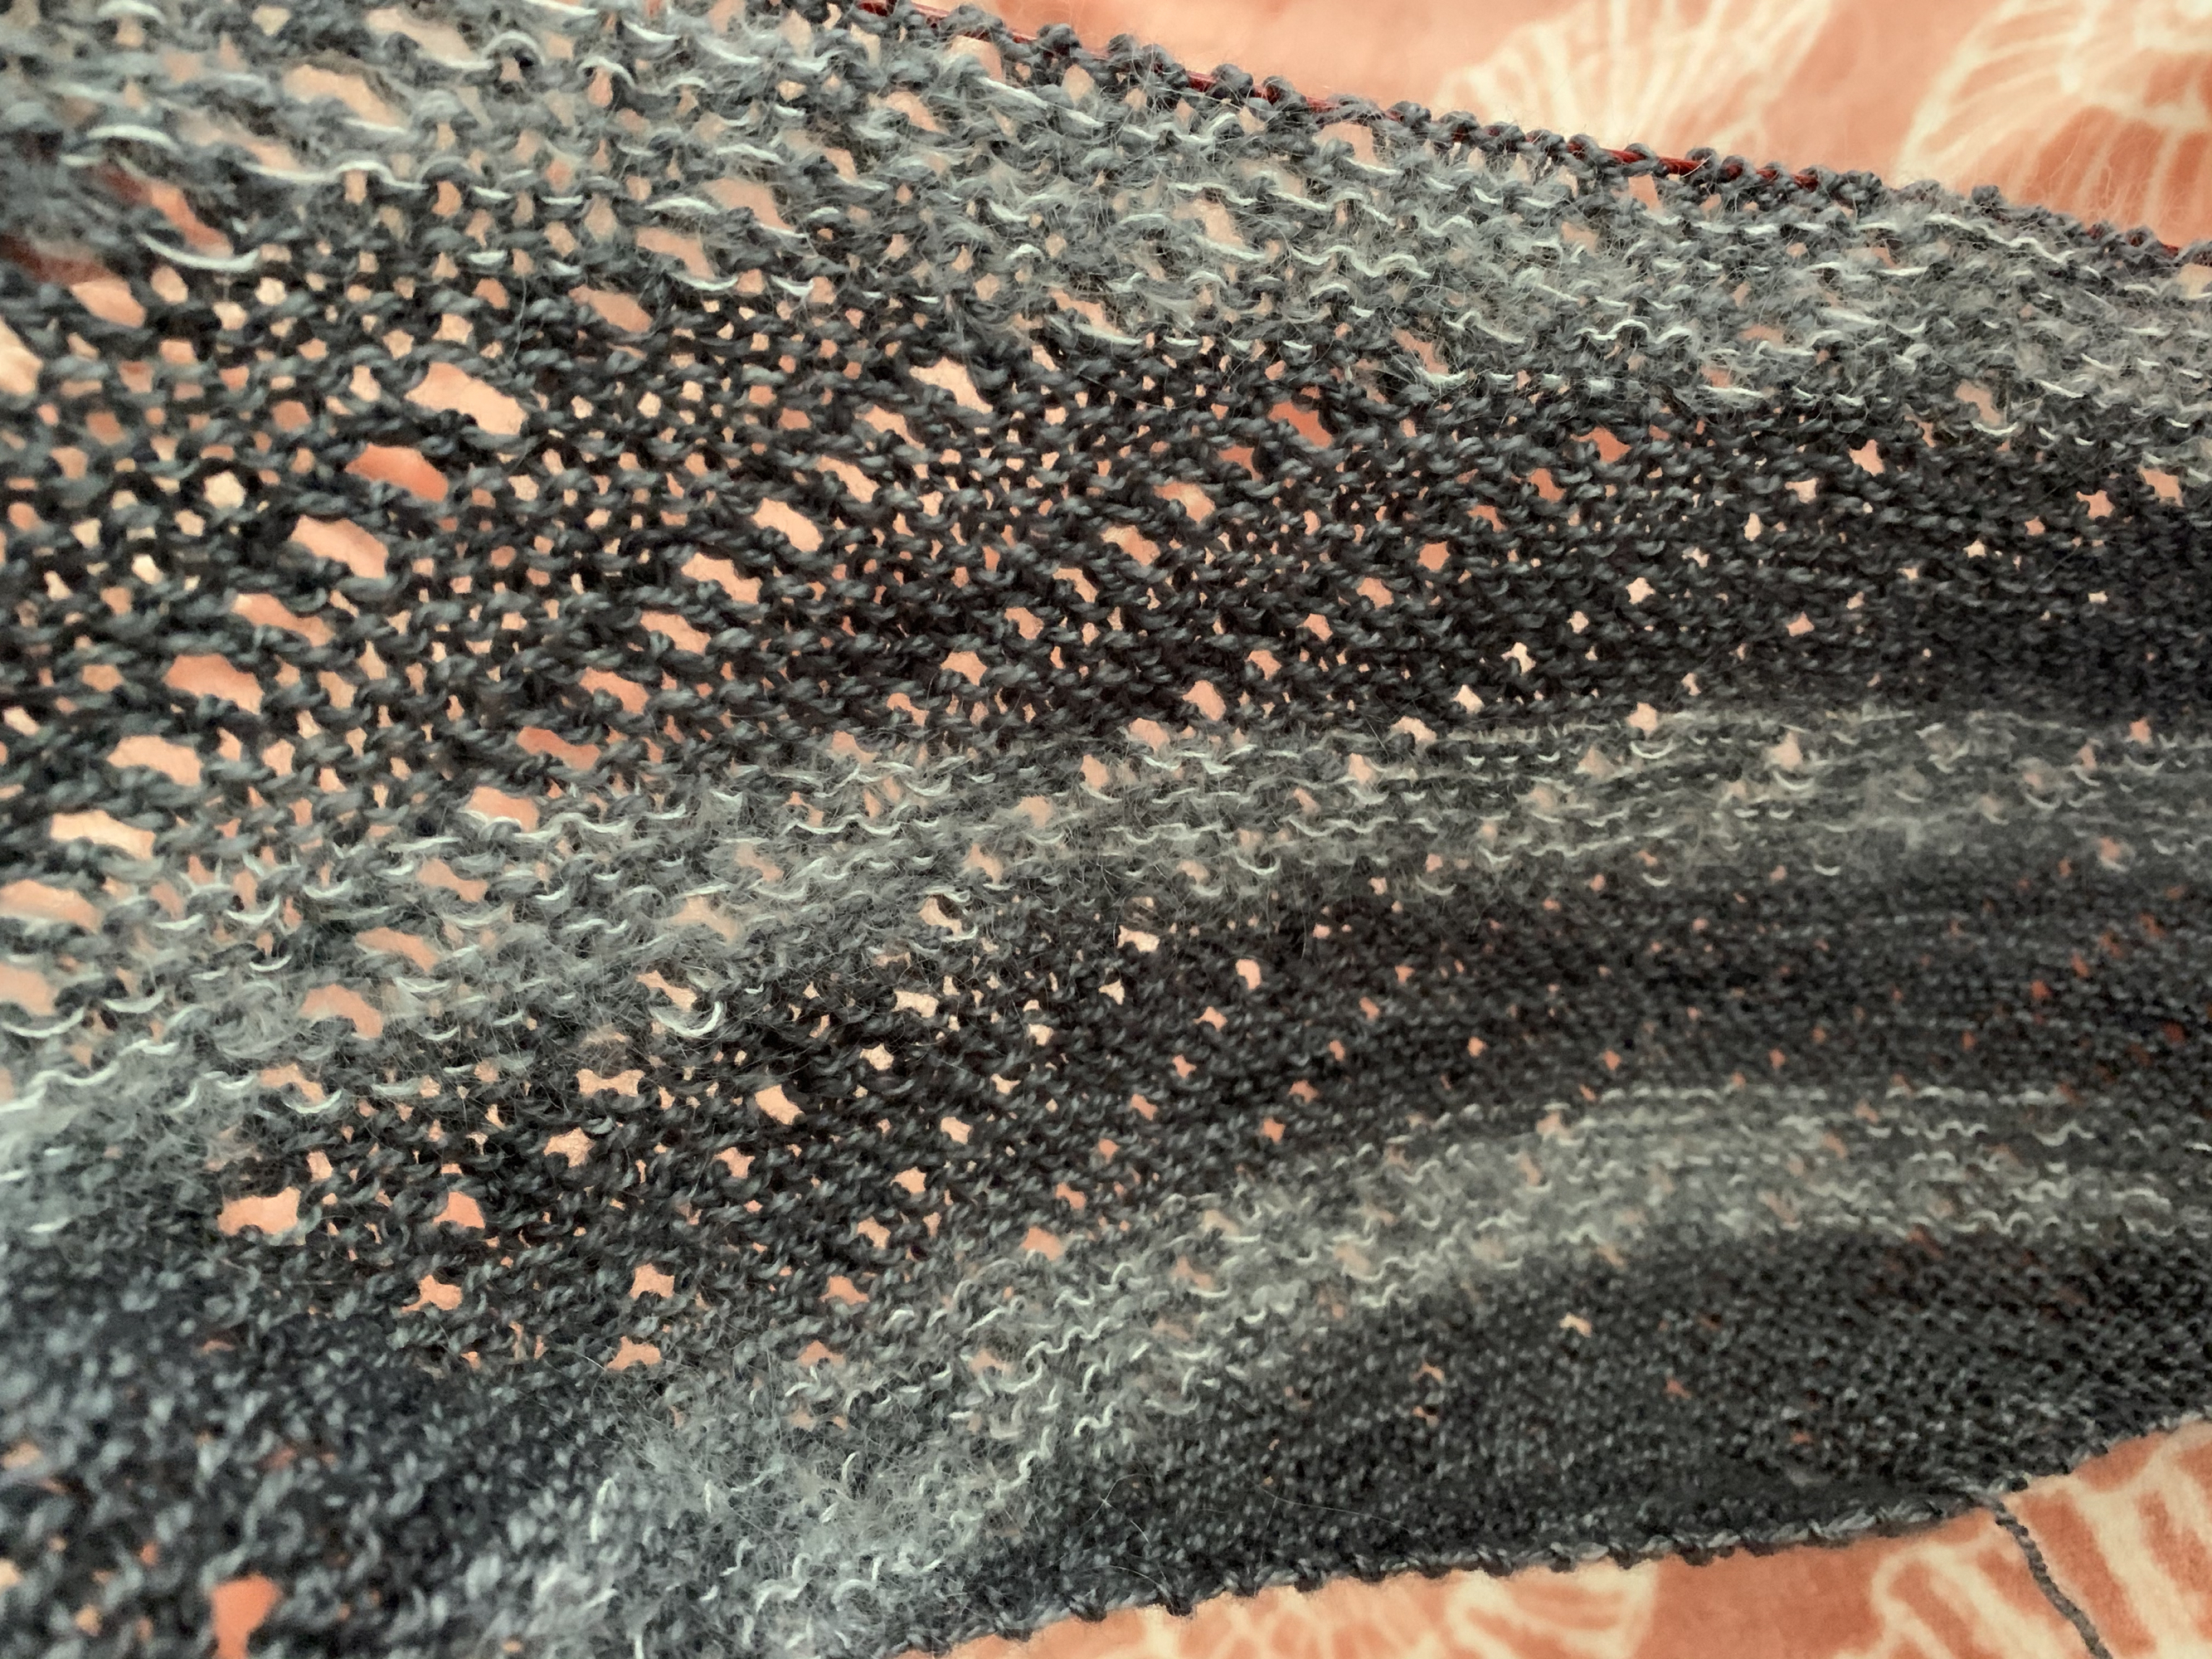
It is always more helpful to me when I can picture how short rows will be knit. The Warm Up Sweater is a pattern from Espace Tricot and it includes short row shaping. I will use this pattern as an example to explain how the rows are knit.
Warm Up is a top-down raglan. Once the neck ribbing is knit, the sleeves, front and back are separated and expanded. Markers are placed to delegate all these sections. The sleeves will have fewer stitches than the front and back, because our arms are smaller parts of our bodies! You should also have a BOR (beginning of round) marker that should be different from the other markers.
Warm-up Sweater
You can see how the dark brown block of color is not as deep at the front as it is on the sleeves and the back. This happened because of the short rows. The front neckline sits nice and low compared to the back.
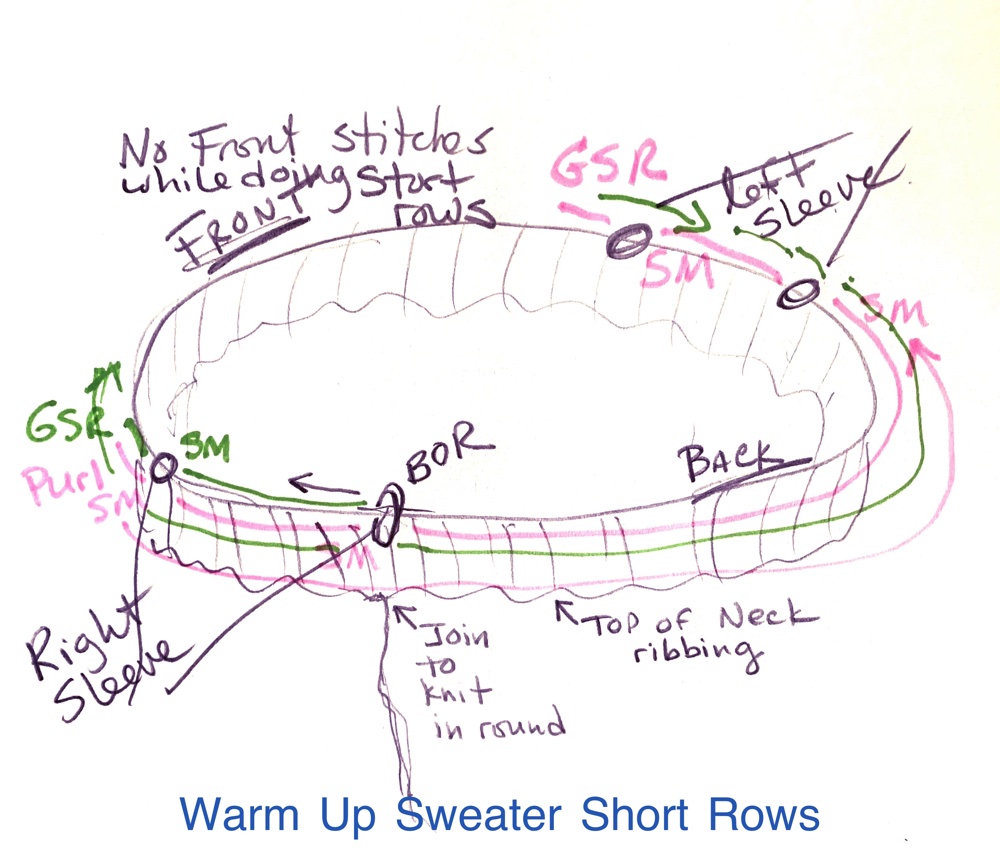
We knit from right to left. We cast on and do the neck, and then begin the body. Our sweater is being knit top-down, but while we are knitting we are holding it upside down.
The Warm Up pattern short row directions say that the first marked area is the Right Sleeve, then Front, then Left Sleeve, and Back. In that order. (See my chart below.)
*Helpful hint: Place a removable marker at the “back” middle area. I do this just to keep the front and back straight in my mind – because no knitting should be done across the front (only while making short rows). Short rows will be knit across the back, and in this case, the sleeves.
Short row shaping on the Warm Up sweater begins with Row 1 which says to “knit to marker”. From the BOR the knitting goes across the Right Sleeve. Then, “slip marker and knit X” which ever number for your size.
This brings you a few stitches into the “front” of the sweater (Green GSR in my image), but now you turn – doing a German Short Row (see how below) – and will purl back (pink line in my image) – across the right sleeve, and the back, and the left sleeve. (This is Row 2, which says: *P to marker, SM and repeat 3 more times. This takes you past the R. sleeve marker, BOR marker, and both L sleeve markers – plus 3 or 4 stitches into the other side of the Front.)
Row 3 of this Short Row section includes increases, in the form of kfb (knit front and back) which are done on either side of the sleeves. You also do a GSR. It is not hard, just do each thing when it says to in the pattern. Some people mark where their short row turns are, but the double stitch made will stand out so there is really no need.
The German short row turn is done like this: Knit (or purl) to the stitch indicated. Turn the work and with the yarn in front, slip the stitch on the left needle onto the right. Then pull that stitch up and over. It will look odd, like two stitches. You are now ready to either knit – on the RS, or purl, on the WS. Follow the directions for the next short row.
Making the turn for short rows will become second nature once you practice enough. If the pattern is well-written, the designer will walk you through those rows. Once the short rows are finished, you will continue knitting normally, or as the pattern directs.
The funny looking short row stitch is always knit together – as one stitch – when it comes time to either knit, or purl that weird stitch.
Socks use short row shaping at the heel. And short rows can make a ruffle on a scarf or other project.
As I begin knitting the Field Sweater pattern, some video tutorials have been very helpful.
The Field Sweater, by Camilla Vad, is pretty popular and very beautiful. The pattern I am knitting is a pullover, but a cardigan pattern is also available.
I’ve continuously seen some form of this sweater all over Instagram. The yoke is textured with “grain” pods, which are made by wrapping the yarn to create a bump. However, it’s not that simple.
This is a top-down knit and I quickly knit the neck ribbing, which is basic. As I read over the grain rounds I became a little confused and went in search of videos.
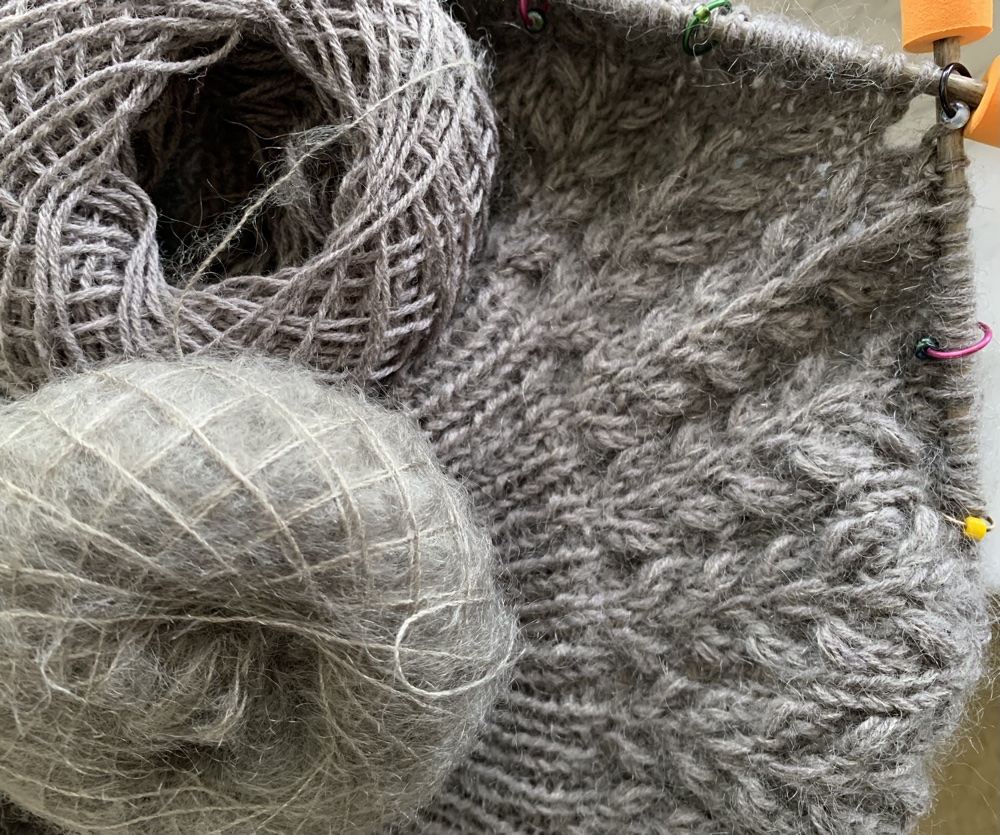
13 round swatch
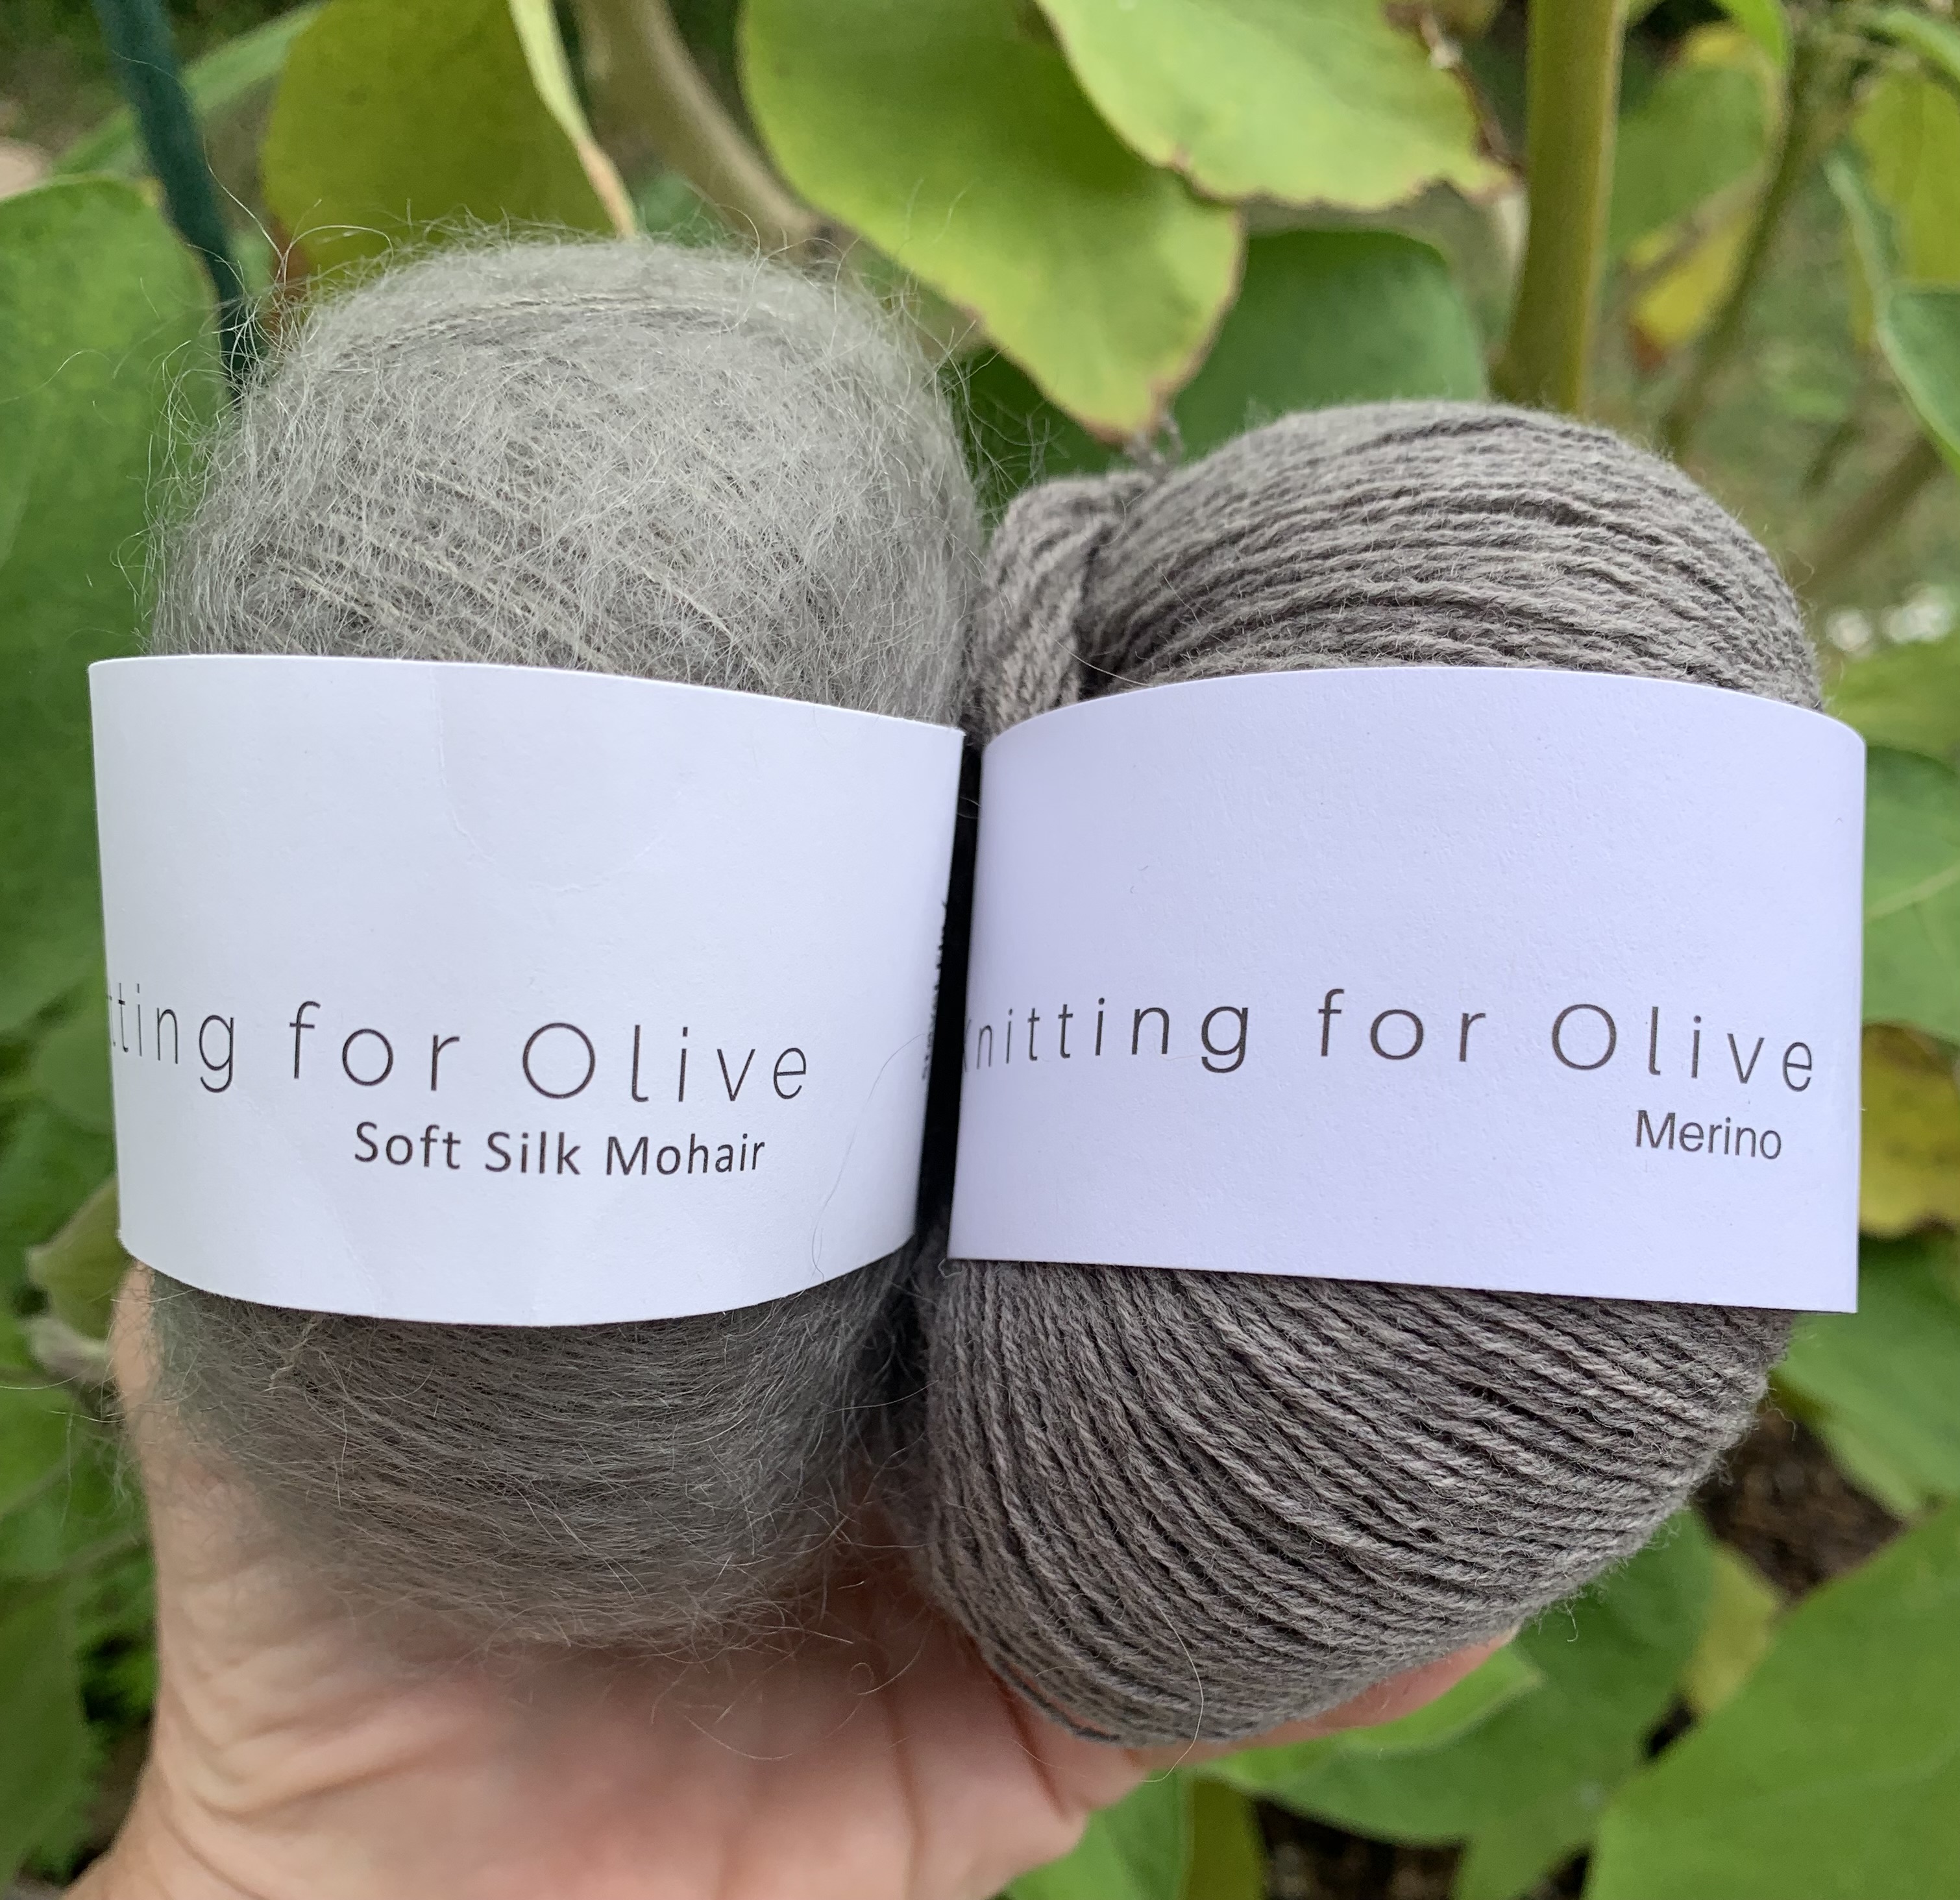
My yarn choice is Knitting For Olive fine merino combined with Soft Silk Mohair (also by Knitting for Olive). Both are in color Dusty Moose, which is a gray brown color. Bought at an end-of-year sale, I’ve never knit with this yarn before. (Now that I have begun the sweater, I absolutely love this yarn.)
Video Help For Knitting the Grain
The Making Grains tutorial by Mostly Knitting is the first one I watched and it is very easy to understand. She covers how to do the rows that make the smaller grain. (There is also a Large Grain to make further down the yoke – she covers that also in another video – Making the Large Grain.)
The grain is a bunch of stitches that make a texture around the yoke. Each grain takes many rows to accomplish. The directions are written out, row by row, in the pattern, with the “grain” part written as “make grain”. Making the Grain and Large Grain is also explained on the first page of the pattern directions. HOWEVER, it is helpful to watch someone actually knit this grain stitch.
After watching the videos I’m questioning whether I want to try these textured stitches using two yarns held together. In fact, I was debating whether or not to knit this sweater at all!
Knit a Little Swatch
The only way to know if I would be able to manage this pattern, while holding two strands of yarn together, (or even one strand) was to try it out. I don’t want to get into the yoke area only to find that I hate what I am attempting, mess it all up, and then be sorry.
So I knit a little swatch which is similar to the one shown in the video. The strands of yarn were carried across the back to mimic knitting in the round. I knit up to Round 13 and did 2 increase rounds.
Cut the strands that are too tightAs knitAs worn
Some of my strands were too tight so I cut them after the swatch was washed. *After knitting this swatch I realized I had accidentally used a smaller needle size than I should have! Chalk it up to bad eyes and tiny print on needles.
Use Stitch Markers
In the video, linked above, the knitter uses stitch markers to separate her two example sections of the grains. As I started the grain sections, I separated each section with markers. It’s a lot of markers, but will help me with this intense knitting project.
Field Sweater grains on yoke
Knitting Combinations
How do you eat an elephant? One bite at a time.
As we knit, each round will have its own combination of stitches. Some rounds are fairly simple, and some will be a struggle – for me. Using a cable needle and knitting many stitches together, slipping stitches, yarn overs – and other types of increases, are all needed to create this interesting texture. For any semi-experienced knitter, these stitches are not difficult. And that is how I have to look at it going in. Knit one small section at a time and hopefully keep mistakes contained…!!
Many Thanks to Mostly Knitting
Thanks to Mostly Knitting – link goes to her YouTube channel – and her excellent video tutorials that seem to answer the many questions knitters have concerning the Field Sweater pattern.
I think the pattern itself is well written, but in places, not as well explained as it could be. For example; “pick up the strand between the sts and knit it tbl” could be stated as “make one left” – see how it’s done in Mostly Knitting’s video “Round 9 of the Field Sweater“. There are two ways to pick up that strand, and if you do it wrong, you will be making a hole.
So far I’ve seen three different ways that the yoke increases are made. I guess it’s kinda fun to change things up. I like knowing that I can look up a video for help with this intricate knitting project. Onward I knit, with more to come.
Here’s my progress…
Yarn: Knitting for OliveStarting Round 23
When I began the yoke texture (making the grains), I realized that going slowly is key. Having markers for each section is very helpful. As I finished up a section, I would go back and count the stitches to double check. As the yoke expands, the sections do as well, and there is more and more to do for each one.
I began knitting using a wooden Lykke circular needle (24 inches), but switched to metal Chaio Goo (32 inch) in Round 27 (photos below). The metal needle made things much easier!
Making, and Closing, the Large Grain
Later in the yoke: Making the Large Grain is part of Round 27. And closing the grain in round 29. See the easier way to close the grain, or knit all five stitches together, this in this video.
Making the large grain is not as difficult as knitting the five stitches together through the back loop.
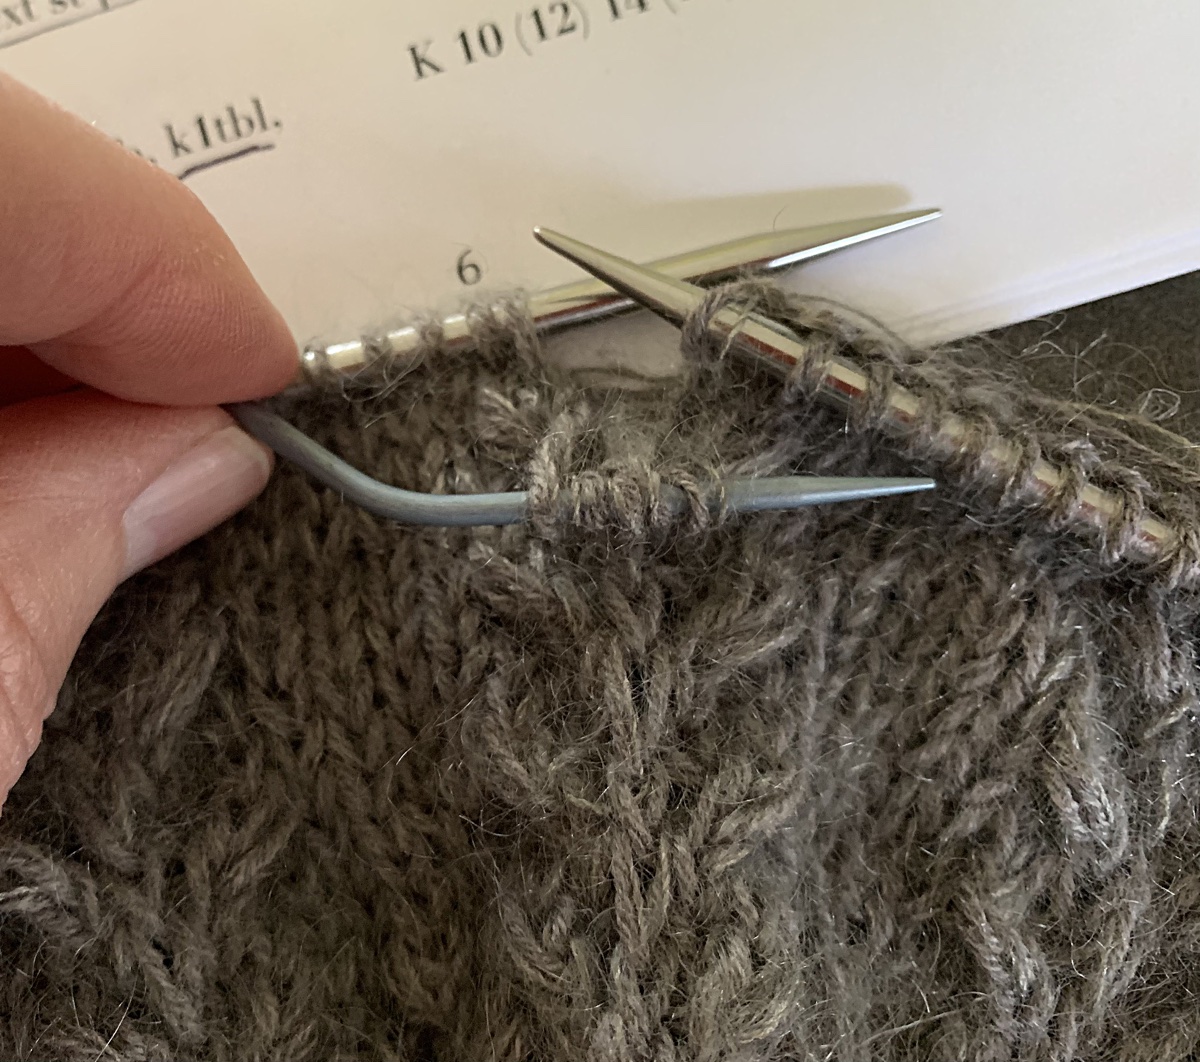
When I got to the last row that completes the Large Grains, I ended up using the cable needle to hold the five stitches that were to be knit through the back loop. The cable needle is smaller than my knitting needles leaving larger loops to pick up.
using cable needle to knit the large grain stitches together
I am enjoying this knitting project. The directions are very good, and completely written out. Having the additional videos is very helpful as well.
Weighing In
On the designer’s page for the Field Sweater page there are 145 comments (at the time of this writing) and many are angry words aimed at the designer for not including much larger sizes. In some opinions, this pattern is not size inclusive.
The measurement goes up to 142 cm , or 55 inches around. That seems pretty inclusive to me. Here’s the thing, if a designer only wants to go to a certain size, it is his/her prerogative. This is HER business. She is in control of her pattern size configurations. I’ve never written a pattern, but I’m sure a lot of math and figuring goes into creating the various sizes. Just like politics, could we please leave the size inclusive bickering out of knitting?
Found some tutorials for knitting the tubular cast on. This one looks so nice when it is accomplished, but may take some practice.
For every pattern I have knit that suggests a tubular cast-on, I skip that part and do my usual German Twisted cast on. One time I did try to do the tubular and it was a disaster. Now, it’s time to try again.
The tubular cast on gives the edge of any 1×1 (or 2×2) ribbing a “rolled” appearance, without an obvious front and back. Often it is used for hat brims, sock tops, collars on top down sweaters, ribs on bottom up sweaters, mitten cuffs or flat knitting the edge of a ribbed project. I have found that it is not an easy thing to accomplish, but worth the trouble.
On this page I have linked a variety of tutorials for doing the tubular cast on in the round and doing it flat.
Tubular Cast Ons Are Done Differently for Flat vs. In the Round!
Three Ways to Do the Tubular Cast On
I’m covering three general ways to begin and knit a tubular cast on. There could be more, but these are the ones I tried – to some extent. Some tutorials are done English style (yarn held in right hand) and some are Continental (yarn held in left hand). Some use waste yarn and some don’t. I had success using Tutorial #3 using a crocheted cast on.
Tutorial #1: Backwards Loop Cast On With Waste Yarn
This tutorial shows flat knitting, or back and forth, not in the round. Half the number of total stitches needed – plus one – are added to a straight, or long, needle using the backward loop method and waste yarn. I used a size 3US straight metal needle for this.
This is all I did. I did not continue with this cast on because I need to knit in the round for my hat. This beginning is similar to the crocheted cast on (see #3 tutorial).
Backwards loop directly onto a straight needle
After a couple of set up rows are complete, the stitches would be connected to knit in the round (if that is needed for the project). She mentions having a video for that, which I can’t find!
Tutorial #2: Italian Tubular Cast on, or Alternating Knit and Purl Cast On
This cast on was tough for me. The Italian Tubular cast on does not use waste yarn. Stitches – all the stitches needed for the project – are added to the needle by doing alternating knits and purls.
It takes practice if you have never done this type of cast on. Also, the stitches twist around the needle and the whole thing can look horrible and confusing (my experience). Getting them all straight for the first set up row might be challenging.
Wool Bird has a very good video showing how to do this in the round. She knits Continental style. As an English style knitter, I found this an easy video to follow.
Jared Flood / Brooklyn Tweed has a video: How to Knit: Italian Tubular Cast On. He uses a thin yarn, which is more difficult to see, but it’s a good tutorial for flat knitting, English style. His pointers: Use a needle 2 sizes smaller than the pattern to begin this cast on, snug up the stitches so they don’t roll, and do a backward loop to hold the stitches in place when finished.
The 1×1 rib cast on can be converted to a 2×2 rib also. See Ysolda’s video below. She shows this at the end.
Ysolda has an excellent, and slow enough to follow, video here. She knits English style and does show how to join and knit in the round. She suggests doing two set up rows before joining. Near the end of the video she explains how to convert the tubular cast on to a knit 2, purl 2, or two by two ribbing, if that is what the project calls for.
Tutorial #3: The Crochet Cast On
My search for info first brought me to this video: Cushion of Joy. It is the one I was able to get through. She gets right to the point, after talking a bit about why we would want to do all that work for a cast on. Her approach is to use a large straight needle and crochet waste yarn onto it.This cast on needs only half the total number of stitches to begin with.
This video is good but, she knits Continental style and I don’t. Her waste yarn is nearly the same color as her main yarn, which can be confusing. However, she does connect the stitches to do her knitting in the round.
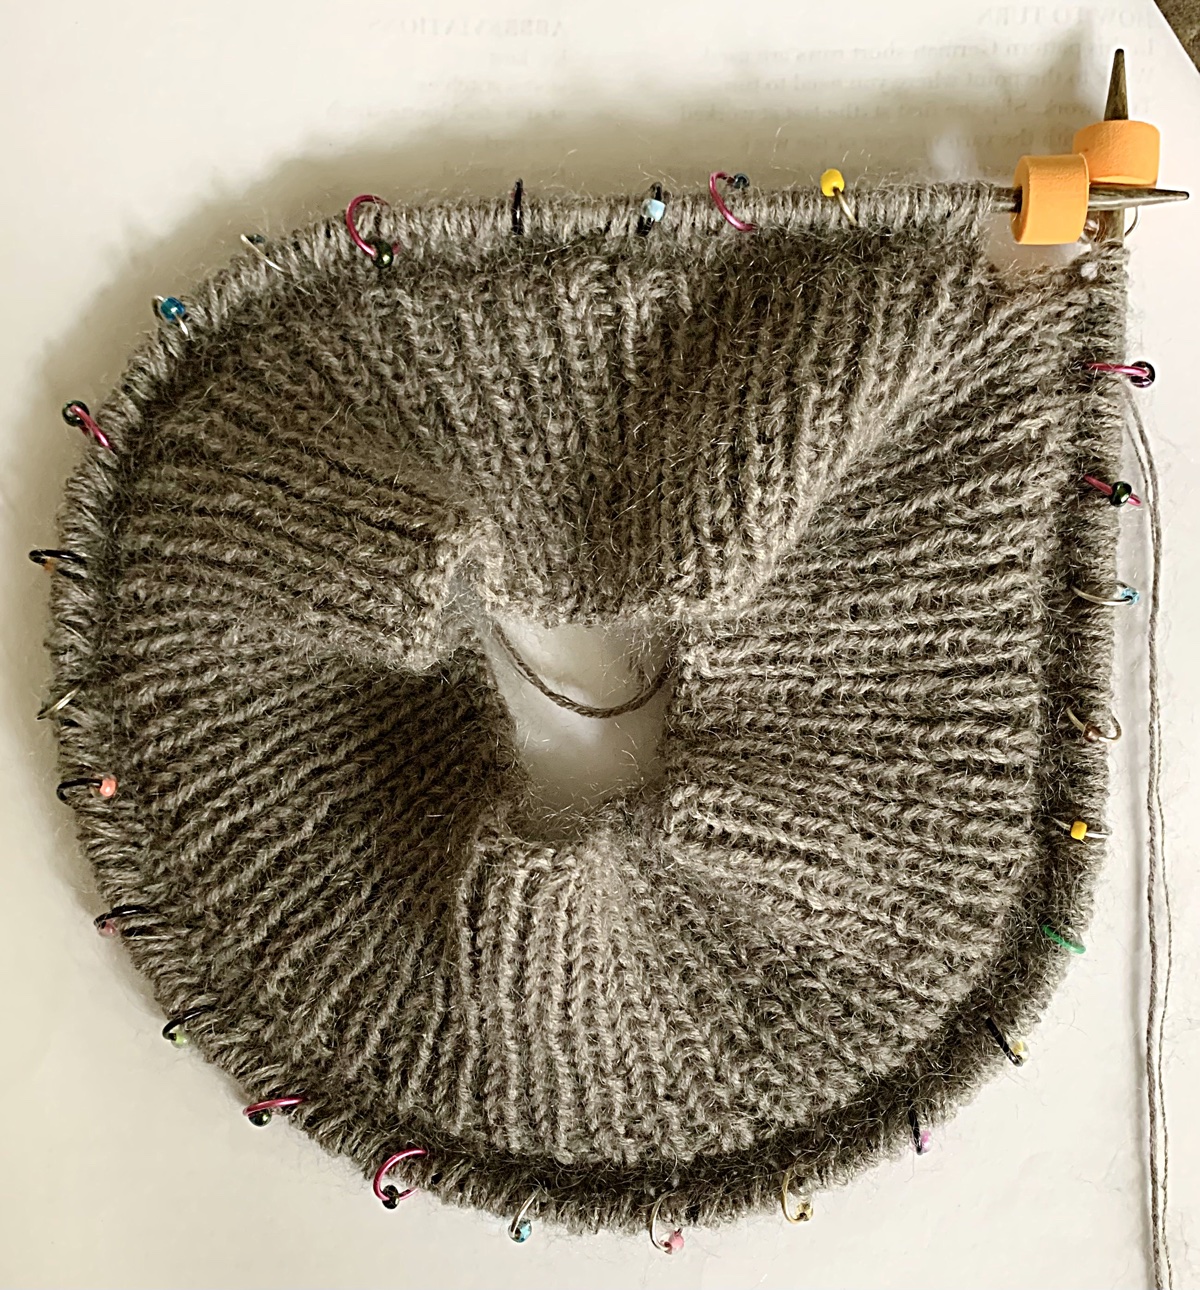
Begin with crochet of waste yarnJoin in the round to knit Tubular cast on in the round
I did have some trouble. Before joining the ends to knit in the round, I made sure all my stitches were straight, as you do normally (middle photo). Once I did my first row, the stitches had become twisted! I fiddled around with it, and just kept going. I was sure the whole thing would be unusable anyway. So watch your stitches on that first row in the round.
My Suggestion: Practice this cast-on for a small circumference (fewer stitches) project, and / or use a heavy type yarn.
This hat pattern (Classic Ribbed Hat – see pattern link below) had 120 stitches for the size I chose. It’s a lot of knitting on something that could end up a complete mess!
As I knit each row, it was difficult to tell if my alternating stitches were in the right place. I really didn’t know what to look for and the tutorial could have been better in this area.
At the end, my crocheted blue waste yarn did not slip right out either. I had to cut it in various places and pick it out.
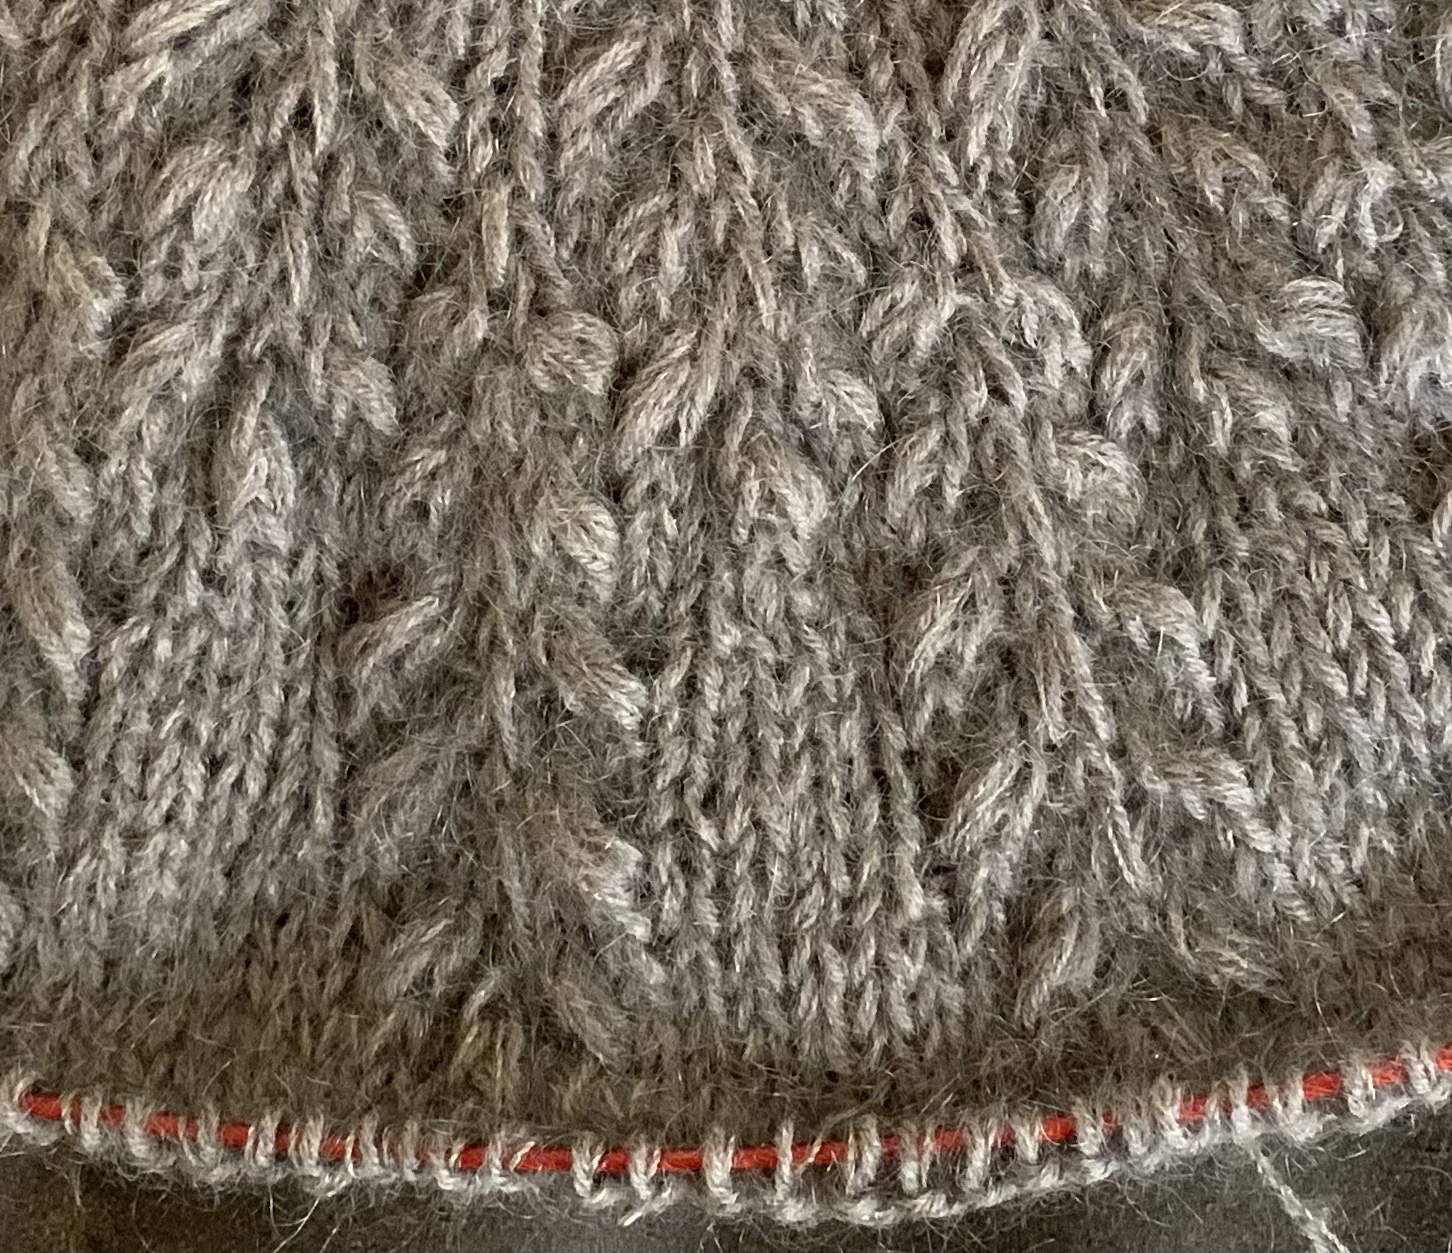
Somehow, and much to my surprise, my first tubular cast on looked pretty nice! It was a miracle…!! I was short one stitch, which I added on my first k1,p1 round. Also, my nubby, tweed yarn is probably hiding some mistakes!
Tubular cast-on success!Hat edge
I was happy and amazed that my tubular cast on was usable. When I do it again it should be perfect, right? Now I am continuing to knit on this hat with finished pictures to come.
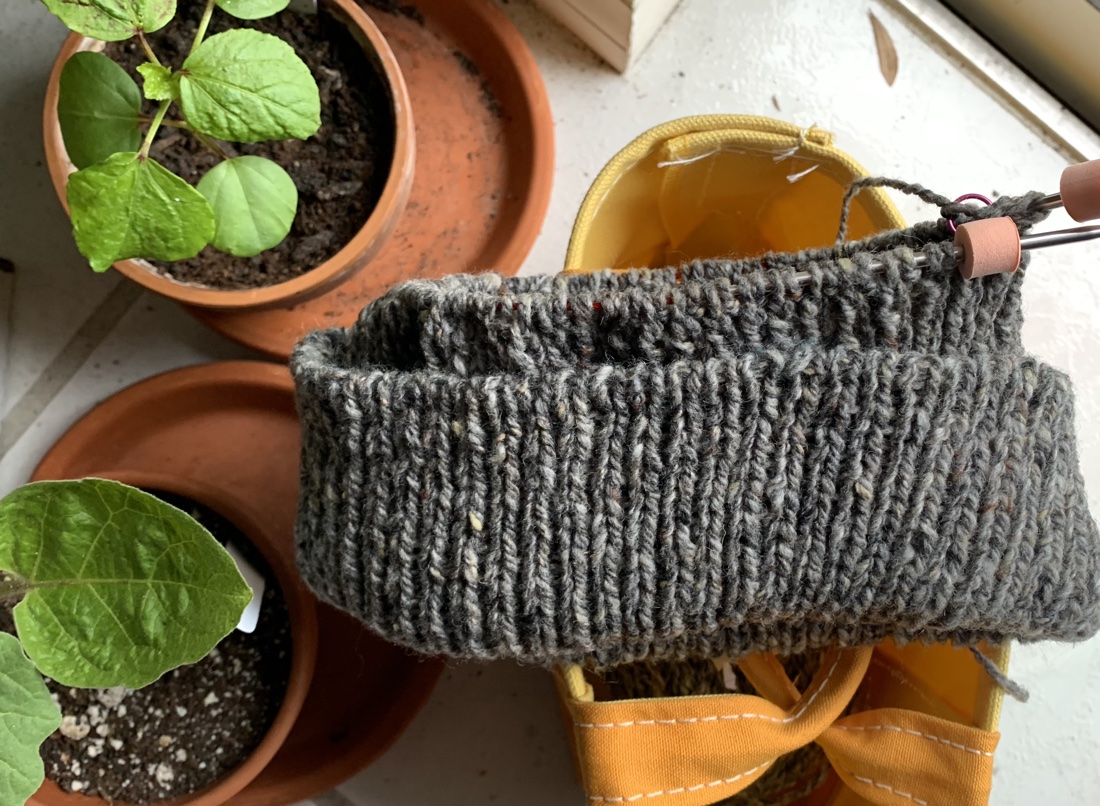
I managed to get through the video and began my hat, which is the Classic Ribbed Hatfree pattern from Purl Soho. I’m using Purl Soho’s Hedgerow yarn in color Woodpile Gray.
Be Positive About Learning Something New
If you have the time, always strive to learn a knitting technique you love. This type of cast on takes time and practice, and I know a lot of people don’t have much free time. I had to rip the whole thing out and start over more than once. Sometimes that is part of knitting and I’m here to say, “You are not alone!”
I recently learned how to do magic loop – finally. And wow, it is really pretty easy. This tubular cast on is not necessarily easy, but is worth learning how to do.