Fair Isle Warm Ears Wool Hat Knitting

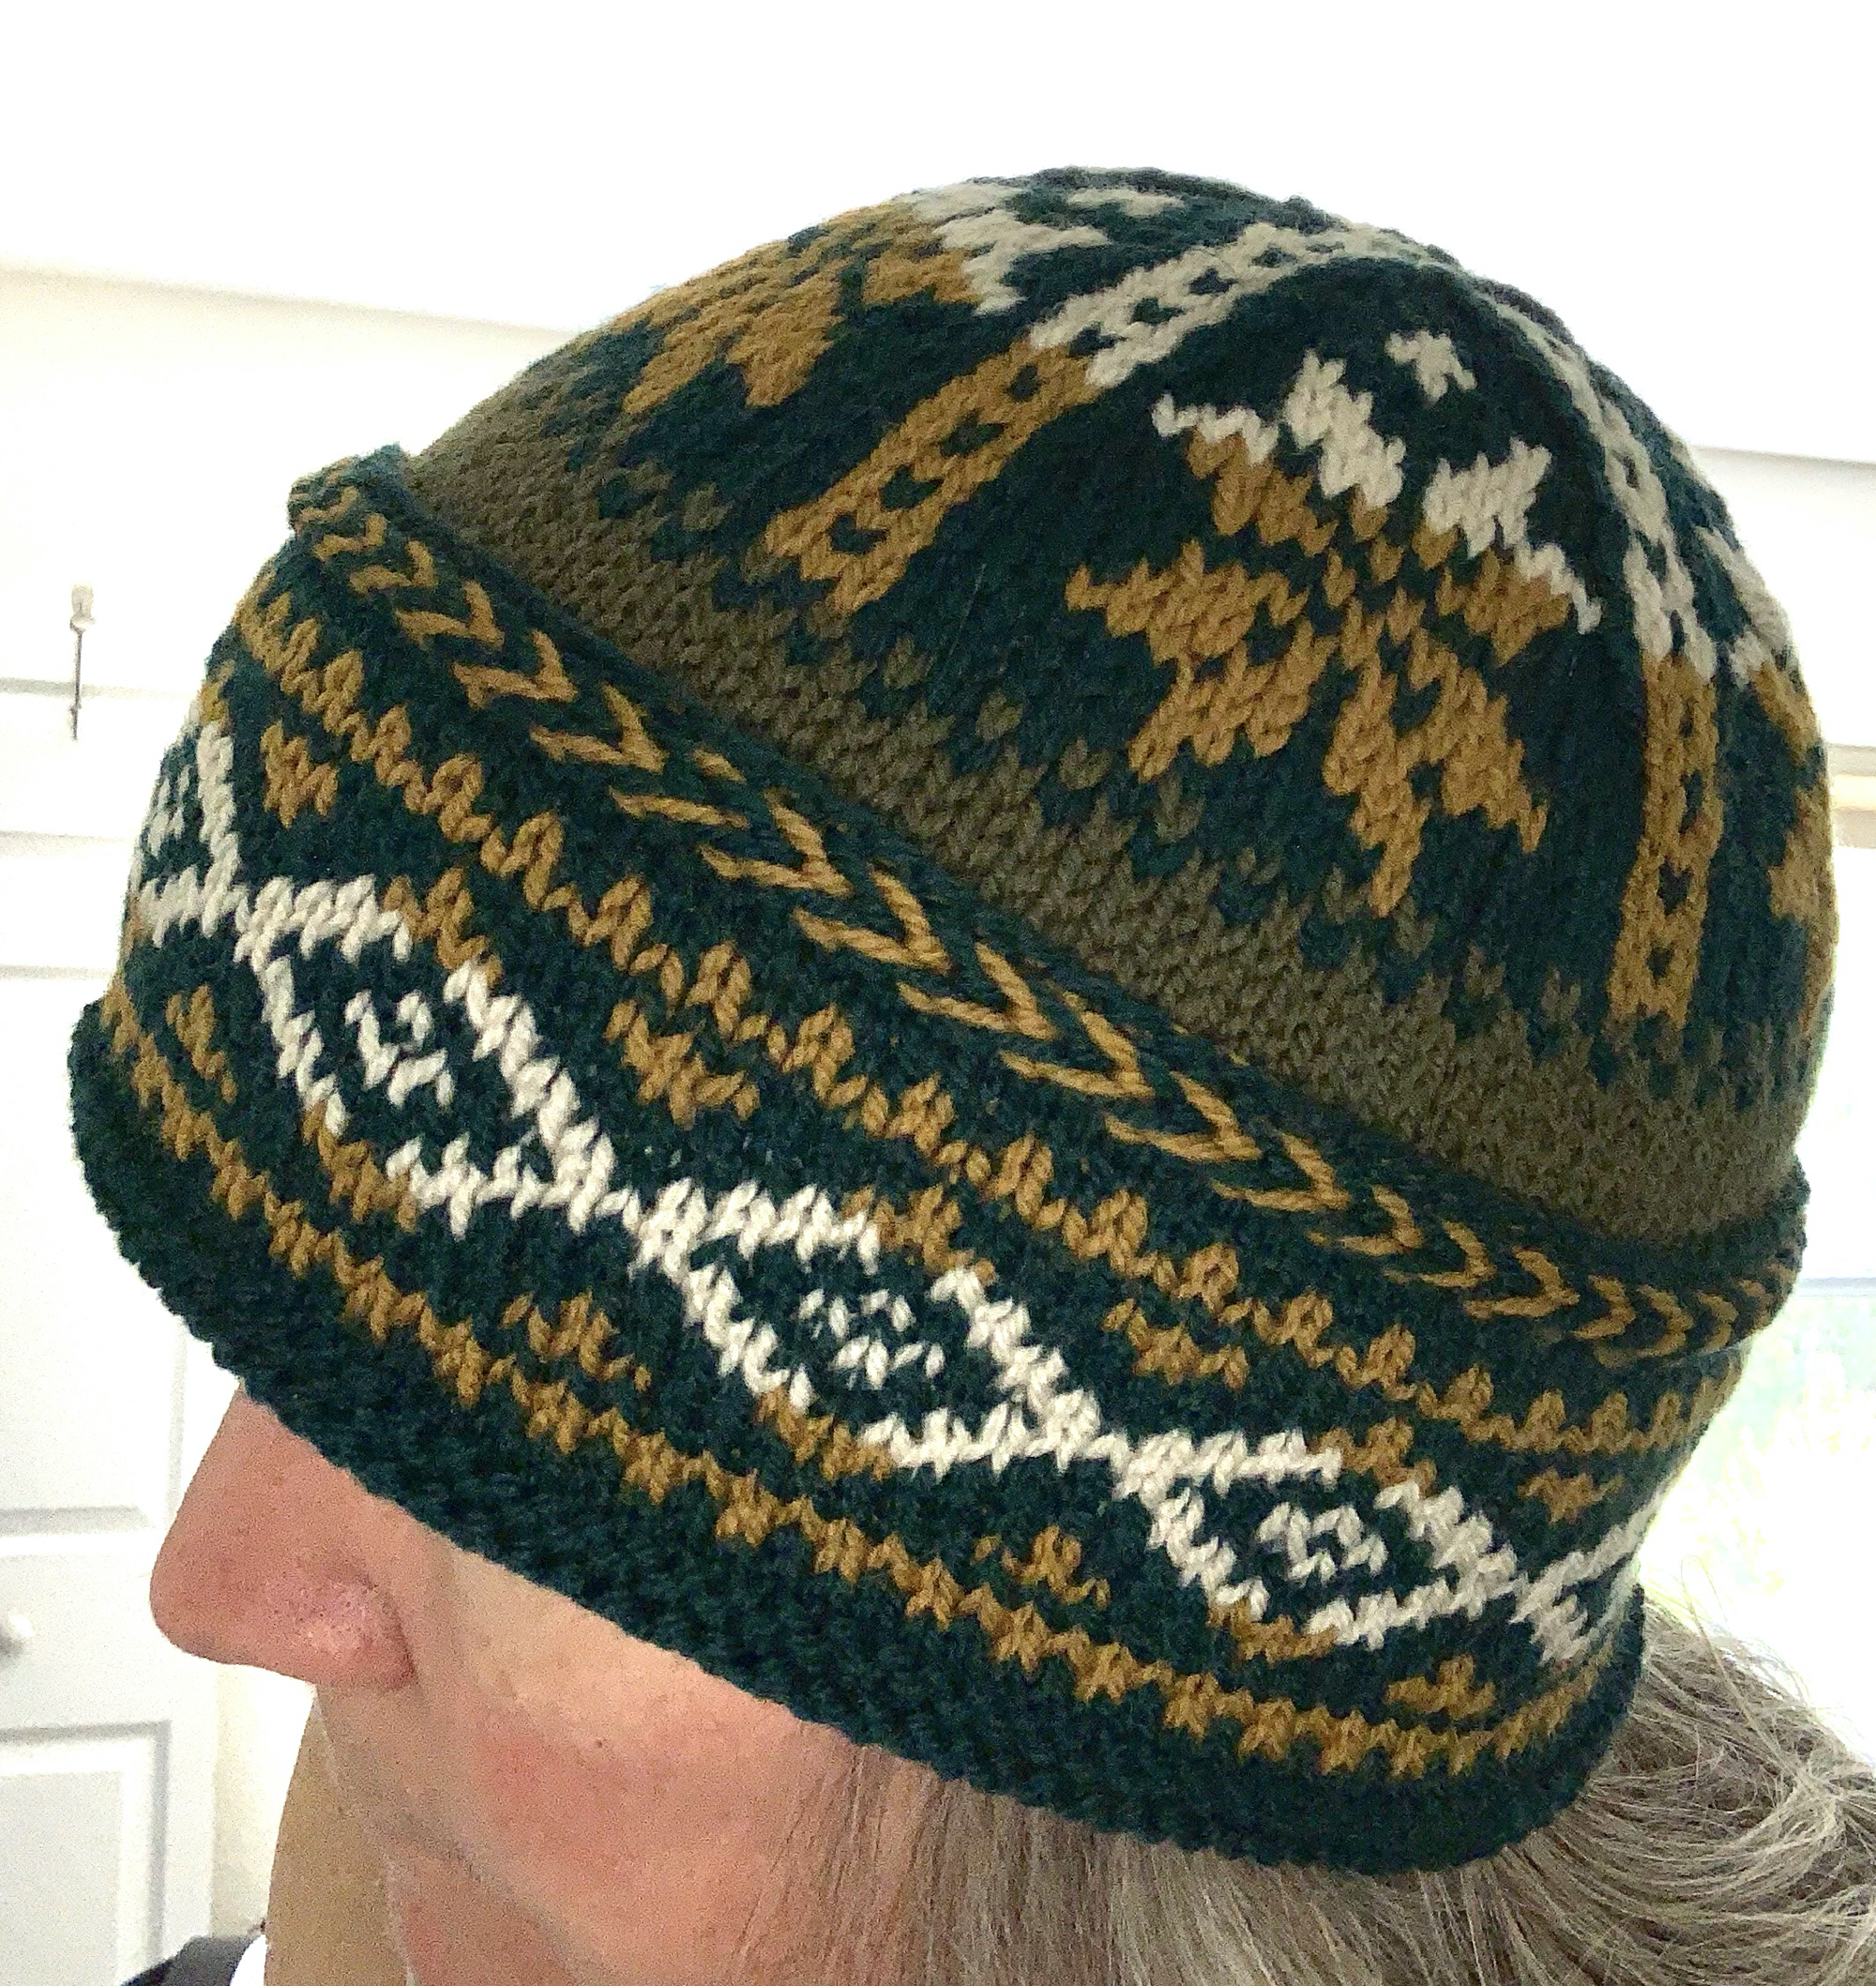
This is my third time knitting the Triple Patterned Watchcap hat pattern from the “Hat’s On” book (link to book below). This Fair Isle hat has a brim which is knit in such a way that it will be doubled and therefore keeps the ears nice and warm.

me wearing the watchcap hat
My new hat

The pattern begins with a Latvian Braid which is called a Twined Herringbone Edge in the pattern. For some reason I always have to review notes on how to create the braid and usually I begin doing it incorrectly! But once I realize my mistake, I can do the braid without a problem.

The braid will be at the top part of the cuff once it’s flipped up. This pattern is in chart form only, and you have to own the book to get the pattern. Hat’s On! is available at Amazon here. (This is an affiliate link and I could earn money if you follow the link and buy the book.) It contains patterns from simple / beginner to difficult / experienced and I’ve had my book for years trying to work up to knitting that pretty hat on the front!

Knitting the Cuff or Hat Band – Colorwork Pattern #1

I like to place markers to help me keep the pattern straight. On the cuff that means every ten stitches.

hat, knitting, triple-patterned watchcap, hats on book,
Using markers for pattern

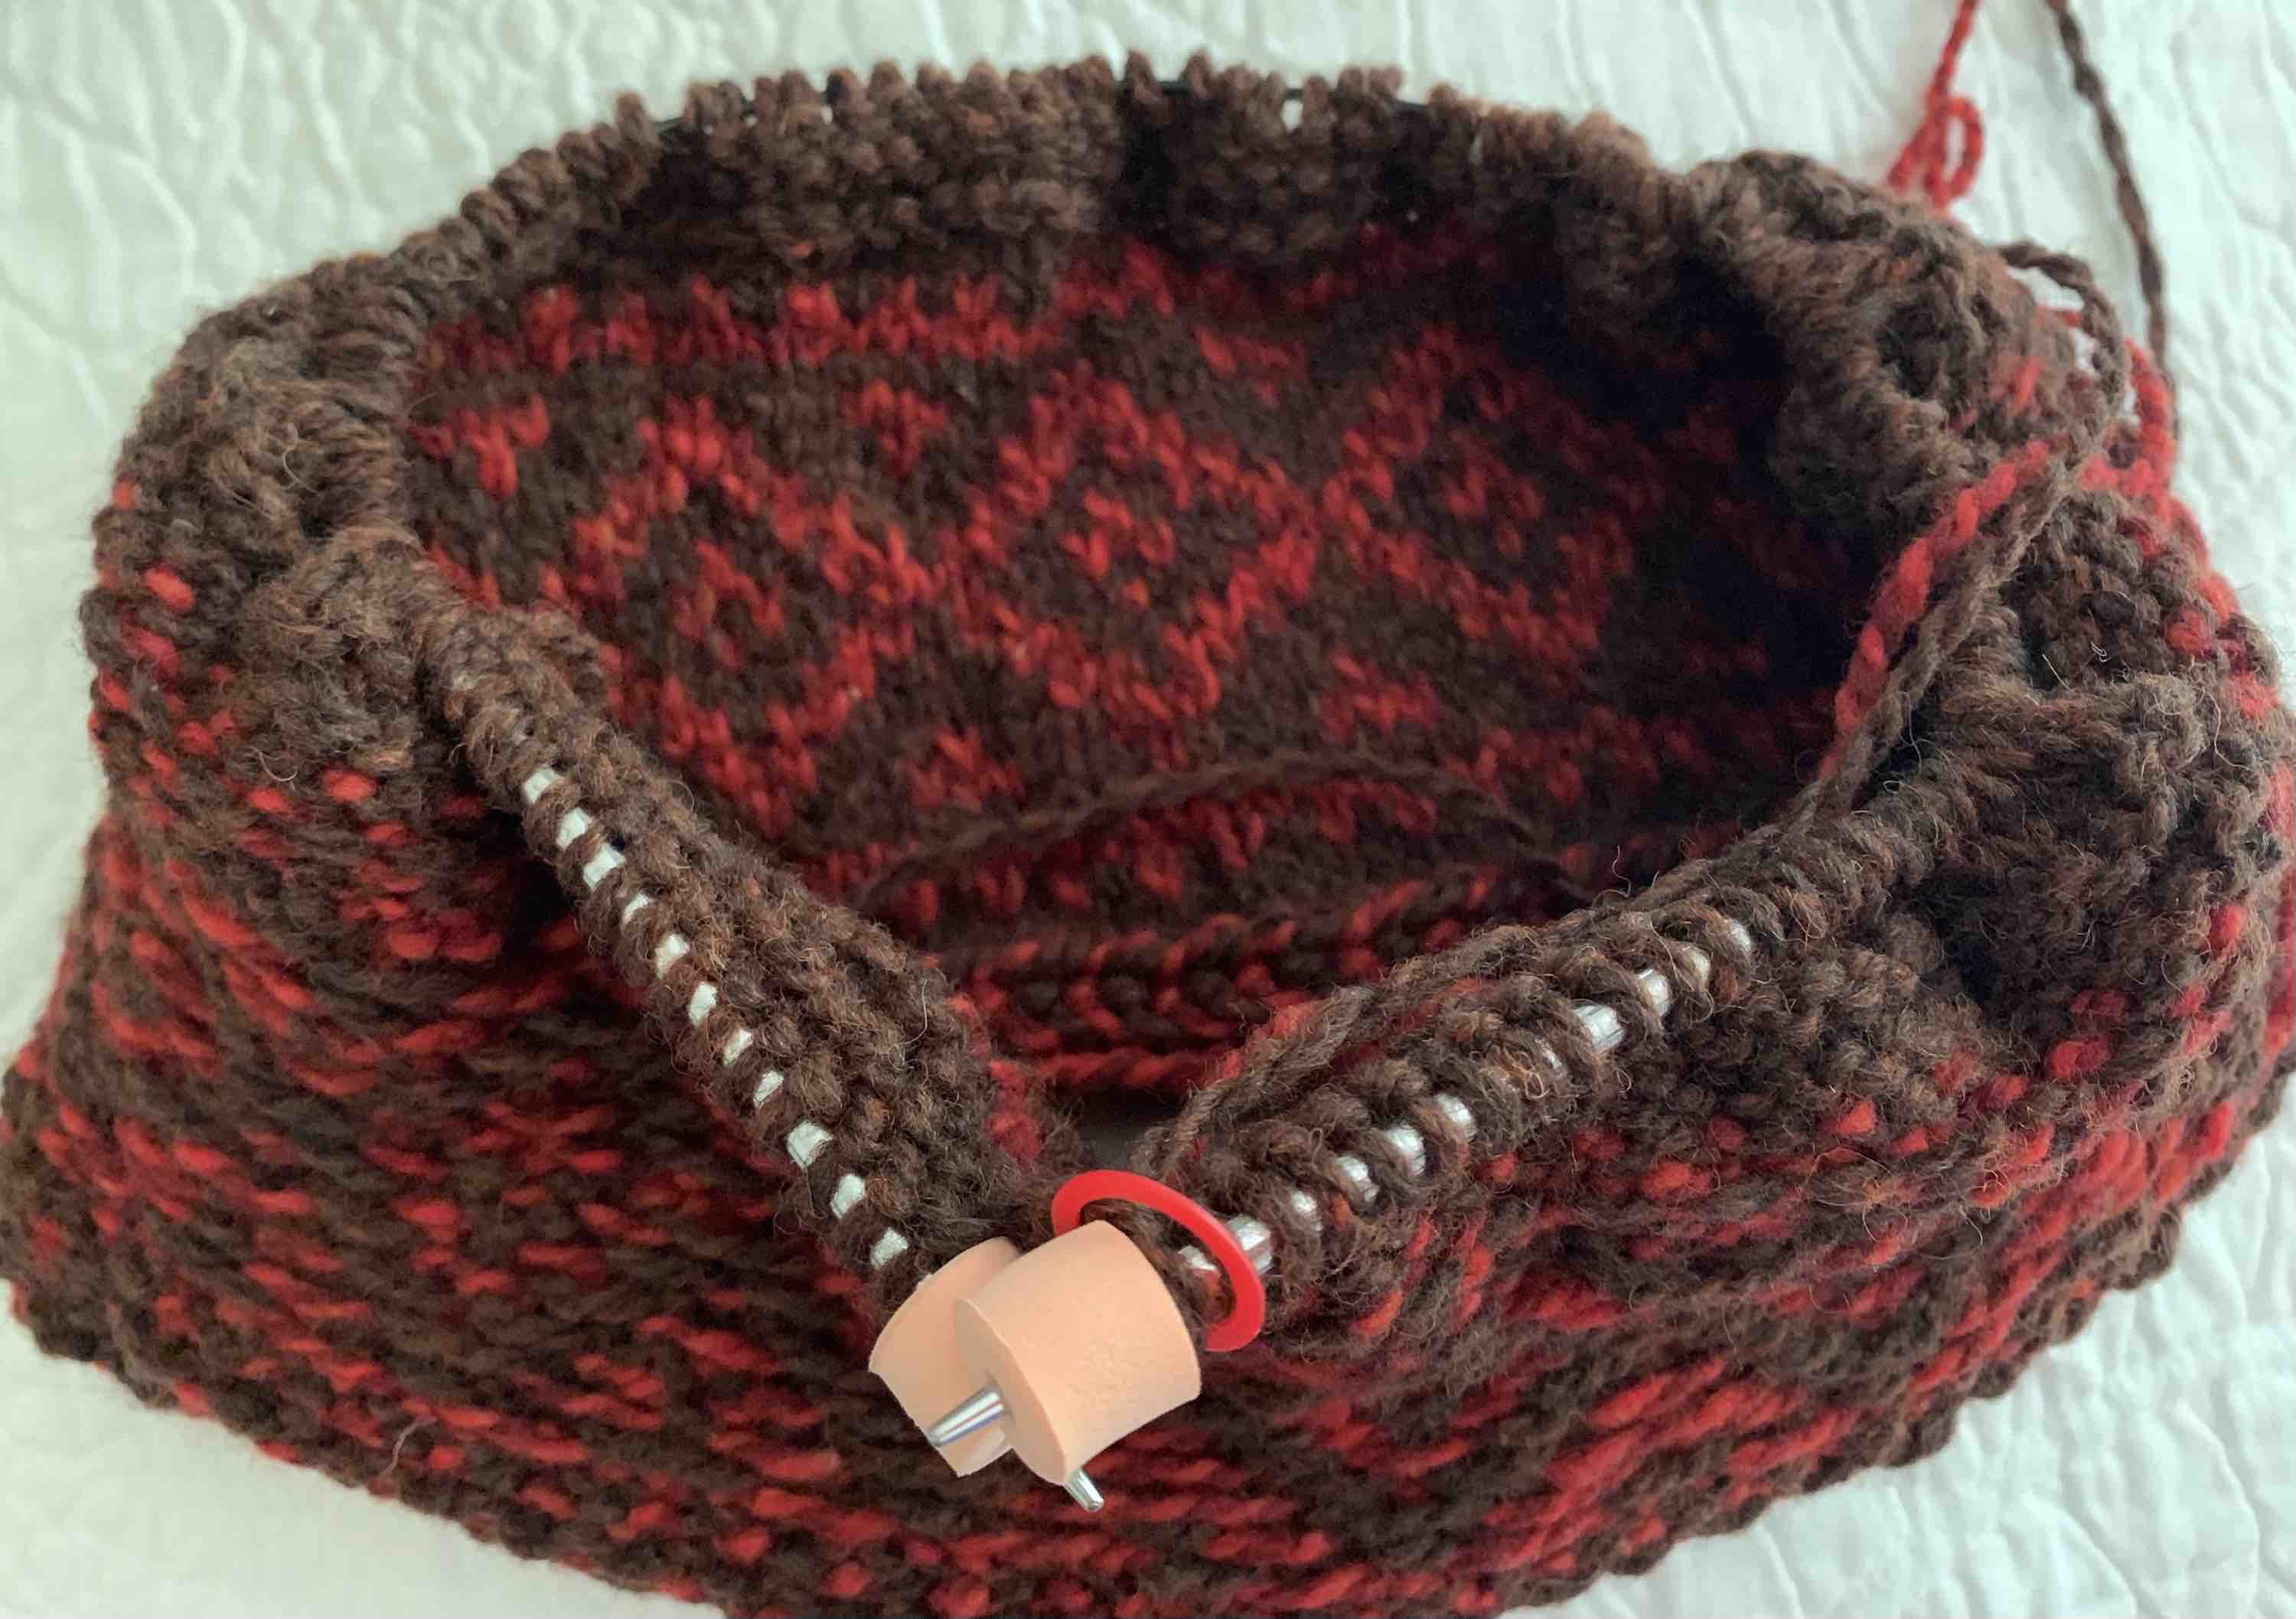
Once the first pattern of the triple-patterned hat is complete the remainder of the knitting is done with the cuff turned inside out. My needles are very crowded while knitting the XL size.

In the photo below, I have flipped the finished brim inside out and begun knitting in the opposite direction for the top of the hat. The remainder of the hat will be knit this way, so the cuff looks inside out. It will turn up when the hat is completed.

hat knitting, triple-patterned watchcap, colorwork, fair isle,
Brim is finished, turned to begin hat top

Knitting Pattern #2 of the Triple Pattern Design

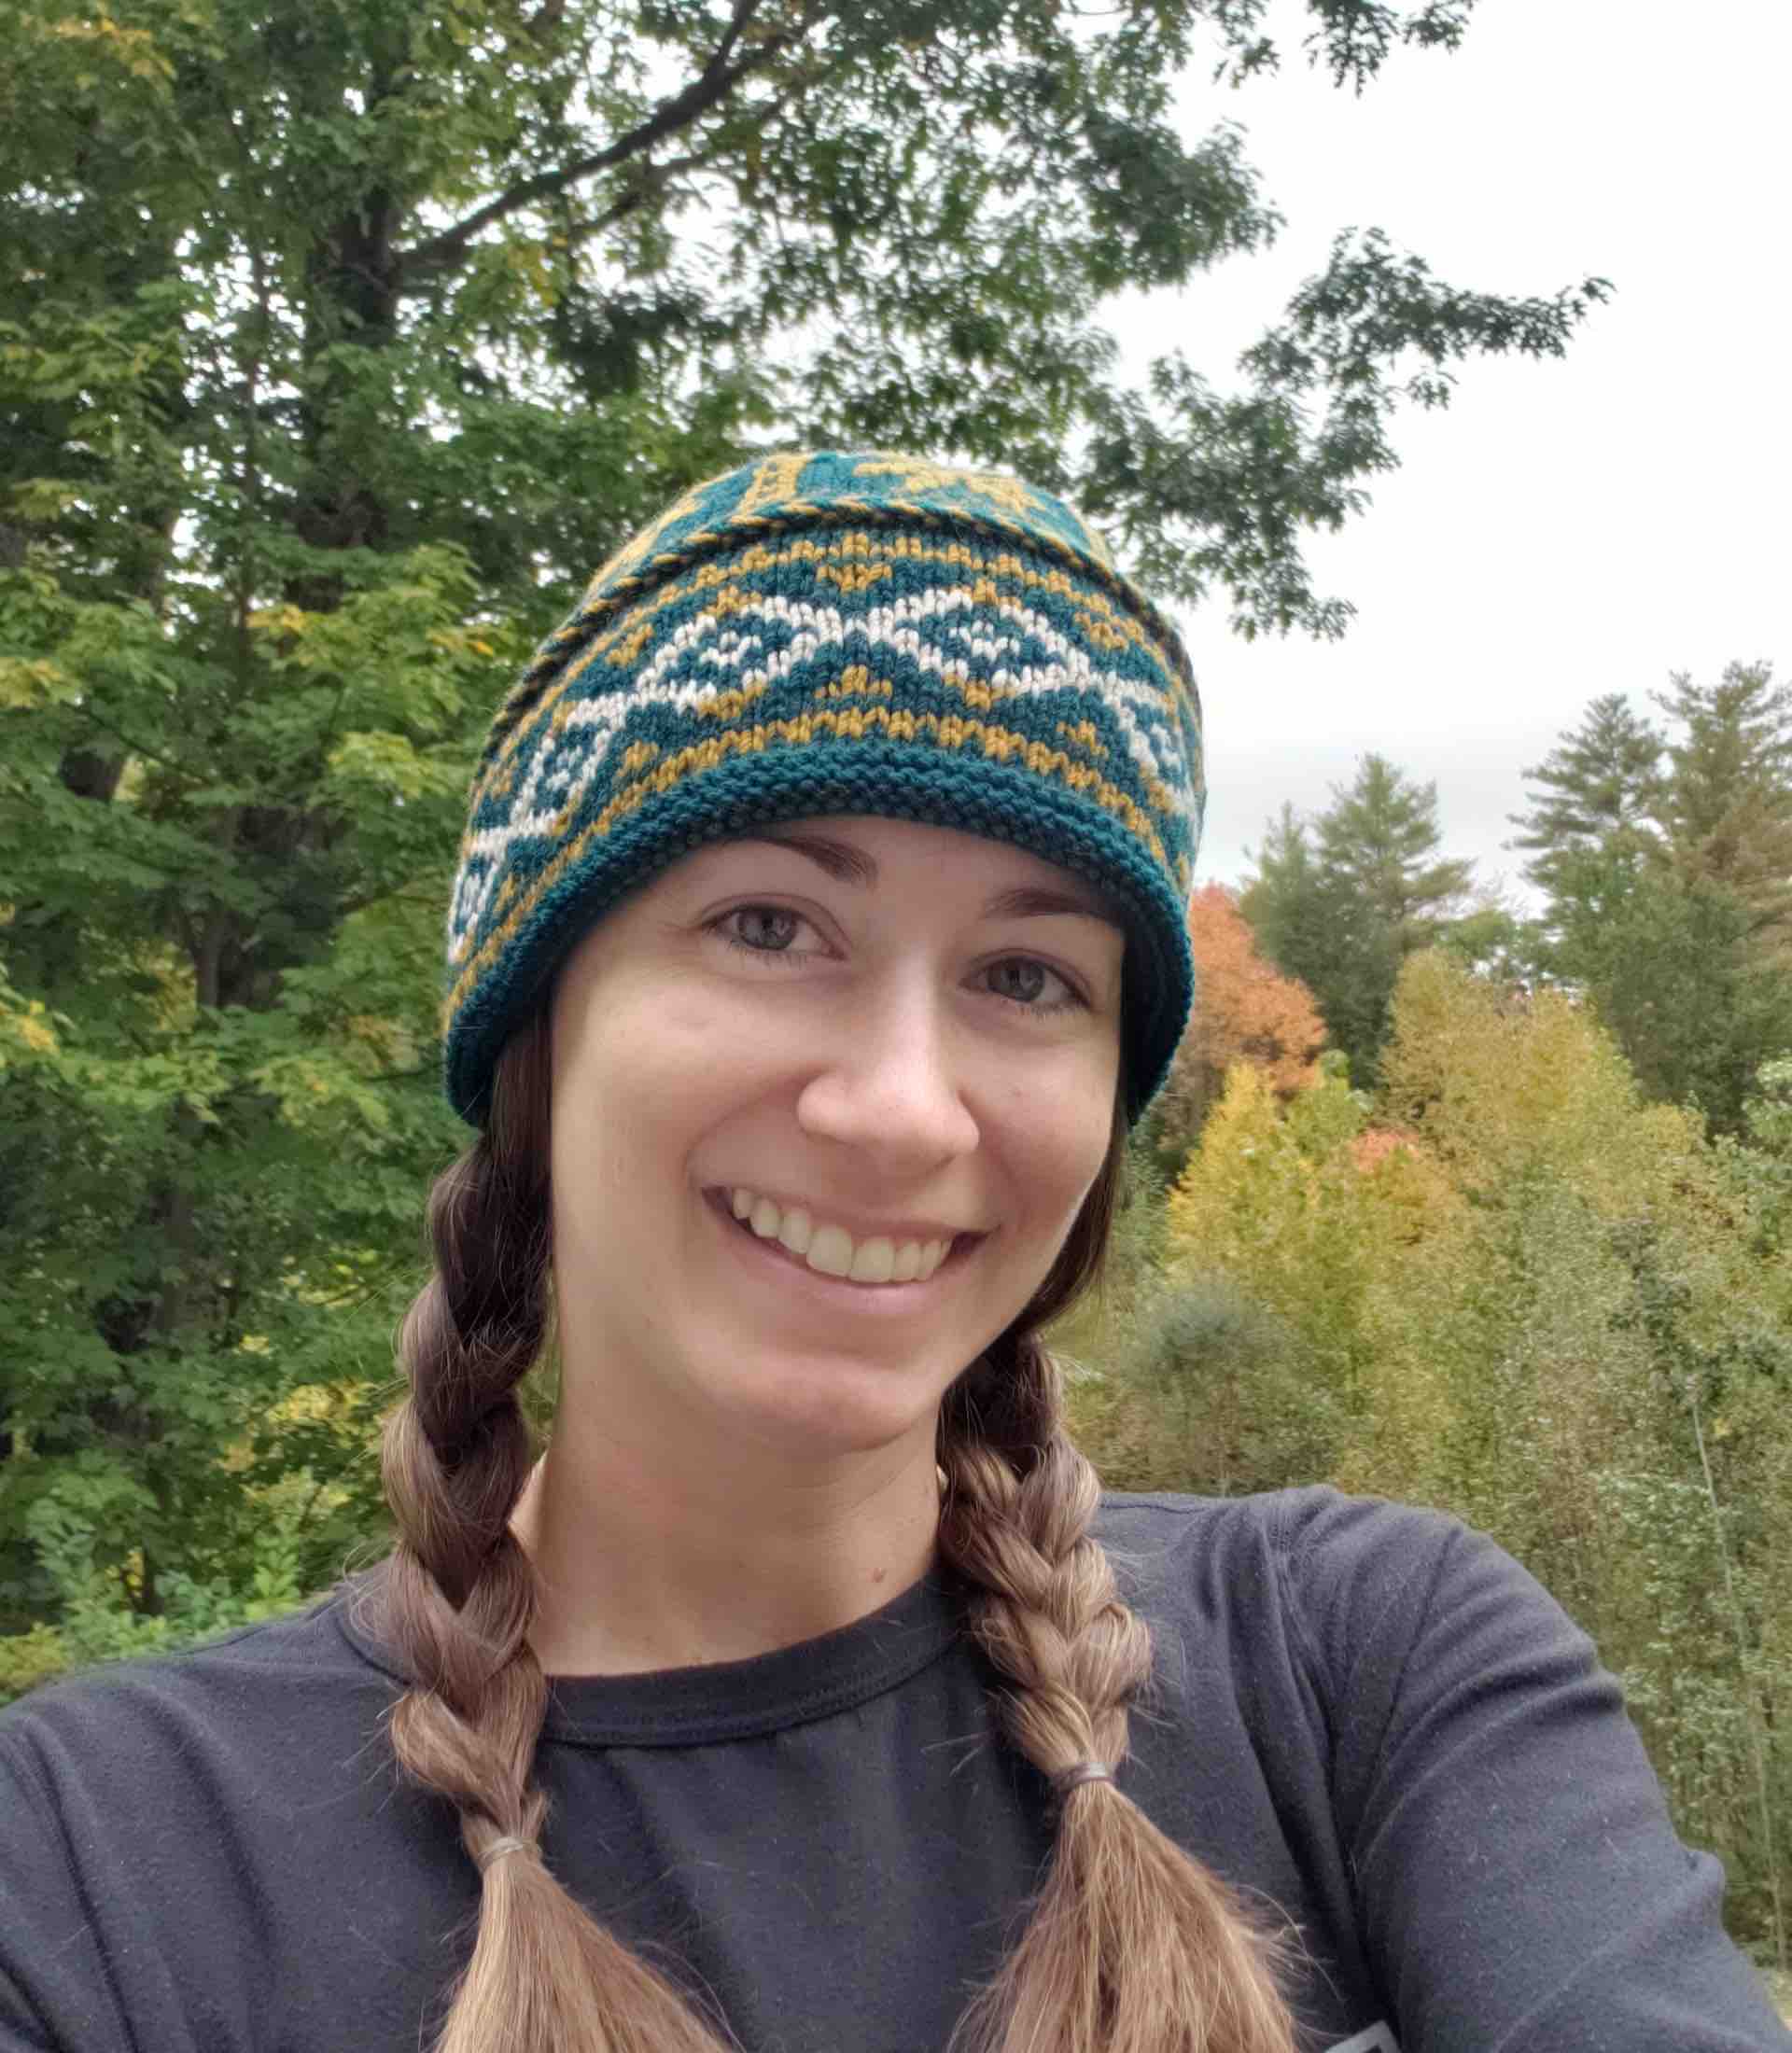
I am following this pattern exactly and the second colorwork pattern is a bunch of circles. It’s for fun only because when the hat is complete the cuff will be turned up to cover this section of knitting. But, Fair Isle is much more fun to knit than simple stockinette. This section could actually contain anything, or nothing at all. When I knit this hat in green and gold, I put a heart pattern in this second section.

I will say that this knit made my hands ache. I did knit at long periods of time, but the wool is quite stiff to work with. The last two hats I made like this were knit with Brooklyn Tweed’s Arbor yarn, which I would have used again, but had no more good colors left. This hat will have a different look because of the yarn, but that’s okay because I also love this type of wool.

Colorwork pattern #2 will be covered by the cuff when the hat is finished.

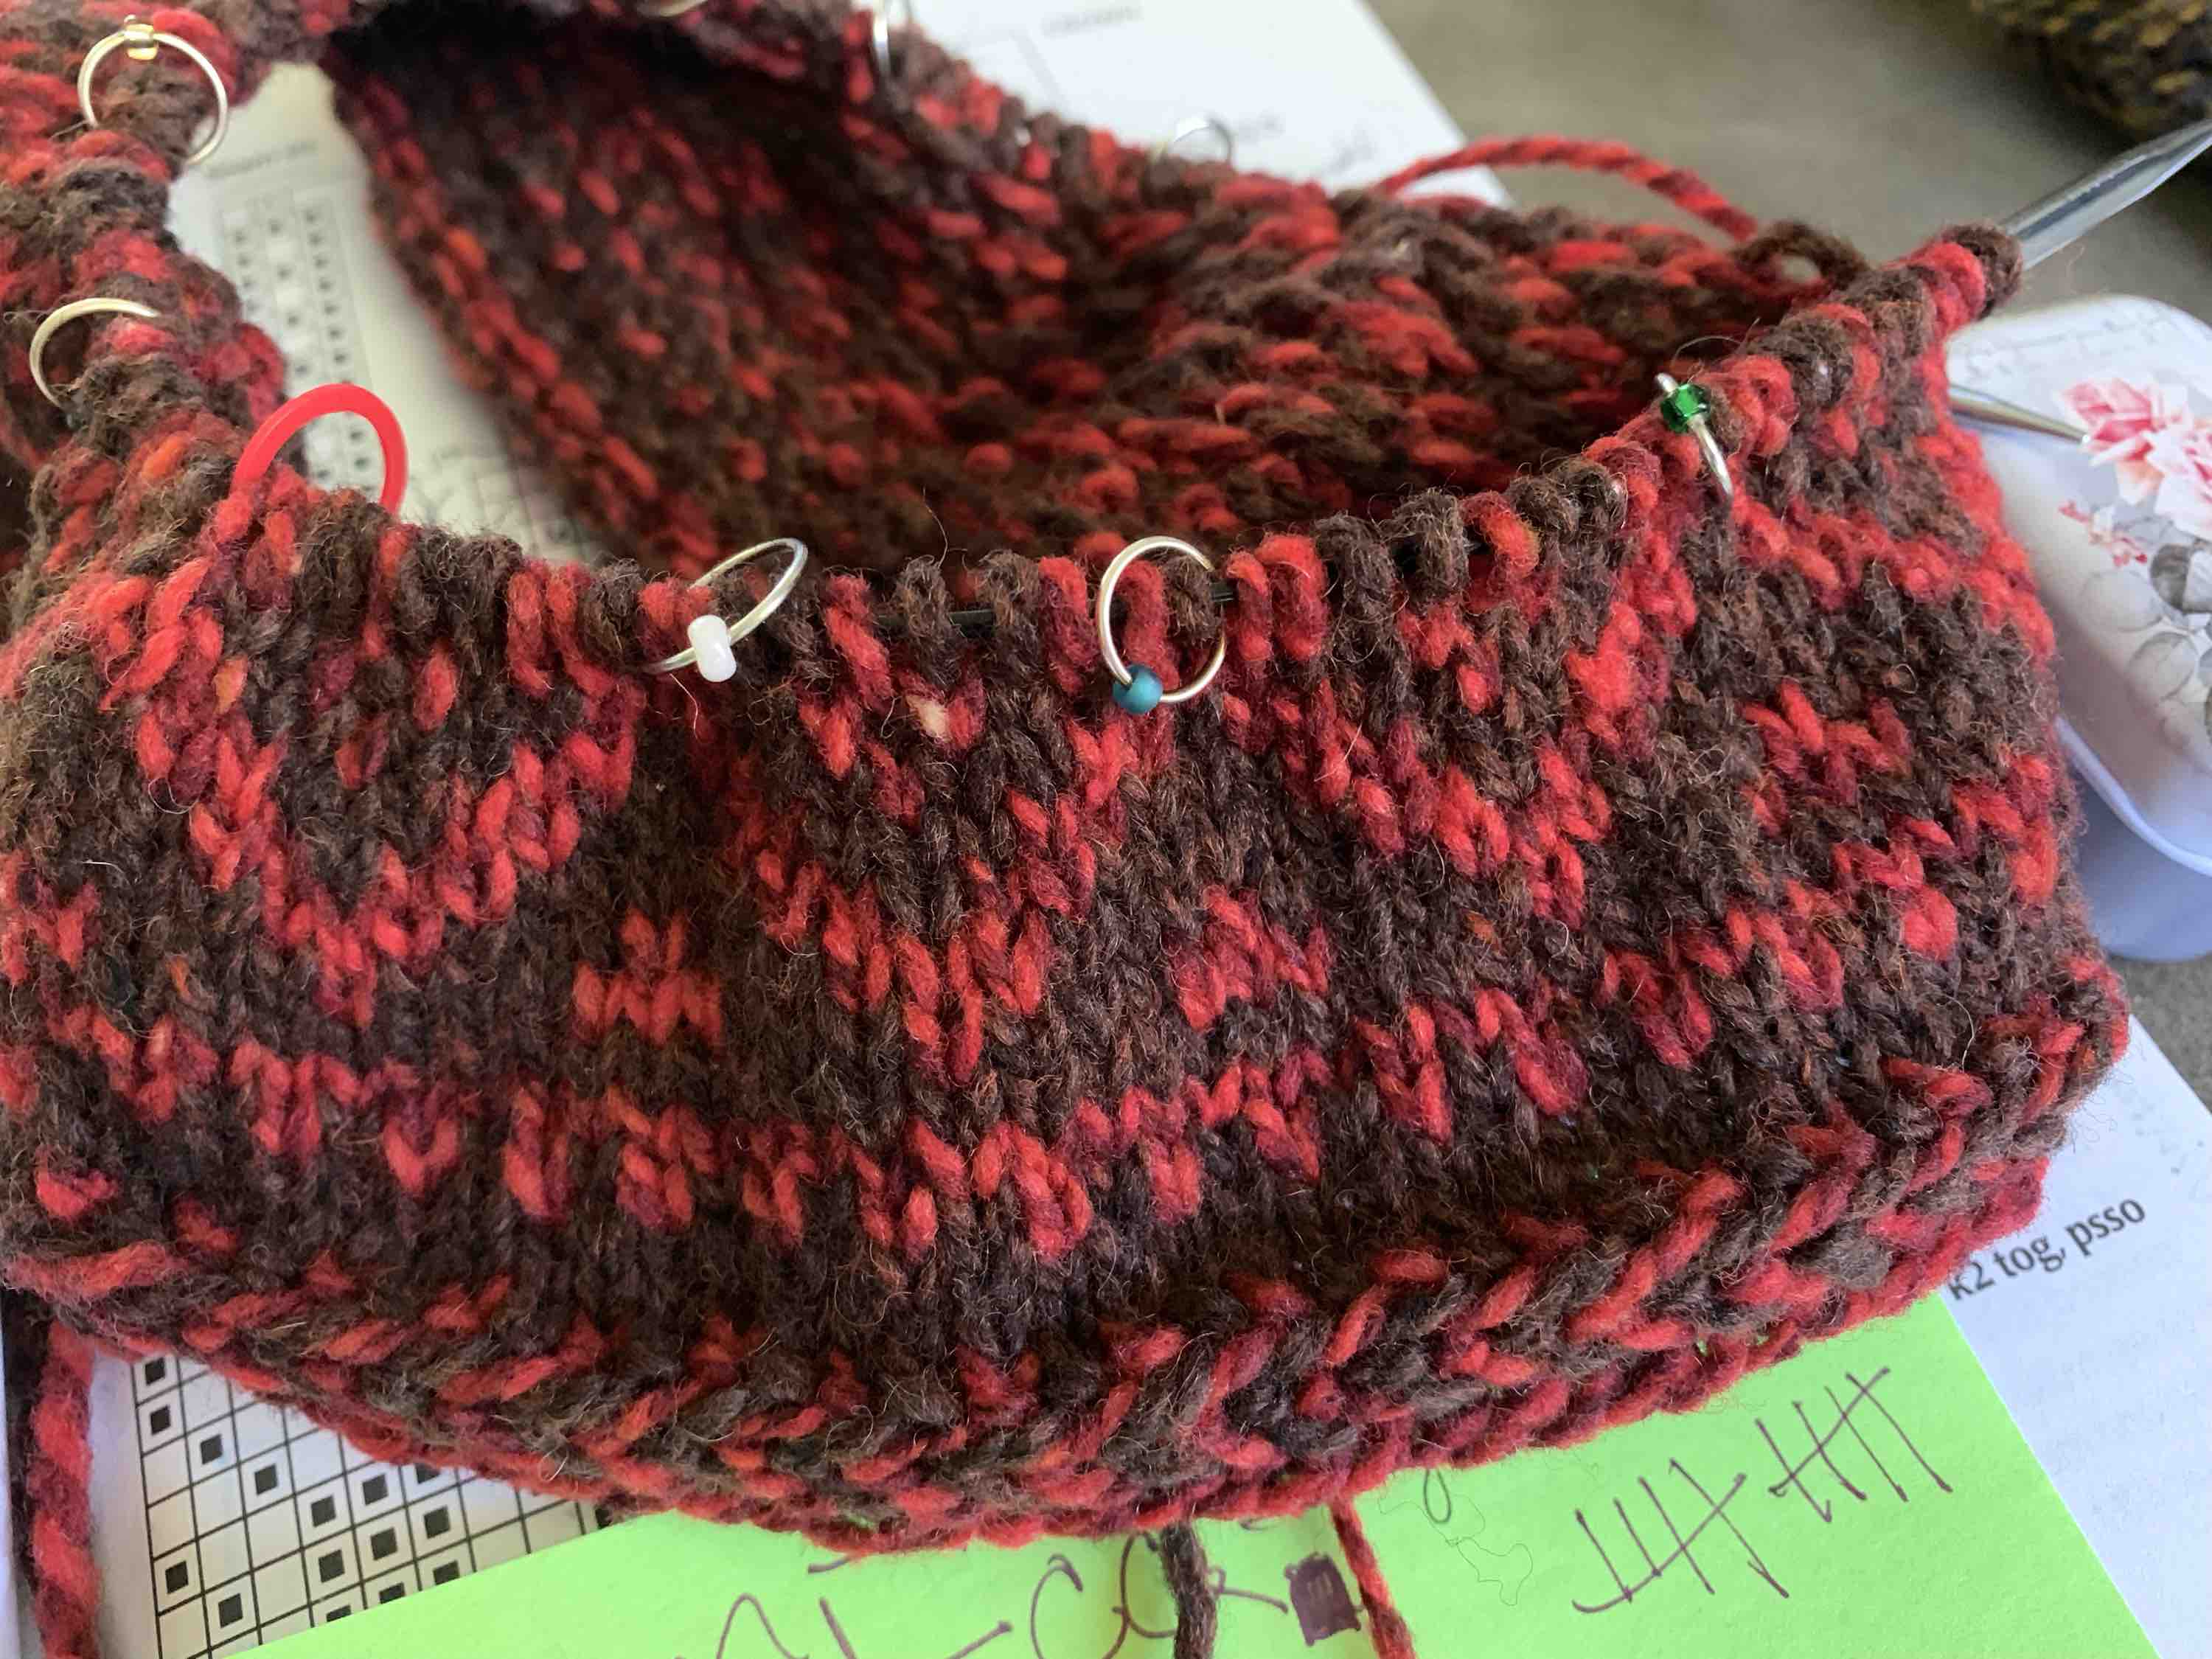
Pattern #3 Completes the Crown of the Hat

As I began pattern number three, I was running low on the brown yarn. I was sure the red would be sufficient, but the brown ball was pretty small. I had used the Teak yarn to knit a pair of boot cuffs for my daughter, so I didn’t begin this knit with a full skein. I do have another brown yarn – BT’s Meteorite – which I am keeping close by, just in case.

It turned out that I had just barely enough brown yarn to finish up the crown – see my image below, far right…! One little strand was leftover. It’s what knitter’s call playing “yarn chicken”.
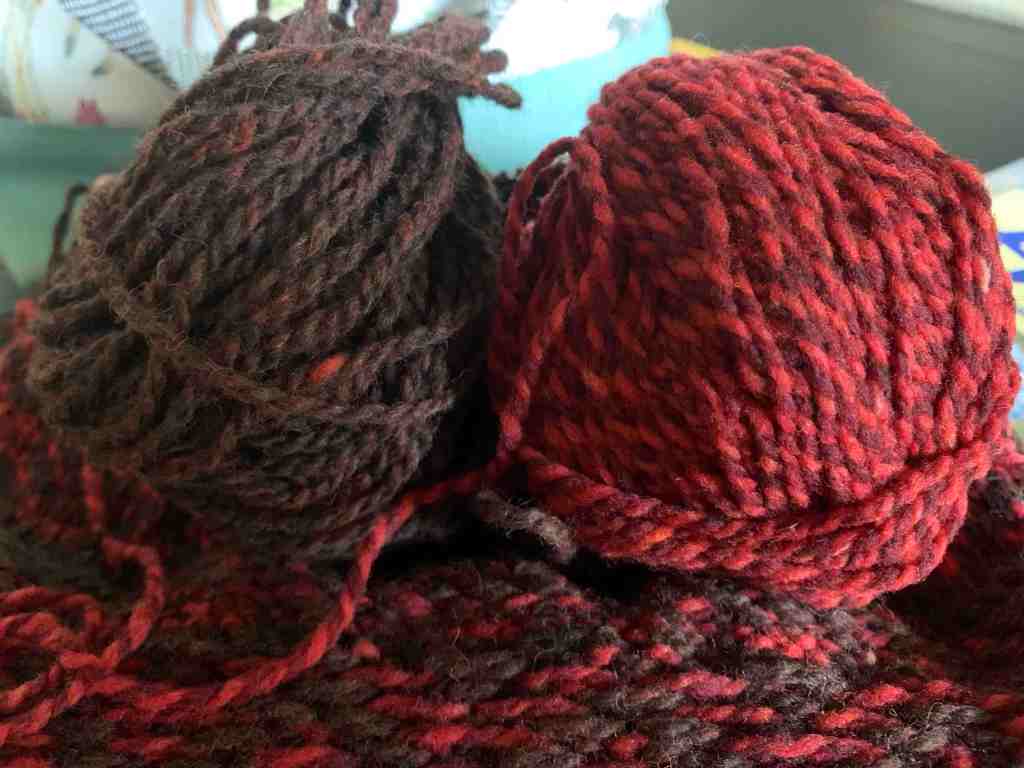
The Wool Yarn

In keeping with my plan to use up the yarn I already have, I found two worsted weight, pure wool yarns that I like together. The yarn I am using for this hat project is Brooklyn Tweed’s “Shelter” in colorway Amaranth (shades of red) and Harrisville Highland Wool in colorway Teak (brown). Wool is wonderful for colorwork and will help to make this hat extra warm on cold days.

The Size and Needles Used

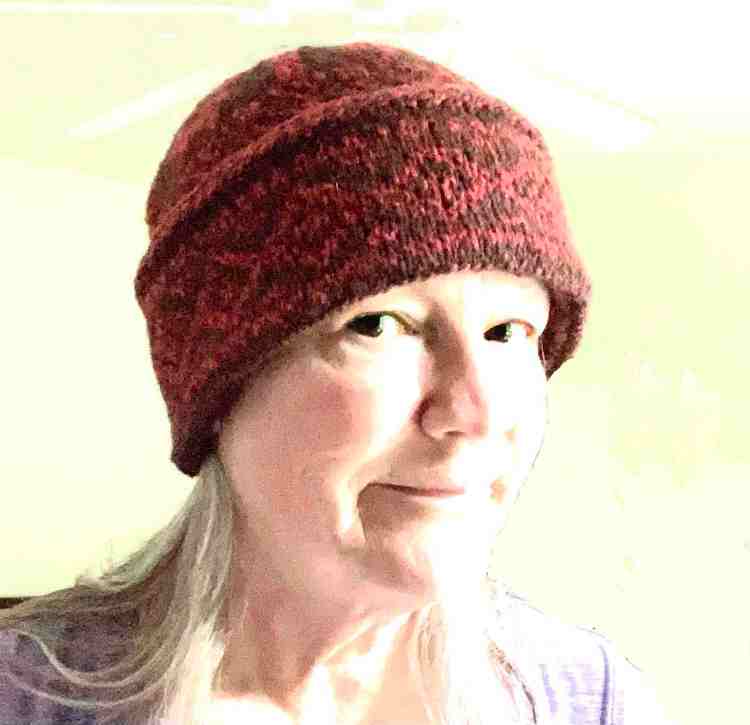
I am using a size 6 needle (16 inch circular and DPN’s) and knitting the size XL hat. Both hats I knit previously came out with head circumference measurements exactly matching the pattern. Because this hat is done in stranded knitting around the brim, it won’t have a lot of stretch. The XL should measure 22 inches when finished and that should fit my head nicely. Yes, it does!

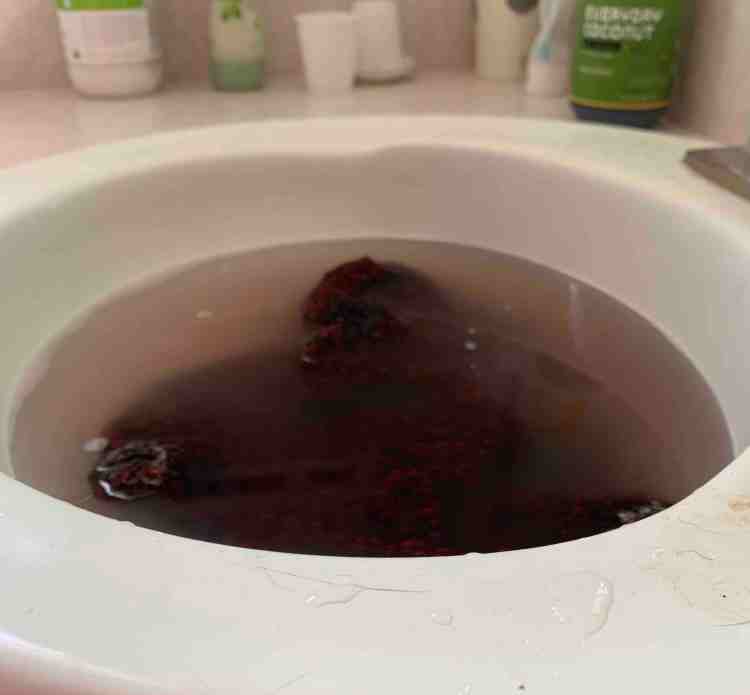
The finished hat, after washing and drying, measures approximately 22 inches around. There isn’t much stretch to this pattern and it fits snug, but not tight to my head. I rinsed it twice in wool wash as there was a lot of color coming out. Yarn tends to be pretty dirty by the time a project is knit, so washing is essential.

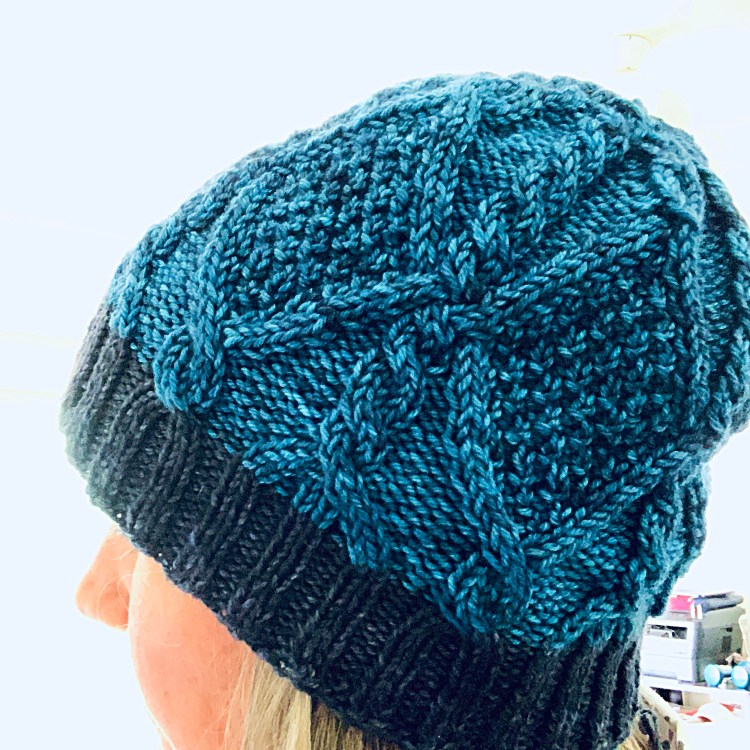
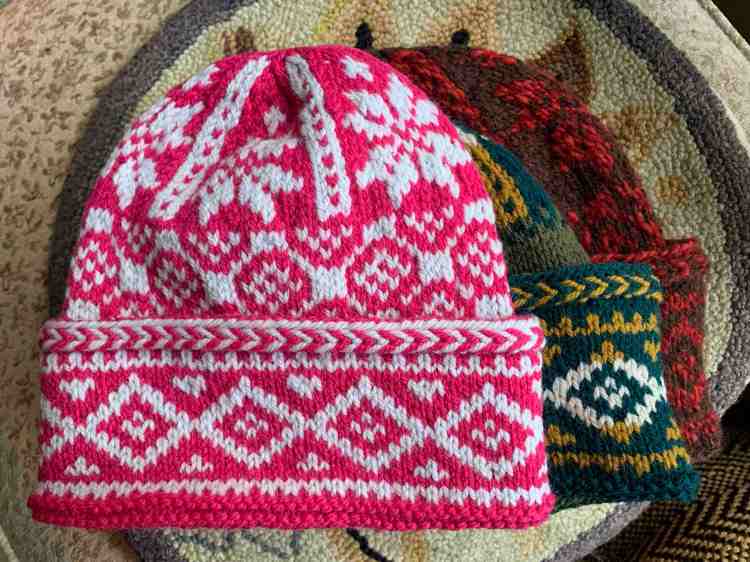
I Now Have Three Triple-Patterned Watchcaps in Three Sizes

Two hats, the size Large and Small, were knit using Brooklyn Tweed’s “Arbor” which is a very nice yarn. I enjoyed knitting with it more than the wool, but I love the outcome of this wool hat.

knitting divider

Latest Blog Posts

Something went wrong. Please refresh the page and/or try again.

Catching Floats and Carrying Yarn, MC and CC

This post is specifically for catching floats while doing Fair Isle, or stranded colorwork knitting.

Fair Isle knitting is when two colors are used to knit across one row. For this example, the Main Color (MC) is held in the right hand, and the Contrast Color (CC) is held in the left hand – you may change that, but it’s how I did it. By using two hands the project is knit using both English and Continental style.

If you haven’t mastered two-handed knitting, you can still knit colorwork if you keep each yarn in the correct position. But keep trying to learn two-handed knitting because it’s a lot of fun.

The Triple-patterned Watchcap

My example here is my second knitting of the Triple-patterned Watchcap from the “Hat’s On” book. The first hat was made in pink and off-white. It is a small size and won’t fit me, so I wanted one that would.

I decided to use up some of my Brooklyn Tweed Arbor yarn in greens and gold, which I bought to knit some mittens a few months ago.

Triple-patterned watchcap hat drying
Finished and drying

This watchcap has three sections of colorwork (hence the name). However, this time I changed the second section of colorwork and made hearts. That section of the hat will not be seen while being worn because the brim flips up over it – see image below.

The pattern begins with a braid, then the first section of colorwork is knit. The work is turned, and the rest of the hat is knit.

Layed out flat, the first section is inside-out.

Colorwork brim of the Triple-patterned watchcap
The brim folds up over the second section of colorwork

You may wonder why I would bother, but I love doing colorwork and I wanted to try that heart pattern. I will use it again at a later time on another hat where it will be seen. The pattern calls for colorwork at this area.

Managing the Floats

When one of the yarns (either MC or CC) has to be carried along behind the work for more than a few stitches, while the opposite yarn is being used, those yarn strands – called “floats” – need to be caught. If they are not, there will be long strands of yarn on the wrong side of the garment.

Some people say five stitches are the max before catching a float. I think it’s really the knitter’s preference, but long floats are not advisable. Once you know how, it’s simple to do, so just catch them often.

My photo below is of the back of the knitting (that hearts section in the hat) and shows how it will look when the floats are caught. There are no long loose bits, and it makes a “fabric” of it’s own.

carrying floats in colorwork
Wrong side, showing carried floats

Carrying the Left Hand Yarn (CC)

This is the easy yarn to carry. As you get ready to do the stitch, slip the LH yarn over the needle from back to front. Then knit with the RH yarn – do not pull the LH yarn off, just let it get caught up with the MC yarn as you finish the stitch.

See it done on Suzanne Bryan’s tutorial around 4:10 into the video. Also, below I mention that she wraps the other – RH yarn – around 3:20.

Carrying the Right Hand Yarn (MC)

Here is where I had my trouble. I learned it correctly and then forgot the next time I knit. When the CC yarn (or RH yarn) is being used for four, or more, stitches at a time, carry the MC by doing this:

For the next CC stitch, bring up the MC yarn (held in the right hand) and wrap around the needle (as if to knit with it – my dark green yarn below). Then, wrap the CC yarn from FRONT TO BACK over the needle (blue yarn).

picture image of how to catch floats
Wrapping the yarn correctly

Now, pull the MC yarn (dark green) up over the needle and it will be caught by the CC at the back of the work. A tug on the carried yarn keeps it from showing through to the front.

If the CC (LH yarn) is not wrapped front to back, the stitch will twist and on the next round of knitting will have to be corrected before knitting. I was, on my second Katie’s Kep, and kept wrapping my left-hand yarn from back to front and couldn’t figure out why my stitches looked wrong on the next round. I was wrapping that CC yarn the wrong way!

Suzanne Bryan’s video is good, but you have to look closely at time 3:20 + to see how she wraps the LH yarn front to back and then pulls up the RH yarn so it won’t show through.

I like to knit colorwork hats for winter because they are naturally heavier because of the two yarns. Those floats create a wrong side design of their own.

A Hat That Fits

My newest Triple-patterned Watchcap fits my head – yay! It is snug, and I could probably wear the XL size. This one is a large and measures 20 inches around. A hat knit like this does not have much “give” because of the colorwork designs.

I do love this design and it has become one of my favorites to knit. I see one in the future that will be full of hearts!

See the pattern at Ravelry, but it is not for sale alone. It’s part of a book full of great hat patterns. I highly recommend the Hat’s On! book.

Here are some of the other hats I’ve knit from the same book.

Pink and White Triple-Patterned Watchcap

The Triple-patterned Watchcap pattern comes from the “Hat’s On” book. I love the look of this little colorwork hat, but “little” is the key word here.

I should have known better. I knit tightly and this is colorwork – which tends to be tighter and smaller in the end than regular knitting. I decided to knit the size “small”. It ended up being about 15 inches around, which is a child’s size.

Triple patterned watchcap small
Unfolded, finished hat

Originally I had wanted to make this for my grown daughter, who does have a smallish head, but not that small. I realized, not too far into the knit, that this hat would be too small for an adult head. I kept knitting anyway to see if I liked the pattern after all. And I did.

Reminder: Stranded knitting does not stretch much!

This small size ended up measuring 16 inches around, just as the pattern noted for the Small size. If I use the same type of yarn, same needle size (I used size 6 as the pattern suggested) then each of the other sizes should give me the correct measurements. This is good to know because I do plan to knit this one again.

Triple patterned watchcap small
The edging at the fold

Some previous knitters of this pattern had swapped out the turn edging for a braid. I almost did that too, but I’m glad I didn’t. The turn rows for the edge, which end up at the bottom of the brim, work very nicely.

The brim of the hat is very pretty with the braid which ended up at the top and row of turning stitches along the bottom. The pattern is begun with the braid, worked to the end of the brim, then the work is turned (see notes below for turning) to begin the rest of the hat. This way the brim is made to fold up.

Triple patterned watchcap small
Crown

I made the second pattern section a little taller than called for and I honestly don’t know why. I was thinking the hat would be too short since it was turning out small. A short hat is not good, but I overcompensated.

I think another row of smaller snowflakes before the top section would be nice.

Triple patterned watchcap small
Finished!

The yarn I used is Arbor, by Brooklyn Tweed, and it’s become a favorite type of yarn for me (The link goes to Wool & Company). It is very soft, and creates a beautiful, squishy end product. The colors here are Azalea and Thaw.

Doing the “Turn”

The pattern says to work the cuff pattern for so many rounds, then “turn”. There is nothing else about doing the turn, but I have notes from doing a pair of mittens which are made in this manner where the cuff turns to begin knitting the rest of the mitten.

Simply turning the project and knitting in the opposite direction is what’s called for, but if it seems daunting, here are my notes:

  • Turn work inside out, with needles at top.
  • Slip the last worked stitch from the Left needle to the Right. This stitch will be the last stitch of the round.
  • Cut the unused color.
  • Begin knitting with the main color as pattern calls for.

Three Hats in Three Different Sizes

I’ve now knit three of these hats, and the green one is a Large – which will be gifted to my daughter. The XL size fits me perfectly, and was knit in another type of wool.

Triple Patterned Watchcap hats in three colors
Knit in sizes, XL (red), L (green) and S (pink)

More Hats I’ve Knit