Venlig Sweater in Flette Bulky, Pattern Knitting Review

A knitting pattern review of the Venlig sweater using Woolfolk’s Flette bulky yarn.

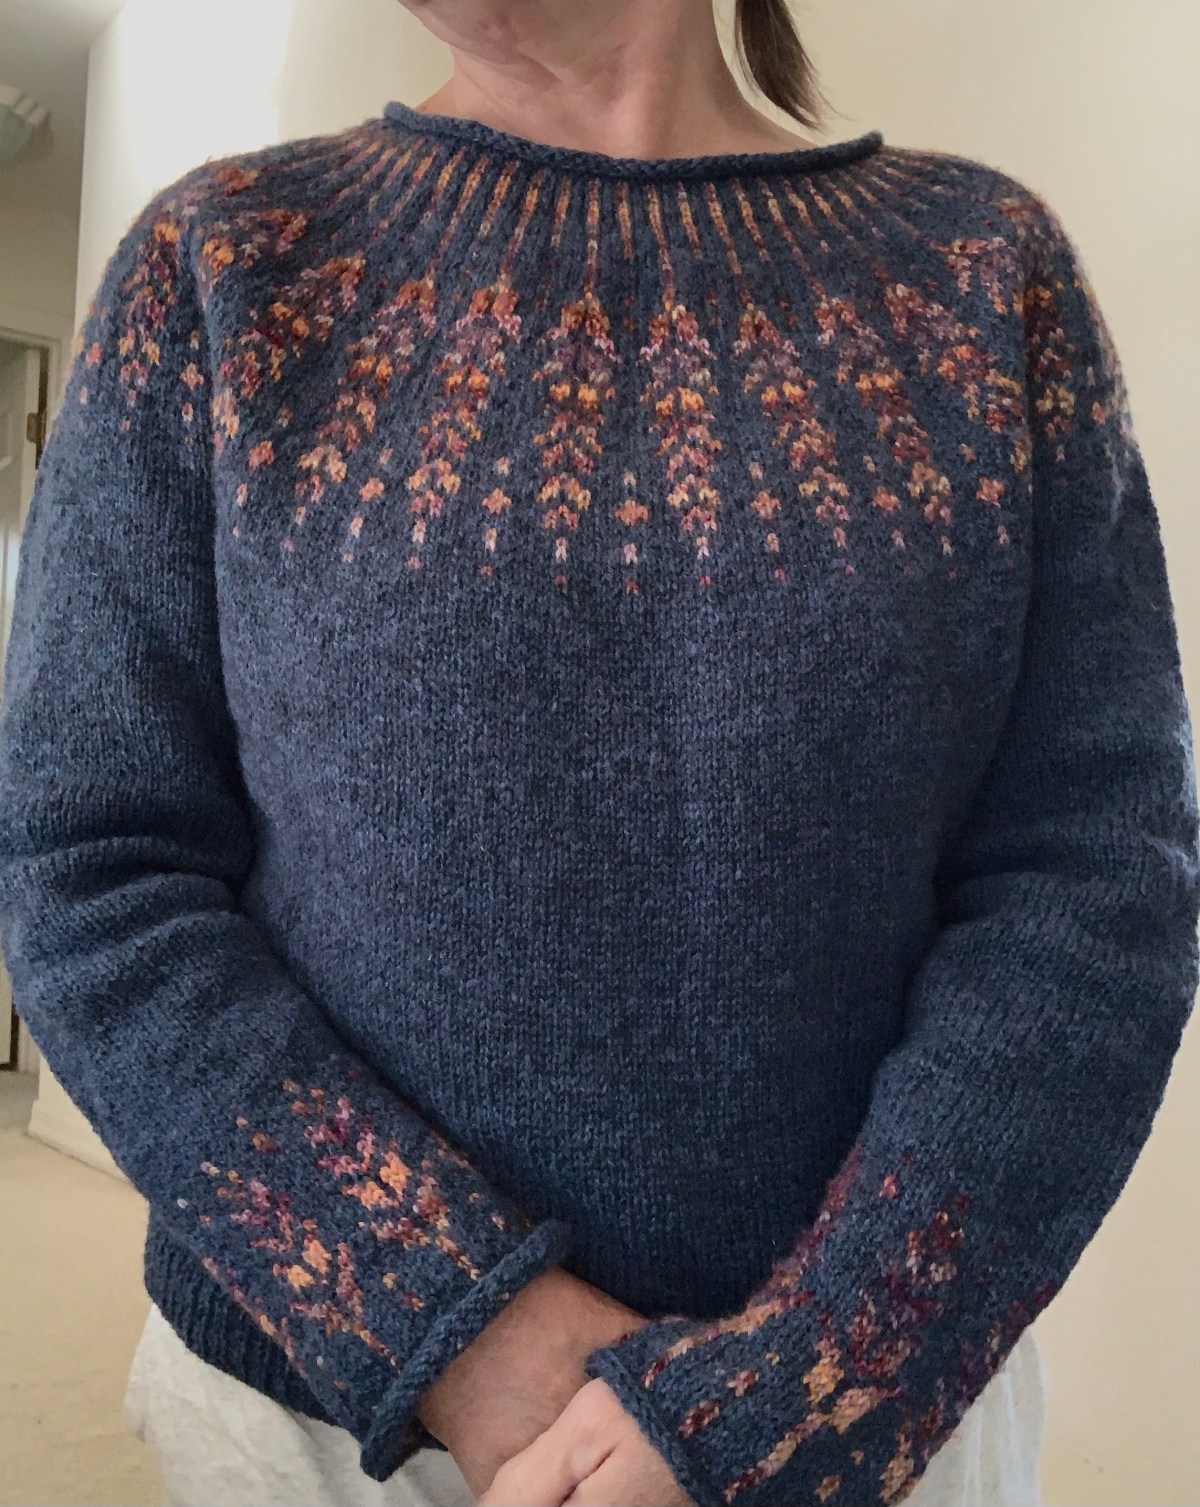
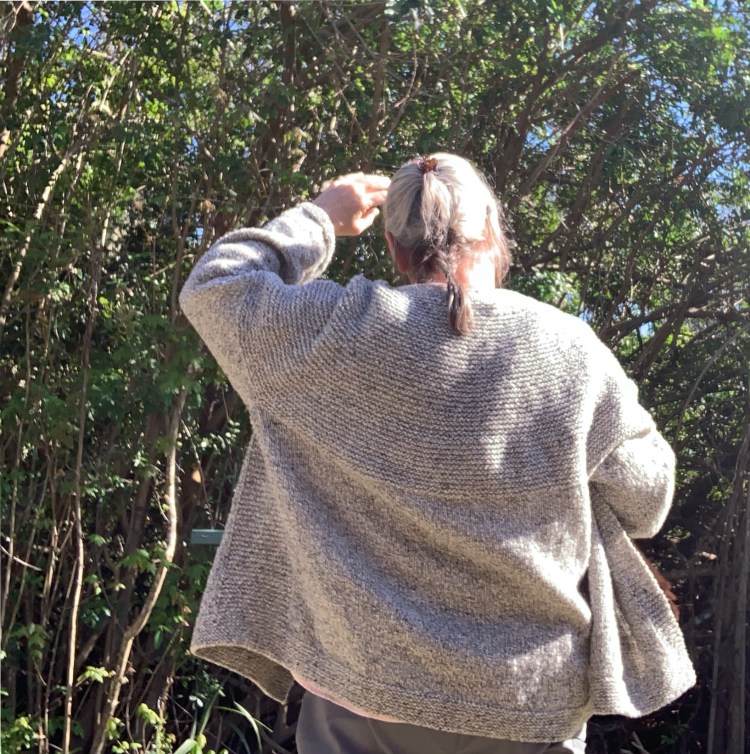
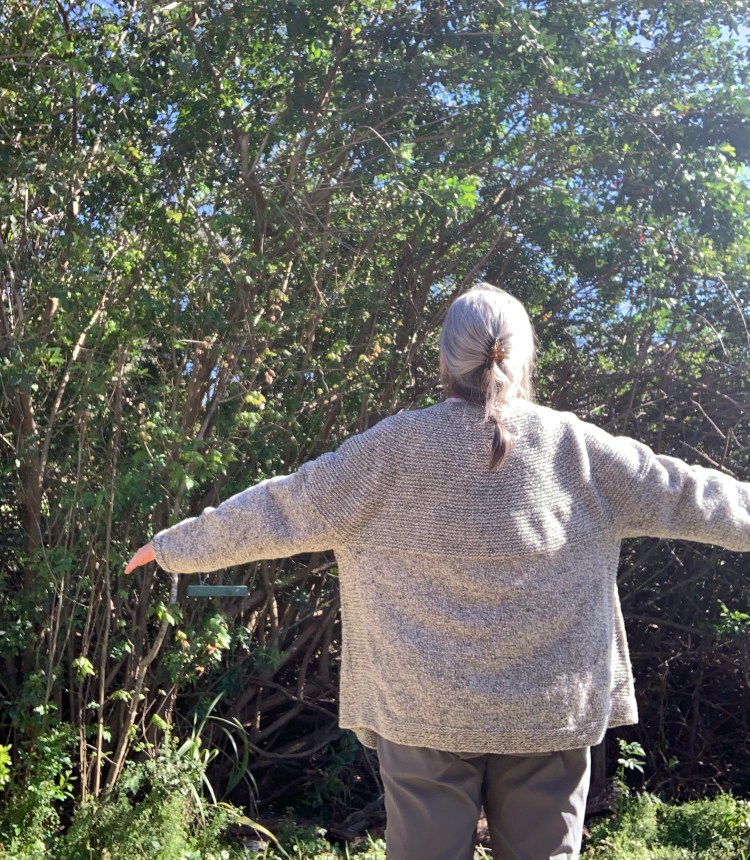
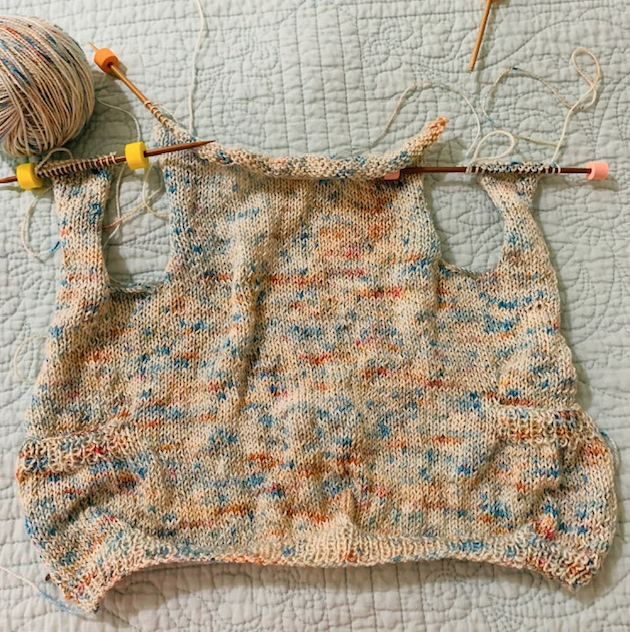
I chose to knit the VENLIG sweater pattern mainly so I could use Woolfolk’s Flette bulky yarn. This yarn looked (and is) so soft that I jumped in and bought the pricy pattern. Ten dollars for a sweater pattern is a lot. This page contains my review of an unnecessarily confusing pattern for a simple raglan pullover.

I have a link to the pattern buying page at the end of this post.

Making This Pattern Easier to Follow

Problems with the pattern.

First, pattern printouts should have readable type. My eyes are not good, but this pattern has the tiniest print possible! The teeny tiny print was very difficult to read. Come on designers – make your patterns readable on paper! It may seem old school to print out a pattern, but that is what I do. (Without internet and power, a paper pattern is necessary. I just came through a hurricane (Ian) and had no electricity for four days. Knitting was my sanity.)

I should have added it to Knit Companion on my iPad so I could read it without using a magnifying glass. But a bigger problem was the difficult to follow pattern. The way the designer separated the raglan sections and added increases, along with short rows – done as “wrap and turns” – was confusing.

Tip: Use a place marker on either side of the “knit one”. That is where the increases are made – before the first marker and after the next. It’s quite simple, but the instructions are hard to follow as you knit along and try to read the tiny print at the same time. Use the markers to guide you. Anyone who has knit raglan style sweaters will get this.

More Mods

I chose not to do the “wrap and turn” and did German Short row shaping instead. I couldn’t’ even understand her wrap and turn directions.

I also made all my increases on the Right Side row and did away with the “make one purl increase”. I used the Backward Loop as my increase and not the M1L and M1R. This was my personal preference. This yarn does not show stitches well, so I figured I’d make the increases as simple as possible.

Reviews of this pattern on Ravelry were unhelpful. Surely I am not the only knitter who had issues?

The Yarn

Once I had the VENLIG pattern, I waited and hoped for a Flette sale. (Be aware there is also a lighter weight Flette yarn, but you need the “bulky yarn” for this pattern.)

One day, there in my inbox, was a notice of a sale from Eat.Sleep.Knit with some yarn listed that included Flette Bulky! Woohoo… I immediately grabbed up my four skeins with a savings of $4.80 per skein. That was huge! And I got free shipping… double win! Eat.Sleep.Knit is one of my favorite places for buying yarn online.

flette bulky yarn order from Eat Sleep Knit
Flette Bulky by Woolfolk – ordered from Eat.Sleep.Knit

So how well does this yarn wind, and what about knitting?

Winding

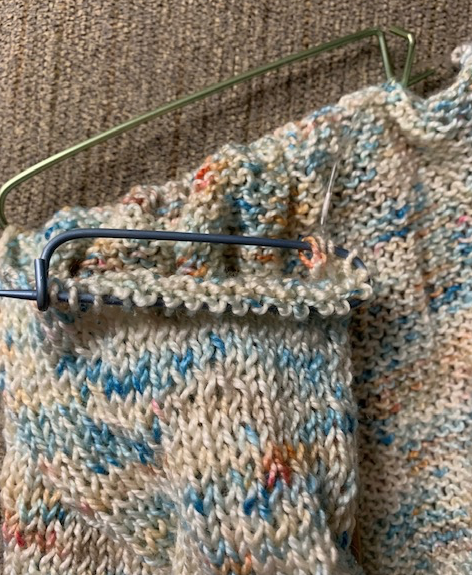
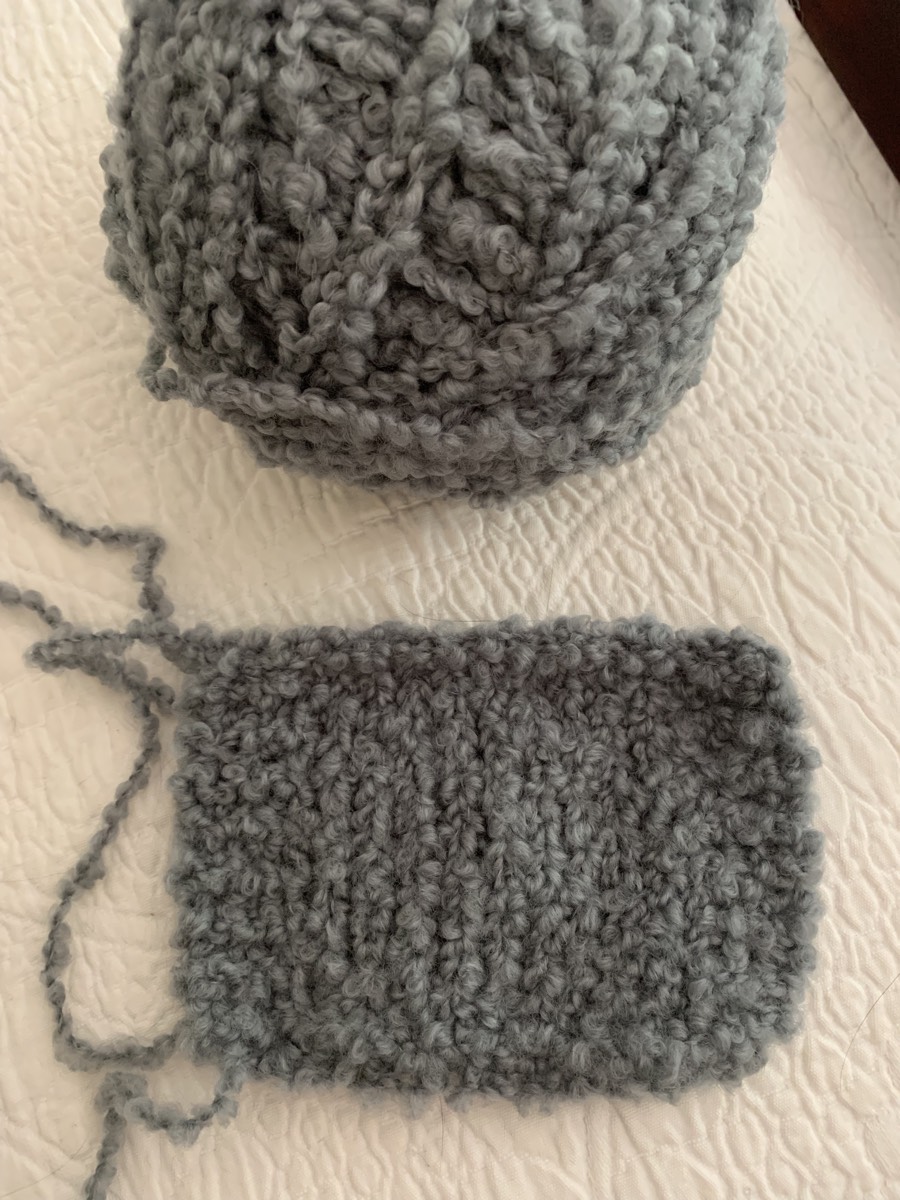
I had to wind my skeins, which I do by hand, over my knees. And I was a bit worried because of the nubby texture. It wound very easily, but there was a tag attached and I mistakenly cut the yarn at the tag- I should have cut the tag – not the yarn! So I ended up with one small ball and used it to knit my swatch.

Don’t cut the yarn at the tag! And when making the swatch, know your stitch and row numbers because you will not be able to count them.

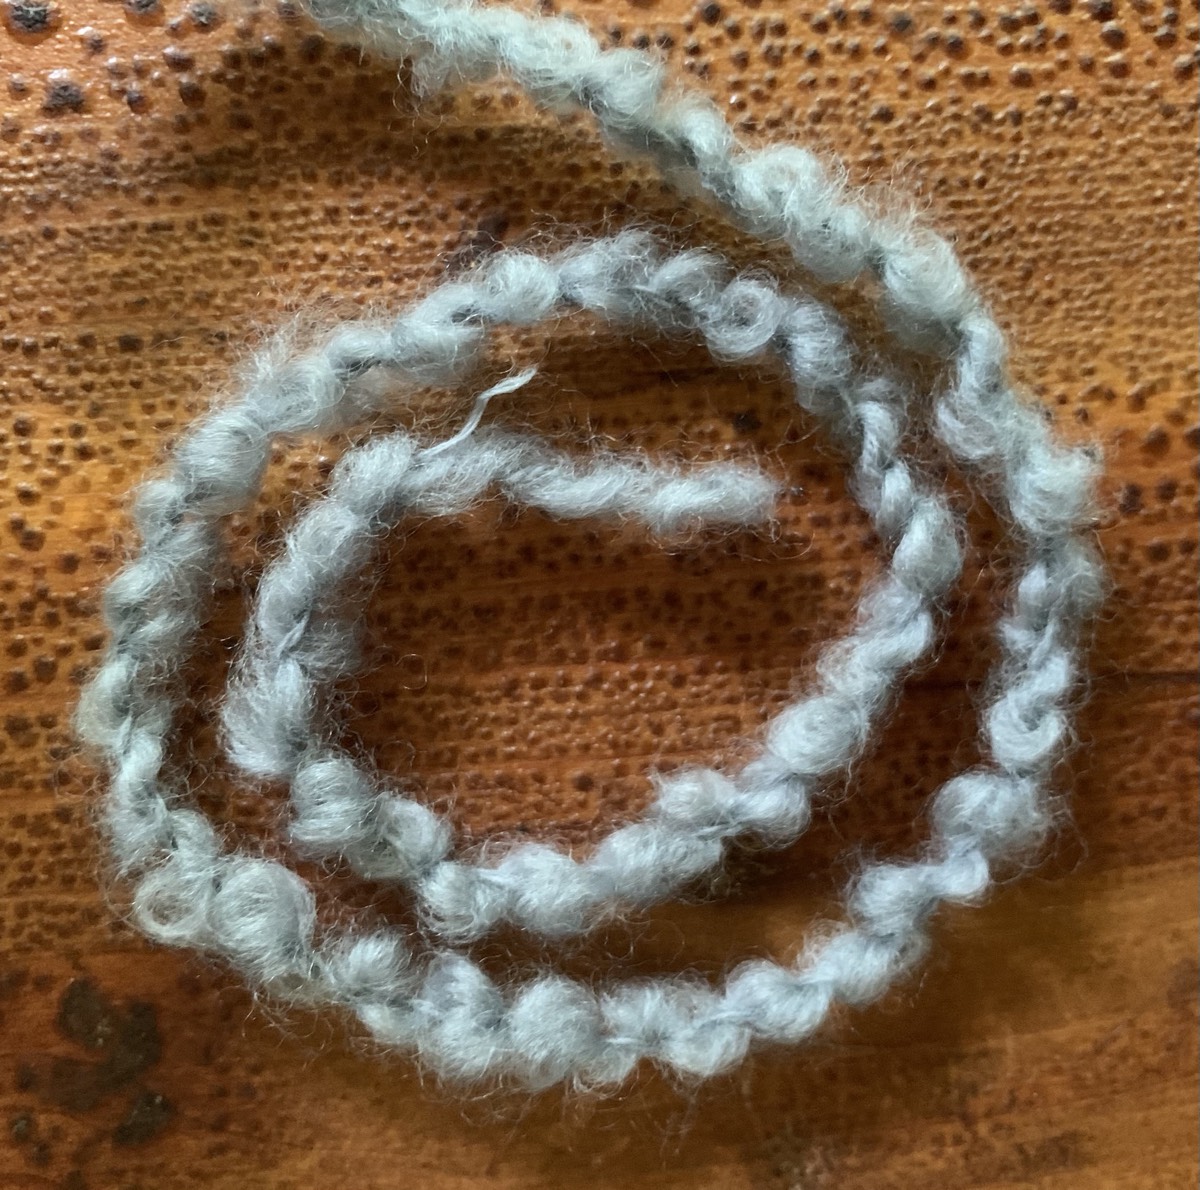
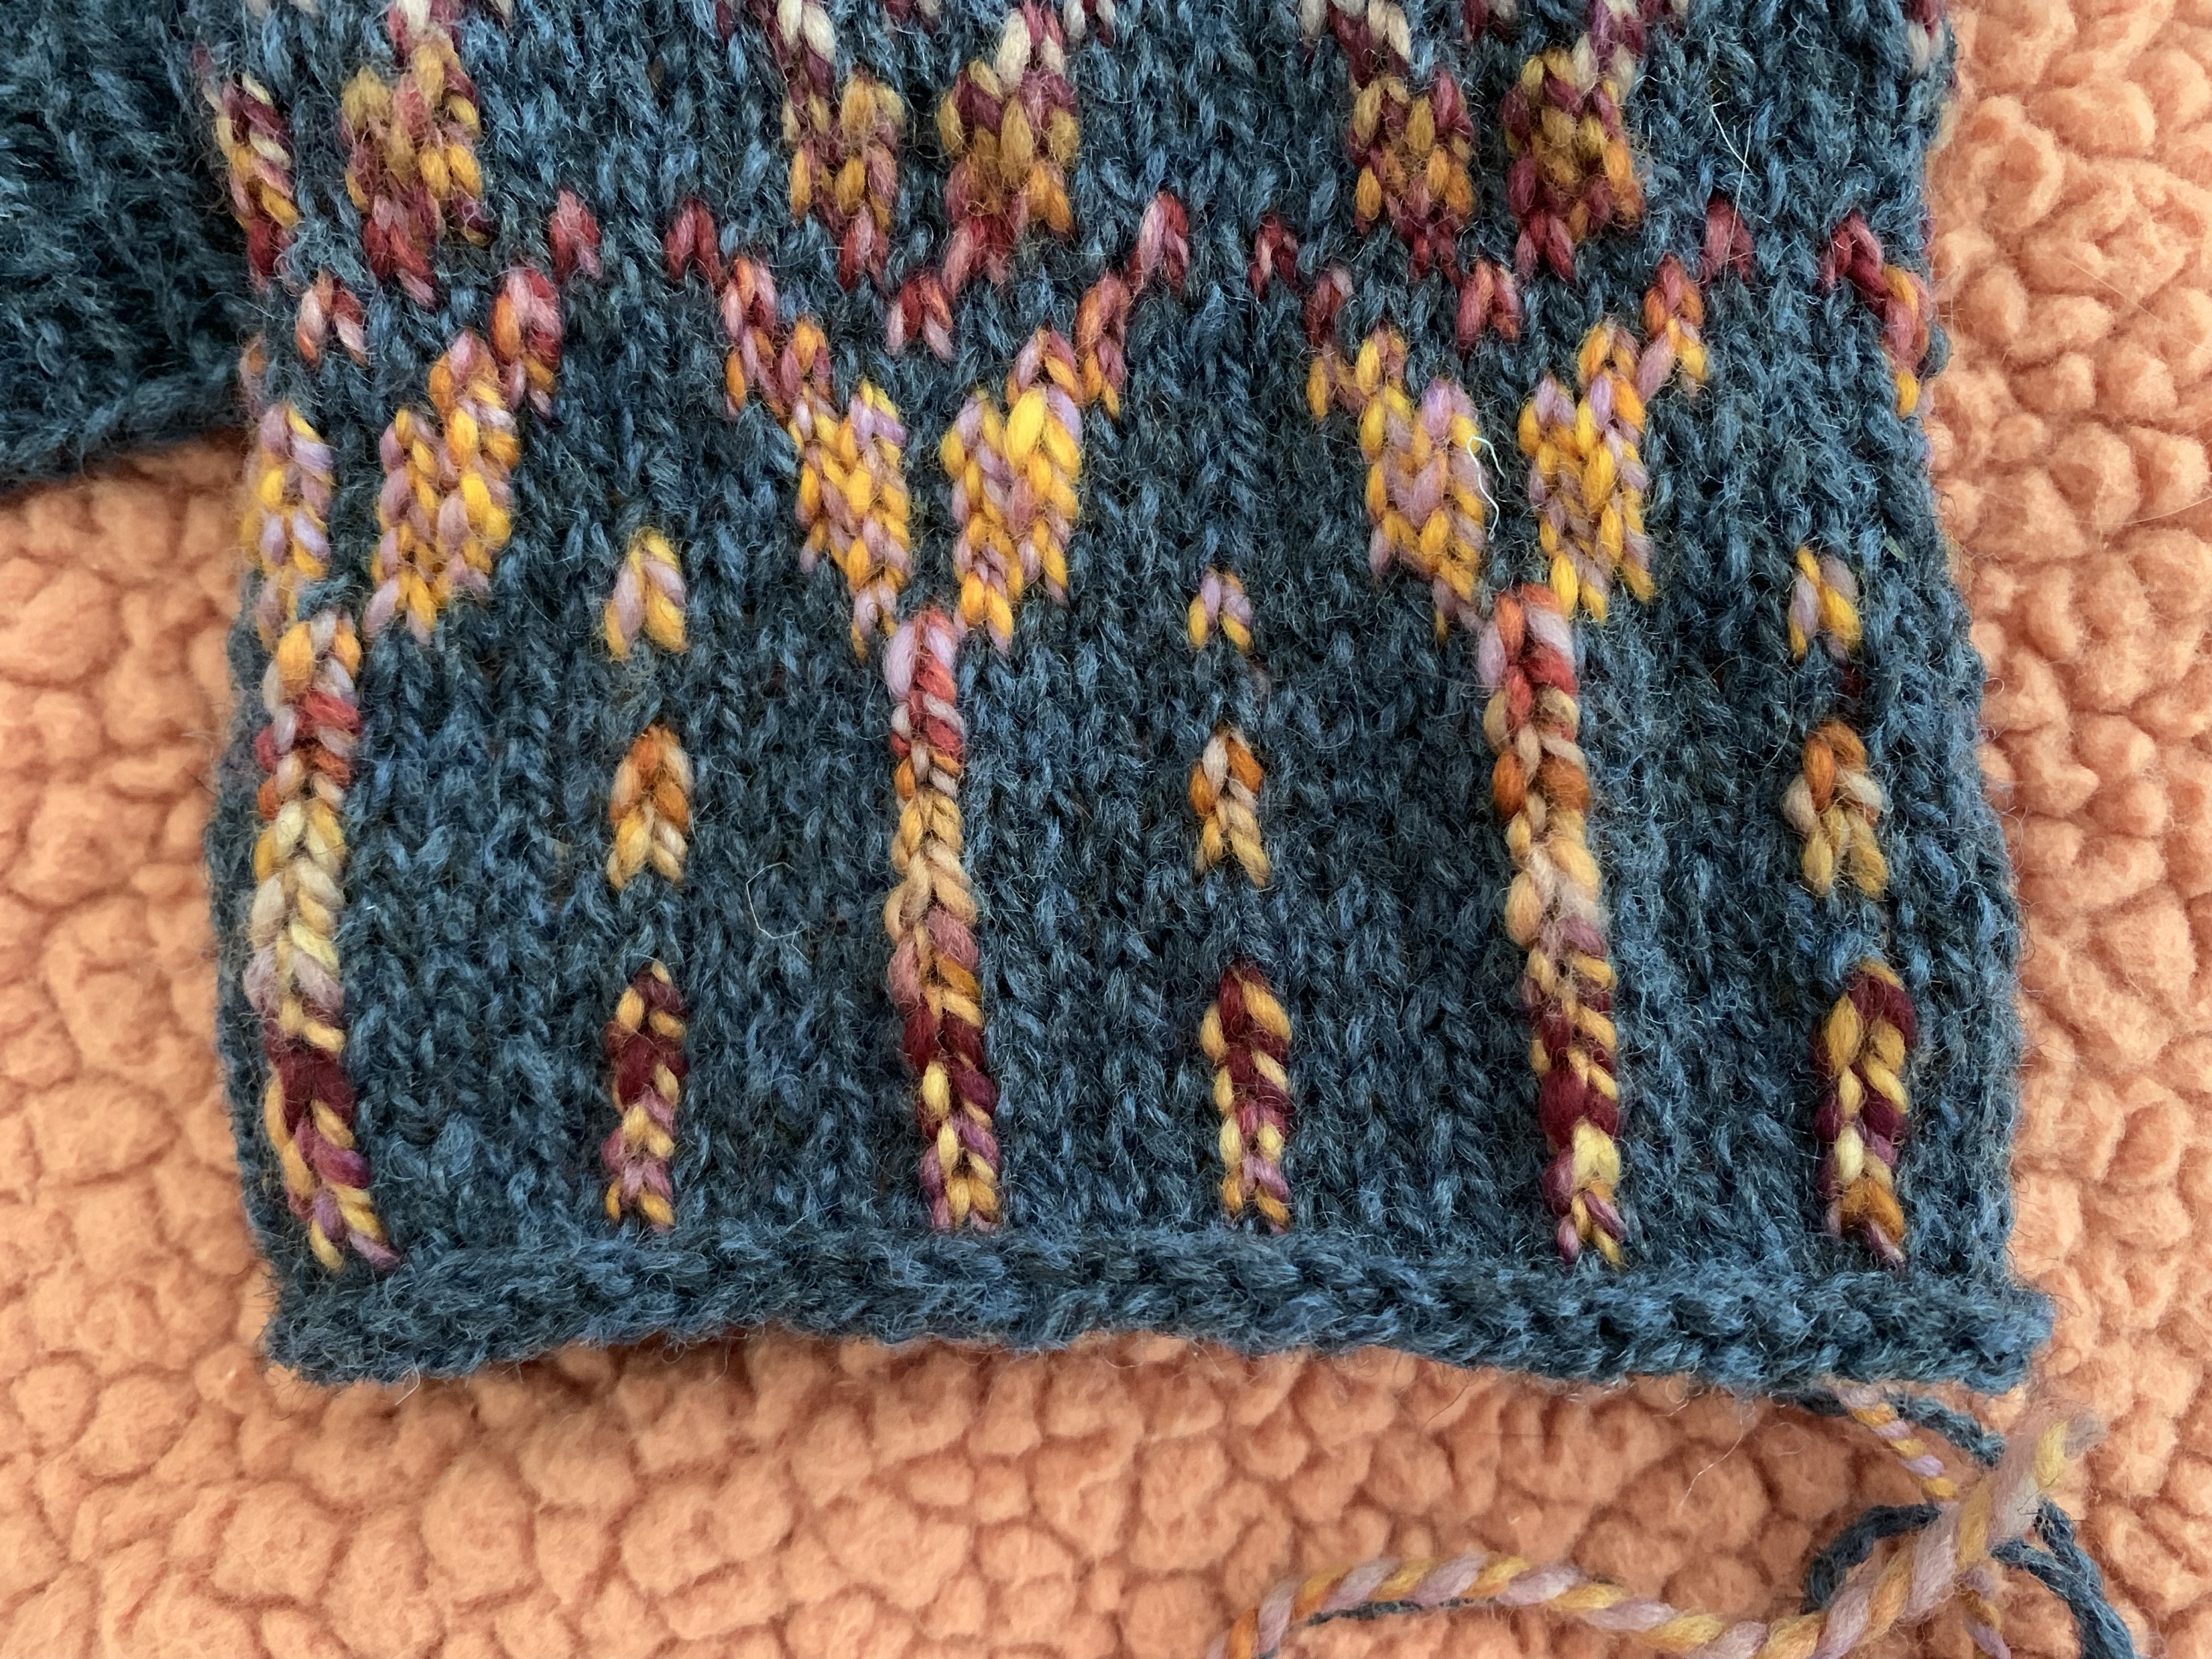
This Flette yarn itself is pretty awesome. It is a boucle (pronounced “boo – clay”) which is a “yarn with a looped, or curled, ply”. It is quite different from anything I have knit with, and super soft. The skeins did have little knots occasionally. I cut out the first one, but decided to knit the others in.

Knitting

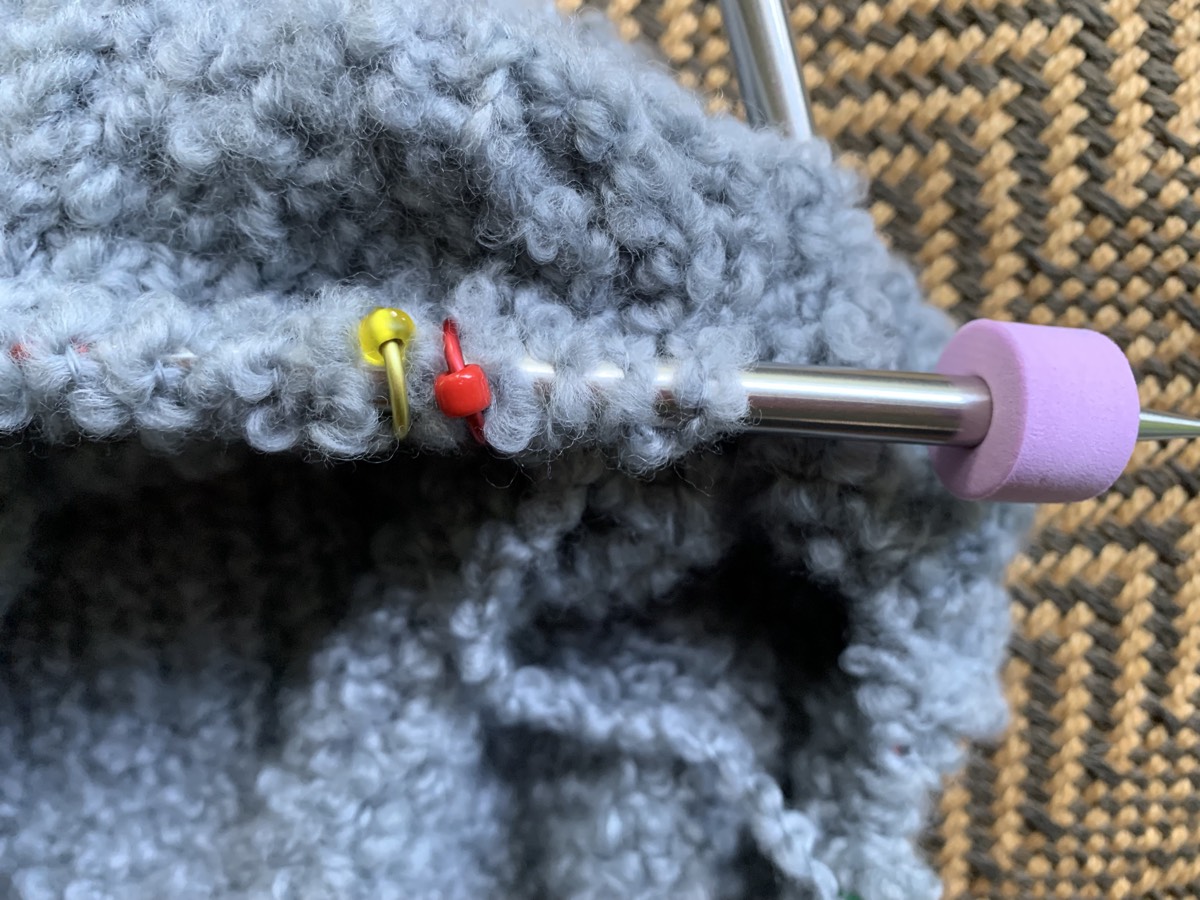
As far as knitting with this yarn, it was okay. Unknitting can be tricky and if you have a mistake many rows back there is no way to pick up stitches to unravel – you must tink, or unknit, your stitches. I noticed a dropped stitch and had to bring it up over 5 rows and that was not easy either!

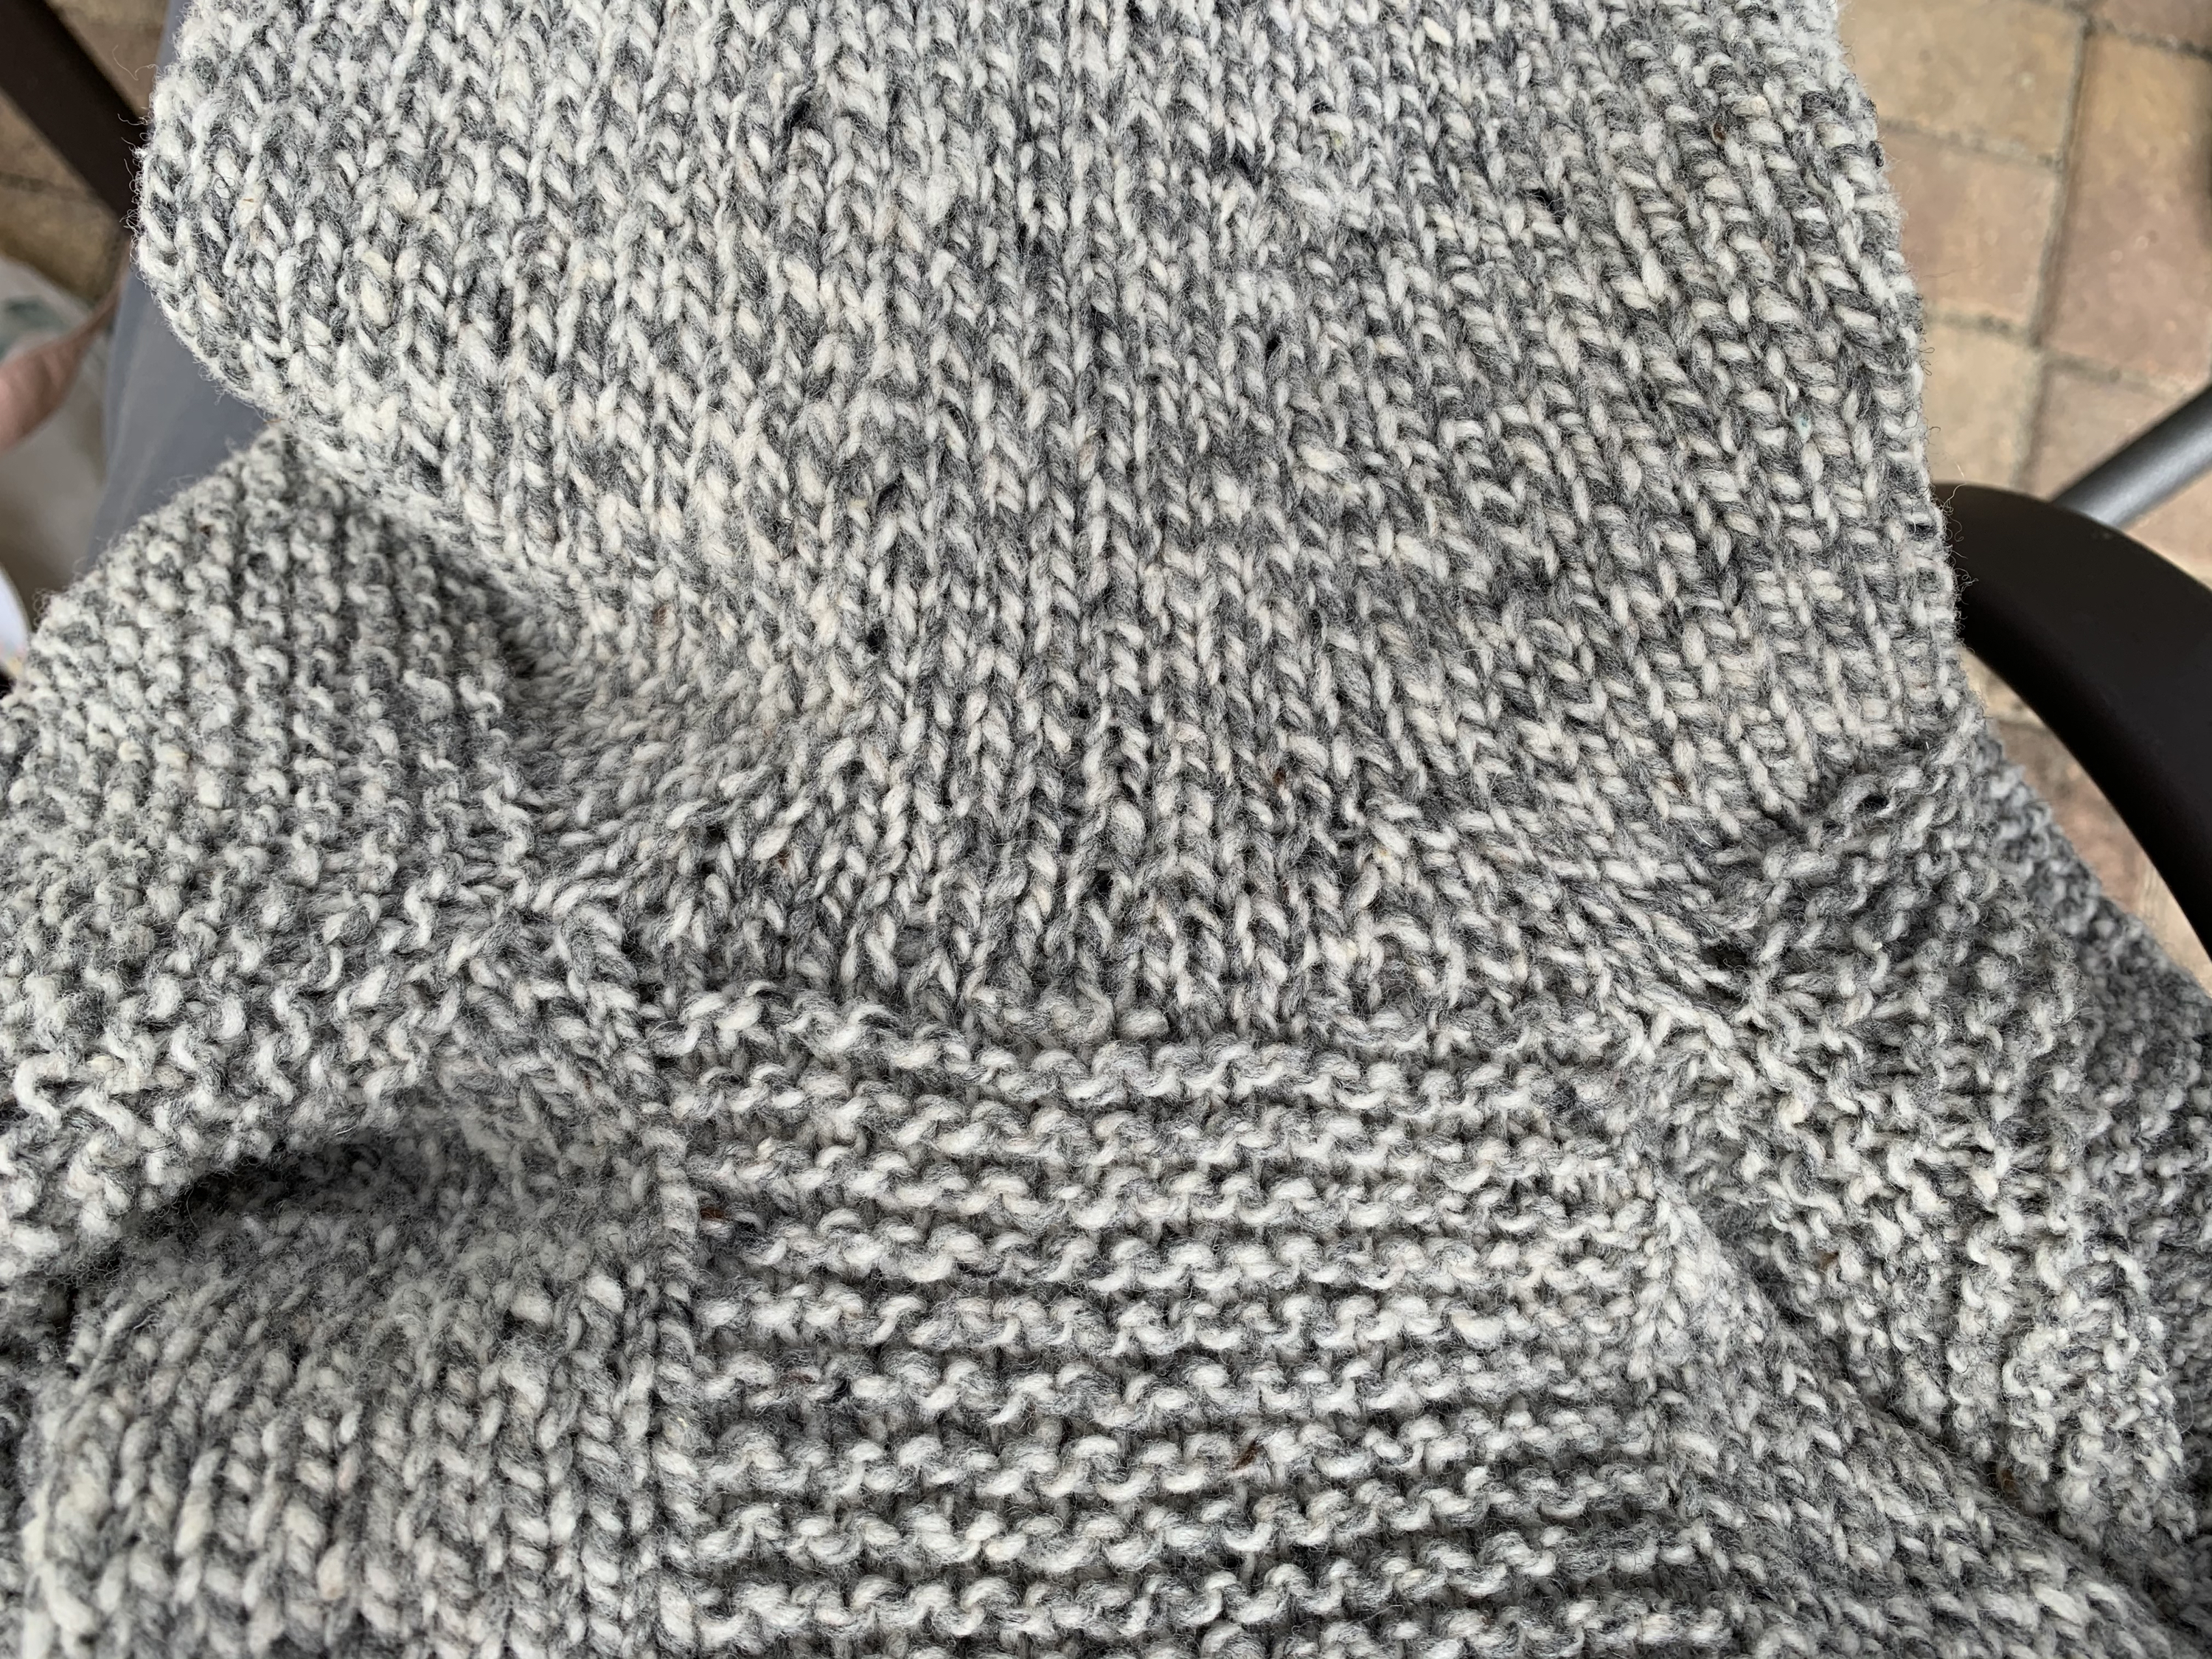
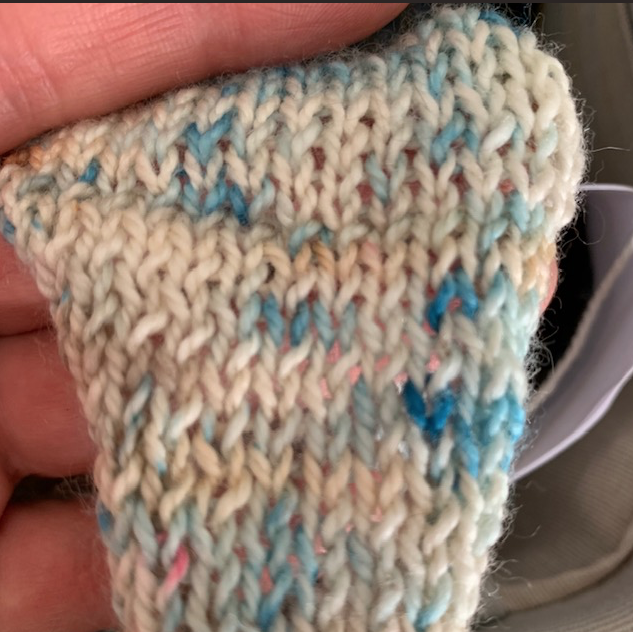
Doing the 1×1 ribbing was tricky too. See my swatch above which has stockinette in the center with garter at the edges – it’s hard to tell what is what!

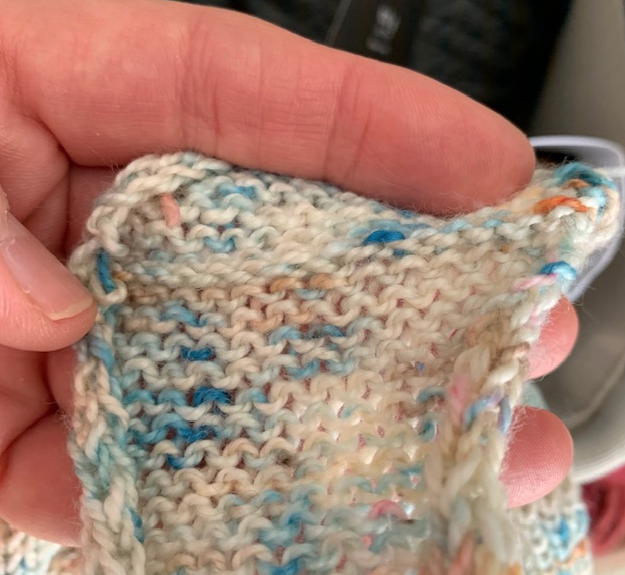
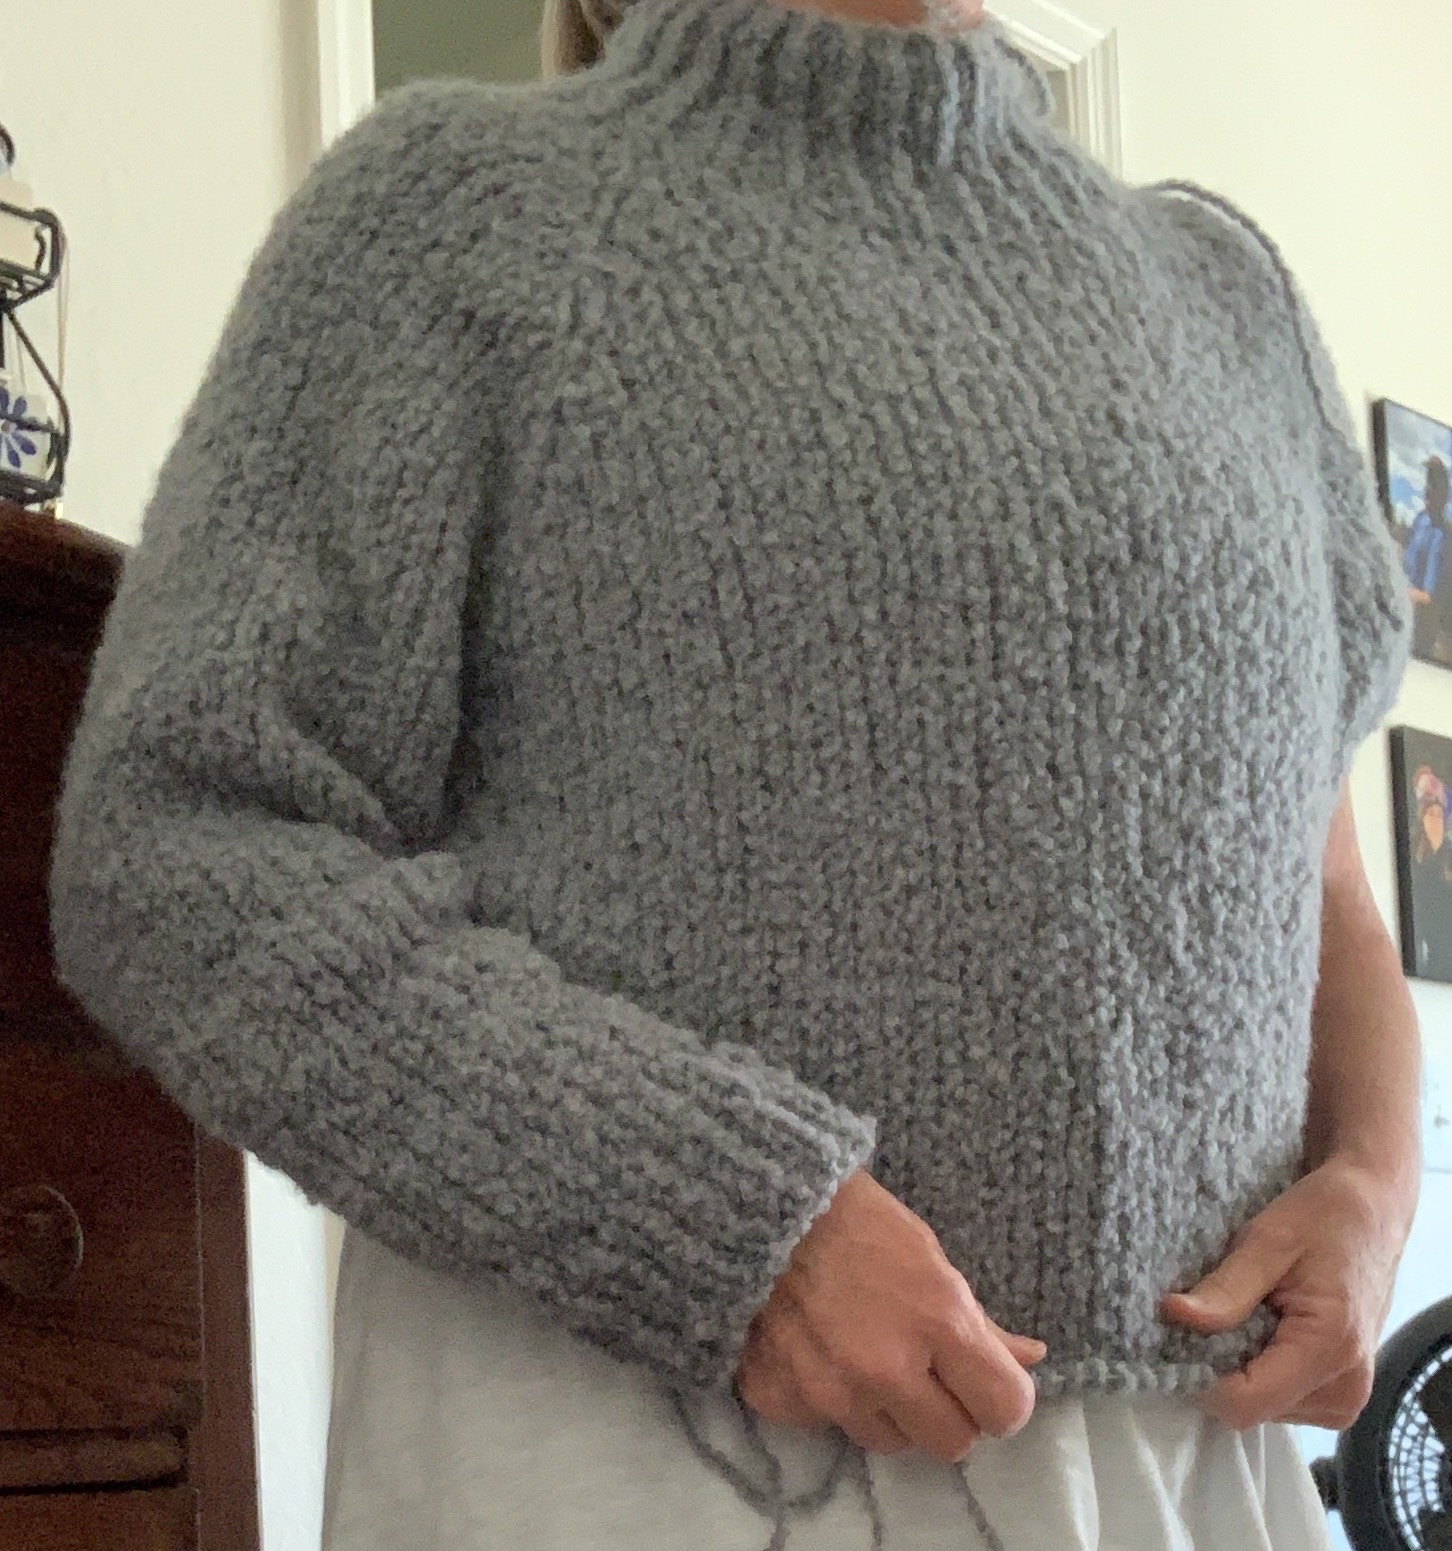
Below is a photo of my body ribbing. I’m doing knit one, purl one. Can you even tell the difference?

knitting Venlig sweater knits and purls
These are knits and purls – can you tell?

Suggestion For the Ribbing

Simply knitting around and around isn’t bad. When it came to the 1×1 ribbing, forget it. I had no idea which was a knit and which was a purl if I lost my place. I ended up placing markers every 10 stitches or so (an even number) knowing that I would begin after each marker with a knit stitch. It was the only way to keep track of my knits and purls.
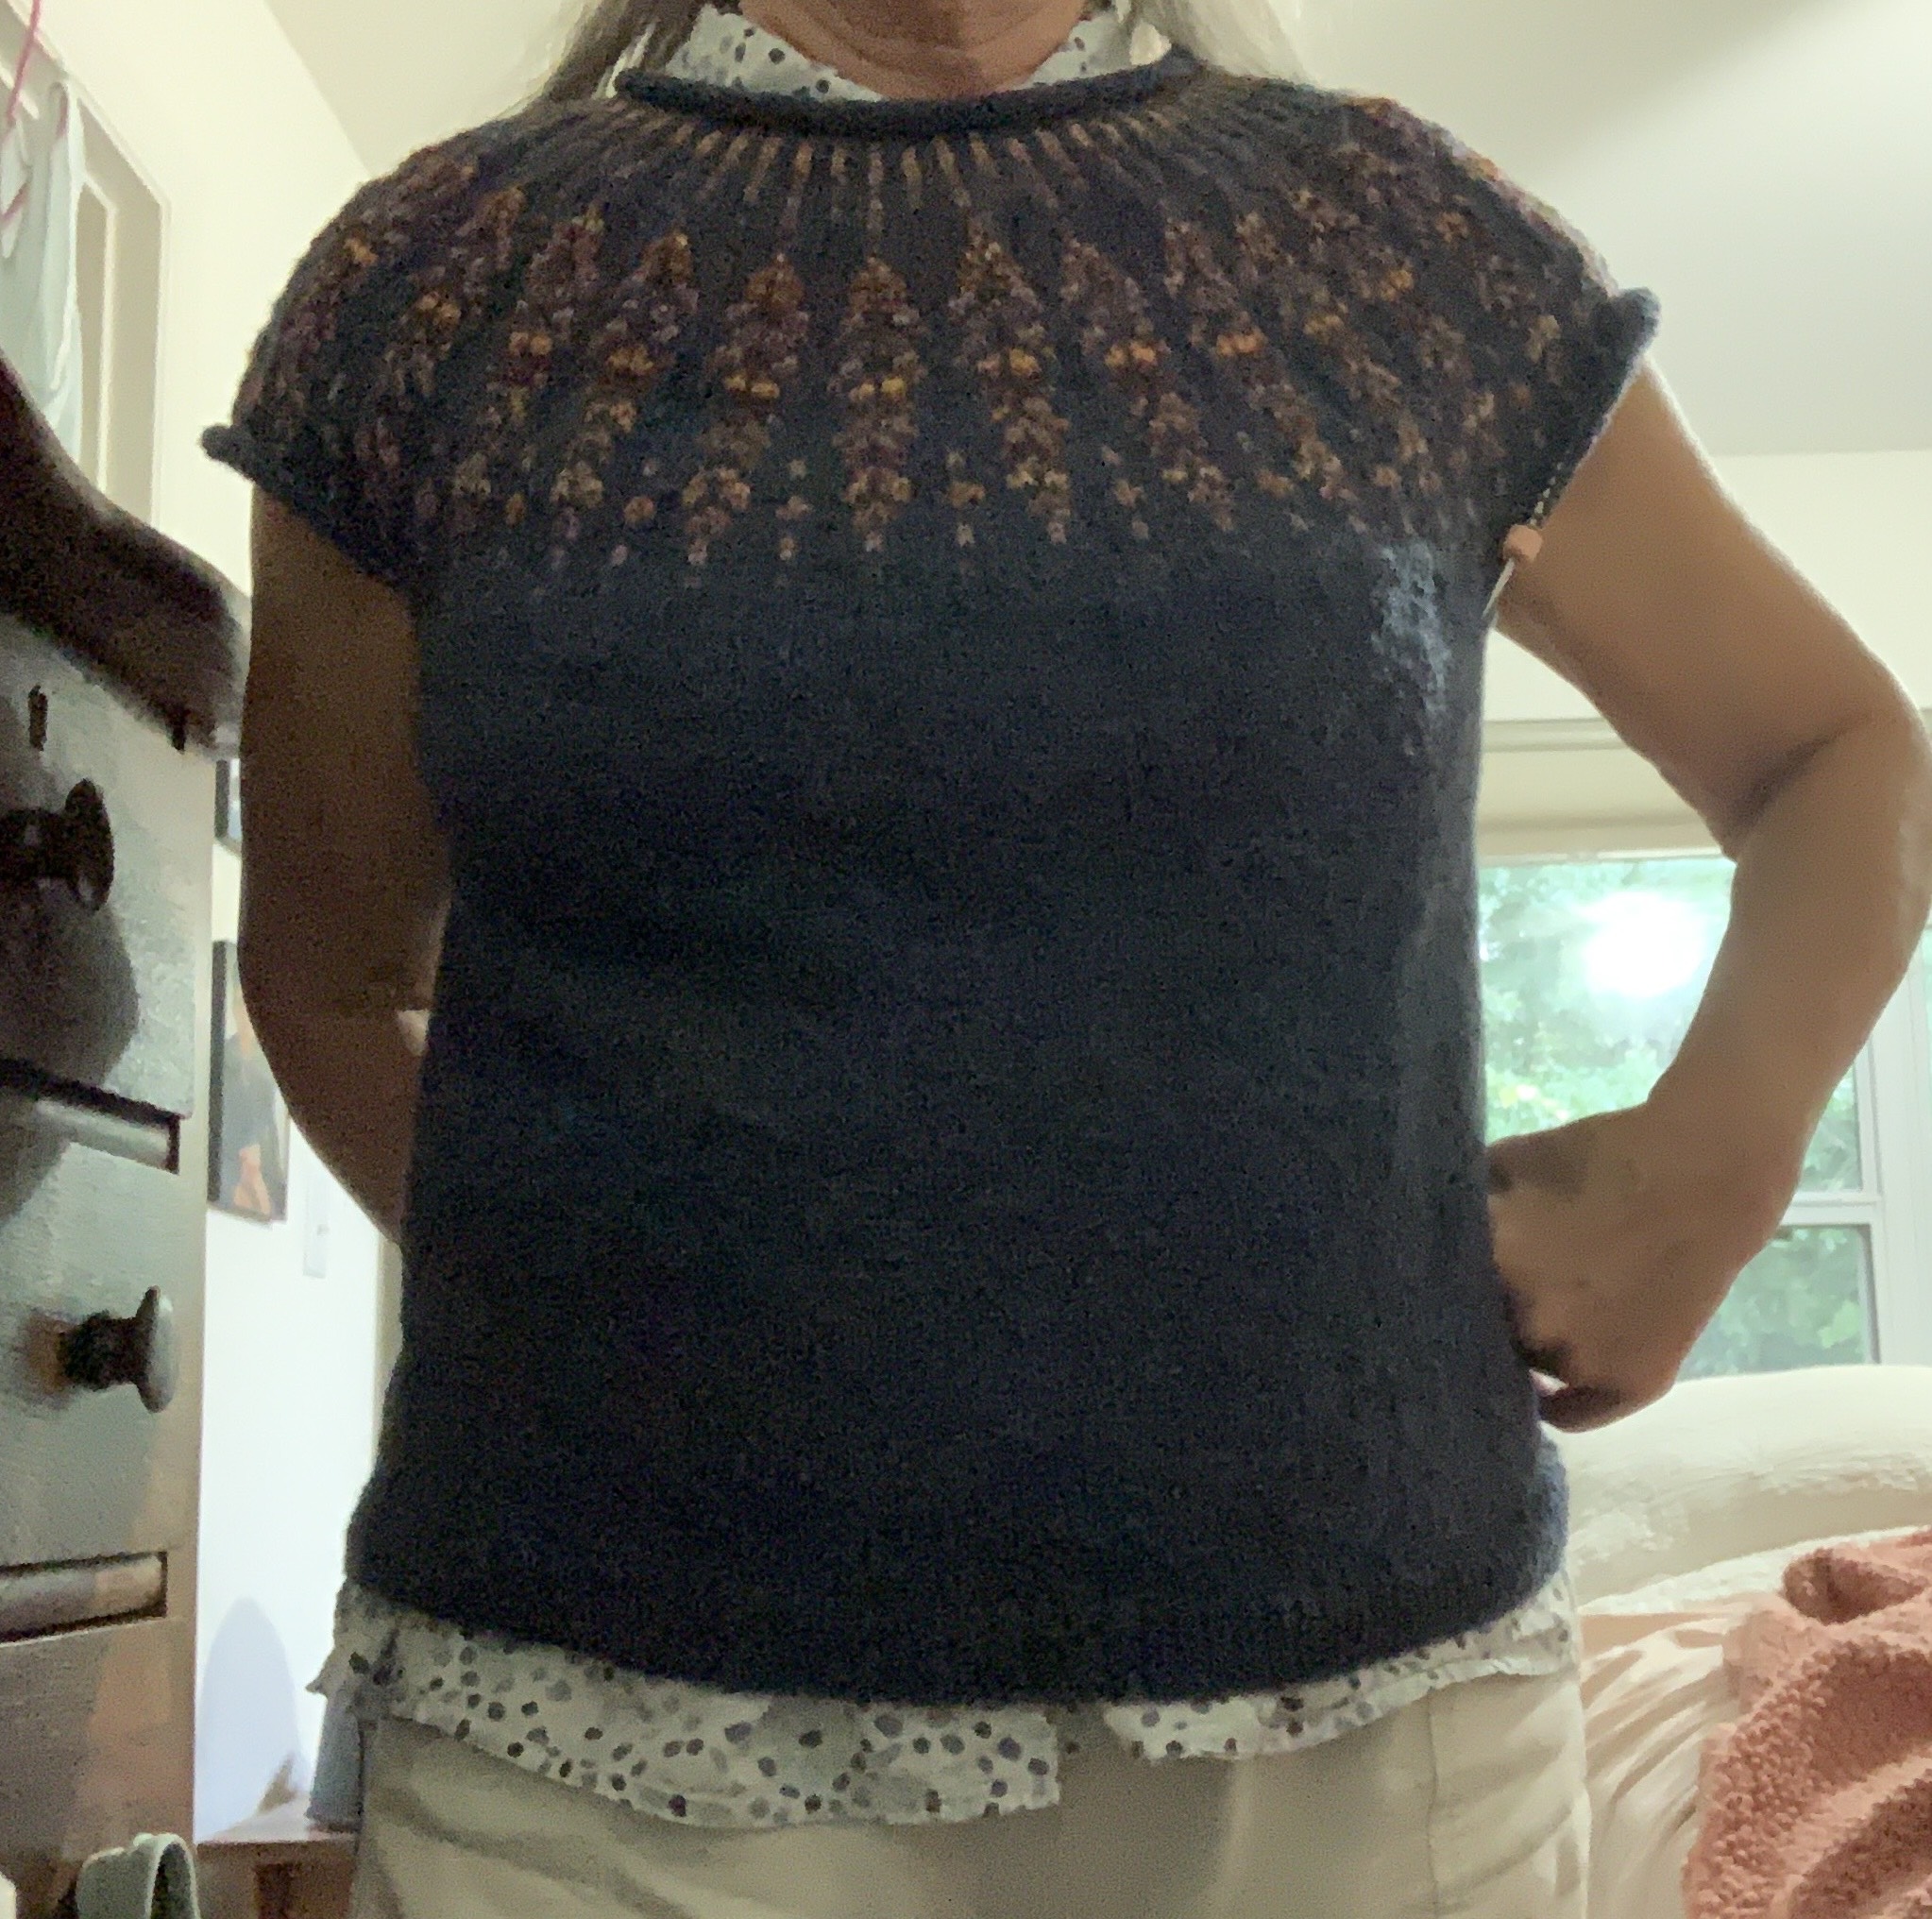
The Sleeves

Because I was worried about yarn amount, I put body stitches on hold at 8 inches to knit the sleeves. I knit the first sleeve on a 16” circular to begin, then changed to DPNs. It was difficult. The yarn is slippery and keeping the stitches on the needles was a pain. On the second sleeve, I used a 16” circular for the entire sleeve after dropping stitches when one of the DPNs slipped right out of the stitches! I was not having fun. (I knit with Lykke wood DPNs, but switched to the same brand 16”.)

I don’t know how to do Magic Loop, but it is probably the best way to knit the sleeves. *Changes made on sleeves: Pick up extra stitches when taking stitches off the waste yarn to close up the gaps under the arms. Usually patterns will say to do this, but this one did not.

After finishing the sleeves I picked up the body stitches with the smaller size 10 needle and did the ribbing until the yarn was gone – with enough to bind off. I would have liked a little more length, but the yarn was gone.

Flette Colors

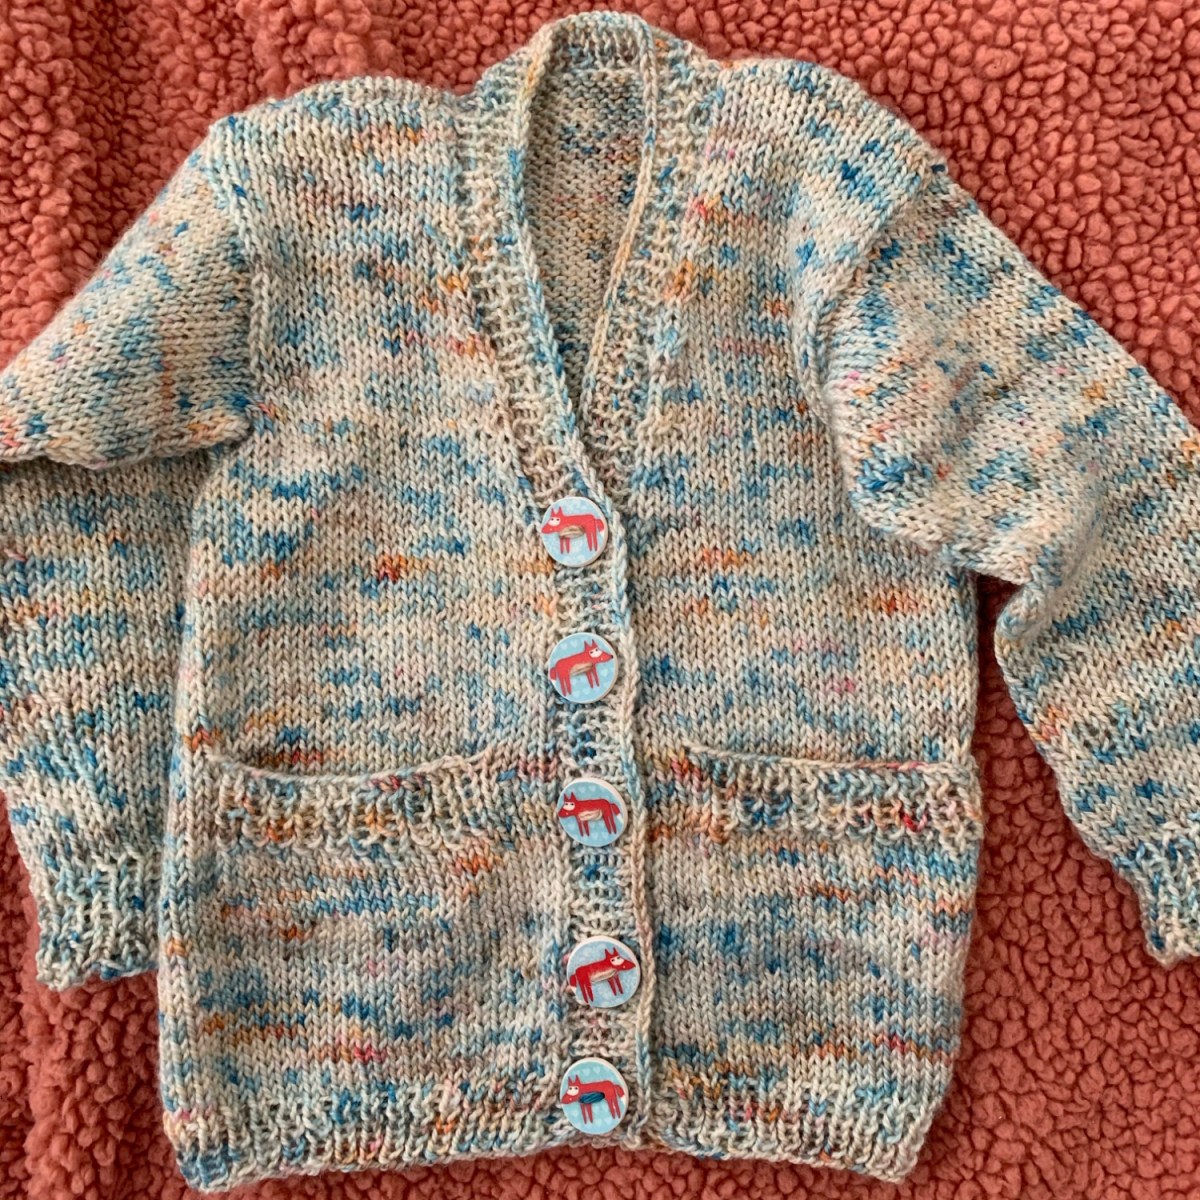
On a positive note, Flette yarn has great color selections. Choosing my yarn color was difficult because I had many favorites! I’d have chosen the dark navy blue, but dark colors can be a challenge for my eyesight. I love the dark green and purple-brown colors as well. I’m not ruling out using this yarn for another project. In fact, I wish I had chosen one of the unique colors instead of gray.

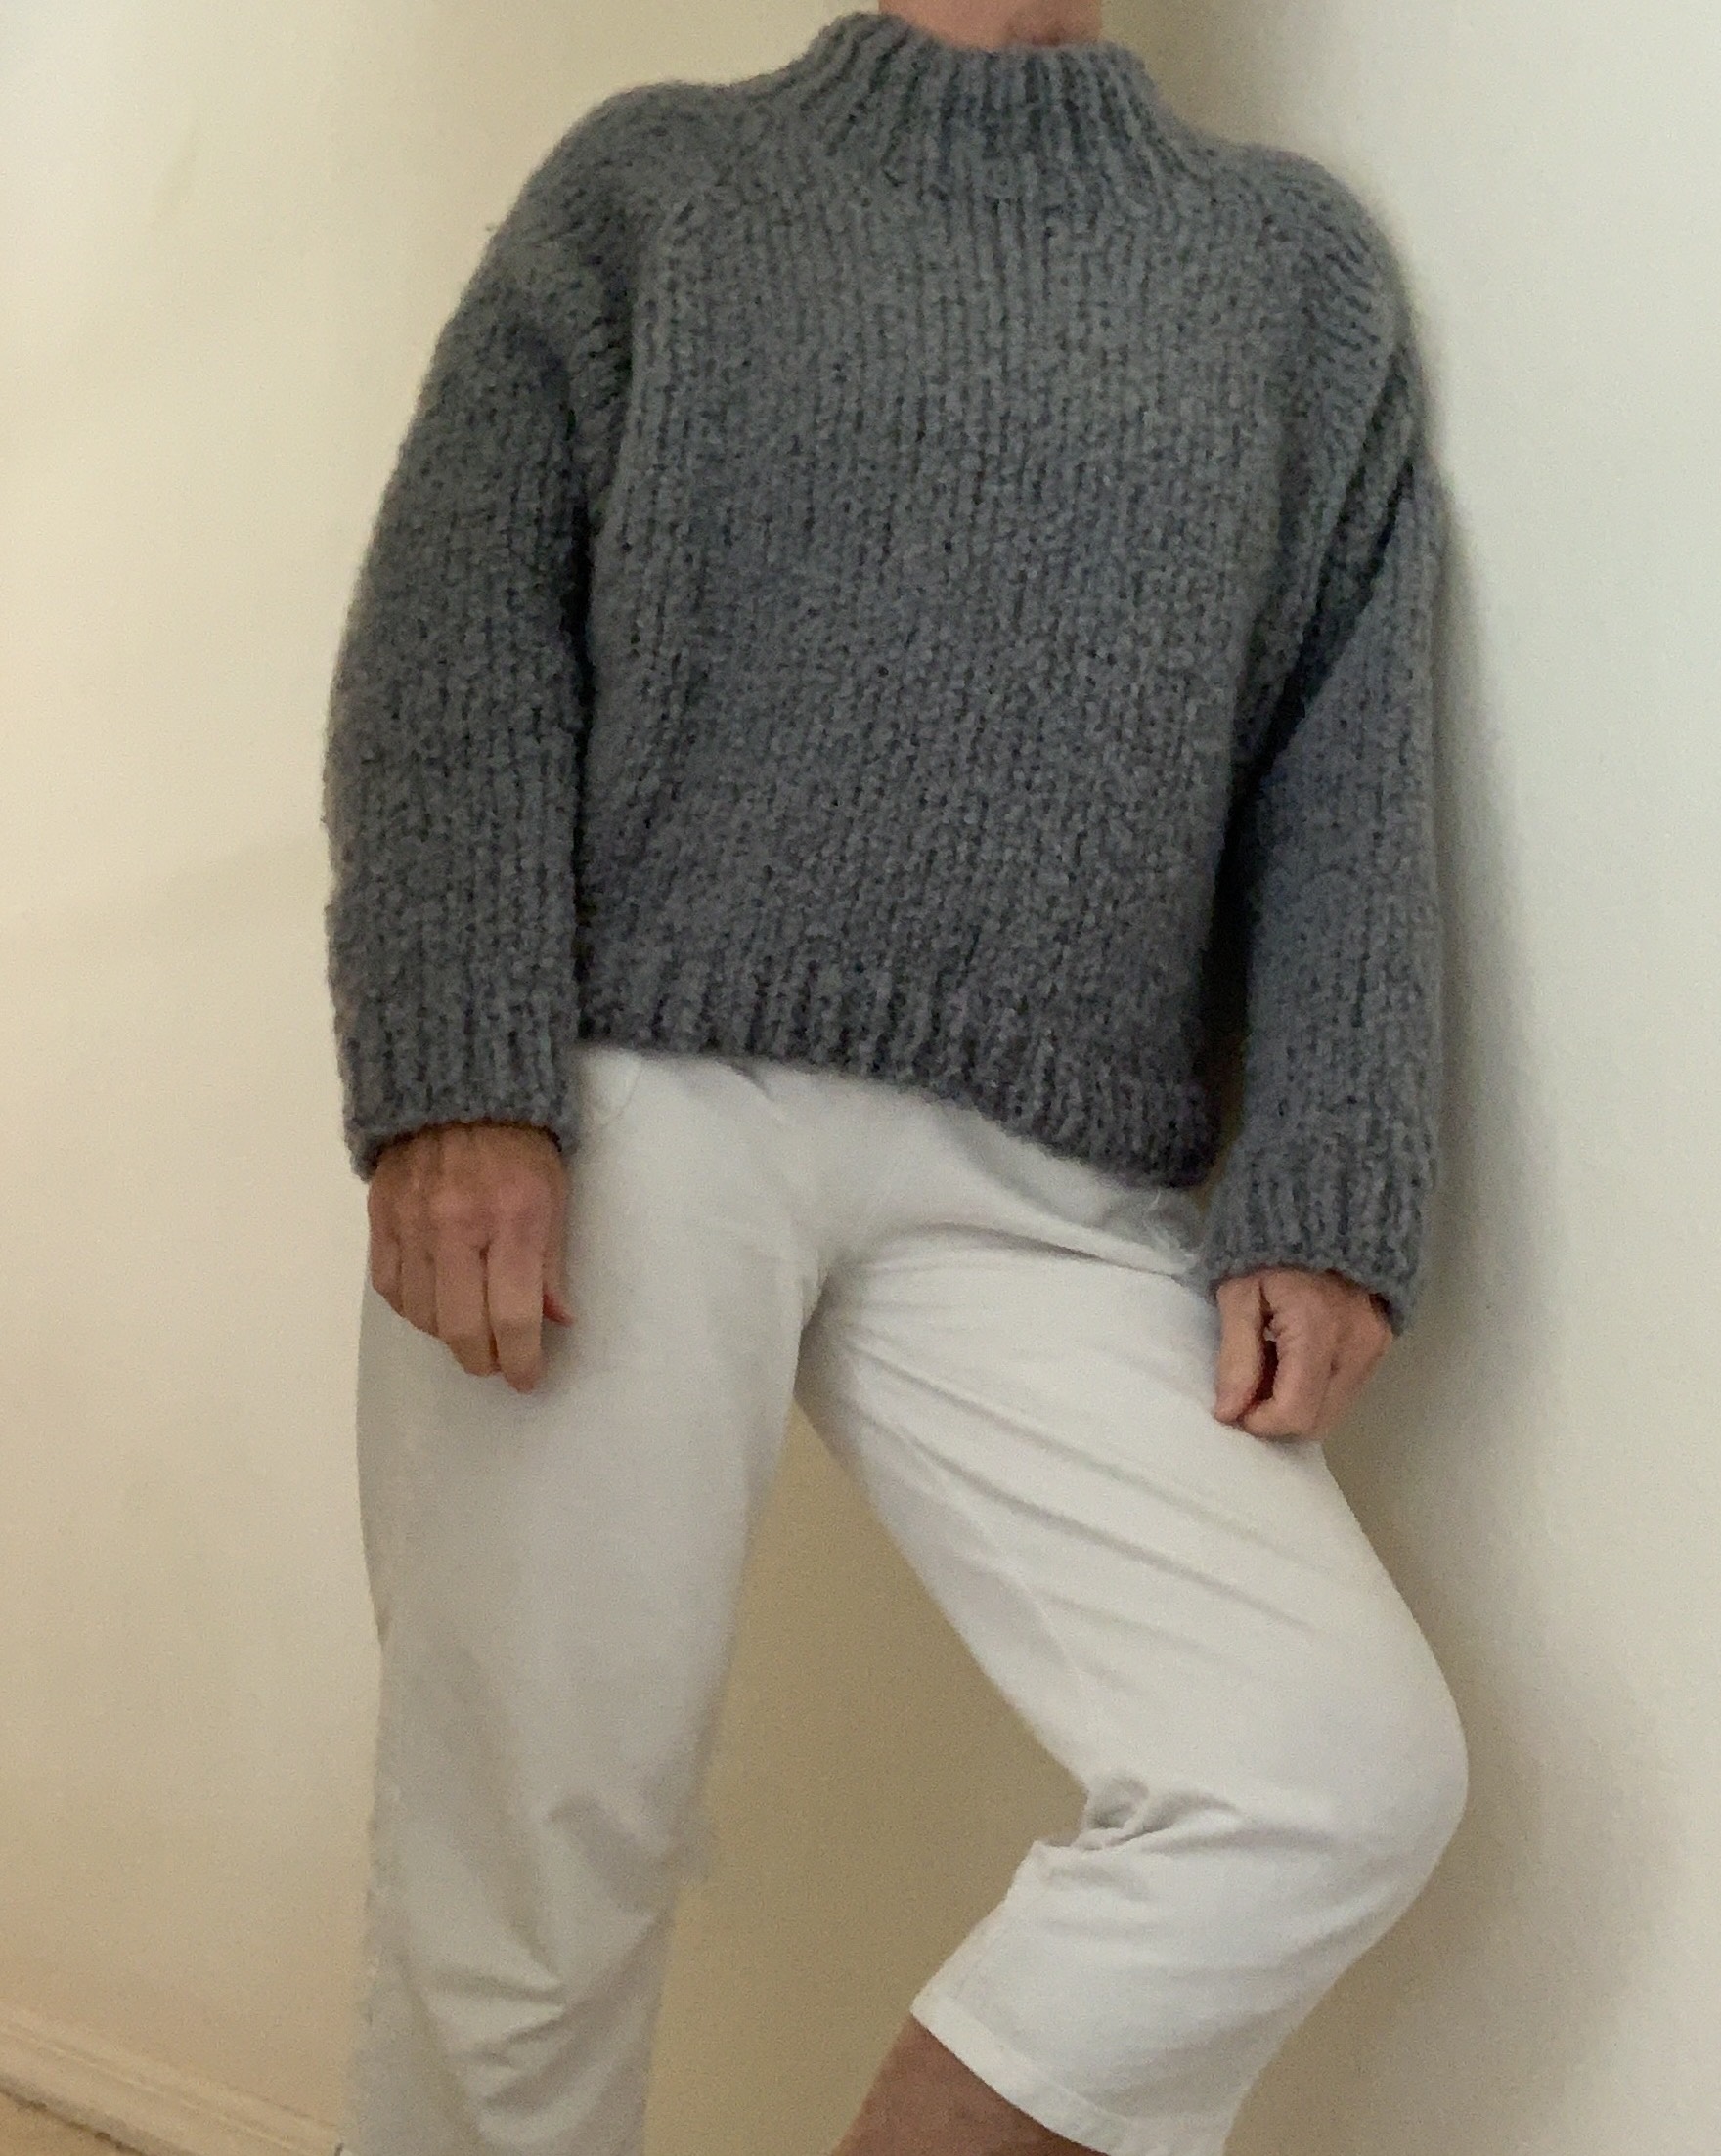
This sweater is probably my most favorite of everything I have knit. The Flette yarn creates a beautiful, soft fabric. The minimal yarn difficulties are completely worth the trouble.

Buy the VENLIG Sweater Pattern

My final opinion of this sweater pattern is to follow my own changes if I ever make it again. The pattern is basically a normal raglan with short rows. Directions were made difficult for no reason.

This pattern (and yarn) is NOT for beginners. Having sweater knitting experience will be helpful.


How Much Do Sweater Patterns Cost?

Here are some sweaters I have knit recently with the price I paid for the pattern at the time. Sweater patterns can be found for FREE and up, but the general price seems to be around $7-$8.

The unisex Cobblestone cardigan, by Jared Flood, was also $10.00 but the directions were excellent. (I loved that the buttonholes were made while the sweater was being knit.) I would certainly knit this one again.

Meadow Moon, by Jennifer Steingass, was $7.00 and has colorwork and great instructions. This designer goes to great lengths to explain her patterns and provides helpful links.

The Carbeth cardigan, by Kate Davies, was around $8.00 and certainly gave me lots to learn. The construction was unique and the folded collar was something new for me. It was missing short row instructions, which I had to figure on my own (yikes), but the intricate pattern was worth the money.

The Calliope and Warm-up were both free patterns, with excellent directions. The Turtle Dove (free) sweater pattern from Espace Tricot uses Woolfolk Luft yarn, which is cheaper than Flette, but also bulky. The pattern is also raglan, and the sleeves could be modified to create a sweater very similar to Venlig, but for free!

Tin Can Knits also offers many free patterns including sweaters.

So paying $10 for this needlessly difficult, yet simple raglan, was too much in my opinion. I only chose it because no reviews of the pattern warned me away… and I wanted to try out the Flette yarn. I did search for other sweater patterns that used the Flette bulky, but did not like them as much.


Keep Reading the Blog

Read more about my recent knitting adventures.

Meadow Moon is My First Jennifer Steingass Pattern

A while ago I decided to make 2021 a year for knitting sweaters. Now we’ve entered 2022 and I am finishing up my projects on the needles.

I’ve seen the Jennifer Steingass patterns around and love many of them. Her Ravelry store is Knit.Love.Wool and her sweaters have colorwork yokes, cuffs, and bottom hems. Many of her designs look to be nature inspired with patterns that resemble leaves, stems, and feathers. The pattern I chose looks like stems of wheat coming down from the neckline.

Sweater Knitting is an Investment

Choosing to knit a sweater means an investment of money as well as time. The sweaters I have knit have generally required around 1200 yards of yarn. Depending on the type of yarn purchased, it can be over $100 in material. Choosing a good quality (non-superwash) yarn is worth it. Wool will hold it’s shape and the sweater won’t stretch like crazy when it’s washed.

I purchased seven skeins of Rauma Finull wool in blue and decided on a hand-spun skein I already had as my contrast color. I had no idea how this variegated yarn would look when combined with the dark blue. So far, I think it’s looking quite good. I did not want a completely opposite yarn color for the contrast. With this yarn I have no control over what colors are coming up on the skein. It’s fun to see the colors emerge.

The Meadow Moon pattern is well-written and very easy to follow. This is big. I’m also knitting another sweater and the directions are difficult. Some designers go the extra mile to help knitters and some don’t. I’m learning to avoid some popular designers who have made me unhappy by not going that extra mile.

After the Fun Colorwork…

The body is a slog… it has taken a while for me to complete. Finally I bound off the ribbing and tried it on. Fit seems perfect. On to knitting the sleeves. At least there will be colorwork at the ends.

Although round and round knitting can be tiresome, it is great for car trips, late night television knitting, and knitting outdoors and soaking up the sun. I like the fabric being created, and would probably knit more sweaters like this one.

Meadow moon sweater knit
Body is done!

The first sleeve is finished. The decreasing was easy and looks nice and I followed the directions for length, which seems to be perfect.

One thing I changed was the bind off. I found the i-cord bind off directions in the pattern to be difficult. I began with it, but it didn’t look good. Possibly, I was doing it wrong. So I did it my way.

My i-cord bind-off resembles the one Stephen West shows in his video here. Except, I only cast on 2 – to the left needle, not 3, which follows my sweater pattern more closely. Then, *knit one, k2tog tbl, slip both stitches back to the left needle. Repeat from the star.

This bind-off takes some time to do, but it does leave a nice rounded edge.

With one sleeve to go I can see the light at the end of the tunnel

Finishing Up My Sweater Knit

None of these photos are great, but here I am wearing the sweater BEFORE washing and blocking. The middle photo is AFTER the wash, and taken in the sun to show the colors of the contrast colorwork. All the bunching of the colorwork became flat once it was washed. Sleeve length is perfect for me.

The sweater is a perfect fit. I would do more short rows because I have a hard time figuring out which is the front / back!

The yarn has created a lovely, lightweight fabric. I think this is one of my favorite knits so far. *Also, it has become the most worn hand-knit sweater I’ve knit so far. It fits perfectly and is very light weight and comfy.


Read about what else I’ve been up to in my knitting world…

Notes on Knitting The Cobblestone Cardigan

On January 24th I began knitting the Cobblestone Cardigan pattern by Jarod Flood. It is rated at two stars out of five for difficulty, so should be an easy knitting project.

The yarn I used was Brooklyn Tweed Shelter in “Narwhal” color which is a marl of two colors twisted together. I bought 10 skeins and my size calls for 11 skeins, but I did squeak by with 10 – just barely. I prefer knitting with a lighter color yarn because my eyesight is not that great. Knitting in the evening is especially difficult. My knitting wish is that designers would print up their patterns in bolder, larger print.

A highlighter comes in handy to remind me of the pattern’s important information.

Brooklyn Tweed Shelter in Narwhal for a sweater
10 Skeins of Narwhal yarn

I read through the pattern and will have to learn the new increase mentioned when the time comes. I love to try new things and I think this pattern will be just challenging enough in places to keep me happy. Also, lots of the knitting is simply round and round (sleeves) and back and forth, which I can do at night. I need this sweater for my trip to New Hampshire in March and I should have it done well ahead of that (*Nope- 3/1 I finished knitting – still needs buttons). Note: This is an easy pattern and would make a good first sweater. End project is large, will go down a sweater size next time.

End Results, Or Continue Down the Page

Please read on to see the notes I recorded while knitting this project. But, before the page got long, I wanted to comment on my finished garment. The Cobblestone Cardigan knitting is finished and the cardigan is very big. The neck had to be tightened up as it was very droopy. Doing that was a big improvement. Note: ***Don’t do a loose cast on! Also the sleeves are big around and droopy in the armpits. My gauge was right on, and I did go up a size, but it was a mistake. Now I am wondering if I should attempt to shrink it, or simply wear it around the house to be cozy. EXCEPT I live in Florida where I put a sweater on about five times a year. I’ve ordered some buttons from Etsy and will get more photos once I add them.

Cobblestone cardigan

Beginning the Project: Cast On and Markers

I’m knitting the fourth size in the pattern although I expect it to be a little large (*Yes, this was a mistake!). I’d rather that than too tight. I cast on using the German Twisted / Old Norwegian cast-on (*Also a mistake – Do a regular cast-on, or the pattern recommendation, or the neck will be too loose!).

I placed a marker to remind me of the right side of the project. Whenever that blue marker is on my right when beginning a row, I am on the right side. I also placed a marker to show the first buttonhole.

Note: Count the stitches whenever the stitch count for the row is given!

Cast on and placing markers for the beginning of the Cobblestone Cardigan
Beginning the sweater

Placing The Buttonholes

I wanted the buttonholes on the right side front (when wearing) and making that pattern change was easy – there is a note in the pattern for making the change. Without a yarn shop / button seller nearby, I’m forced to search online for my buttons and it’s hard to find them online in the right size but I did find some to order from Etsy.

marking buttonholes for Cobblestone Cardigan
Marking my buttonholes

Every time I knit a the hole for a button, I place a marker so it can be seen easily. Then I am knitting 12 ridges between buttonholes.

Moods Fabric has a chart that shows button sizes in inches / mm and ligne.

Learning a New (and Easy) Increase

The Raised Right Increase (RRI) in the Cobblestone pattern was something I had not done before. I found it to be a very easy increase to knit. I’ve done the yarn over increase, knit front and back increase, and the right / left lifted increases.

The RRI reminds me of knitting in the round with colors or stripes and creating the jogless knit stitch at the beginning of the round, except the stitches are not knit together. This is an increase stitch so it is creating an extra stitch by lifting a stitch from the previous row. The pattern provides detailed directions for doing this stitch. Note: Remember that the RRI includes a knit stitch so when the pattern says, “RRI and knit 2” you will be knitting 3 stitches total.…!

In case you want to know some variations on making a knit stitch increase, the Interweave site has a list of Six Essential Increases Every Knitter Should Know. I admit that I do not know them all!

Knitting the Body of the Sweater

It is February 6th and there is not much to say here except to watch for buttonhole placement as I knit. (*I ended up not really liking the long garter stitch area of this sweater. I think I would shorten that up if I ever knit this again. It makes the shoulders / top of arms look bulky.)

Somehow cats know just when to show up and get into the photo, don’t they?

knitting the Cobblestone Cardigan
Knitting the body

End of February and On To Knitting The Sleeves

Because I am one skein short of the recommended amount of yarn, I will begin the first sleeve with a new skein of yarn. Once I see how far I get, I will use up the remaining 1/2 of the ball leftover from the body of the sweater.

Stitches on hold were put onto a 16 inch circular needle. Using a wooden DPN, I began picking up stitches from the underarm and divided all stitches for the sleeve to fit four DPNs (19-20 stitches on each needle). After the stitches were picked up, I used the 16 inch circular needle to knit down the sleeve until close to the end when I changed to DPNs at the cuff – the sleeves are WIDE. *I reduced the number of rows before each decrease row. For my size I was to decrease on every 8th row, and I did it on row 7. After the decreases, the sleeves were about long enough, so I stopped knitting and did the cuff – change to the smaller needle.

  • picking up stitches to begin knitting the sweater sleeve
  • picked up stitches for sleeve knitting
  • knitting Cobblestone sleeve

Don’t forget to change to size B (6) needles to do the garter stitch cuff! I forgot on this first sleeve so I ripped the first cuff out and re-knit using the smaller, size 6 needles. I had enough gray yarn to finish up both sleeves correctly.

The underarm seam on my first sleeve looks really good! Because the stitches are picked up in the center of the underarm, leave a longer than usual tail to close up any holes at the edges. I did pick up a few extra stitches and then decreased back to the normal count.

Underarm sweater seam looking good
I’m very happy with the look of the first sleeve underarm

The knitting is finished. I squeaked by with my ten skeins of yarn, but I would suggest buying the eleven skeins suggested. I shortened up the body a little and also the sleeves. If you need extra sleeve and body length, you will definitely need 11 skeins! The sweater, before washing, seems very large – and stayed large. The neck is loose, so I hope that blocking will help tighten it all up. *I had to pick up stitches around the neck to tighten it up and did a regular, rather tight bind-off with the smaller size needle.

Cobblestone Cardigan knitting project on the mats and drying
Washed and drying my Cobblestone
  • Wearing my Cobblestone Cardigan hand knit in gray wool
  • modeling the Cobblestone Cardigan
  • Cobblestone Cardigan knit in Brooklyn Tweed yarn

Knitting the Cobblestone Cardigan was fun, except that I put a time limit on myself due to my travel plans. The pattern is perfect for any beginner sweater knitter. Overall, I love the body and trim, with garter down the sides. I’m not as thrilled with the puffy shoulder area and big, wide sleeves. The neck was too wide and droopy, but mainly because of my cast-on choice – I think. A tighter neckline pulls the sweater up more and looks better.

Buttons came from TrimGem at Etsy. I ordered some black and gray and chose the gray which I think work nicely.

My Cobblestone Cardigan hand knit sweater is done with buttons added.

Recent Blog Posts

Something went wrong. Please refresh the page and/or try again.

Knitting the Playdate Cardigan For Kids

The little Playdate cardigan by Tin Can Knits is a wonderful pattern with excellent directions that will broaden a beginner knitter’s horizons!

The Playdate Cardigan pattern comes from Tin Can Knits. I bought and printed out the pattern a few days ago and have since been working my way through this cute sweater. The pattern has size adjustments from 0-3 months to 4XL…. so you can knit it for just about anyone.

I chose to knit the 6-12 months size. I’m using a 16-inch circular and 5 double-points in the same size. Another smaller needle (with same size dpn’s) is needed for the ribbing. My yarn is Emma’s Yarn, fingering weight, Super Silky in “Malibu”. I would not have chosen silky yarn if I was buying a skein to knit a sweater, but I wanted to use stash yarn for this first attempt. I would choose a favorite baby sweater yarn next time.

Creating Pockets

This is a bottom up pattern, but it begins with pocket sections. As I read through the pattern, the pockets were confusing to me. I’ve never done pockets. HINT: To knit a 2-color sweater begin the ribbing with the contrast color. But the pre-made pocket sections will be behind the work, so the main color can be used.

First thing to do was to knit two little rectangles which would become part of the pockets. I almost decided not to add pockets just in case I couldn’t figure it out, but I’m glad I used them. Because first, they are easy to add, and second, they make the sweater look cute!

Baby sweater
Getting started on “Playdate” baby sweater

Once the bottom of the sweater is begun, the little rectangles will be added to the long needles and create the backing. The top stitches will be knit into the regular line of knitting.

Adding the pocket to the Playdate cardigan
Placing stitches of pocket onto long needles

The K1P1 ribbing for the top front of the pockets is created first, then bound off. See the back of the pocket above and the front below. The little rectangular backs will later need to be sewn down to actually create the pocket.

Playdate sweater pocket knitting
Ribbed edge of pocket with backing added to needles

The Back and Shoulders

Once the front is knit to length, the back stitches and one shoulder will go on hold. I used some metal stitch-holders (they were my grandmothers) which work well for holding small amounts of stitches. I always have trouble picking up my stitches when I hold them using yarn. From here, each shoulder area will be knit, along with the back – separately.

Knitting stitches on hold
Shoulder and back stitches on hold while knitting other shoulder stitches

I used DPNs to hold the shoulder stitches because my sweater is so small. The pattern directions say to work the stitches, ending with a RS row and then “break the yarn leaving a long tail”. I guess they figure you will know enough to keep those stitches on hold, but you need an extra needle for that (or yarn). So it helps to have double-points handy with good stitch stoppers (Mine are by Cocoknits and they work great). The same thing happens for the neck and I left my stitches on the main circular needle for that longer section of knitting. I used 2 double-points for straight knitting the first shoulder section.

Top edges of sweater on hold
Shoulder parts of Playdate on hold using three needles

Once the back and shoulders are the correct length, they will be stitched together. I tried 2 different methods here, and decided I liked the Kitchener stitch – as shown in slow motion by Very Pink Knits – which came out pretty smooth. I sat in front of the computer while I did it so I could watch her video.

Playdate sweater knitting in progress
Ready to connect at shoulder seams
Shoulder seam in kitchener stitch
Kitchener stitch joining back and front at shoulder
Ridge on wrong side of kitchener stitch
Shoulder seem, wrong side of kitchener

All the edges are curling up badly, which is par for the course when knitting stockinette. I had the same problem on the Fine Sand sweater, but after washing and blocking it looked great.

Baby sweater with pockets
My front and back knitted sections are now attached at the shoulders

On To The Sleeves

As I went around the armholes picking up stitches, I picked up a few more than was suggested just so there would be no holes. On the next couple of rows I decreased back to the correct number. I was able to knit one sleeve within a few hours time. I think I like making this little sweater. It’s finishing up fast and looking pretty cute!

Playdate with button band started
Getting there!

A long, circular #3 needle was used to pick up the required stitches around the sweater front opening. A #3 was suggested for the bottom ribbing and sleeve cuffs, but I used a #4. The rest was knit on a #5. I didn’t check gauge because the end size did not matter to me.

Knitting a Button Band and Doing Buttons

This is my first attempt at doing a button band around a cardigan. It means placing the buttonholes evenly and making each hole the correct size for a button. Thanks so much to Tin Can Knits and their excellent page all about knitting a button band. I will definitely be referencing it during this phase of knitting. My buttons are on order from an Etsy shop (Ginger Mint Collection) because I have no place local (that I know of) to buy buttons.

In the meantime, I decided to knit a little swatch and try out a couple of buttonhole sizes. Once my buttons come from Australia I can see which of the sizes to knit on this cardigan. I’m not sure which set of buttons I will use, but hopefully one of the button designs will match well.

I’ll keep this swatch for reference and have added a tag with info as a reminder. I did the 2-stitch buttonholes because a good size button will fit through.

Buttonhole knitting practice
Measuring buttons

Until my buttons come, and I’m sure they will fit the size holes I make, this sweater will be on hold…. changed my mind. I decided to add 5 buttonholes and continue to finish the band. Today I washed the sweater and when the buttons arrive I will pick the ones I like and add them. *Update: chose the fox buttons!

Finished! My Thoughts on Knitting the Playdate

This was a fun sweater to knit and I got it done quickly. Here is a link to the pattern once again: Playdate by Tin Can Knits. I learned to make buttonholes and pockets, so that was nice. It’s good to learn new things. I would love to knit this one again – and in October / November 2022 I am, using blue yarn this time.

Tin Can Knits has a book out called Strange Brew with loads of options for knitting pullovers and maybe other things. I just found it for sale at Jimmy Beans Wool and ordered a copy.

knitting divider

Knitting Stories From the Blog