Knitting is much more involved than picking up two needles and some yarn. Seriously, there is a lot to know. For this reason, I have enjoyed my knitting journey because there is always something else to learn. If you enjoy continuous learning, knitting may be just your thing!
The good news is that when beginning to learn to knit everything can remain simple. The focus is to get used to holding needles and working the stitches. Get the yarn onto the needles and practice. A beginner question may be, “What needles do I need to get started?” So, I’m here to give you some advice on buying a first pair of knitting needles. And if the knitting bug strikes, they surely won’t be your last pair.
None of my advice here is set in stone! I’ll try to mention some basic things to consider about buying knitting needles.
Knitting Needle Types
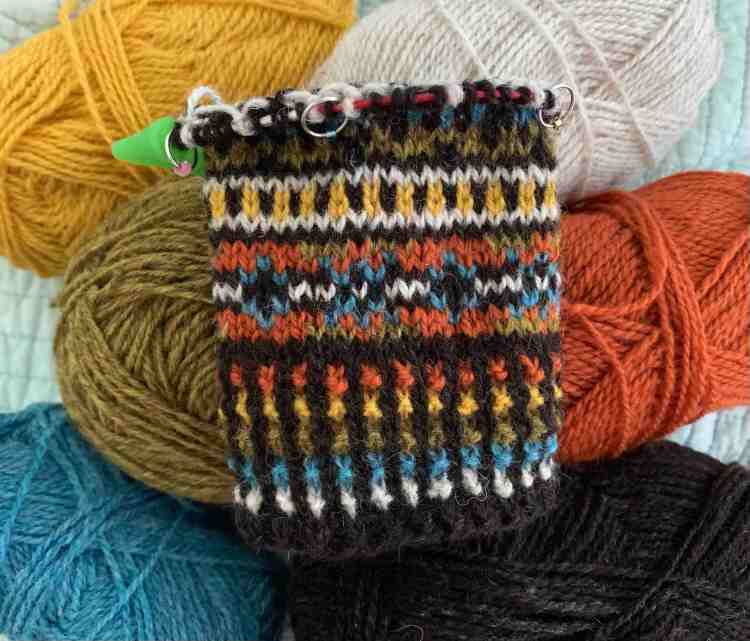
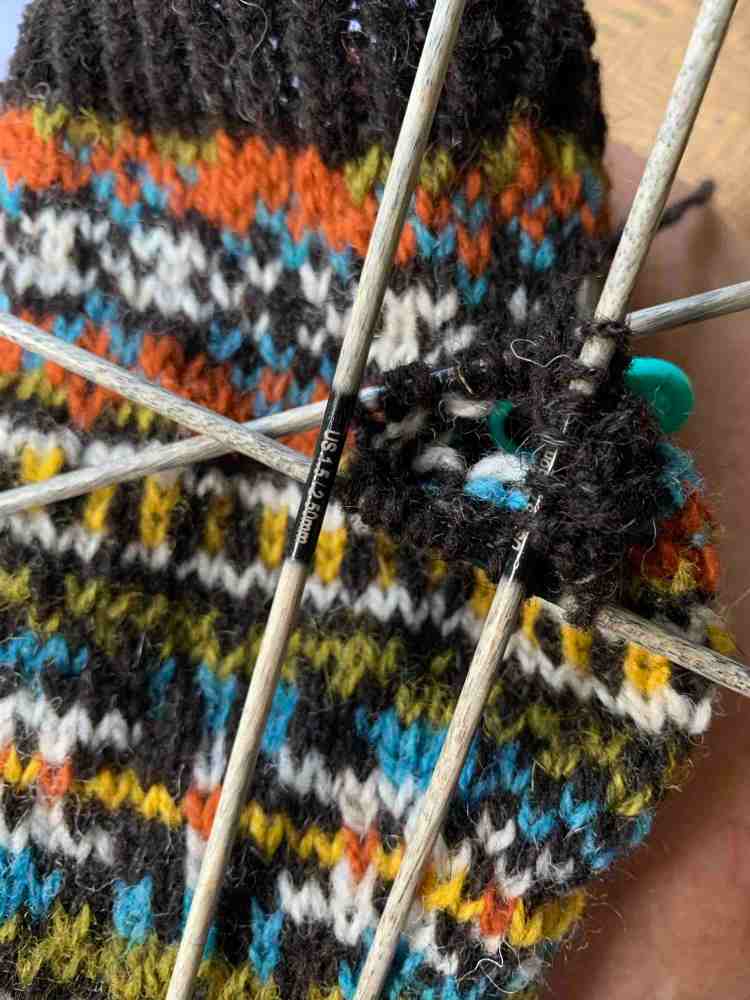
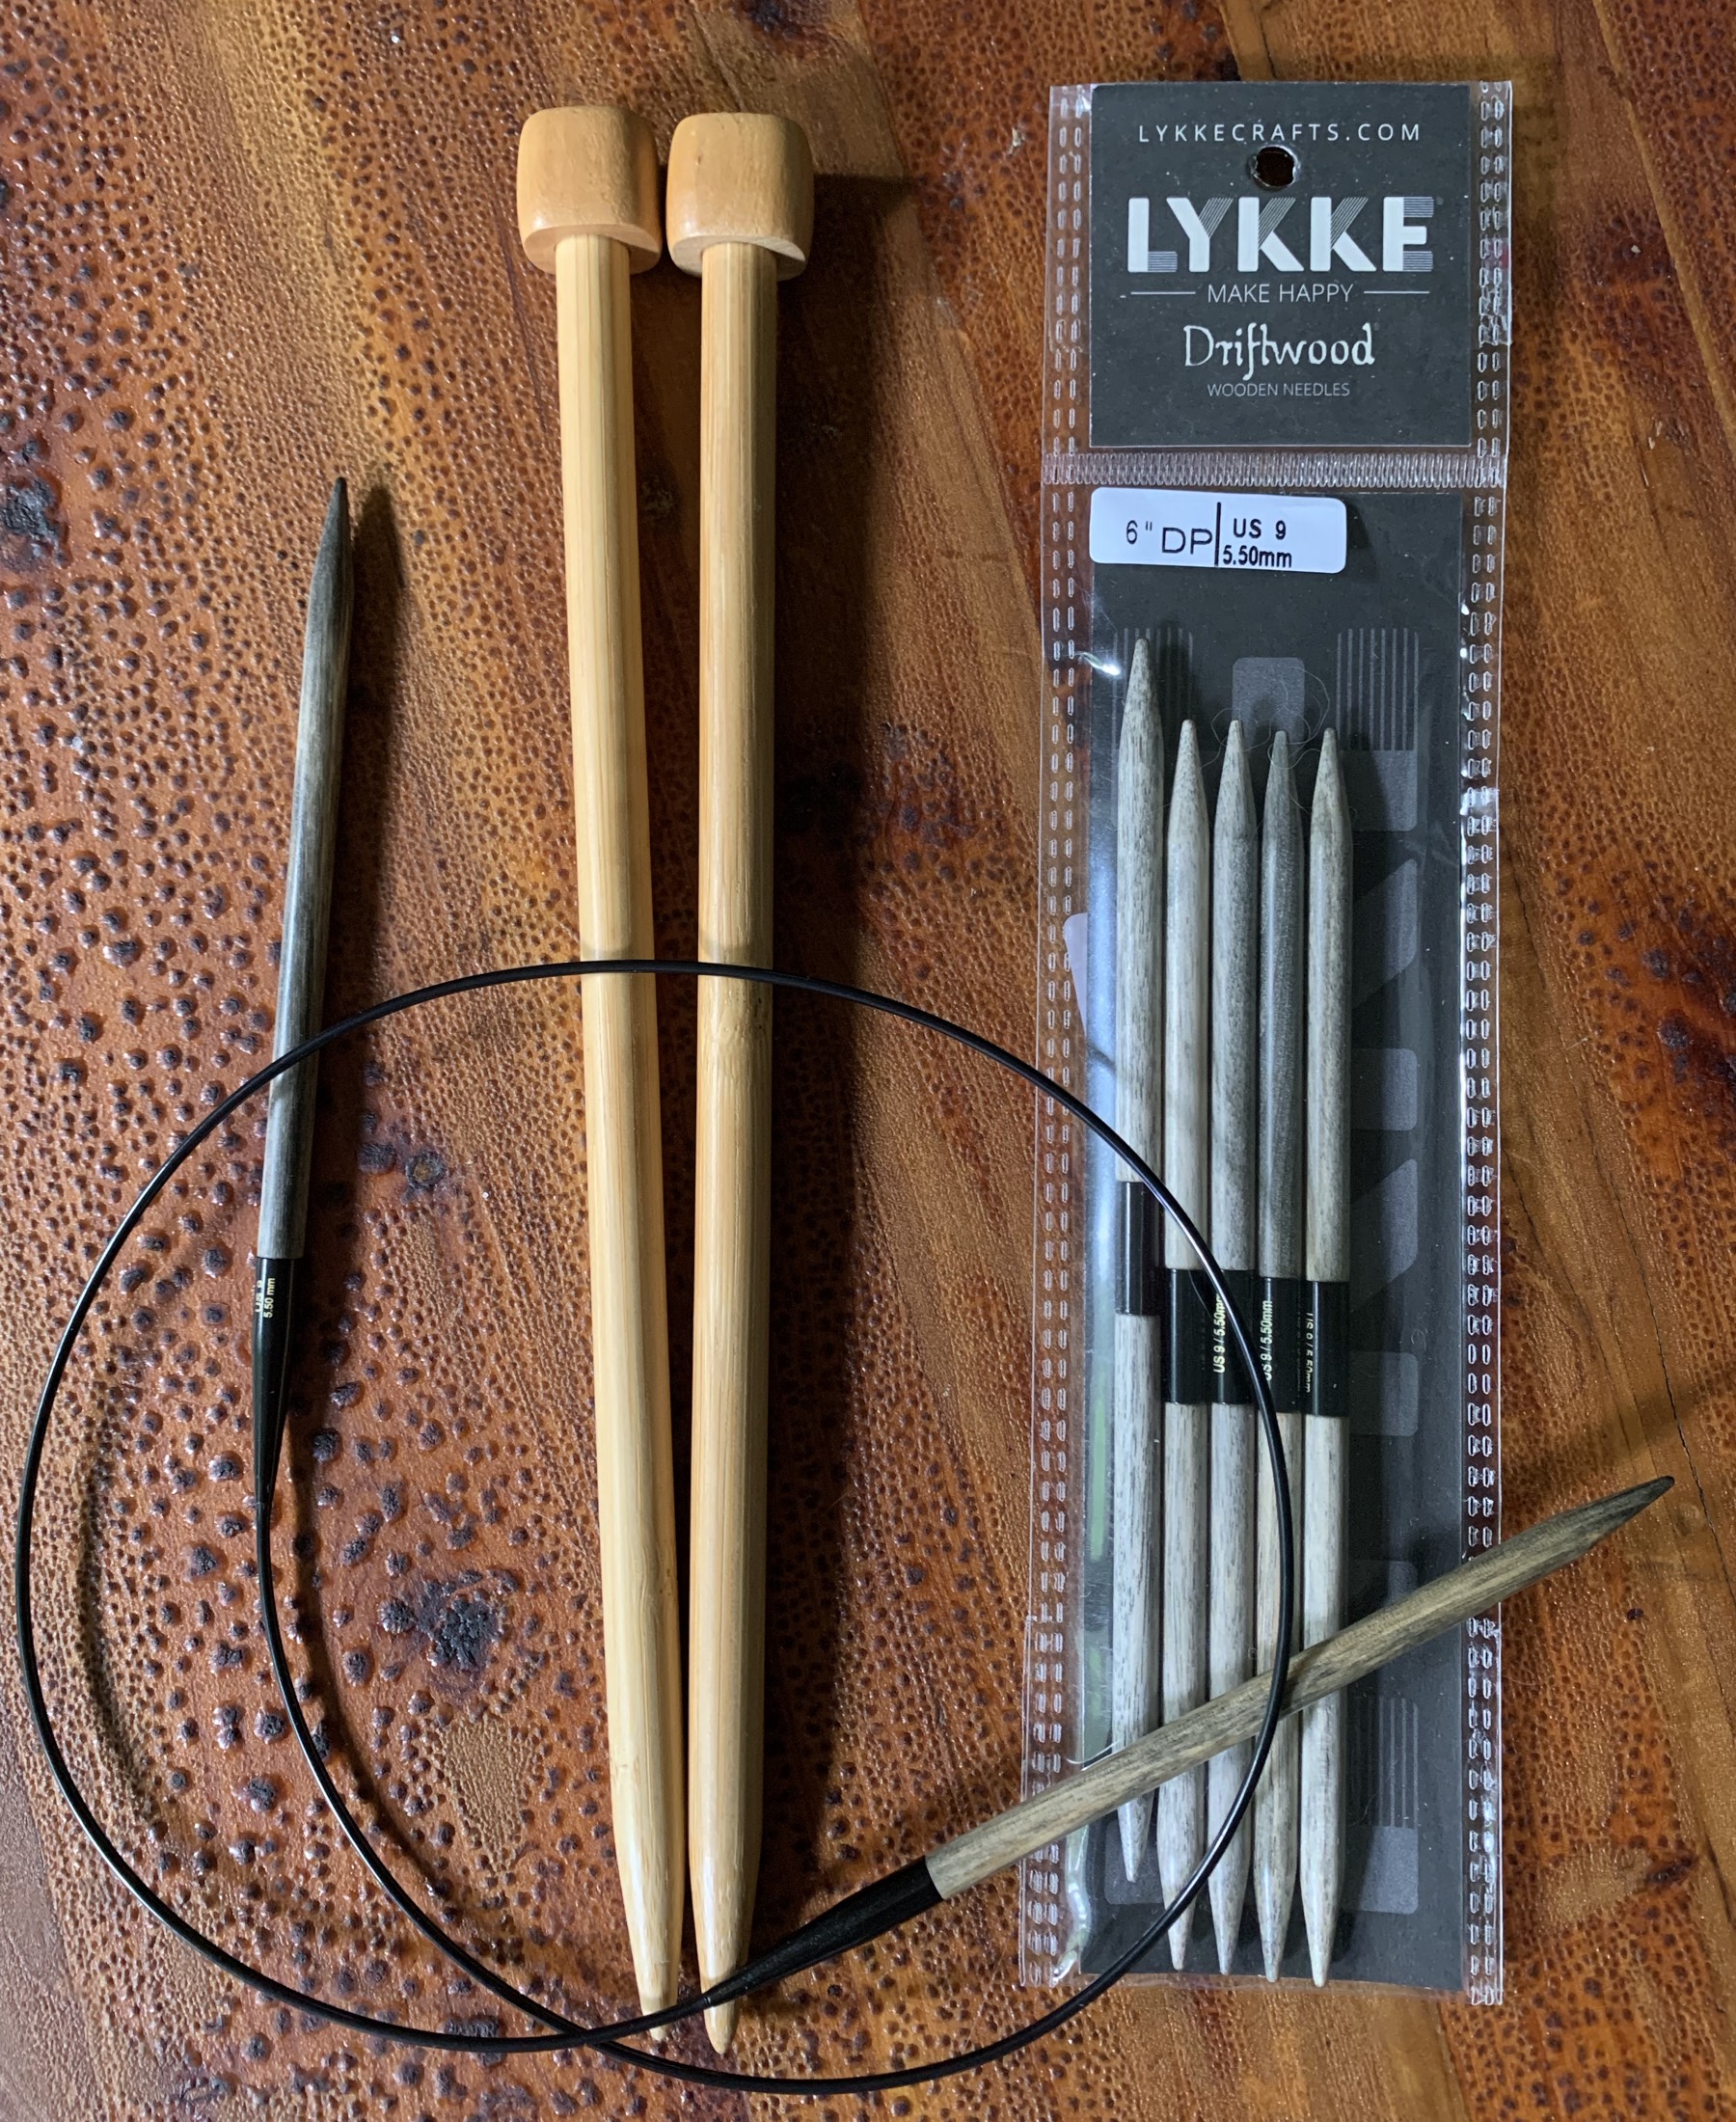
Knitting needles come as straight – which are just that, or circular meaning you can knit around and around if you choose. Then there are the double-pointed needles which are used for small circumferences like socks and mittens and hat crowns. There are cable needles for cabling too.
My Beginning Knitter Days
I had a set of my grandmother’s knitting needles, which were all straight needles, and that is what I picked up to use when I began my knitting journey. I didn’t want to spend a lot of money trying something I might not end up liking.

The old metal needles were difficult to use because the yarn slipped easily. My next step was to buy wooden straight needles for better control of the yarn.
Later, I learned about circular needles, and I have since purchased a lot of those. Circular needles are metal or wood needles joined by a cord. When knitting, pretend they are not joined and use them just like straight needles.
FOR BEGINNERS: Because they can be used for flat or circular knitting, I would suggest buying a circular needle to begin with. Namely a 32-inch wood circular needle – in a natural color, probably size 7 or 8. Colored wooden needles can sometimes bleed onto fingers and yarn so stick with natural wood.
Circular Needles Work 2 Ways
In the photos below I am using 32-in circular needles to knit a cowl and a shawl. The Honey Cowl (white) is knit in the round – the stitches have been joined and knitting is done round and round, called “in the round”. The Hidden Gems (orange) is knit back and forth called “flat knitting”. See the red cord with no stitches? Even though I am using a “circular” needle, I am knitting back and forth – just pretend there is no cord attaching the needles. I also could have used straight needles to knit the shawl.
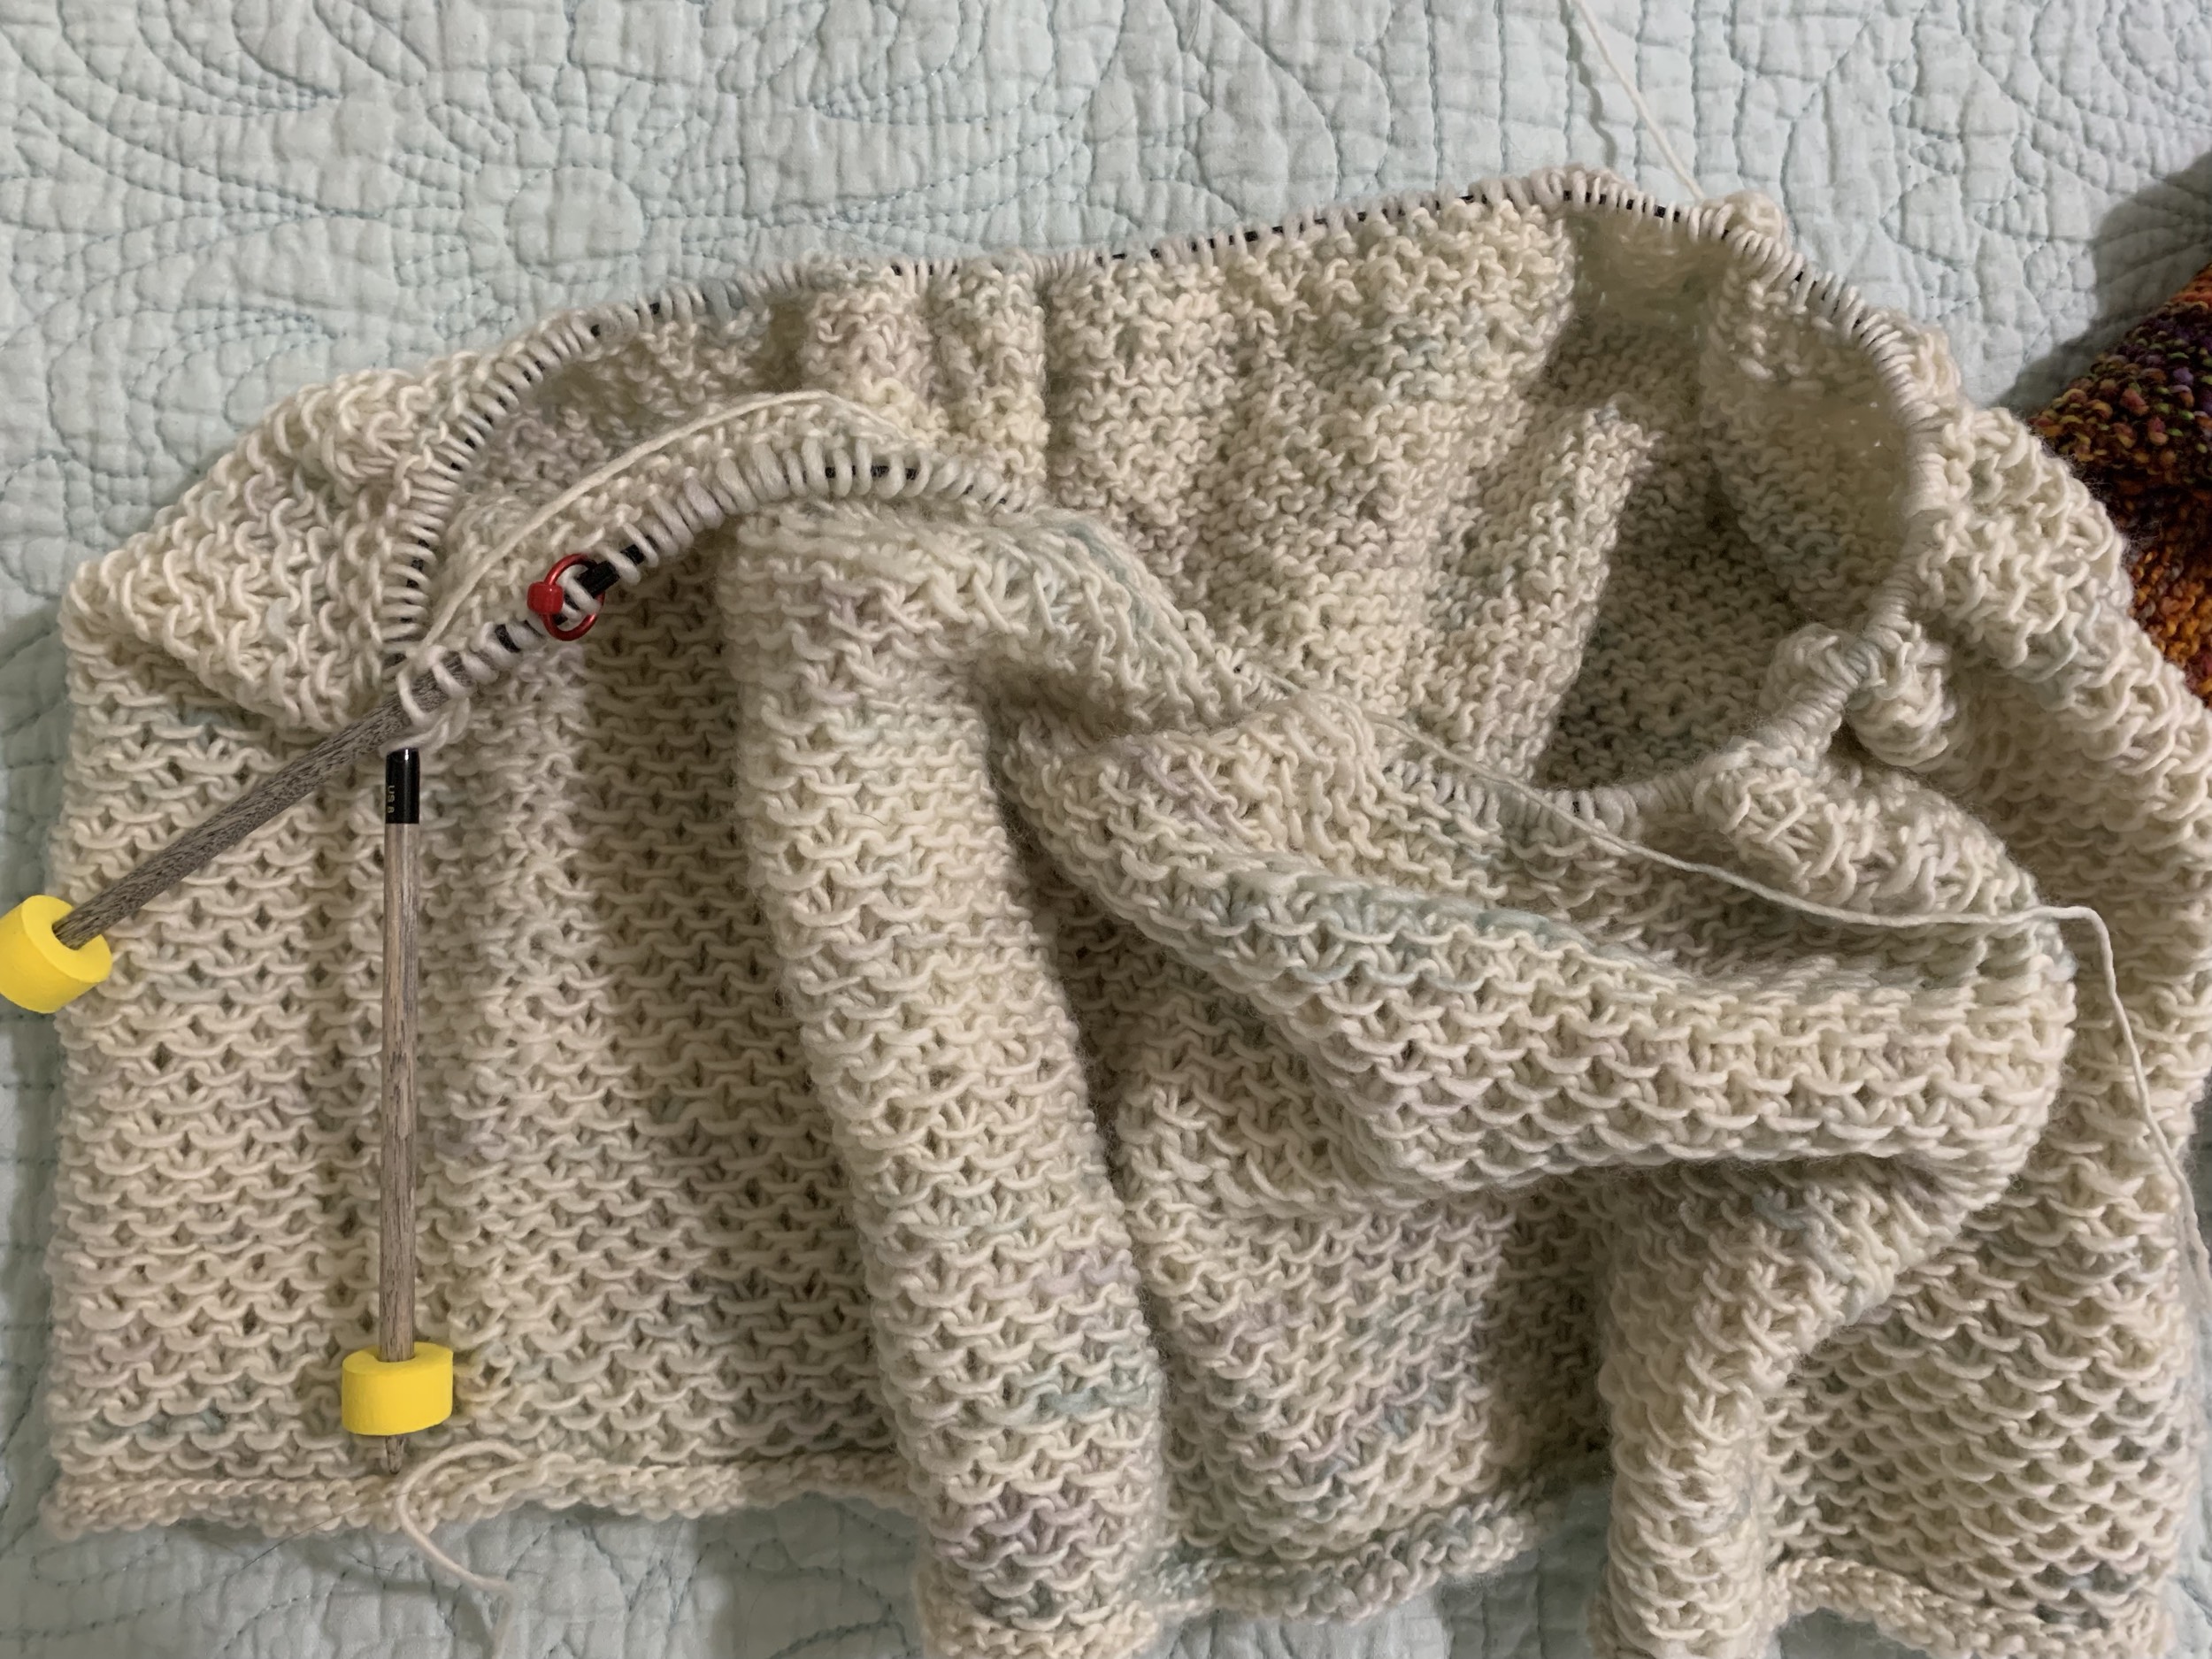

Practice knitting can be done on either type of needle, as long as the circular needle is long enough to be comfortable in your hands. A 32-inch long circular works perfectly, which is shown in both of my photos.
Circular Needle Advantages
- More stitches will fit on a large, circular needle
- Needles are attached so you won’t lose one!
- Larger projects can be knit, such as blankets, wraps, and big shawls.
- Circular projects like hats and sweaters need this type of needle, not necessarily this length.
My favorite needles are Lykke Driftwood (wood – seen in the Honey Cowl photo). I also have a lot of Chaio Goo (metal ends with red cord, in the Hidden Gems photo) – these are both affiliate links to Amazon. Wood is easiest, especially for beginners.
A Word About Interchangeable Knitting Needle Sets
If you KNOW you will be knitting a lot in the future, spending money on a knitting needle set could be a wise decision, although I don’t recommend it for beginners. I want to mention these as options for down the road.
Needle sets come in pieces, with various size “ends” or the needle part, and various cord lengths. The needles can be attached to any cord (interchangable) and it gives you pretty much every size and length of needle needed for knitting nearly everything, but not quite.
An interchangeable needle set does not include double-pointed needles, and sets only include certain sizes. Read carefully about what is included if you plan to purchase an expensive set like this. And they are expensive, but worth the money if they will truly get use.
The downside of buying a set is the question of how well the needles attach to the cords and stay attached. Once the needle is put together, how easily does the yarn slide over the join. Read comments beneath an Interchangable Needle set before you buy to find potential problems.
Buy Needles That Are Printed With Sizes That Are Easy to Read!
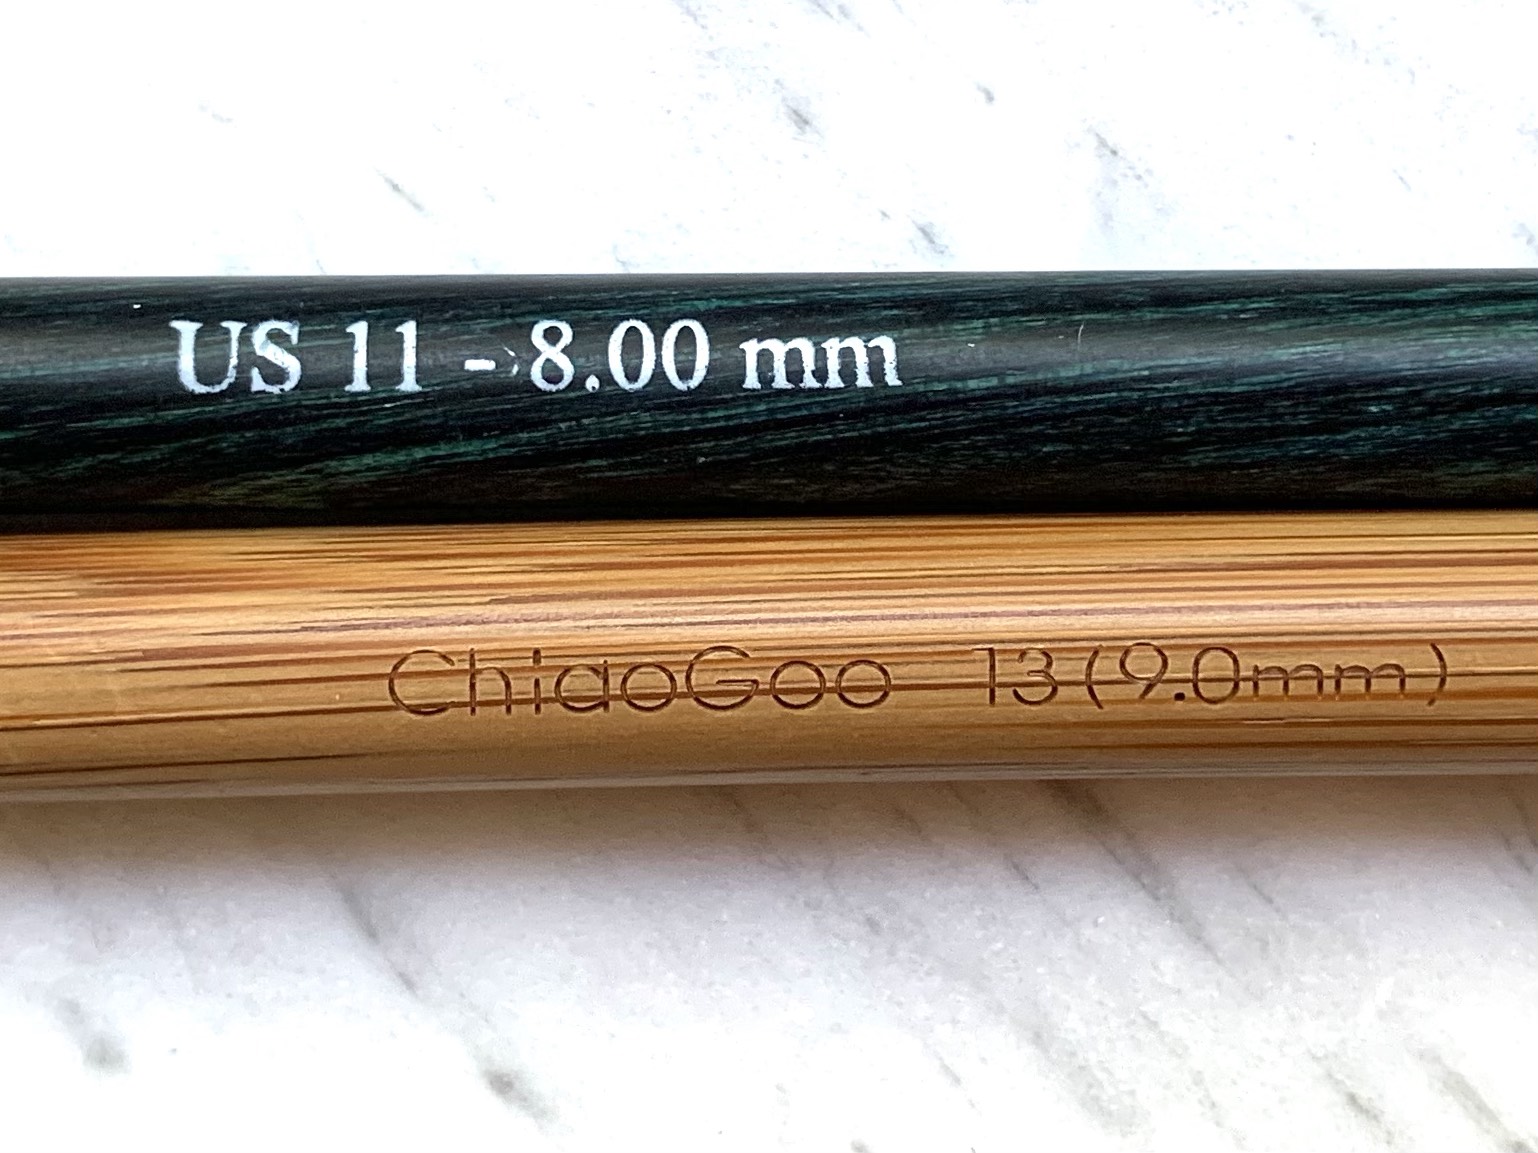
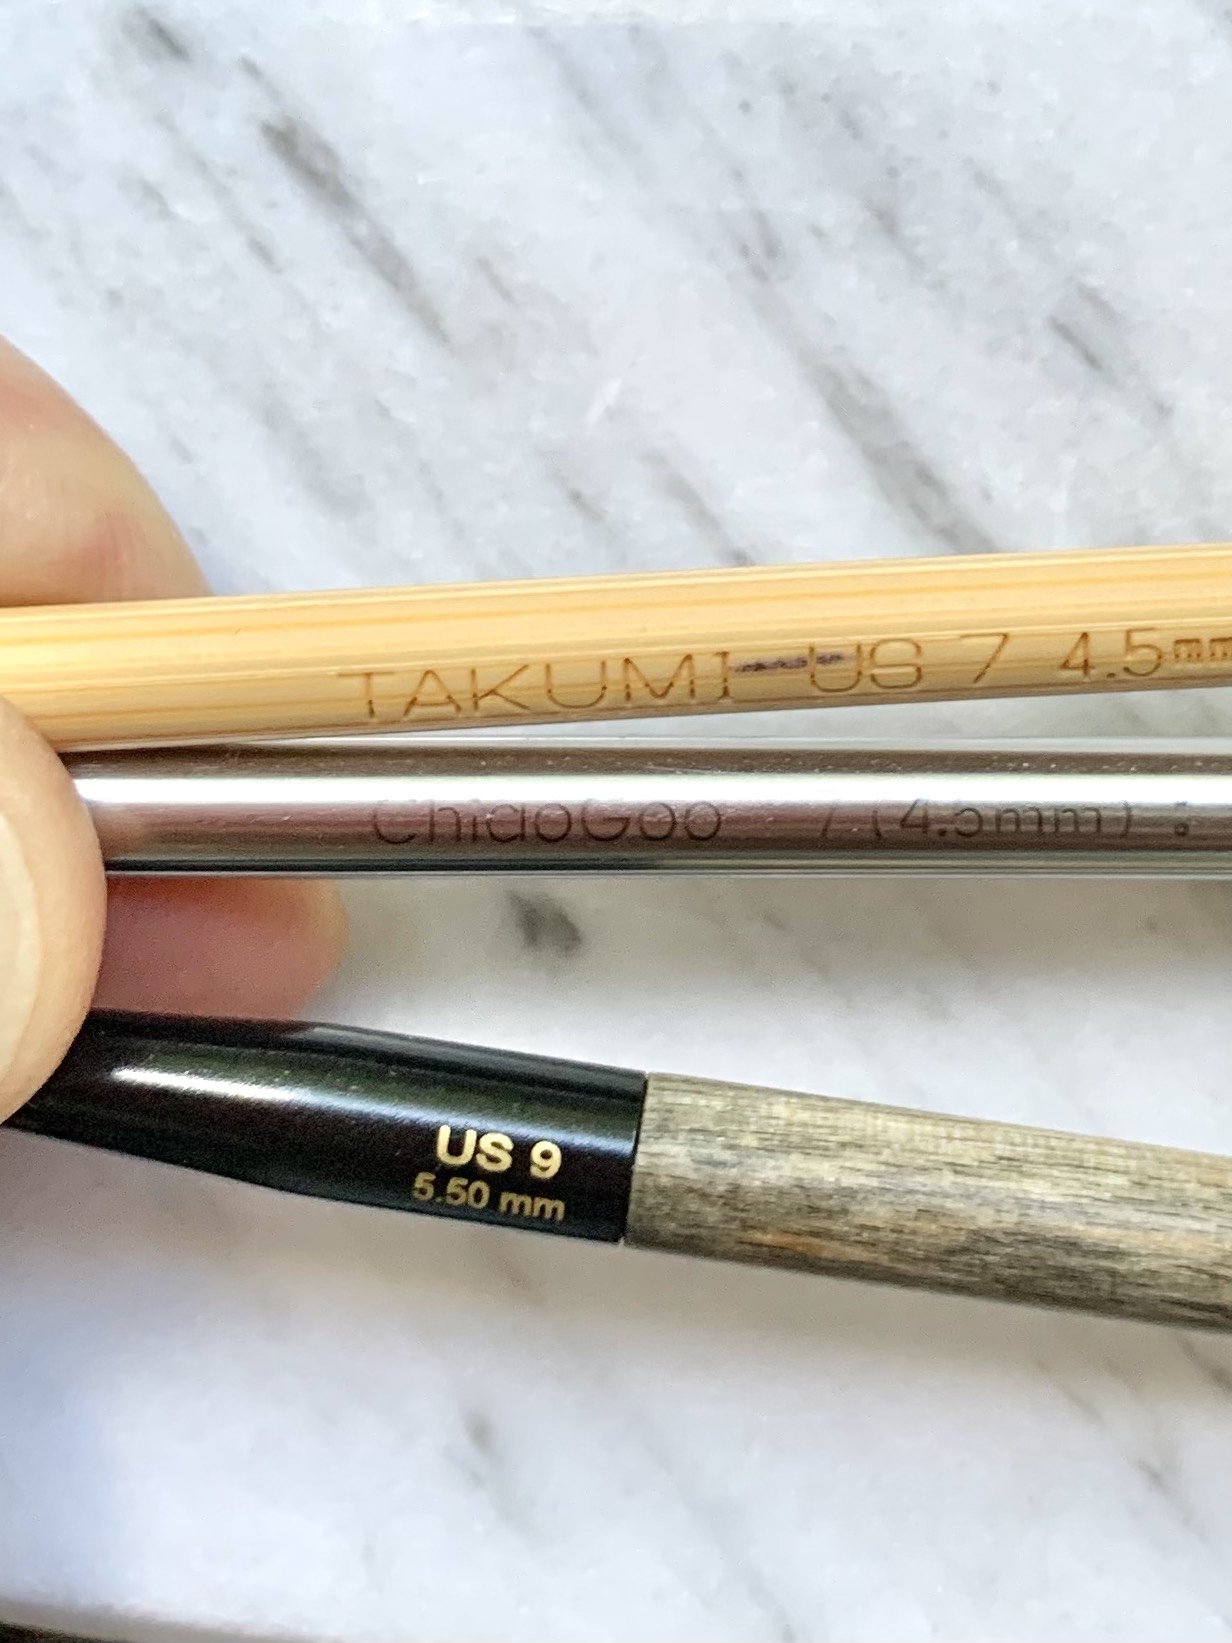
Each knitting needle you buy will be sized. If you are knitting a pattern that calls for a size 8 needle, you will look ON THE NEEDLE to see the size. Some brands make it easier to read the sizes than others. If you have bad eyesight this is especially important.
Another reason I love the Lykke brand is their easy-to-read sizing. I love ChiaoGoo metal needles and have many, but finding the size on those metal needles is often difficult for me!
Having a knitting needle gauge sizer is also helpful, but they are not always super accurate in my opinion. You stick the needle through the hole to see the needle size. Every knitter probably has at least one and you may want one down the road.
Matching Needle Size to Yarn
So now you have purchased your knitting needles and the next important part of knitting is of course the yarn. If you bought size 7 or 8 size needles, buy a worsted weight yarn. Worsted can also be called aran. (Read more about yarn weights.)
Tip: Buy a lighter color when choosing yarn as the stitches are easier to see.
Yarn and needles need to match up, or be close. What I mean by that is a skein of yarn will usually have a suggested needle size on the band. Check the label on the yarn you buy.
The label below shows that the “Shelter” yarn is worsted weight and needle size suggestion is 7-9 US, or 4.5 to 5.5 mm. This label says that when knitting with this size and this yarn you will knit approximately 4 1/4 to 5 stitches per inch.

Why is this important? Well, if I wanted to knit a scarf using my size 8 needle, and I want my scarf to measure around 12 inches wide, I would need 60 – 5 per inch x 12 inches – stitches on the needles. This math gives you the number to cast-on. If you are using a pattern, match the needle size and yarn type to the pattern requirements and cast on as the pattern says.
This is a rough guess, and that is okay for an item such as a scarf. But when knitting a garment, such as a sweater, you will need to be much more careful and find your gauge – but that is for later. For now, we just want to get the yarn onto the needles and begin knitting!
Read my post to begin knitting either a dishcloth or scarf.
Keep Reading the Blog


Something went wrong. Please refresh the page and/or try again.