Camel Yarn Weekend Hat Project

A simple ribbed hat pattern with enough brim folds to keep ears warm. The Weekend Hat is a pattern by designer PetiteKnit.

Petite Knit has a few hat patterns that I’ve saved in my knitting library. While searching for a good pattern to use with Camel yarn, I settled on the Weekend Hat.

This is a fairly simple ribbed hat. I couldn’t decide if I wanted to spend money on such a simple hat pattern. Why couldn’t I figure this out myself? I’ve knit many hats, but this one includes rows of knitting that designate where the hat folds. And this brim folds twice for keeping ears extra warm.

But for less than $6.00 I can follow a pattern and have the hat come out correctly, with no figuring on my part. Also, I enjoy supporting designers for their hard work.

This hat comes in six sizes – but… size 0-1 years measures 18-19 inches in circumference. This seems quite large to me. However, using a thinner yarn with smaller needle size, would keep the hat smaller. This size information can be found on the hat pattern page – you don’t need to buy it first. (Link below)

The hat sizes change as follows: Cast on numbers are the same for 0-3 years. Also the cast on is the same for the ages 3-9, small and medium, but the length (height) of hat changes. The Large size has a larger cast on and is taller.

Using Camel Yarn for the First Time!

Choosing a Needle Size

The knitting needle size suggested for this hat is a size 4. I cast on (I used this join to knit in the round) and began knitting using this size. It seemed too small, and after about an inch, I measured the stitches. Sure enough it was smaller than intended.

I wanted to go up one needle size but did not have a 16″ circular needle in size 5. So, I used my size 6. The camel yarn ball lists sizes 6-7 as the size to use with this yarn. Listed as a DK weight, this yarn is quite thick, and seems closer to a worsted weight to me. So, a size 6 needle seemed right.

The Yarn

It is a chainette construction yarn. Instead of plies, the strands are combined into a chain that is light and airy. Read more about the benefits of chainette on this page. Once it is knit, you will not see the “chain” texture. I was successful at spit splicing the yarn, but it took a lot of rubbing. This hat took 3 plus balls (buy 4) of Pascuali Camel DK yarn. I had quite a lot of yarn leftover, so the hat could have been made longer, or larger around. I knit the size Small.

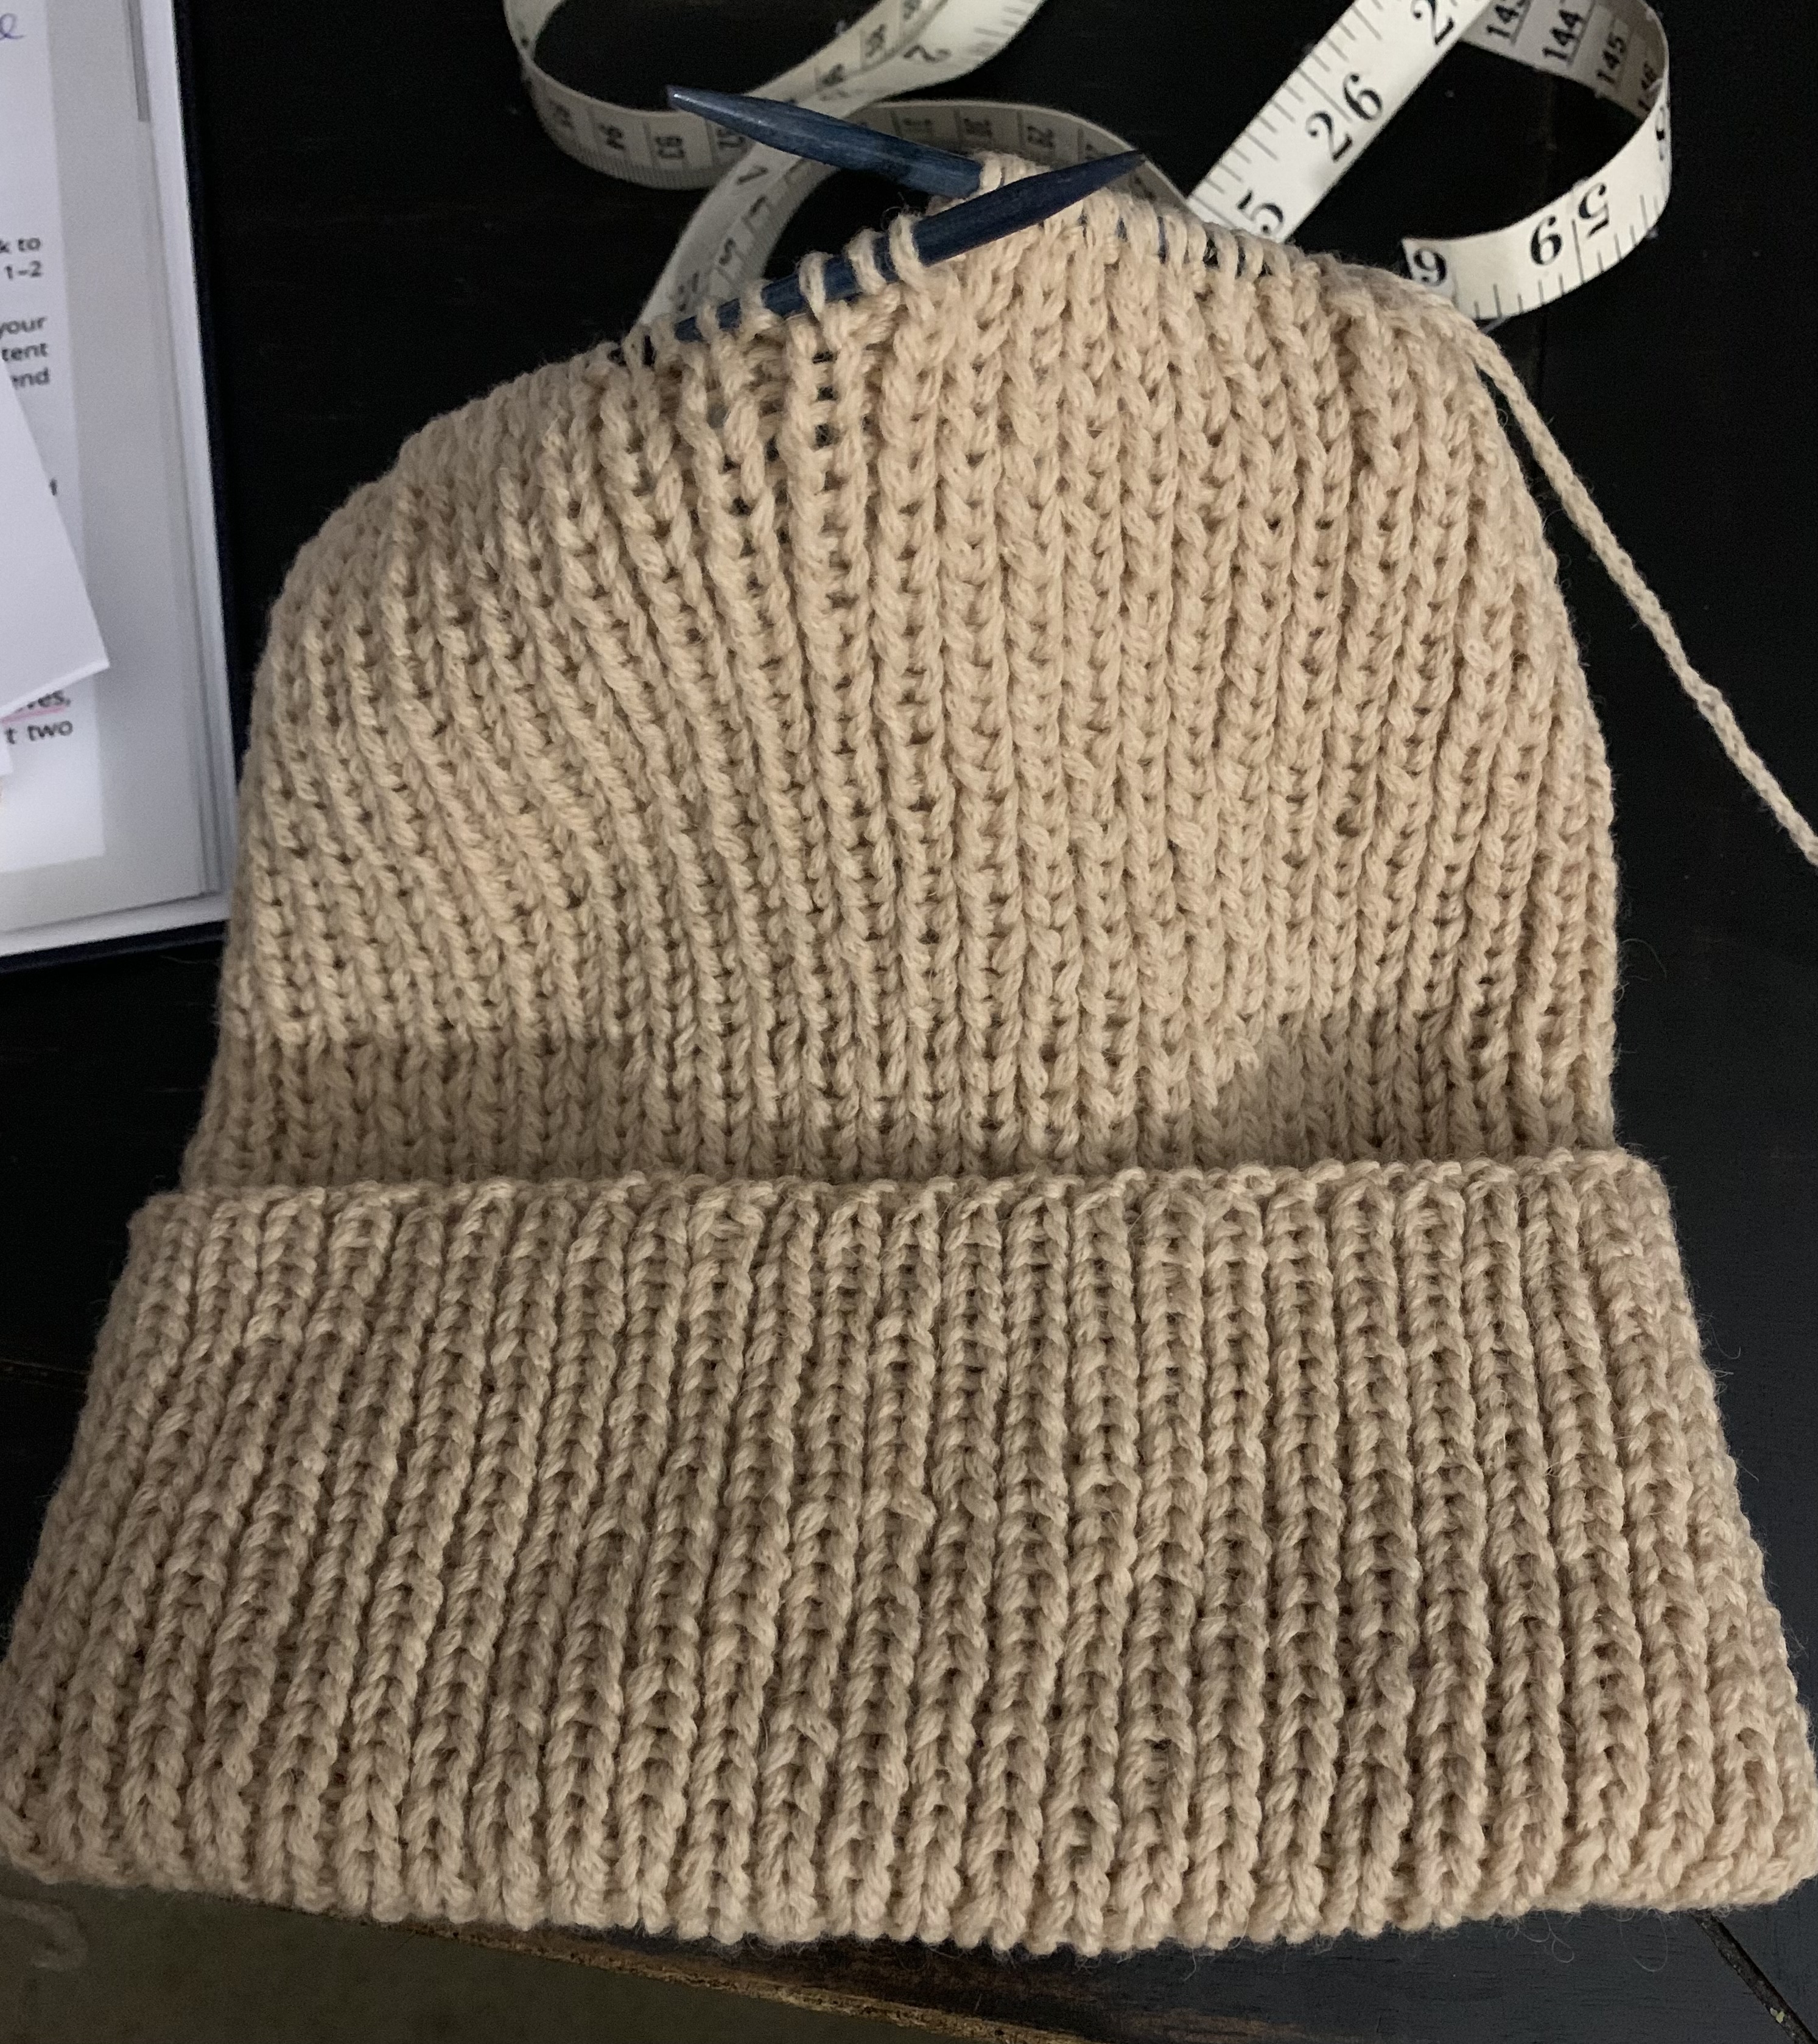
As mentioned above, this hat will have a brim that folds twice. For this reason, the cast on edge will not show. I did a long tail cast on, and even though I began the hat with a small needle, it all worked out fine.

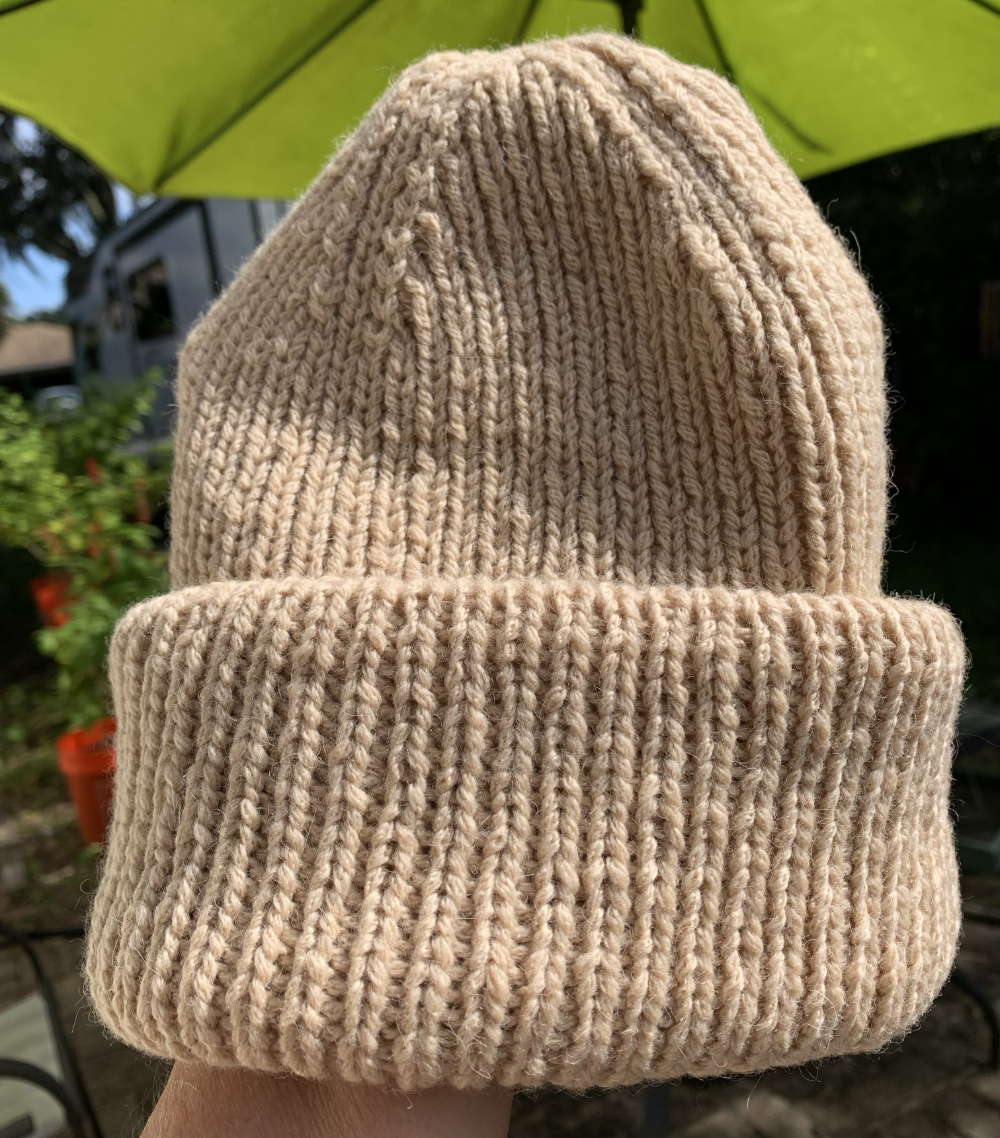
I knit size small and the hat fits me, although it is not for me. I was knitting for someone who has a small head.

I had enough yarn to make the hat longer / taller, but it would not have been necessary. I think it ended up the perfect height.

I took this quick (and non-perfect) photo wearing the hat. It shows how there is a little point at the crown.

Final Thoughts

The pattern is easy to follow and is mostly a 1×1 rib except for the few rows that make up the fold lines. If you would rather not include them, it would be easy to leave them out. Also, some Weekend Hat knitters knit the pattern but did only one fold for a more normal brim.

I suggest that you consider using the needle size suggested for the yarn being used. I did not knit a swatch to check gauge. My Camel yarn was closer to being a worsted weight and needed a larger needle.

This was my first project using Camel hair. I loved the feel of the yarn, which was soft and strong. Unlike sheep’s wool, the hat did not change much after washing. It also took three days to dry – but I live in a very humid place.

Now that I have finished knitting this hat, I can recommend the pattern. For the first time ever, I used Magic Loop to finish the top of a hat. I’ve used Magic loop for sleeves, but never for a hat. Small circumference knitting is always my least favorite thing to do.

If you are looking for an easy hat to knit, that covers the ears with many layers of warmth, I do recommend the Weekend Hat. I will be knitting it again using another Camel yarn. Be sure to watch for that yarn review.

More to read…

Something went wrong. Please refresh the page and/or try again.

Pattern Review: Beginning the Magnolia Chunky Cardigan

I’m knitting a beautiful cardigan pattern by Camilla Vad. The Magnolia Chunky Cardigan is knit top-down with lace and bobbles on the body and sleeves. On this page I cover some issues I had in the beginning.

This is such a pretty cardigan, with lace at the bottom of the body and sleeves. The Magnolia Chunky Cardigan (Ravelry page) is a design by Camilla Vad. Although “chunky” is in the name, it is knit with a worsted weight yarn, or a combination of yarns held together that equal a worsted weight. The finished sweaters on her Ravelry page (link above) are so beautiful.

This button up sweater is shorter, with a boxy shape and 3/4 sleeves. Many knitters have lengthened it and knit long sleeves as well. Usually, I like a longer sweater, but this one is quite pretty as is. Personally, I like the way it is meant to be, so I will probably follow the pattern as written. Don’t hold me to it….:)

Heads Up

This is not a beginner pattern. It includes lace, which means yarn-overs done correctly. It includes bobbles (new to me), increases, knitting and purling through the back loop. There is a button band, or one with buttonholes. You should have experience with most of these things to complete this pattern.

The Yarn I Chose

Harrisville Designs Highland Wool, on a cone, is the yarn I chose for this cardigan. It is worsted weight, in the color Suede. The light gray yarn has a bit of brown in it, but the color is very neutral. Each cone contains 450 yards, and I have three cones. The yarn came from my stash, but I love the color for this project.

Harrisville Designs yarn cone Highland wool in color Suede.
Highland wool cone – color Suede

This yarn is awesome. I love wool, and it is strong and consistent. There are knots, but they splice nicely.

This one can be a little tricky

Almost as soon as I began the sweater project, I had some trouble.

With this pattern, for whatever reason, some things could have been made much clearer. Thankfully for me, I am late to the party, and over 2,000 cardigans have already been knit from this pattern…. so it is popular! I want to thank the knitters who kindly shared helpful notes on their Ravelry pages.

Edge Stitches

This seems to be the biggest problem knitters have with this pattern: Edge stitches. At times they are included in the line by line directions, but not always. More about that in the “yoke increases” section below. But first…

The First Wonky Thing

The cast on and twisted rib neckline are done on smaller needles. Once the rib is complete, you simultaneously switch to a bigger needle while also beginning short rows.

If you are familiar with how short rows are done, you will know that a short row is just that – it stops short of the entire row, and then turns to knit back (or purl back) the opposite way. Knitting goes back and forth like this to lengthen the back part of the sweater so it will fit correctly. It is needed. You will be working off two different size needles until all the short rows are complete.

When I got to the “turn” I mistakenly picked up the smaller needle to knit because it was there! I had to rip back and use the larger needle while letting the stitches on the smaller needle just hang there. This was very odd, but worked out fine when I paid attention!

When expanding past each turn, just knit those few stitches off the small needle. And remember to pick up the larger needle as you knit, or purl, back.

Yoke Increases

The designer makes a note at the beginning about making sure we don’t stagger the yoke increases. They should line up over one another. Each knitter must figure out how to space their set of increases. For the size Large sweater, which I am knitting, 11 evenly spaced increases must be figured.

I THINK that the trick here is to not include 2 stitches (the edge stitches) when dividing up the number of stitches for increases. Now that I’ve passed that part of the pattern, I can’t be sure. Next time I would try that.

This threw off my subsequent rows. Things did not match up to the pattern, but I marked the increase locations and kept my increases lined up – even though they were not exactly where it seemed they should be. All my stitch counts were correct.

The Lace and bobble making

If you follow the pattern, the lace section will begin right after the body and sleeve separation. I knit a few extra rows here before beginning the lace. This is a good place to add length to the body, if you want it.

The pattern has some stitches that do not show up in the lace chart, or the lace written directions (the pattern has both). These stitches are mentioned before beginning the lace section. We simply must remember to add them when we knit, or purl, each row. The best way to do that is to use stitch markers.

I’m following the written out lace pattern. I rarely knit lace, and when I do, I usually have trouble. Those darn yarn overs get me every time!

Those end stitches will remain knits – except for the extra one. Refer to the directions for changes to it.

Nupps or Bobbles – Swatching for Practice

I’ve never done a knitted bobble, but this pattern has something called nupps. They look like little knitting bobbles.

Before trying my hand at bobble making on my sweater, I decided to practice on a swatch. I practiced making the bobbles shown in this video. She goes a little fast, but it’s easy to pause and catch up.

To practice my bobbles and nupps, I knit a couple of swatches. I had a hard time at first with the pattern nupps. They are easy to do, but didn’t look very good.

Image below: Nupps tan swatch, and bobbles gray (many mess ups).

knitting nupps and bobbles

A bobble is fairly easy to unravel FYI, just in case it looks really awful.

My question is this, will the bobbles be too large compared to the nupps? Maybe I can find a nupp video. YAY… Mostly Knitting has a good Nupp making video which you can watch here.

To Be Continued

The directions for this sweater are actually pretty good. It’s just that you have to be careful and go back and reference particular rows and stitches. I’m grateful that all the lace rows are also written out! I’m not good at reading charts.

Now, I am going to finish the lace and ribbing and then start the sleeves. If I come across any other tricky directions, I’ll be sure to share. And if anyone who has already knit this sweater wants to chime in, please do so in the comments and help us out.

By the way, Camilla Vad has other beautiful sweater patterns. Her pullover, Magnolia Bloom, contains this same lace pattern, but it’s on the yoke. I have already knit the immensely popular Field Sweater.

divider image animals in sweaters

Rebel Cardigan Completed and Here is The Review

The Rebel Cardigan pattern is a newer design by knitwear designer Ankestrick. While knitting the Rebel Cardigan, I closely followed the pattern. The only modifications made were on the sleeves, which I left a bit looser as I knit to the cuff. I also did not do a tubular bind off.

On this page:
  • Knitting Sleeves, my mod for the cuff decrease.
  • Knitting the body
  • Hip width increases
  • Binding off, hmmm?
  • Finished Photos
My Decrease Row For Sleeve Cuff Ribbing

I stopped doing decreases when the stitch count was 58. For my size (4), decreases were to continue to 48 stitches. I like some width to the sleeve in case I wear something long-sleeve underneath.

The ribbing for the cuff is done on 48 stitches for my sweater size. I needed to decrease, in one row, to get from 58 stitches to 48 before doing the 1×1 ribbing. Here’s how I knit that decrease row to end up with 48 stitches:

On the next round I began the ribbing. I had been using DPNs for the sleeve but changed to a 9 inch circular for the rib. I really don’t know which way I like less – haha.

Once both sleeves were finished, I put the body stitches back onto my longer needle. I then kept knitting until I ran out of yarn.

Knitting the Body

The body of the rebel cardigan is back and forth knitting, while creating a very nice edging down the front. Panels of 1×1 rib on each side, while stockinette makes up the back. I usually knit my sleeves first and then finish up the body with the remaining yarn.

Making Increases for Hips

I decided to do some hip area increasing, which is mentioned in the pattern. At about 10 inches (body length measured under arm) I began to follow the increase suggestion. This means doing increases at front and back after 14 rows, then increases for the back only at the next 14 row mark. At least, that is how I figured it.

Not Doing a Tubular Bind Off, But What Are the Choices?

This sweater pattern calls for a Tubular BO (bind off) which is done with a sewing needle and not knitting needles. I don’t mind doing this bind off on a small sleeve circumference, but don’t really like it for an entire body bind off. It entails pulling yarn – long enough to do the whole hem – with a needle. I’m not super familiar with it, and didn’t want to mess up my bind off.

Also, the 1×1 rib is on two edges (front sections) with regular stockinette between, so how would I manage that? I guess there are tubular bind-offs for stockinette, but I’m not sure.

Bind Off Options to Consider

So I searched and found a “sewn bind off” shown here by Brooklyn Tweed. I suppose this is how you do it. Tubular to the stockinette, then sewn, and back to tubular for the other side.

It would have been nice to have been given other bind-off options and suggestions in the pattern. And would it be possible to do the sewn / tubular bind off in sections? I don’t think so.

As it ended up I did a normal bind off in pattern (k1,p1) until I got to the stockinette section (the back). Then, I did an Icelandic bind off for the stockinette. This has caused the back section to curl.

Rebel Cardigan bind off with curling edge at stockinette section.

I’m using my blocking pins to hold down the stockinette hem. Now that it is mostly dry, the hem is flat (yay)! You can see, in my photo above, the shaping where the increases were made further down the body.

Like most people, I am naturally a bit bigger in the hips than the waist, so I recommend doing these increases for the longer version.

Knitting For Olive Yarn

I chose to knit the Rebel using two yarns held together. I had just finished up knitting the Field Sweater pullover and used the same types of yarn (Knitting for Olive). I am very happy with the outcome, and do love this yarn. The Mohair is not as fly-away as some others I’ve used.

The Knitting For Olive company is RAF certified, and that means they create their yarn in an “ethical and responsible” way.

Finished Knitting Sweater Photos

The washing and blocking to dry has not been done yet. See that little bump on my shoulder? That happened when picking up stitches, so be careful and take your time to make the seam look smooth.

Please keep reading!

The Field Sweater Knitting Notes and Outcome

My experience knitting the Field Sweater pattern was a good one and I am very happy with the finished project.

The Field Sweater knitting pattern has a beautiful textured yoke. The “grains” can be a bit daunting to knit, at first. A kind knitter has shared informational tutorials on her YouTube channel, and these helped me a lot. I wrote a whole page about beginning this sweater project and knitting the grains.

The Pattern

I found the pattern to be very easy to follow, but a few things were not as well explained as they could have been. The description of the M1L increase was different, but each row of the entire grain section was written out. I did find the grains easier to knit after watching the videos that were made by another knitter.

Changes

The only change made by me, was to knit a wider sleeve. Once the sleeve stitches were picked up, I decreased only enough to come to the 70 stitches that begin the top of the sleeve, for the size I knit.

I continued knitting, using a 16 inch circular needle, all the way to the cuff. For the row before the ribbing began, I decreased to the suggested number (50) for the cuff.

Sleeve Decrease Round

Just before the cuff ribbing, I did one round and decreased from 70 to 50 stitches. After much contemplation (and exasperation!)… I finally figured it out and did the round like this:

To decrease from 70 to 50 stitches all at once: *k1,k2tog,k1,k2tog,k1 – Repeat to end of row.

Hey, I have come across this page / site by Mimi Codd where she shares a calculator for this very thing! You can try it out HERE. In fact when I put the numbers in (70 stitches to decrease to 50) this is what I get: K5, k2tog, [k1, k2tog] until last 6 stitches, K6. This would have saved me loads of time. I’m linking it in my top of page menu under knitting.

The sleeve ended up being loose, as I’d hoped, and was knit to the length suggested in the pattern. With a wider sleeve, it is possible to wear this over a top.

I did my bind off a little differently with a k1, p1tbl. Someone on Instagram had mentioned doing this as a bind off and I do like it.

Finished and Happy

Now, I have finished knitting this pretty pattern. The sweater fits me perfectly. It still needs a wash, but I’m already in love with it. It won’t be the last time I use this yarn.

More Knitting Ideas and Stories…

Something went wrong. Please refresh the page and/or try again.