Birthday 61 Sweater Pattern Could Be a Challenging Knit

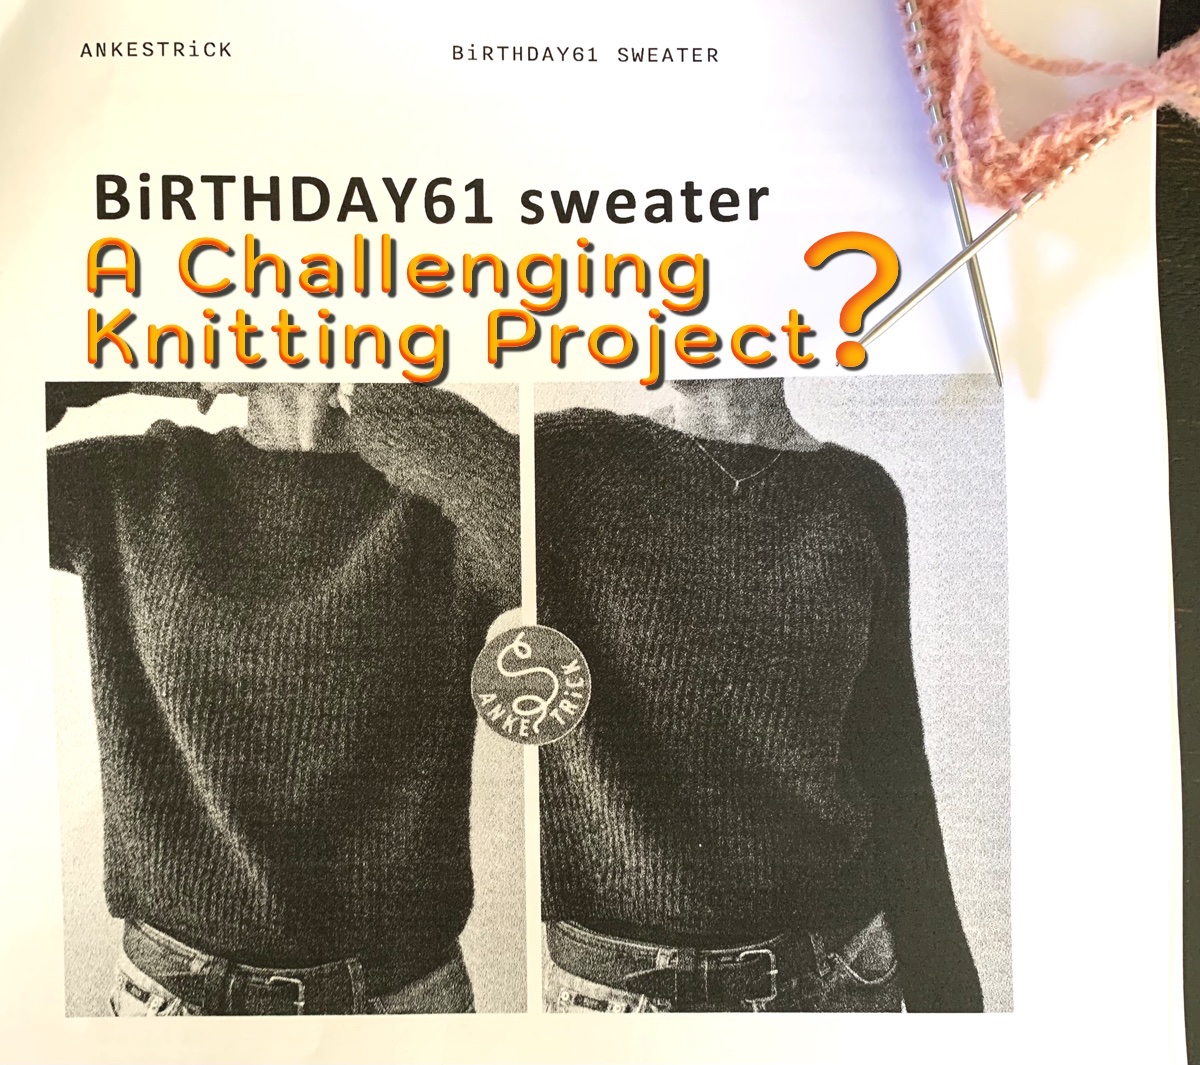
This simple (looking) pullover by ANKESTRiCK caught my eye. I love it for its one-color simplicity and squishy ribbed texture.

Looking further at the pattern, I realized that it may be too difficult for me to accomplish. I have my doubts, but will probably try it anyway. (See my trial below.)

First of all, the whole sweater is knit in a small size needle. Suggested needle size 0 to 1.5US, depending on gauge. That is tiny! This means lots and lots of stitches, that could take me months to finish. On top of that, it is knit in a “half fisherman’s rib” . The tags for this sweater include “brioche tuck”. Scary. I’ve tried knitting brioche a number of times and failed miserably.

Pattern Help

Fortunately Ankestrick has a full page of links for help. Some links will apply to the Birthday 61 sweater pattern and go to YouTube. I love it when designers give me lots of help to achieve success. She also has a Ravelry forum page for help with this specific project.

She has her own suggested invisible cast on, seamless join, and decreases worked in the half fisherman’s rib stitch. The pattern explains how to incorporate the rib stitch while making German short rows. The pattern lists many special techniques I’m unfamiliar with. But, I should be able to find help to create them while knitting the project. Will I understand and accomplish them? Who knows. I have successfully knit her Rebel cardigan pattern, and am already a fan of this designer.

The Yarn

A sweater knitting project can be quite expensive. Lots of yarn is needed to knit a size 3 or 4 sweater (which is my usual pattern size). This pattern calls for 1800 yards. This is a lot of yarn, and must be because of the stitch used.

*Note to self: knit this using a light color to easily see the stitches!

The second issue for me is the needle size. After looking through my smallest needles, I have the required lengths in size 1US only. Otherwise, I would need to spend money on new needles.

The Swatch, Or Jump Right In?

This leads to the question of how to knit a swatch for the Birthday 61 sweater. I may jump in and try the pattern with some stash yarn just to see how far I get.

Okay, this is what I decided to do. I began the pattern using the smallest sweater size (my actual size will be 4). I dug out some Rauma yarn. I need to know if this pattern is something I can manage, so I’ll try out the special cast on and then down the yoke with increases and short rows.

A New Type of Cast On (for me)

Anke lists her cast-on as “Anke’s Invisible Cast On“. It seems very similar to the Italian Tubular cast on, except with better changes (IMO). She does her videos in Continental style, which can be confusing to those of us who knit English style. She also does not speak, but adds text to her vids.

For the cast-on, (use any length needle to begin, but switch to a 16″ for the join.) I watched the video, but then realized I could simply follow the directions in the pattern – this is easier!

This is not a super easy cast on for me, but with practice it will get better. I used my long 32″ size 1 needle. The first (set up) row is turned, and we work back across the stitches that were just cast on – without having to join in the round – yet. Get out the size 16″ for row 2 as that will be joined to knit in the round.

Yoke Markers and Short Rows

I did not knit all the first rows after cast on because this is a trial knit and not something I will wear.

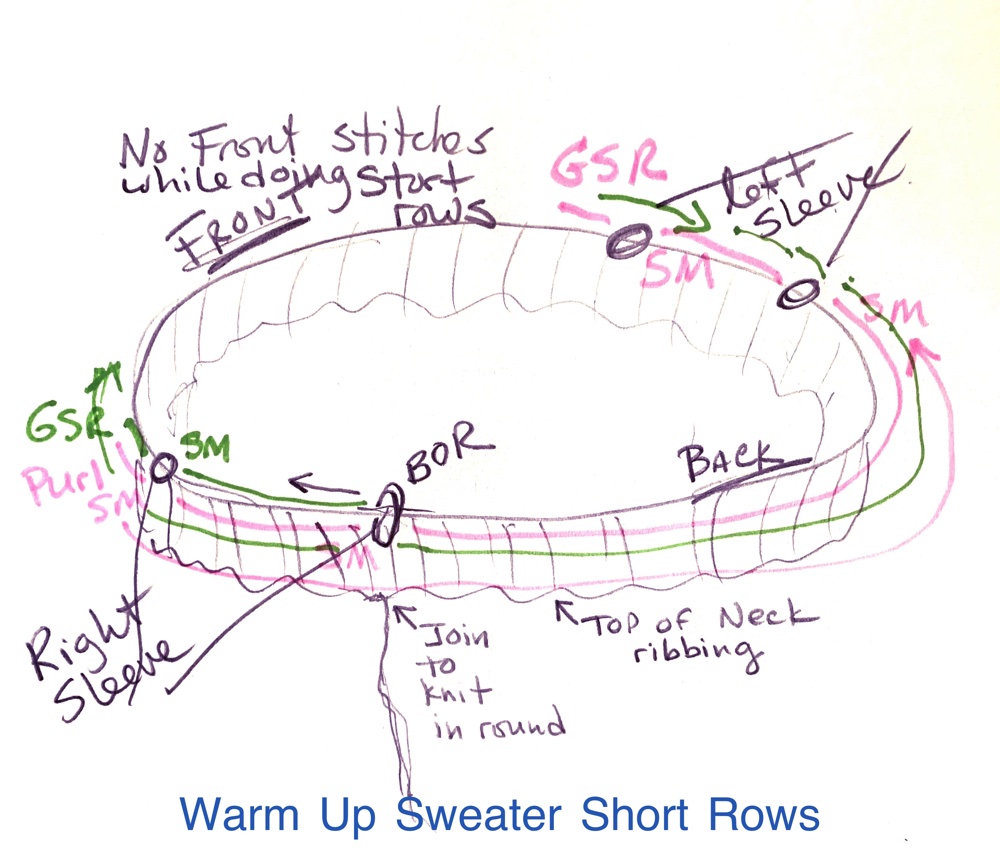
Upcoming are the yoke placement markers for raglan sections and sleeve / body increases. Those are combined with working short rows – and I was thinking that this could get sketchy. BUT… every short row is explicitly described – all 14 of them!

* When looking at the image showing marker placement, remember you are knitting counter clockwise from the BOR marker. Also, we are knitting down from the top of the sweater. Flip the page upside down if that helps to visualize.

Also, I suggest using various colored markers for the different sections. It helped me keep track of where I was (green means sleeves, white means front, etc.)

To get through the increases I need to know how to kbYOk. This is a knit below, yarn over, knit stitch. It is a two-stitch increase. See her video here. It is not difficult, but remember to do it because going back to fix a forgotten kbYOk is a bit tricky. And for some reason I kept forgetting to do them.

Below is my trial sample showing how the sweater top will look after all the short rows are complete. See how the very front is the shortest. Between each section of increases (sleeves and body) is a raglan section – four of them. Those do not change width.

birthday 61 sweater
Knitting short rows and increases

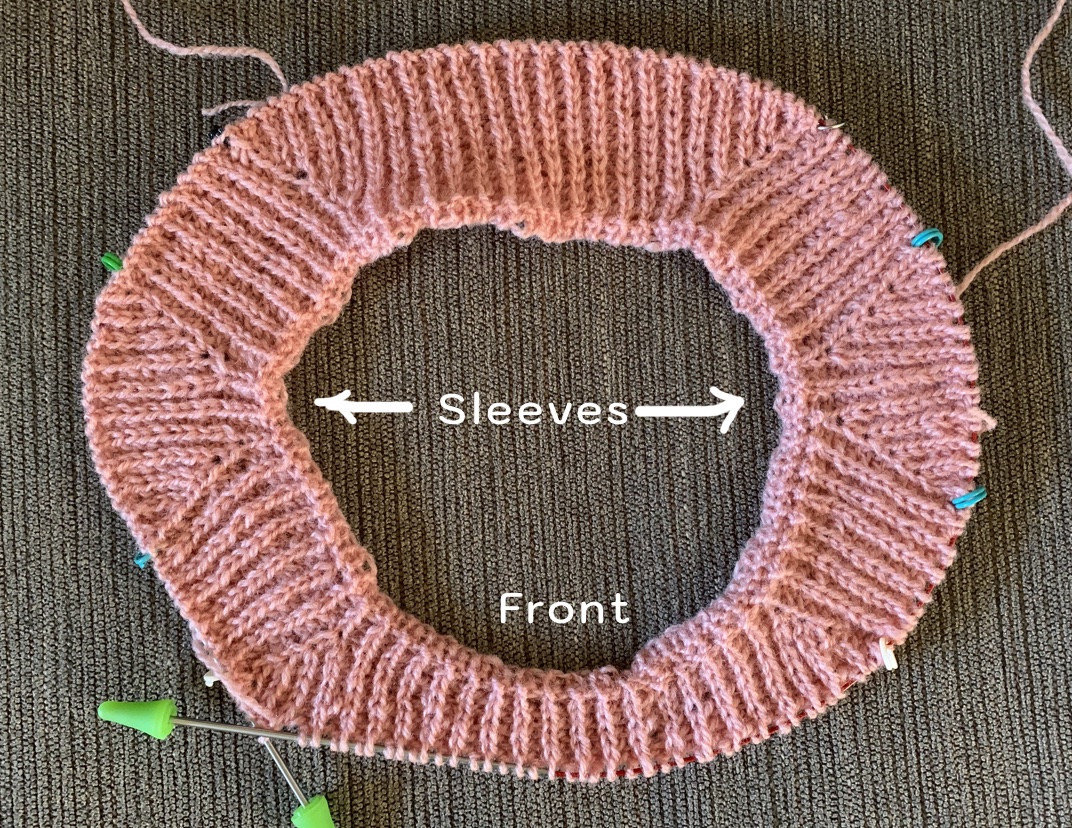
This sample is full of goofs (and the beginning neck rows have been omitted). I don’t like my cast on edge. I’ll have to practice that, or maybe not use it.

At this point I will be knitting increase rows alternating with purl rows. This continues to widen the sleeves and body. I probably won’t go much further as this is only practice. From this point on, I think I am able to continue and will plan to buy yarn and knit the Birthday 61 pattern.

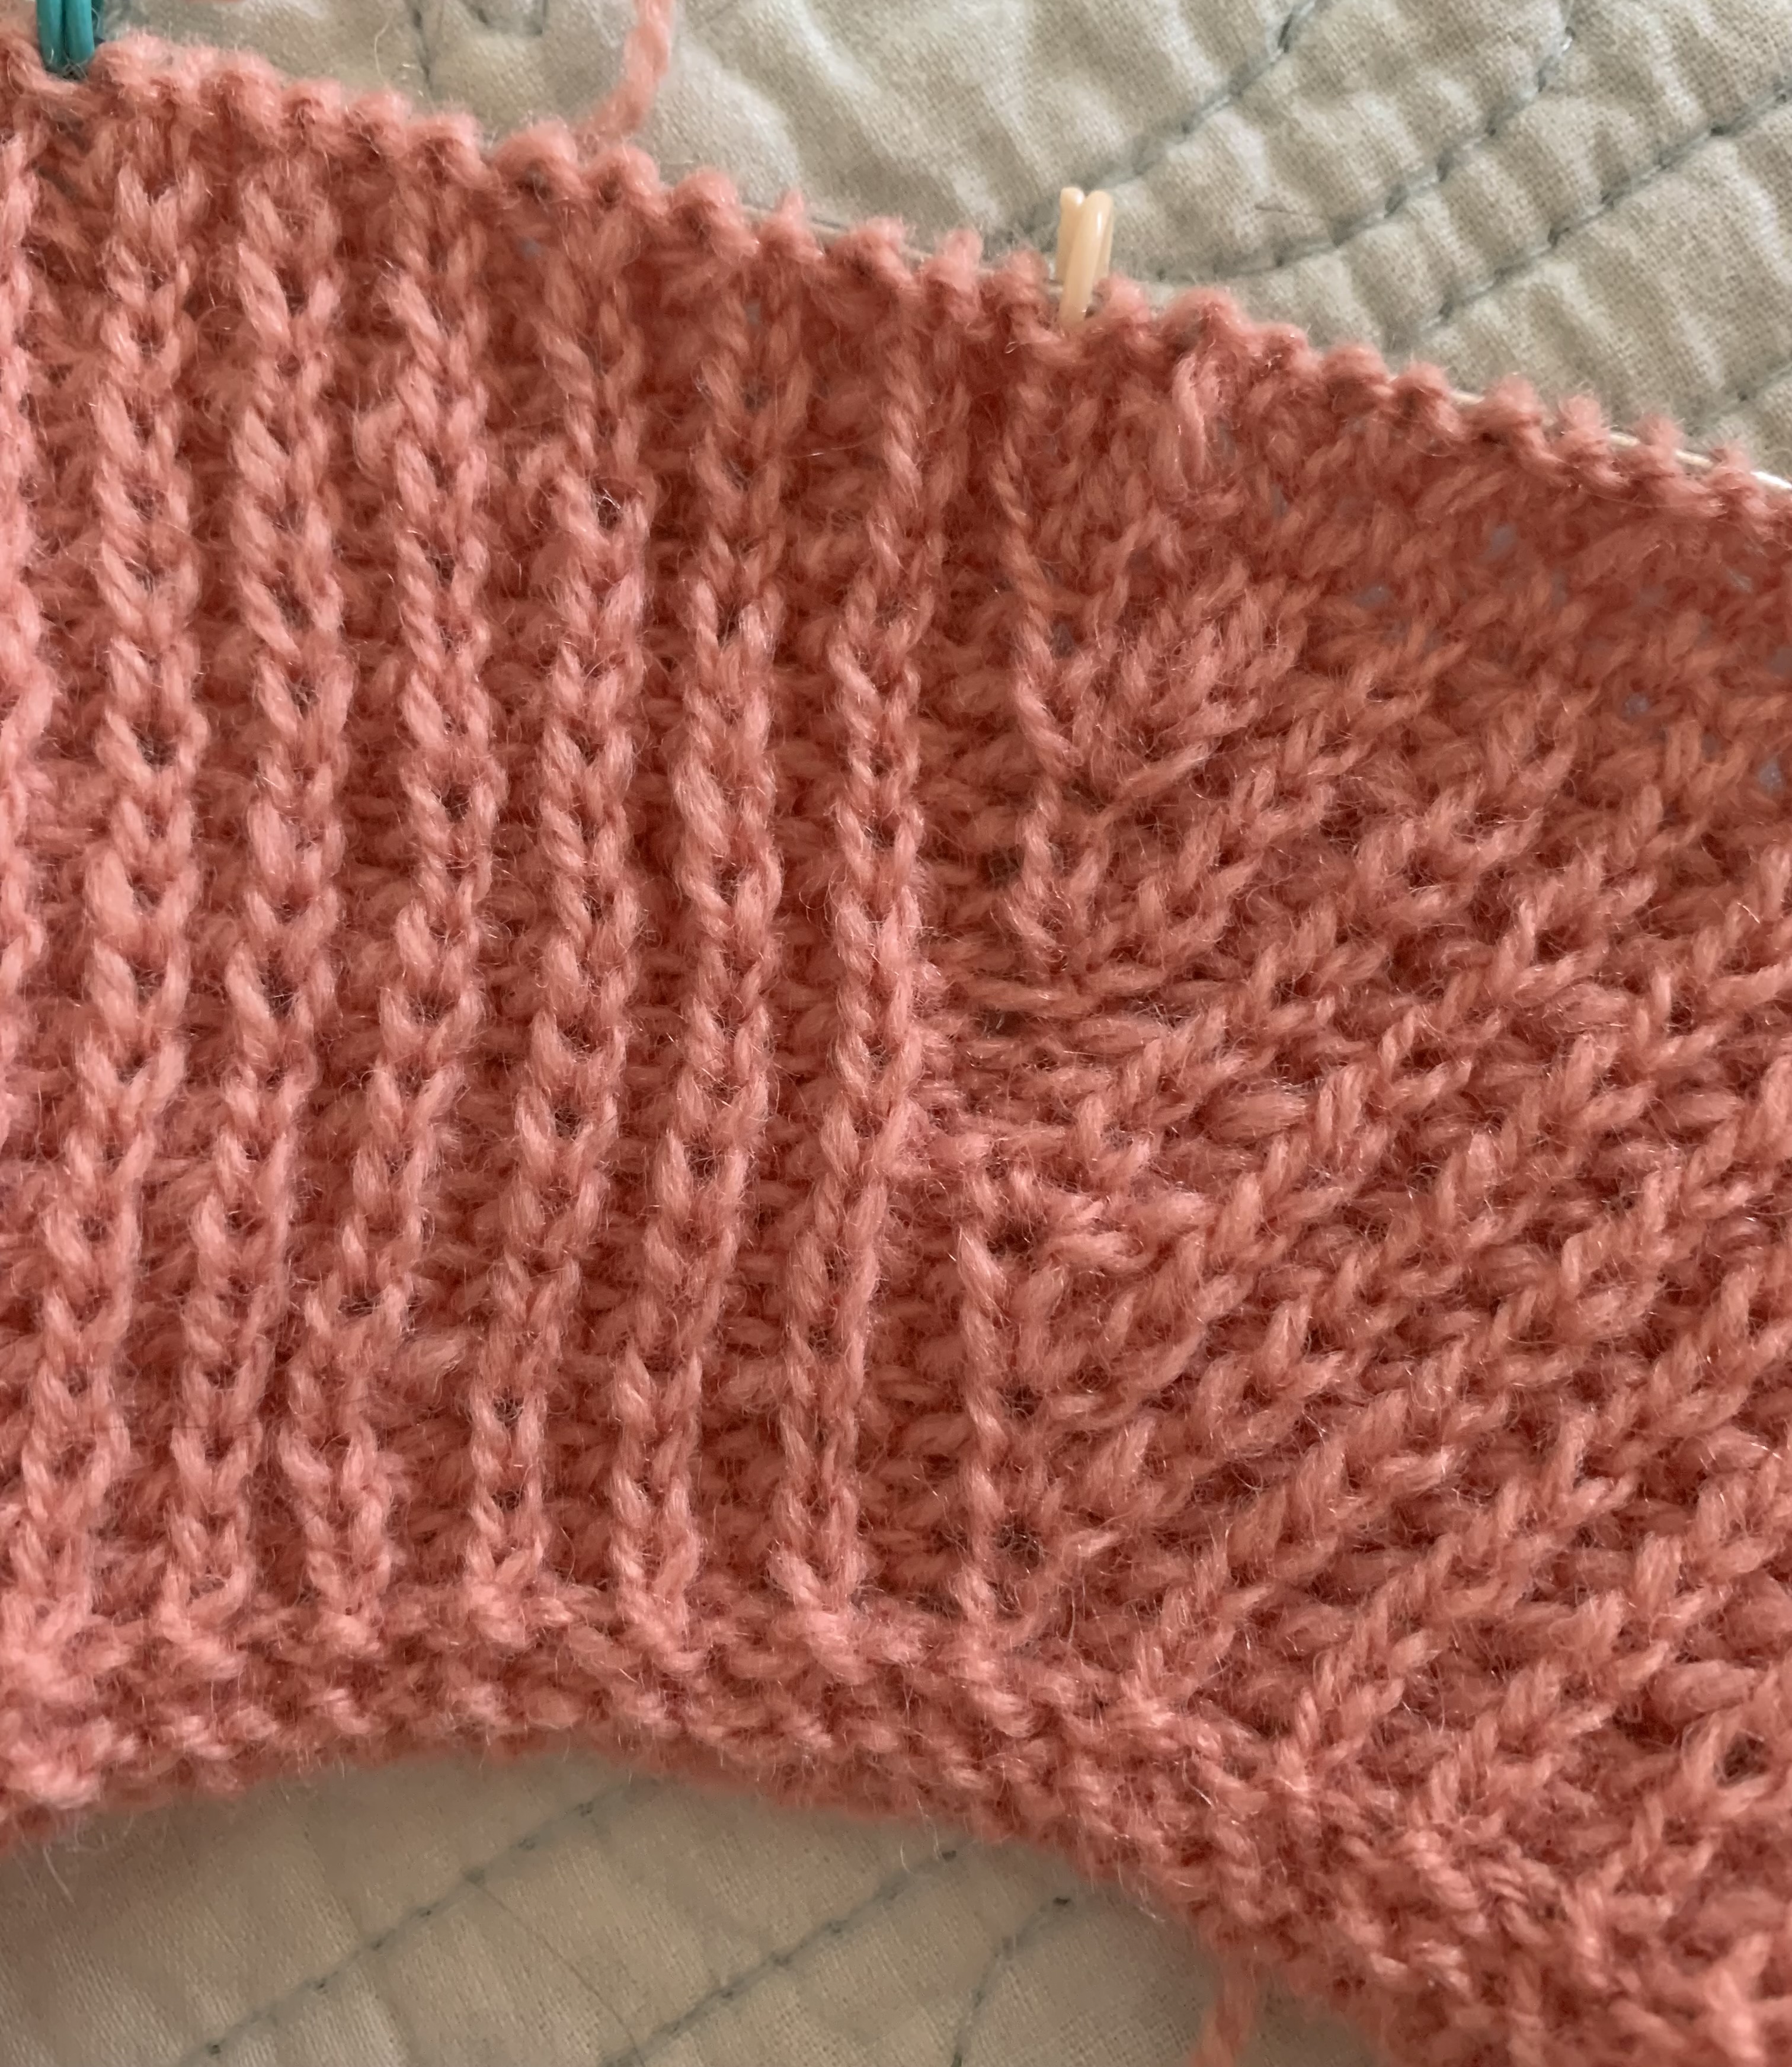
To keep track of knits and purls, here is what they look like. The purl stitch is “sunken” and the knits stand out.

half Fishermans rib knits and purls
Knits and purls.

So I have continued knitting on this trial piece and has you can see, I have made some obvious mistakes. I’m not happy with the cast on. I’ve messed up my knits and purls. Also, ripping back to fix something can be very tricky.

Birthday61 trial
A big goof!

More Advice From a Knitter’s Review

After viewing the test knits and other Ravelry knitters, it was brought to my attention that there is an alternate way of knitting the ribbing. On page three of the pattern, at the bottom, you’ll find the information. It replaces the purl row with a k1,p1 row. Apparently they look the same. I’m doing purls only for those rows.

Oh Gosh, More Yarn to Buy

I do not have enough of any fingering yarn to knit this project, so now I will be buying more yarn. The amount required is quite high – 1800 yards for my size 4. Once I begin this pattern for real, I’ll write another page all about it.

yarn ball divider
Knitters & non-knitters welcome – Keep Reading

Something went wrong. Please refresh the page and/or try again.

Understanding Knitting Short Rows on a Pullover Sweater

On this page I try to help beginner knitters understand short rows, and the important shaping they do when knitting sweaters.

Short rows are just that, shorter than normal knitting rows. Most often I come across directions to use short rows while knitting sweaters. In order for a sweater to fit properly, the back needs to be raised up a little higher than the front. It makes the neckline lower in front and therefore more comfortable. This is done by knitting back and forth over one section (the back) and ignoring the front stitches, for a few rows. 

Short rows also can be used to shape things, like sock heels, or shawl edges. I’m no expert on short rows, but I feel they are necessary as part of sweater knitting.

Sweaters Knit Without Short Rows

I’ve knit a couple of sweaters that did not include short row shaping. They are not the most comfortable to wear. The Carbeth Cardigan really needed short rows. The pattern was unique and pretty nice except that the back pulls downward, and shouldn’t. I tried to add some short rows myself, which I think helped, but I didn’t really know for sure if I had done them correctly.

Farfuglar was another pattern that omitted short rows. I wish that pullover pattern had included a few short rows as well.

Without short rows, there will be a noticeable difference when wearing a sweater.

Picturing Short Rows

It is always more helpful to me when I can picture how short rows will be knit. The Warm Up Sweater is a pattern from Espace Tricot and it includes short row shaping. I will use this pattern as an example to explain how the rows are knit.

Warm Up is a top-down raglan. Once the neck ribbing is knit, the sleeves, front and back are separated and expanded. Markers are placed to delegate all these sections. The sleeves will have fewer stitches than the front and back, because our arms are smaller parts of our bodies! You should also have a BOR (beginning of round) marker that should be different from the other markers.

We knit from right to left. We cast on and do the neck, and then begin the body. Our sweater is being knit top-down, but while we are knitting we are holding it upside down.

The Warm Up pattern short row directions say that the first marked area is the Right Sleeve, then Front, then Left Sleeve, and Back. In that order. (See my chart below.)

*Helpful hint: Place a removable marker at the “back” middle area. I do this just to keep the front and back straight in my mind – because no knitting should be done across the front (only while making short rows). Short rows will be knit across the back, and in this case, the sleeves.

short rows drawing

Short row shaping on the Warm Up sweater begins with Row 1 which says to “knit to marker”. From the BOR the knitting goes across the Right Sleeve. Then, “slip marker and knit X” which ever number for your size. 

This brings you a few stitches into the “front” of the sweater (Green GSR in my image), but now you turn – doing a German Short Row (see how below) – and will purl back (pink line in my image) – across the right sleeve, and the back, and the left sleeve. (This is Row 2, which says: *P to marker, SM and repeat 3 more times. This takes you past the R. sleeve marker, BOR marker, and both L sleeve markers – plus 3 or 4 stitches into the other side of the Front.)

Row 3 of this Short Row section includes increases, in the form of kfb (knit front and back) which are done on either side of the sleeves. You also do a GSR. It is not hard, just do each thing when it says to in the pattern. Some people mark where their short row turns are, but the double stitch made will stand out so there is really no need. 

The German short row turn is done like this: Knit (or purl) to the stitch indicated. Turn the work and with the yarn in front, slip the stitch on the left needle onto the right. Then pull that stitch up and over. It will look odd, like two stitches. You are now ready to either knit – on the RS, or purl, on the WS. Follow the directions for the next short row. 

Watch this excellent Short Rows Video for more help.
small green yarn

More About Short Rows

Making the turn for short rows will become second nature once you practice enough. If the pattern is well-written, the designer will walk you through those rows. Once the short rows are finished, you will continue knitting normally, or as the pattern directs. 

The funny looking short row stitch is always knit together – as one stitch – when it comes time to either knit, or purl that weird stitch.

Socks use short row shaping at the heel. And short rows can make a ruffle on a scarf or other project. 

My Knitting Life

Revisiting an Old Blog Means Lots of Organizing

Little house-misty field
The Little Red House

As I prepare to write again on this blog, I am seeing just how horrible I used to be at writing.

Blogging for me has been a huge learning experience and whenever I see old posts of mine, I cringe. Tags are horrible, links are missing, categories don’t make sense, and photos are not placed well, if they show at all. Some posts have bad links and some writing is so bad it should be deleted.

I was learning. Like anything in life that is new to us, doing it over and over usually makes us better at it. I’d like to think I have advanced in my writing and blogging skills over my years of posting at my various websites and blogs.

What I didn’t know, but do now is that links are good. Outside links and links to pages and posts within a blog are good for SEO. Bringing readers is what we want after all, right?

I suppose some people have plenty of family and friends who read their blogs and that is fine. Some photography blogs I follow have little text yet they have loads of likes and comments. Supposedly you must write good content to place well in the searches for subjects. And that content should be at least 300 words.

I’ve never been much on keywords, since I believe in simply writing about my subject matter in the best way I know how. But tagging is important and many of my posts here have horrible tags. Almost none of my posts link to each other, and I can’t even find subjects to read about when searching my own blog! That is not good.

So I’m organizing this blog just like I organized my Seashell blog not long ago. Categories can be removed, but first the posts have to be directed to other categories… but they are almost all bad. This will take time.

No one I actually know reads my blogs. I have come across some very nice fellow bloggers who run sites I truly enjoy visiting. Mostly they are photographers, artists and gardeners. And they visit me and leave comments (thank you!). I don’t have family or friends who keep up with my blogs, and that is fine. Blogging can take you around the world, where you will find nice people who show you great things. It’s partly why I do it.

Don’t just write… visit others who write about subjects that interest you. Leave comments and maybe they will become a dear online friend.

(Photo at the top is of the Anchorage restaurant on Lake Sunapee.)