New England native, Florida resident. Blogging about boating, beach-combing, gardening, camping, and knitting. Work for Zazzle as a designer since 2008.
For the mitten knit-along I am doing, colorwork knitting is a requirement. The pattern must include more than one color for this KAL, and the mittens I am knitting have three. Once you know the basics of doing colorwork, also called stranded knitting, the project will end up looking good instead of a mess (like mine used to be).
Colorwork Basics
I have a little experience in knitting colorwork. Basically you are knitting with two or more colors and using them to create an image or pattern. Yarn is held in both hands, with left hand using the prominent yarn, and right hand holding the “background” yarn color.
However, if there is a long bunch of stitches in one color only, it means the other yarn must be carried along until ready to use. Because you can’t just let it droop and create a long “float”, or unattached length of yarn, you have to know how to “carry a float” for both the left and right hand yarns. This is knitting talk for catching the unused yarn with the used yarn to bring it along correctly. And it is done differently for each hand (color).
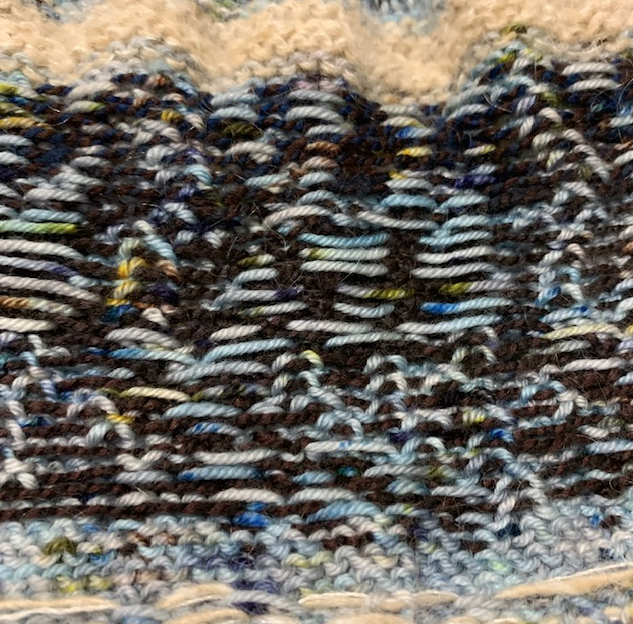
Moose motif
For instance, when I knit this moose motif I had to carry yarn colors over numerous stitches. When knitting the rows of brown for his body, I had to carry the blue yarn and catch it up while I knit the brown so as not to leave a long strand drooping along the back of the hat.
Catching the floats for the moose motif
Catching floats is not difficult and once you know how to do it, it becomes simple. I suggest you knit something where you can practice this over and over until it becomes second nature. I’m getting more practice now while I knit the Milet mittens.
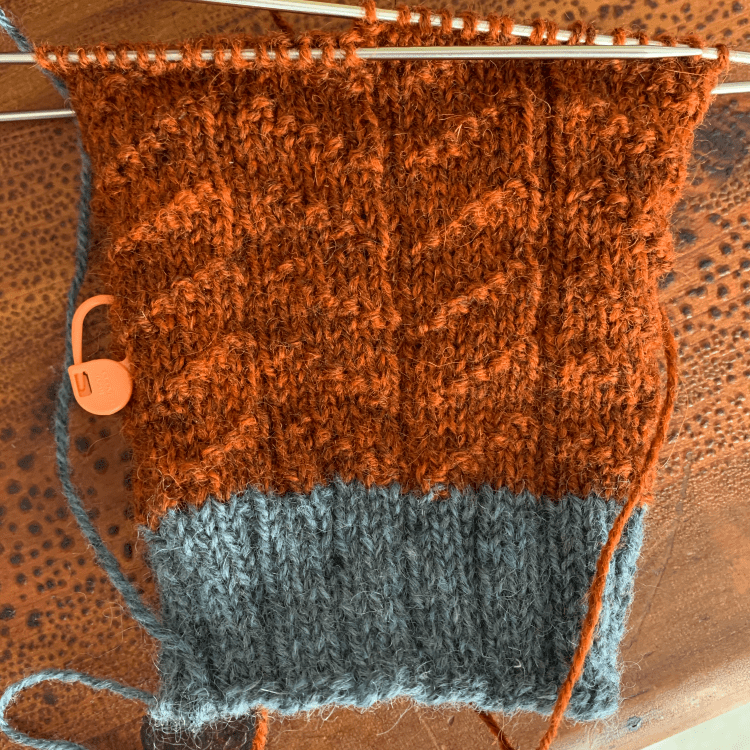
Yesterday I cast on my mitten project for The Woolly Thistle knit-along. Needle size 1.5 (cast on and now cuff ribbing), and size 2 for flower color-work cuff. Size 2.5 is called for, so I may go up a size for the hand. My trial knit for this Milet pattern was large.
Casting on
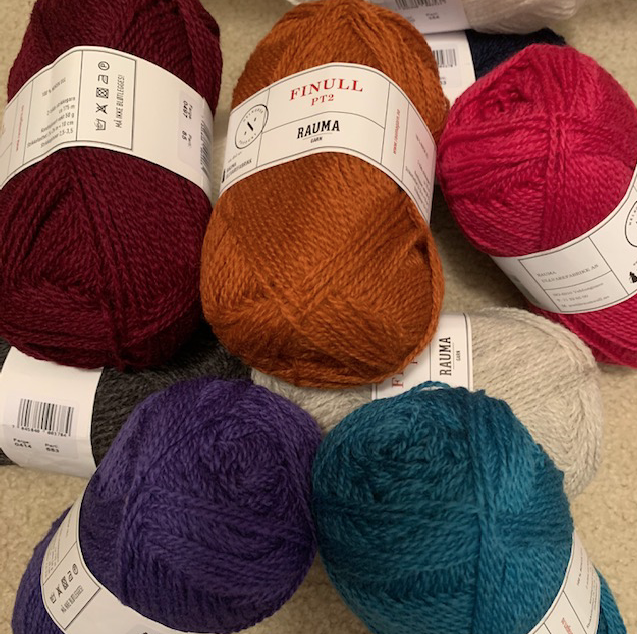
My daughter helped to decide on colors – but we had to pick from the ones I already had because there was no time to order more.
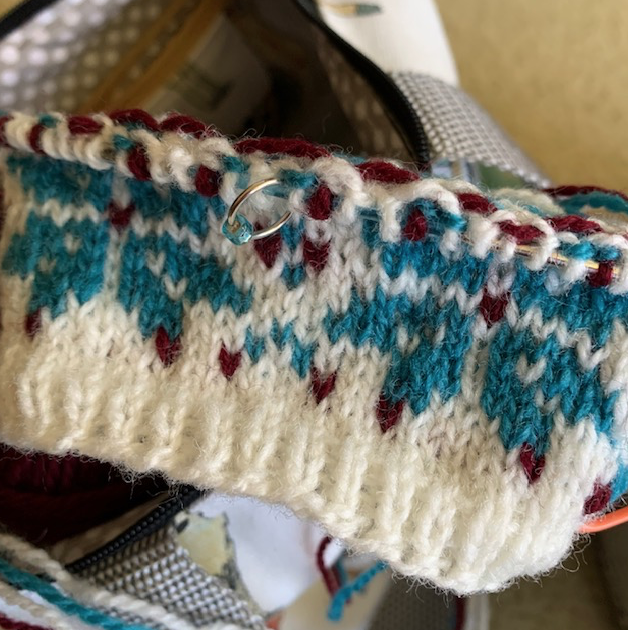
Accomplished the floral cuff the first day of knitting
Color switch: Maroon as main color for hand, with white. Blue flowers and accents in place of yellow. I have shared on Instagram and in the Ravelry TWT forum as was suggested. Yes, there are prizes to be given and lots of interesting patterns being knit. I’ve already found one to save for later.
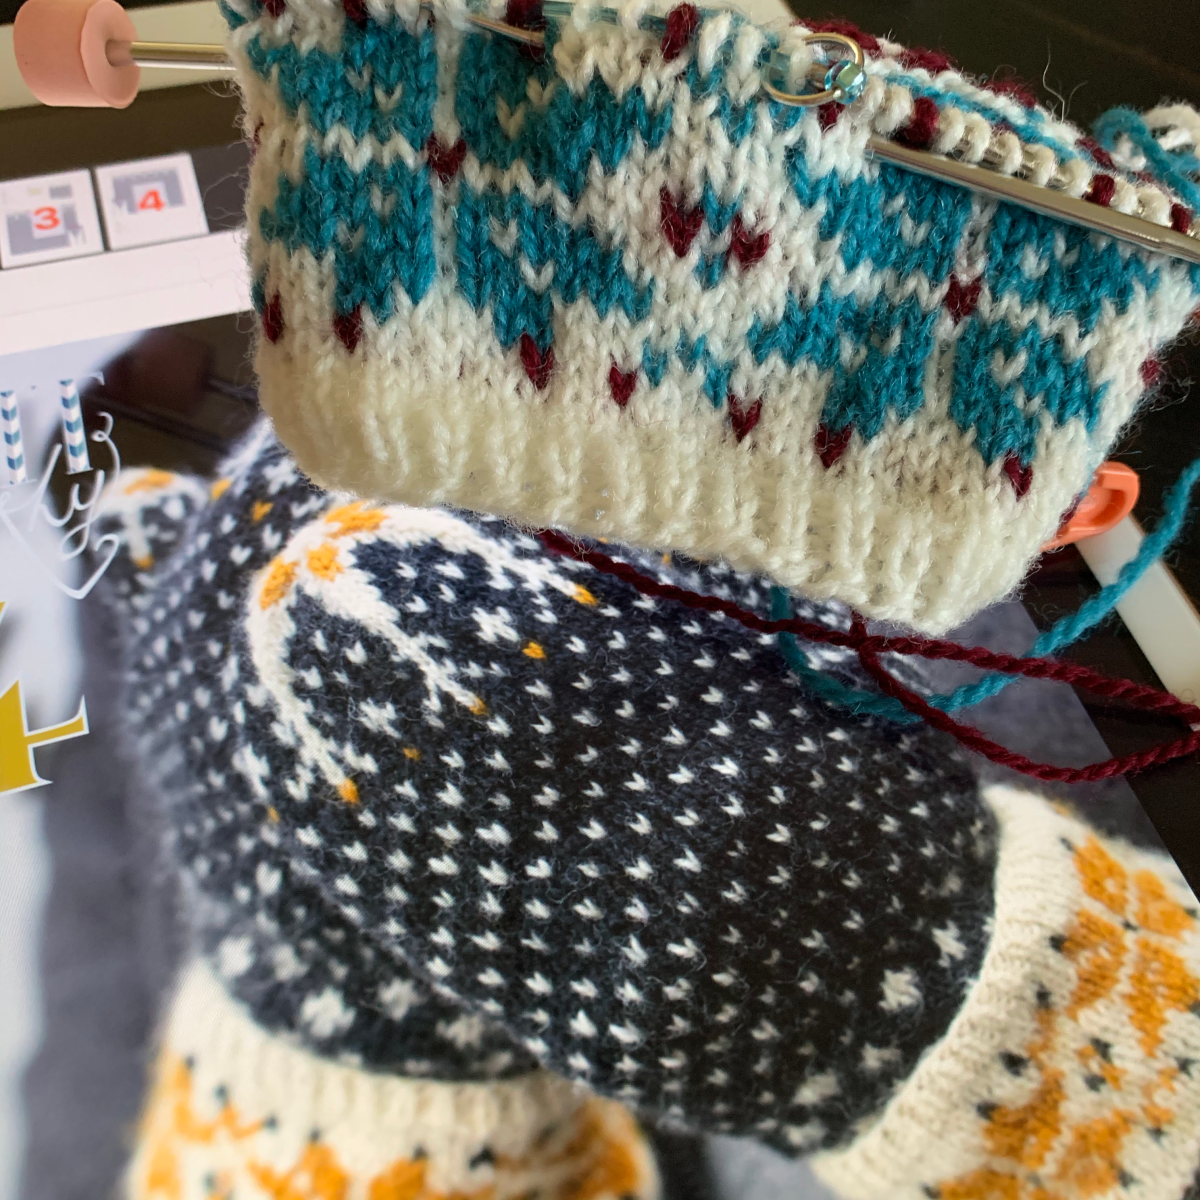
Milet pattern on my iPad with my work in comparison
The Woolly Thistle mitten knit-along begins on February 13th so I need to settle on a pattern to knit. I had thought I would knit the Helianthus mittens, and downloaded the pattern to browse. The thumb is difficult because the thumb chart is not with the mitten hand chart. Am I supposed to overlap it? And how? Seems difficult to follow a chart when one part is in one place and the rest in another. (This is why I decided to NOT knit the Helianthus, and stick with the Milet pattern.)
The Helianthus pattern does give me the opportunity to do a Latvian Braid, which I tried. I love the look of it! I was using a 9-inch circular needle and the knitting was slow going, but the end product is pretty sweet! The pattern has clear directions for making the braid.
Fontana and my first Latvian Braid!
I’m using Rauma Finul PT2 yarn in colors Dark Petrol Heather (blue #4123) and Very Light Green (#4106) in the image above. If I decide to continue with this mitten pattern, I will probably begin over with a prettier color match up. It’s a floral design, so it really should be “flower” colors. The pattern designer knit it in orange and yellow.
The Latvian braid is created by simply knitting and purling rows but carrying the yarn certain ways. It’s very easy, just tricky when working with such small needles and tight stitches. To knit 2-color mittens like these, one needs to know the correct way to do colorwork.
Adding More Rauma to My Stash
Now that my new Rauma yarn has arrive, (The Woolly Thistle has super speedy shipping!), I will choose three new colors and cast on a new Milet.
I’ve seen way too many mitten patterns that I would love to knit – or attempt to knit. My first choice was the Milet Mitten pattern which I began and is turning out large (see my trial mitten). The pattern is easy enough to follow that I think I could have a good end result AND get the pair finished by the end of the knit-along – which is March 26th.
More Mitten Patterns Using Rauma Wool
Here are more mittens (and a couple fingerless mitts) I’ve had my eye on which use Rauma yarn, or similar. If my first pair of colorwork mittens come out okay I may go for it and knit all of these. If it ever snows in Florida, I will be ready…!
Snovotter, by Skeindeer Knits (snowflakes)Fingering
Sionnach Mitts (Fox Face) by Nina Pommerenke – these are cute!! Fingering
If you want to join the knit-along, sign into Ravelry and find The Woolly Thistle group. The rules and such are listed in the forum. There will be prizes, and pattern discounts, but the fun is seeing what everyone makes, and trying to keep up with your knitting! Cast on days are February 13th and 14th.
Thoughts About This Mitten KAL
As time has passed, and I’ve browsed tons of mitten patterns, and read lots of forum posts, I began to doubt if I would participate in the KAL. Forums can be cliquey and in this case, I feel that there are loads of participants – so many that getting lost in the crowd is very possible.
However, knowing that many people, from all over the world, are casting on, and knitting mittens specifically, while I am too… is encouraging.
So Cast-on day was February 13th… see how it went. I amusing the maroon and blue, with white, for my mittens.
New wool yarn to add to my stash
I know that KAL’s are advertising disguised as camaraderie. Shops and yarn and patterns are mentioned in forums and on Instagram as hashtags abound. It’s all about sales in the end, but for a few weeks we can believe we are simply buddies, in the knitting trenches together, working to create a yarn keepsake.
In the end (fingers crossed) I will have a wearable pair of mittens.
My new year knitting program is going to include smaller projects, namely socks and mittens. I began The Woolly Thistle Mitten KAL (knit-along) this month (2/2020) and while knitting my mittens, I’ve used 9 inch circular needles, Flexi-flips and DPN’s. Here is my opinion on all three.
A Look at 9-Inch Circular Needles
I really like the little 9 inch circular needles. I think I first used them when I made a little baby bootie (never made the second bootie!) But they were too big for the cuff of the bootie so I used DPNs. I also used them to knit the sleeves of the Polliwog Popover baby sweater sleeves.
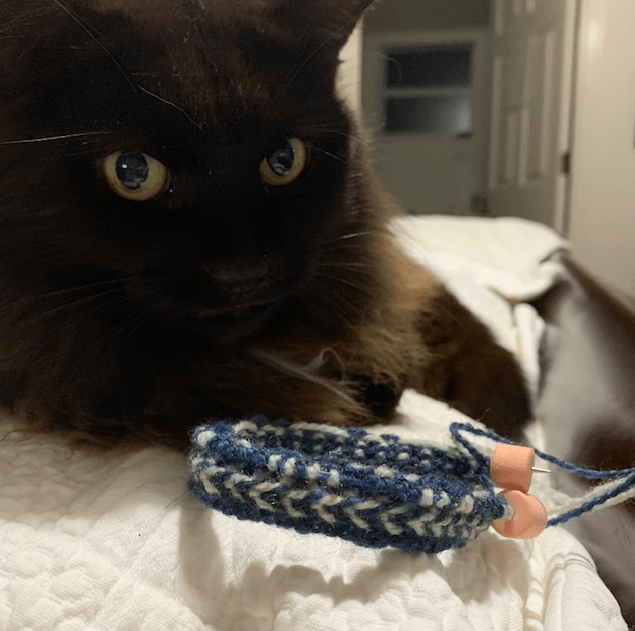
Here you can see my Latvian Braid (first one I ever made) using two yarn colors on a 9 inch needle. I think Fontana is unimpressed, but I had fun making it. After doing a Latvian braid on the Milet mittens using Flexi-flips, I realized a 9-inch circular makes for a neater braid.
Fontana and my Latvian Braid
Overall, I do love using the small 9-inch circular needles. Yarn holders for the ends of the needles are necessary, and the tight circumference can tire my hands quicker, making them ache. Also my colorwork knitting is very sloooow on tiny needles because the stitches are so small and tight.
I have the ChiaoGoo and Hiya Hiya 9-inch and they are both very similar.
Three-Needle Knitting With Addi Flexi-Flips (Size Problems) and Hiya Hiya Flyers
Both Addi Flexi-flips and Hiya Hiya Flyers brands come as a three-needle set. You knit with two needles holding the yarn and use the third to knit. A bit like DPN’s but with fewer, and longer, needles, that flex.
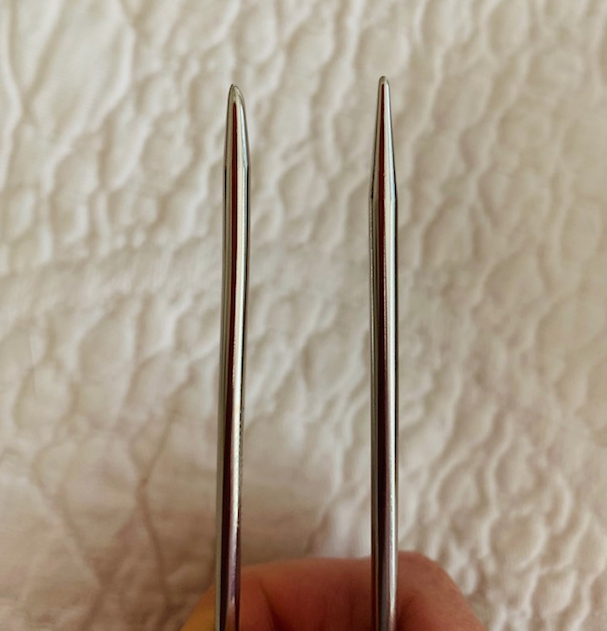
Addi has different tips on the end of each needle so you can knit with either sharp or blunt points.
Addi Flexi Flips – One needle with two tip choices – sharp or blunt
Using the 3-needle set is easier than DPN’s as there 1 or 2 fewer needle changes, depending on the number of DPNs used, but I still have some trouble with the beginning of round stitches. See my braid rows below and how the BOR colors are off. I do have trouble adding a 3rd needle to start a row.
My braid is off a bit using the 3-needle combo
Also with only two needles holding the work, I found that I was dropping stitches, so I began to put stitch blockers at the end of the needle not being used.
I have both brands and the needles are similar. The tube connecting the needles is a little longer on the Hiya brand, and Addi’s needles are a little longer overall. Addi’s come in a tube and Hiya’s come in a plastic bag.
Addi’s Incorrect Sizing
But I want to warn you of one crucial difference and it has to do with needle size – dimension.
When I began knitting my first Milet mittens, I ordered (what I thought was) a size 1.5 US set of Addi Flexi flips. I ordered them from Wool and Company and they were listed as size 1.5 US – no mm size was mentioned. However, when they arrived, the tag simply said 2.75mm (see tag below). I had to look it up, and come to find out 2.75mm does not equal 1.5, it equals size 2. The needles were too large.
So I checked my older pair of Flexi’s which actually says 3.0mm / US2. (See the photo below) BUT…3.0 mm does NOT equal 2, it equals 2.5 US…!!!!
Incorrect mm to US sizing in FlexiFlips
I went back to my order form at Wool and Company to make sure I did not mistakenly order the wrong thing. I did not. I kept the size “2” needles since I didn’t have that size, but I still needed a 1.5 size for my mittens. So I looked at other places online. The small size needle is hard to come by but Amazon had them and advertised them incorrectly also. Or should I say, they were advertised as Addi Flexi Flips advertises them.
Jimmy Beans Wool was where I saw the only notice to customers that the sizes of the Flexi Flips were off. They mention that the smaller size needles are off in the product paragraph. I wasn’t crazy – the needle sizes are not true to advertising. And only 4 of the smallest sizes are listed wrong – all other sizes seem to equate correctly.
If you buy according to the metric system you are fine, but those of us in the US will be using the wrong size needles unless we compare the mm size to US sizing.
The Basic DPNs
I have a heck of a time beginning any small item using DPN’s (double-point needles. With all those pointy sticks in the way, it’s not fun to keep track of where I am and what I’m doing.
I think it’s actually a little better when using very small needles to knit socks or mittens. The Snowfall sock pattern below has a repeat pattern that fits nicely on four, size one, metal, DPNs. But I did cast on using a 9 inch circular and knit the ribbing before changing to DPNs.
Sock knitting using double pointed metal needles.
Magic Loop
Many knitters use the Magic Loop method to knit in the round. I have looked into it, on YouTube, and found a toe-up sock example, which I may try one day soon.
I can’t give an opinion on the Magic Loop method because I have never used it. Basically you use a long circular needle, split the stitches, and knit as in the round. Some clever people knit two pair (both mittens or both socks) at one time on the same long needle!
Knitting Inside Out… What?
Something else I have just learned is that when knitting colorwork some knitters knit their mittens, socks, and whatever, inside out! Crazy right? The reason for doing this is to keep the floats more uniform and less tight.
I had to search YouTube for that information as well. Melissa B has a good video explaining how simple it is to knit inside out.
In Conclusion
In conclusion, I’d have to say from personal experience that I prefer casting on with circular needles. If I need to do a Latvian Braid, circular is my choice. If needle size is not too small – say size 0 – 2, I don’t mind knitting along with them either. Normal knitting, or stripes, are easy, but for very small sizes and colorwork, they can make my hands ache.
Beyond that, it really depends upon the project at hand. I still have a lot to learn and new methods to try, and a pair of mittens to finish.