

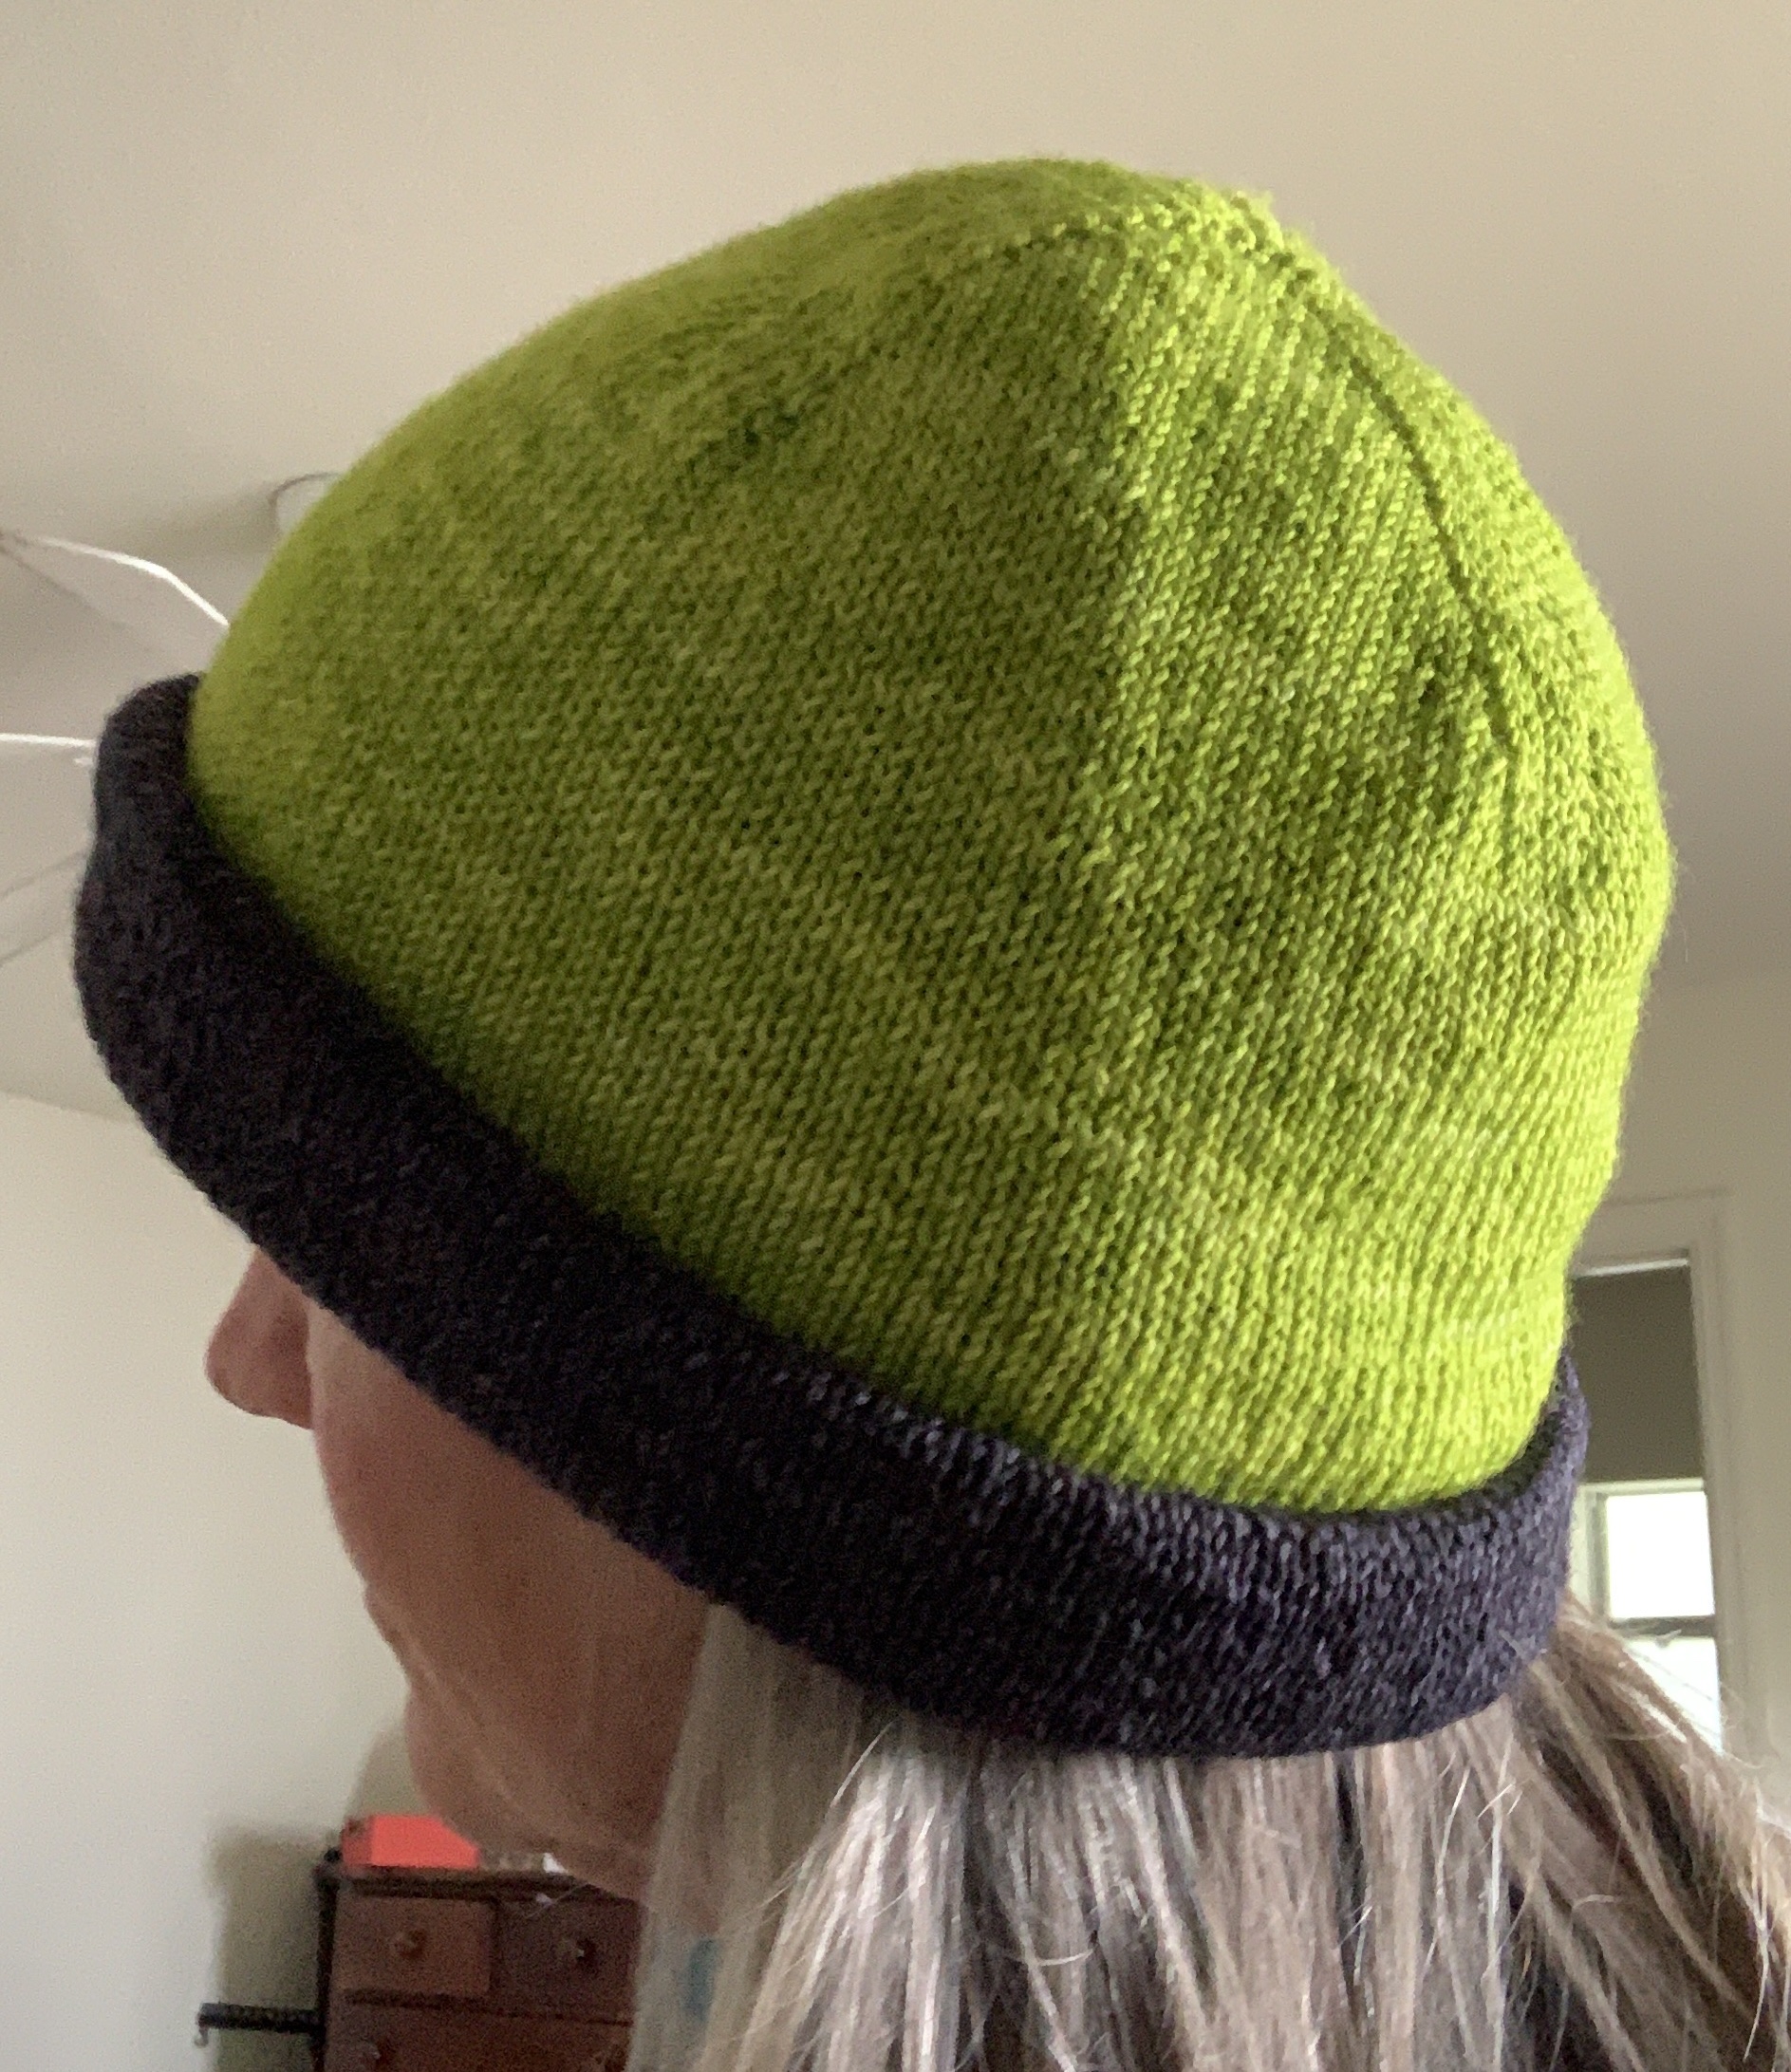
The Musselburgh Hat pattern is super popular and I’ve seen the finished hat photos everywhere online. Knitters are raving about this simple, unique, double layered hat that is really two hats in one. It is knit from one crown to a second crown, creating a long section of stockinette in-between.
The Musselburgh pattern is by Ysolda Teague and can be found to purchase at her Ravelry page, or on her website. At the time of this writing, over 17,000 projects have been knit…!!! Wow. Knitters LOVE this hat.
The big draw, I imagine, is not only the simple circular stockinette, but the fact that it’s a perfect hat for using up stash yarn. Suggested weights are heavy lace to DK, and nothing bigger because this hat will be worn doubled. Also, if you knit it long enough for a brim, the brim will contain four layers when folded up.
If you don’t understand this pattern, I have drawn a picture. The hat is knit, in the round, from one end to the other. You make a long, enclosed tube. One end is tucked into the other when worn, to make a double layer. The long style creates a folded brim using the center colors, or make it shorter for a doubled hat with no brim.
My finished hat will be bright green with a folded black brim, OR a striped (black and green) hat with a folded black brim. Two hats in one. Each hat will be two layers of fabric with four layers at the folded brim.

Musselburgh Finished


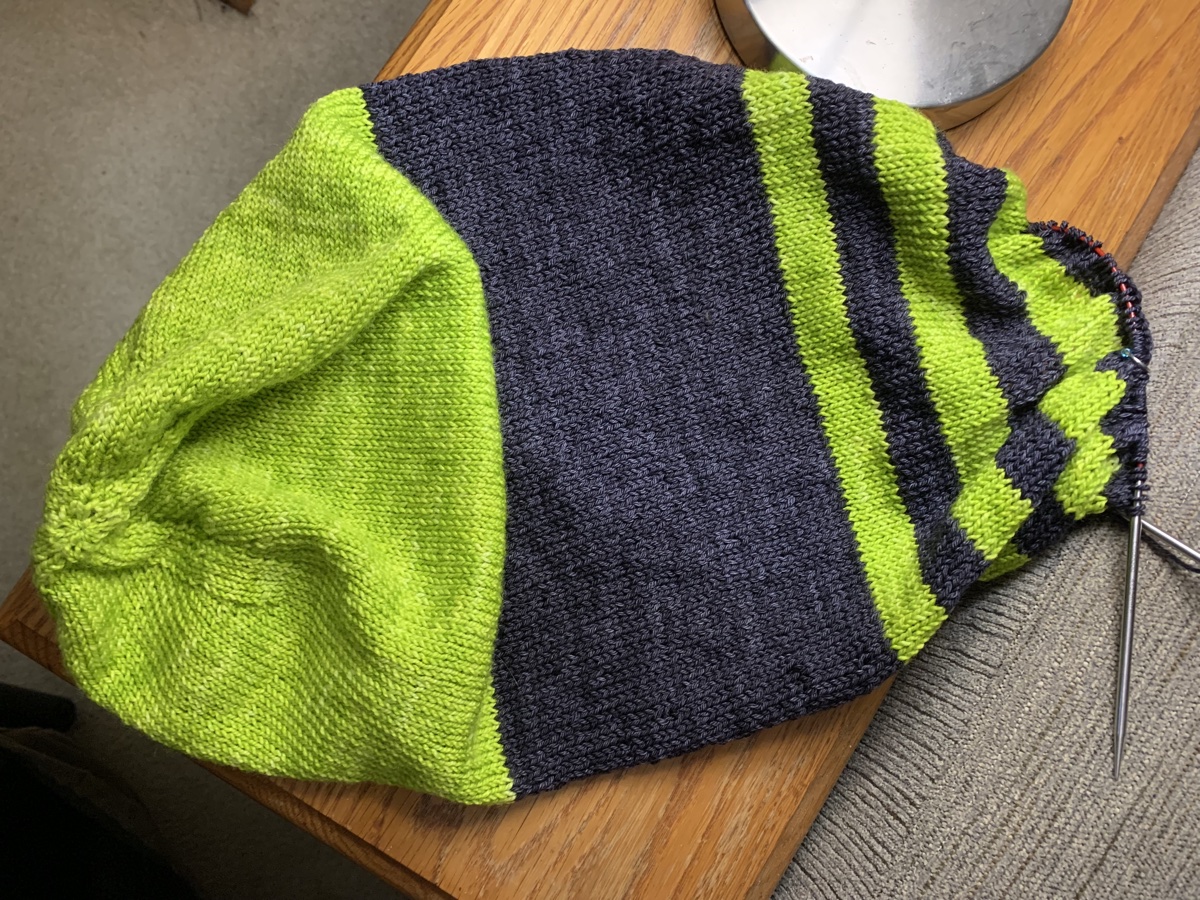
I decided to knit a total of 25 inches with 9 inches at each end and 6 inches in the center for the brim (folded measurement 3 inches). That was the plan, but my hat ended up measuring less at 21.5 inches. Too short for my liking. See this video from a knitter who has made 12 of these hats!
How Do I Begin Knitting This Hat?
Although I’ve been knitting quite a lot of items during the past few years, I was stumped when it came to beginning this hat!
To begin the project, the cast-on begins at the crown with a small number of cast-on stitches, which will expand outward with increases made. (You must be able to knit “make ones”.) Directions say to cast on the stitches using your “preferred center-out cast on.” The designer goes on to list a few, but it’s up to the knitter to figure out which one to use and how to knit it.
Pinhole, or Disappearing Loop Cast On
When I searched for “Musselburg cast on” the pinhole, or disappearing loop, cast-0n came up. This video, by Mostly Knitting, is a good tutorial – not for the hat, but for the cast-on. She gets straight to the point and the tutorial is easy to follow. However, be prepared for this fiddly cast on. She makes it look easy – and for me, it was not! I won’t go into detail, but let’s say it took me a few tries to get my stitches made. Hint: It does help to keep the loops of each cast-on stitch loose.
FYI: I am using a size 4, 32″ circular needle, wood Lykke brand, to do the pinhole cast on. My yarn is from stash, and I am guessing it is a fingering weight sock yarn.
Below left: My stitches have been cast on and there is a loop still open. Below Right: I have pulled the strand to close up the loop. Hence the “disappearing loop” cast-on name.
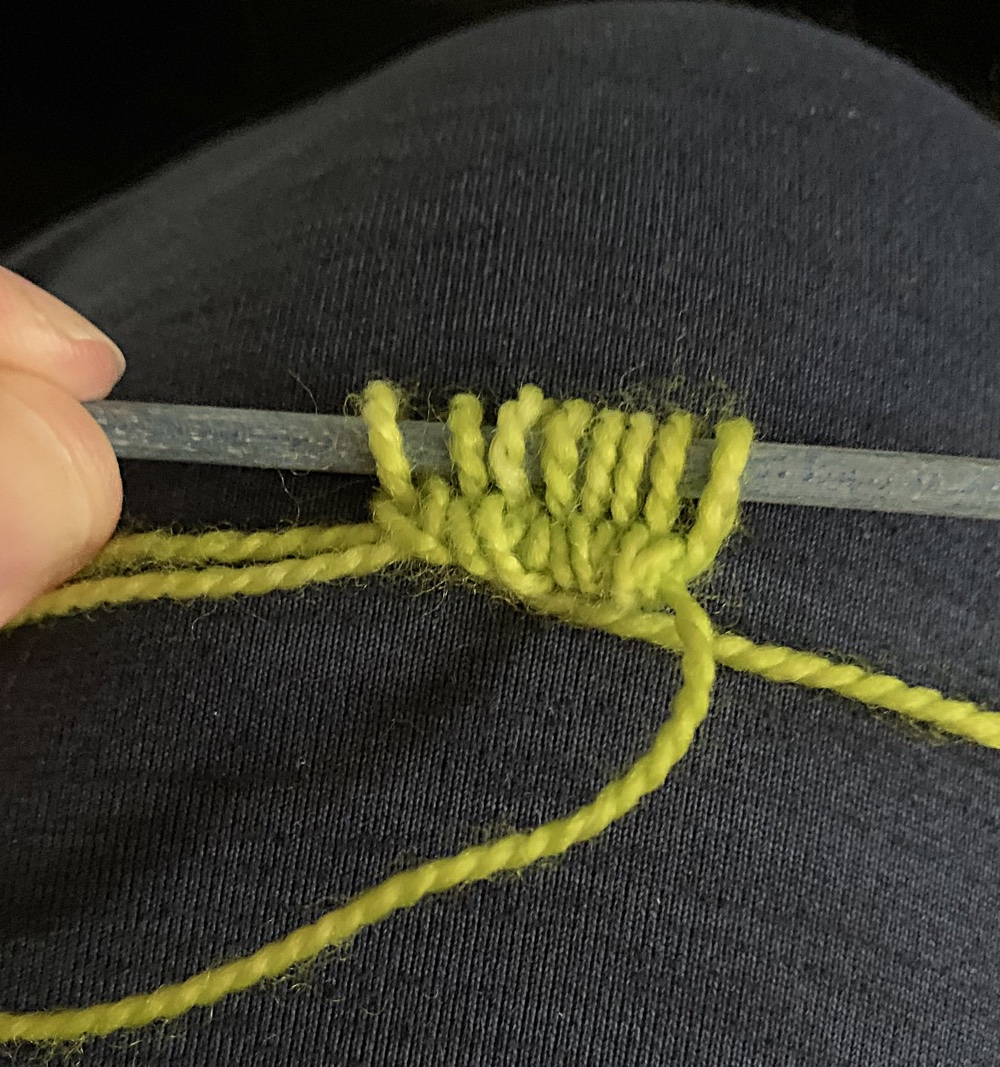

Now I have my cast on accomplished, but I need to knit in the round with only a few stitches. Apparently most people use the magic loop knitting method to continue knitting from here. Maybe it is time for me to learn Magic Loop.
Magic Loop Knitting Tutorial
The video above gets the cast-on made and ends with four stitches on each end of a long circular needle. Then, the rounds begin and must be knit using the magic loop method. Or, the stitches can be transferred to DPNs, which can’t be easy to manage with so few stitches. I dislike DPNs. So, I figured I would try to do the Magic Loop.
In this video by Myra Wood, the details of the magic loop are covered. She is not casting on the the Musselburgh Hat, but it doesn’t matter. She is showing us how the needles are positioned to knit in the round starting with very few stitches. So, first do the pinhole / disappearing loop cast-on, and then begin knitting in the round using the magic loop method. Simple. It’s always good to learn something new – or in this case, two somethings!
For magic loop knitting remember this:
- Use good needles, with soft, pliable cable. This is important. The needle I used was wood (Lykke brand) with a rather thick cable for my liking. I should have used my Chiaogoo needles (Amazon paid link). Try a metal needle with a bendable cord. Make sure the join between the needle and cable is smooth because the stitches have to slide easily from the cord to the needle.
- Whichever needle has the working yarn, pull that needle out of the stitches and use it to knit.
- Place a marker as a reminder of the beginning of the round..!


For the Musselburgh Hat pattern, I didn’t worry about the markers until I knit the first round using Magic Loop, and added them on that first round. From there, I followed the hat pattern while doing Magic Loop. The orange marker in my photo is for the beginning of the round – BOR. You need to mark that somehow.
Transfer Stitches, or Continue in Magic Loop
The knitting could continue using magic loop, but I transferred my stitches – on a plain knit round – to four DPNs making each corner (end of needle) a marker. Because I had the needles, I began on shorter DPNs and then transferred to longer DPNs. Once I had my total number of stitches to begin the length of the hat, I used a 16″ circular needle.
Find Your Gauge to Complete the Crown
The pattern has charts for size and gauge. This was confusing at first, but as is usually true, reading the directions carefully is everything!
The designer has created these charts to help us get the right size hat for our knitting tension. Once we begin the crown knitting and take the measurement, we will then know our personal gauge number. This is the opposite of what is generally done to knit a pattern. Usually we (the knitters) have to match the designer’s gauge.
Because each knitter will be using various types of yarn and various needle sizes, the gauge will vary for each individual. The designer has calculated the gauge variations and given us a number to go by for the crown and hat size.
Once the crown size was big enough, I measured for my gauge. I counted six stitches in one inch across, so my gauge is 6. From there, I used the charts to find out how much more knitting I would have to do to complete the crown section. BUT, I decided to add more stitches for a total of 136 around, and this ended up being too large. I think the original count would have been too small, so somewhere in-between.

Don’t forget to weave in the ends at the right time!
Before finishing up by decreasing for the second crown, don’t forget to weave in the ends! Pull the hat inside out and do your weaving before the entire thing gets closed up. Glad I remembered this step.
Final Thoughts
This pattern is versatile and looks to be quite easy, until you try to get started with the crown. It’s probably going to be a learning curve for many. Once the second crown is knit, the final yarn must be woven so it can’t be seen with the tail tucked inside.
I used sock type yarn, which is not my favorite to work with. I was hoping this hat pattern would help me use up some stash. But, in the end, I am not very impressed with the outcome. Mainly it is my own fault for bad measuring and using too many stitches.
More than that, I simply have knit hats that are much more fun and end up looking and fitting a lot nicer. A ribbed hat for instance hugs the head better.
I’m not sure I will knit another Musselburgh, but if I do, I think I will try using colorwork patterns for each end section, and a ribbed center for a snug, turned up brim.
More knitting stories and reviews:


Something went wrong. Please refresh the page and/or try again.


I’m about to begin a Musselburgh hat (1st one) and found your post-lots of helpful info, thank you!
LikeLiked by 1 person
Glad to hear it! It’s a cool hat. Have fun. 😊
LikeLike
Thanks for the information. Much appreciated.
LikeLiked by 1 person
thank you! this really helped me out.
LikeLiked by 1 person
I’m so happy to hear that! Have fun with the hat.
LikeLike
Now I have to try this@
LikeLike
I believe I will have to make more of these and use up some stash!
LikeLiked by 1 person