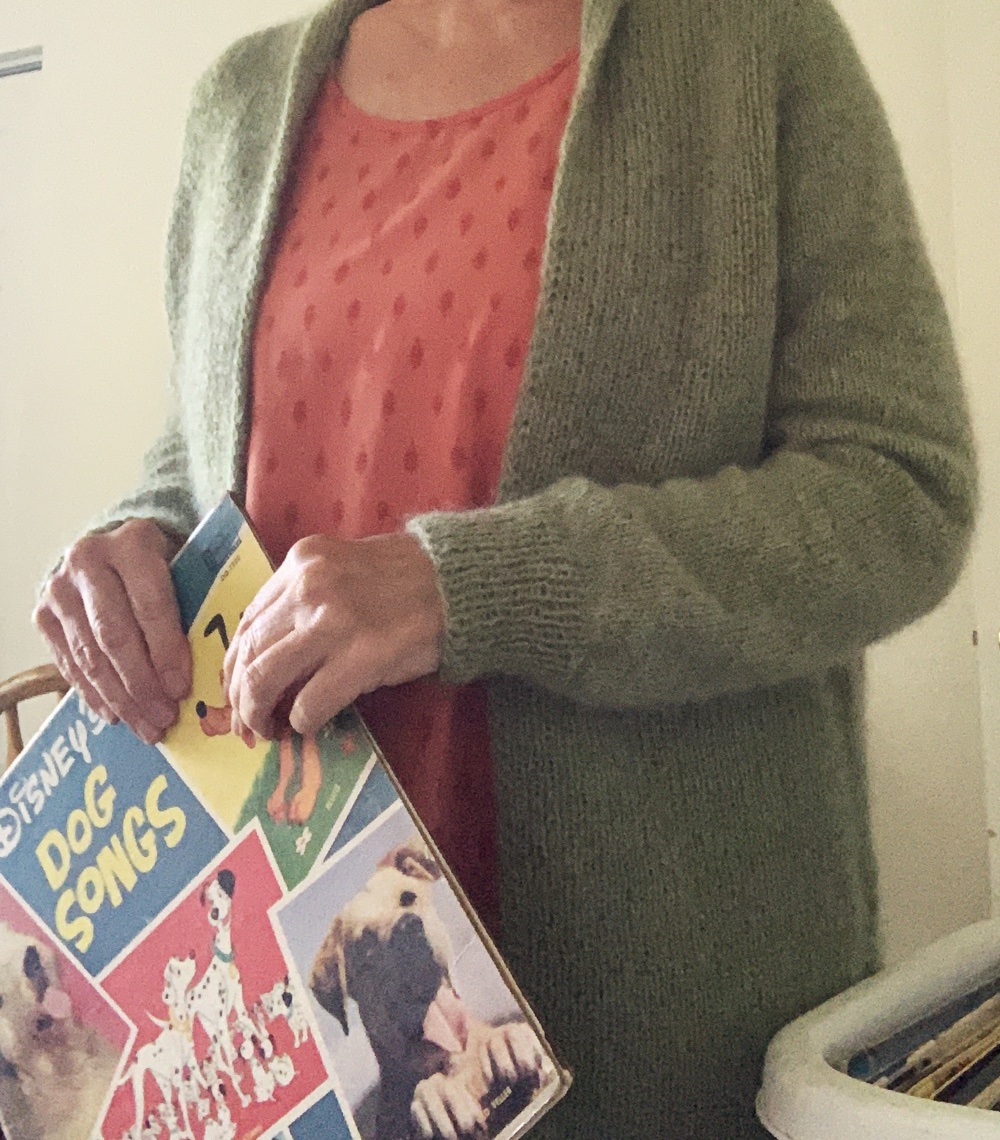
The Rebel Cardigan pattern is a newer design by knitwear designer Ankestrick. While knitting the Rebel Cardigan, I closely followed the pattern. The only modifications made were on the sleeves, which I left a bit looser as I knit to the cuff. I also did not do a tubular bind off.
Find Ankestick’s Rebel Cardigan pattern page here at Ravelry.
On this page:
- Knitting Sleeves, my mod for the cuff decrease.
- Knitting the body
- Hip width increases
- Binding off, hmmm?
- Finished Photos
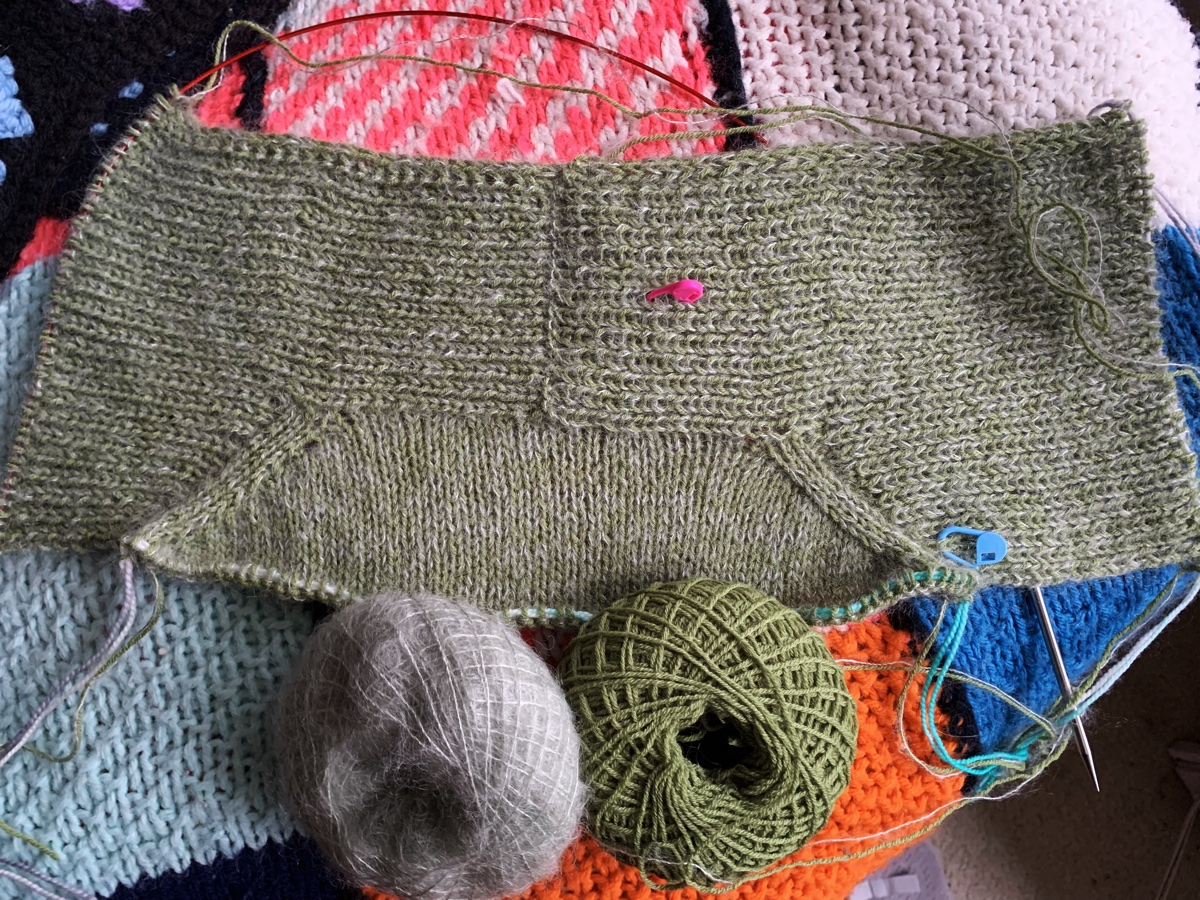
My Decrease Row For Sleeve Cuff Ribbing
I stopped doing decreases when the stitch count was 58. For my size (4), decreases were to continue to 48 stitches. I like some width to the sleeve in case I wear something long-sleeve underneath.
The ribbing for the cuff is done on 48 stitches for my sweater size. I needed to decrease, in one row, to get from 58 stitches to 48 before doing the 1×1 ribbing. Here’s how I knit that decrease row to end up with 48 stitches:
*K4, k2tog – repeat to last 4 stitches, then K2, k2tog
On the next round I began the ribbing. I had been using DPNs for the sleeve but changed to a 9 inch circular for the rib. I really don’t know which way I like less – haha.


Once both sleeves were finished, I put the body stitches back onto my longer needle. I then kept knitting until I ran out of yarn.

Knitting the Body
The body of the rebel cardigan is back and forth knitting, while creating a very nice edging down the front. Panels of 1×1 rib on each side, while stockinette makes up the back. I usually knit my sleeves first and then finish up the body with the remaining yarn.
Making Increases for Hips
I decided to do some hip area increasing, which is mentioned in the pattern. At about 10 inches (body length measured under arm) I began to follow the increase suggestion. This means doing increases at front and back after 14 rows, then increases for the back only at the next 14 row mark. At least, that is how I figured it.
Body length, on my sweater, is 18 inches from underarms. (See my photo below.) The long version pattern directions call for 20.5 inches.
Not Doing a Tubular Bind Off, But What Are the Choices?
This sweater pattern calls for a Tubular BO (bind off) which is done with a sewing needle and not knitting needles. I don’t mind doing this bind off on a small sleeve circumference, but don’t really like it for an entire body bind off. It entails pulling yarn – long enough to do the whole hem – with a needle. I’m not super familiar with it, and didn’t want to mess up my bind off.
Also, the 1×1 rib is on two edges (front sections) with regular stockinette between, so how would I manage that? I guess there are tubular bind-offs for stockinette, but I’m not sure.
Bind Off Options to Consider
So I searched and found a “sewn bind off” shown here by Brooklyn Tweed. I suppose this is how you do it. Tubular to the stockinette, then sewn, and back to tubular for the other side.
It would have been nice to have been given other bind-off options and suggestions in the pattern. And would it be possible to do the sewn / tubular bind off in sections? I don’t think so.
As it ended up I did a normal bind off in pattern (k1,p1) until I got to the stockinette section (the back). Then, I did an Icelandic bind off for the stockinette. This has caused the back section to curl.

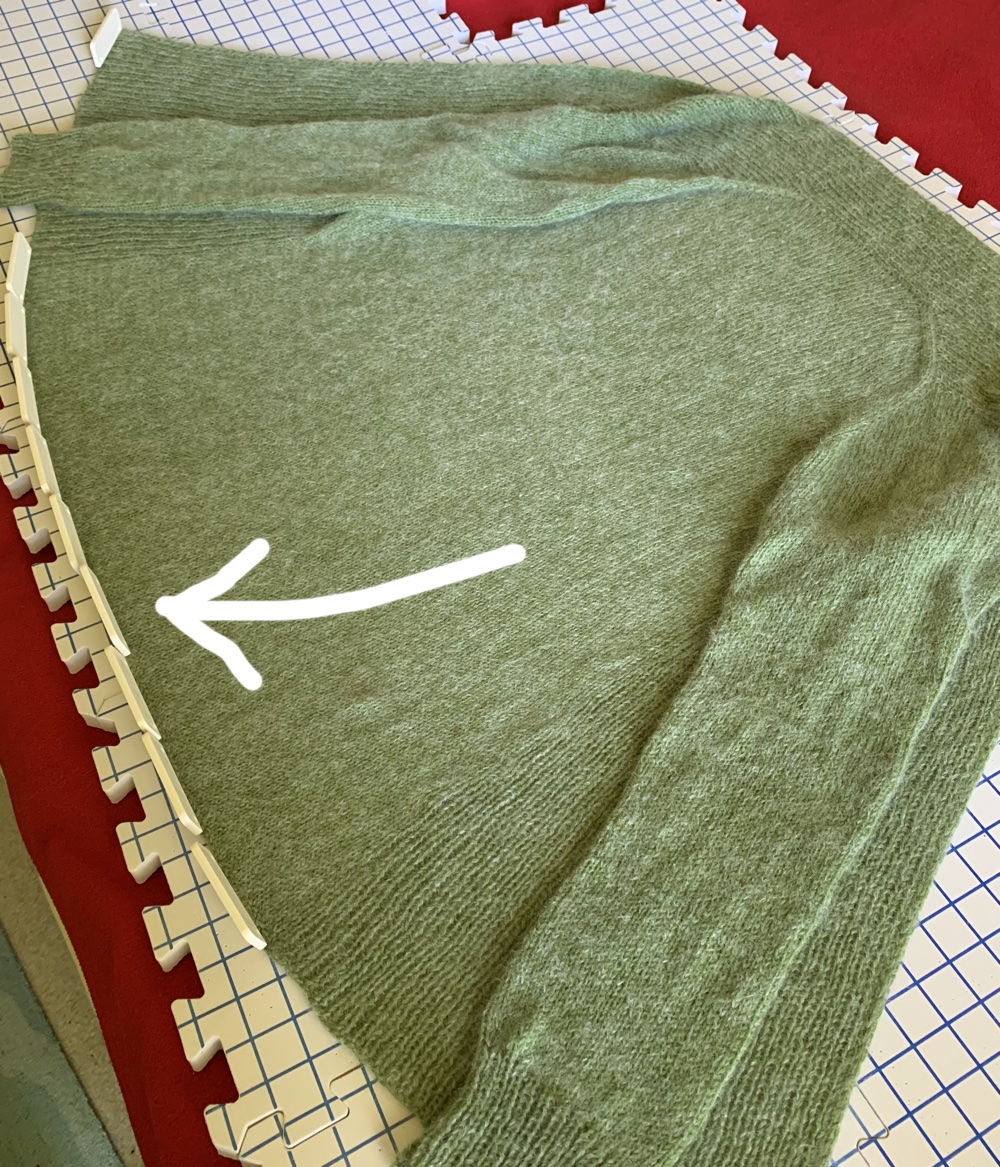

I’m using my blocking pins to hold down the stockinette hem. Now that it is mostly dry, the hem is flat (yay)! You can see, in my photo above, the shaping where the increases were made further down the body.
Like most people, I am naturally a bit bigger in the hips than the waist, so I recommend doing these increases for the longer version.
Knitting For Olive Yarn
I chose to knit the Rebel using two yarns held together. I had just finished up knitting the Field Sweater pullover and used the same types of yarn (Knitting for Olive). I am very happy with the outcome, and do love this yarn. The Mohair is not as fly-away as some others I’ve used.
The Knitting For Olive company is RAF certified, and that means they create their yarn in an “ethical and responsible” way.
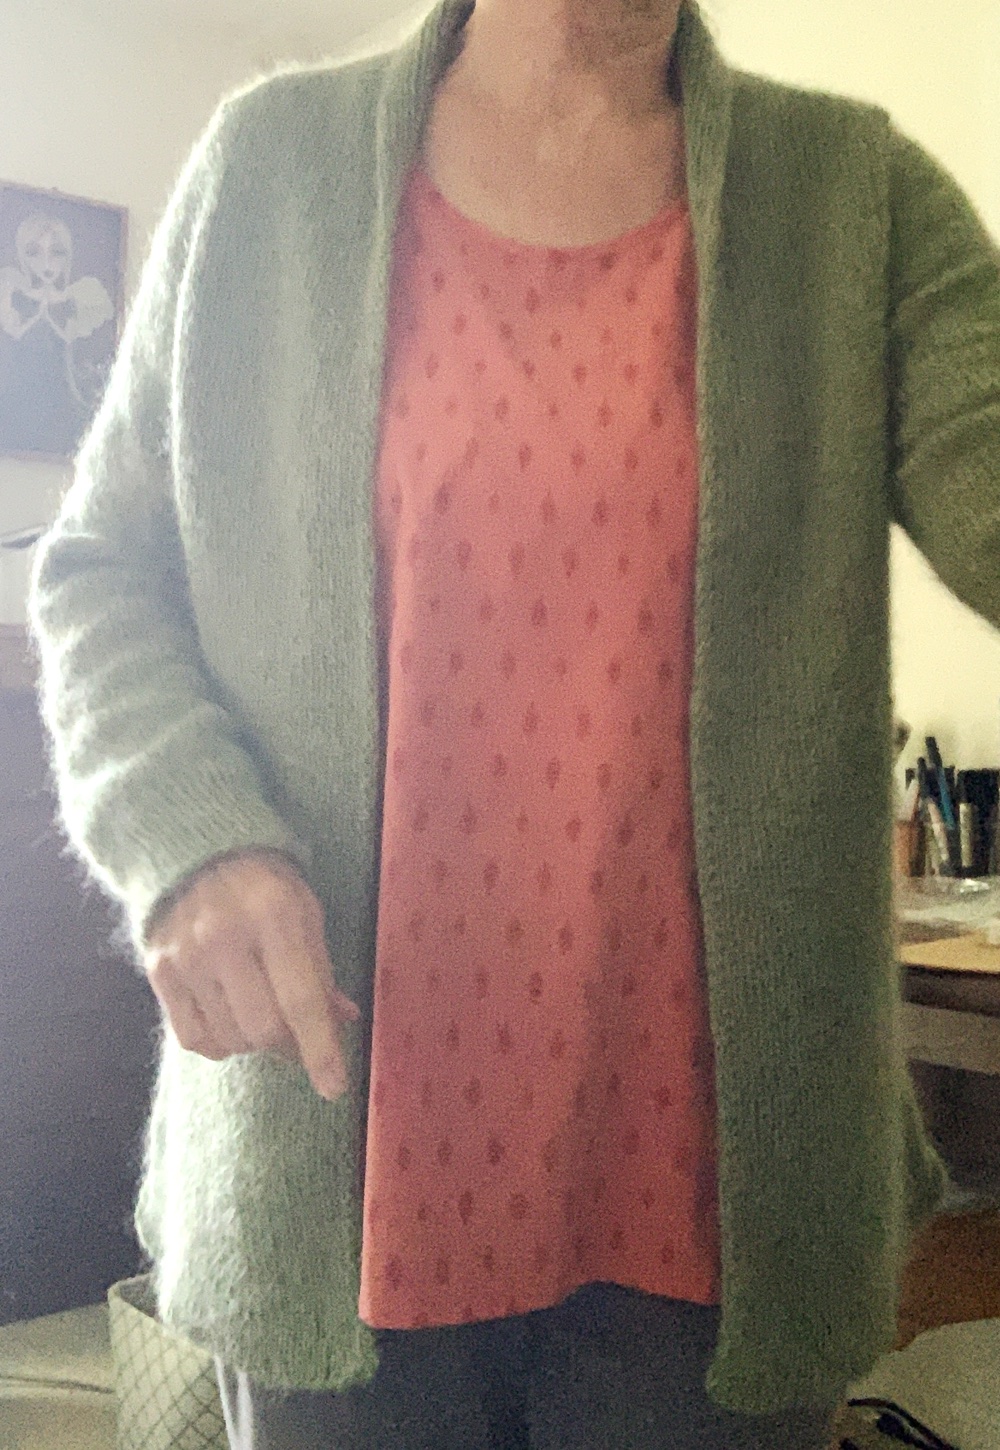
Finished Knitting Sweater Photos
The washing and blocking to dry has not been done yet. See that little bump on my shoulder? That happened when picking up stitches, so be careful and take your time to make the seam look smooth.


Please keep reading!


Something went wrong. Please refresh the page and/or try again.